I am really excited to walk you guys through today’s post because I’ve never done anything like it before! Five years ago when we moved into this house we had absolutely NOTHING for our master bedroom. Literally not a single piece of furniture. We have a big space to fill and it has taken over 5 years to get it right. Today, I want to walk you through our master bedroom through the years and show you all the phases it has gone through.
I want to show you this because I often hear from readers that decorating a room takes them so long, whether it’s being indecisive or not having budgets available to do the room at once, so I hope this helps show that sometimes it takes me just as long to get something right! But I will say this, I’ve learned a few things on this space and what you shouldn’t do when decorating a space!
Master Bedroom Through The Years
Our Master Bedroom Today
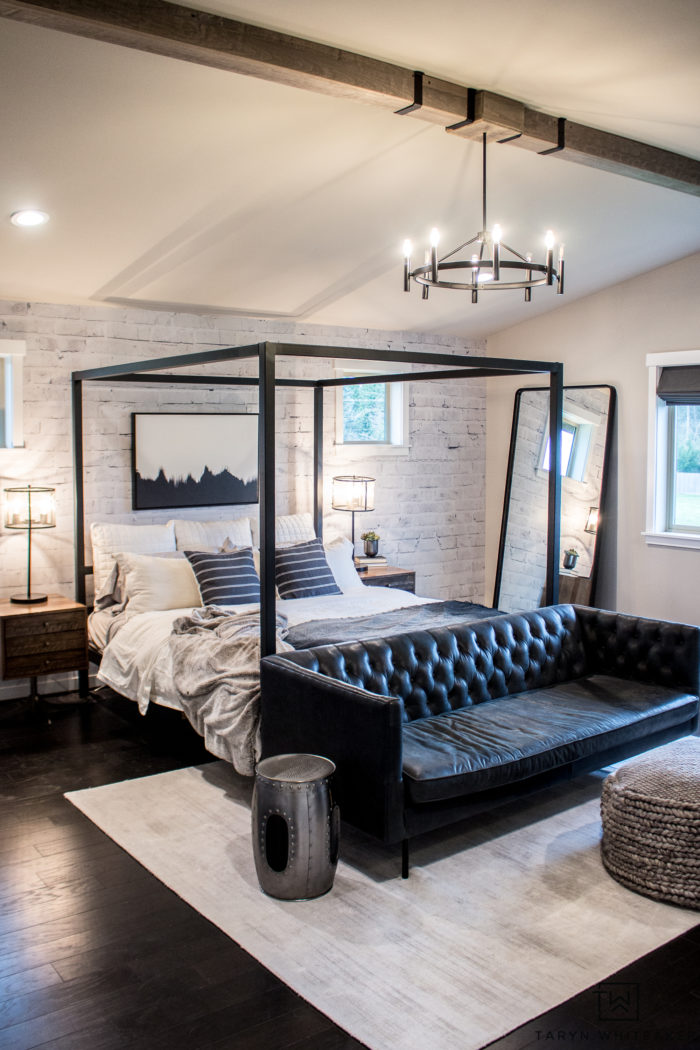
A few weeks ago I share our full master bedroom reveal. While nothing is ever “final” in my mind, I don’t have any intention of changing anything in here for a while. Ok maybe the lamps but not any time soon ;) The mirror was my final addition in here and now I’m happy.

But let’s go back to the beginning, because this bedroom didn’t happen overnight. Does it even look like the same space? It had carpet, was a completely blank space and ready to be given a look of it’s own. The vaulted ceilings gave it so much potential and those small windows have always been a total pain to decorate around. But I do love the natural light.
This picture was taken when we finally got a bed frame and bedding. It felt so good to take the first step in building this bedroom. I knew from the beginning that I wanted a black and white bedroom that was full of texture and rustic elements and five years later that I what I ended up with. Just took me a while to get here.
Black and White Bedroom

As I decorated our bedroom I struggled with what to do with those windows, I originally made these DIY Rustic Curtain Rods as a way to cover them up and also make the space feel cozy. I also added a DIY Live Edge bench, some new artwork above the bed and used a side table I had. It was a good start!

The next step included a new large area rug that fit the space better, and a chair in the corner to make it a little cozier. And some new wall art, that ended up being a little too much and I took it all down shortly after. One thing I have learned over the years is that it’s easy to ‘over decorate’. To feel like you need something on every single wall and an object in every corner. When you just need to remember simple is better and sometimes you need to wait for the perfect pieces that make a big statement. Quantity over quality.
This phase was also when I added our nightstands that we still have to this day. I love the unique base, they are also very sturdy and solid nightstands which was important to us.
Replacing Carpet With Hardwoods
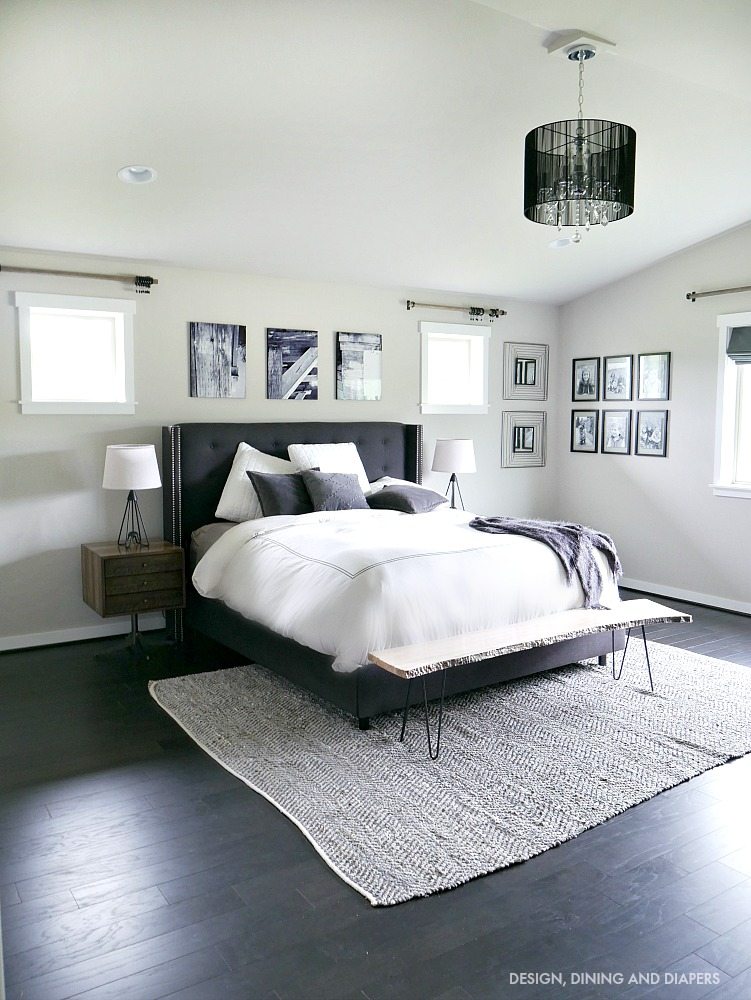
One of the biggest changes we made in here and investments was replacing the builder grade carpet with these black hardwoods. I love the luxe look it brought in here. (And oh my that lumpy comforter, wish I could go back to redo this one!). It was after I got the hardwoods in that I felt like I really got my vision for this space and I saw it’s full potential.
Black Canopy Bed
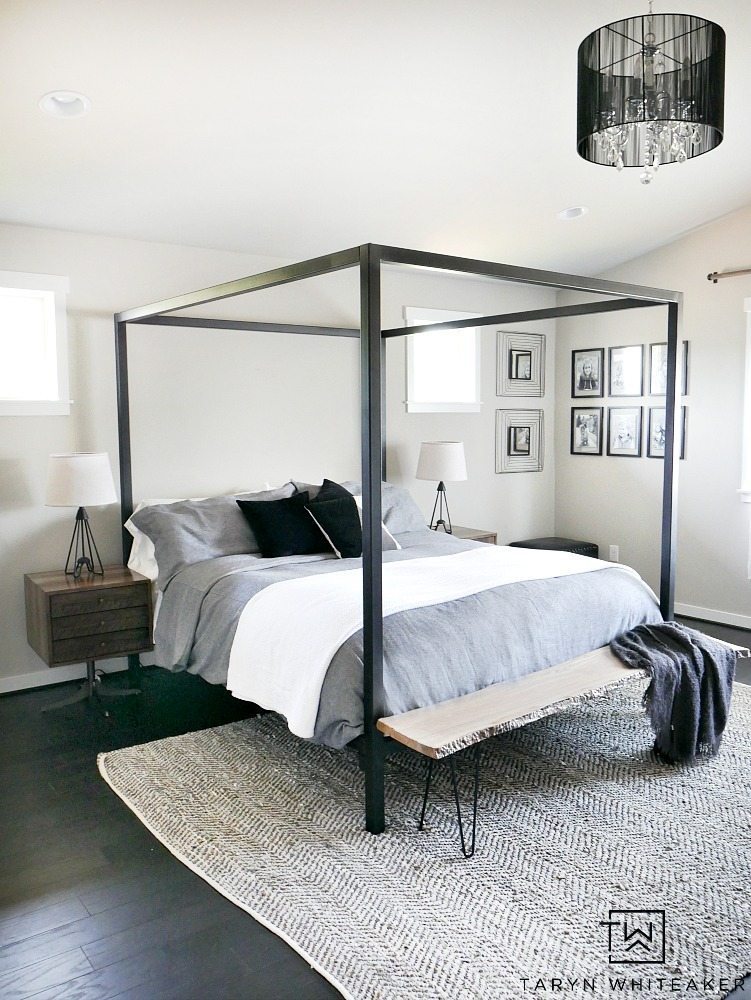
At this time I realized that the bedroom decor wasn’t going in the direction that I was hoping for. I think this happened for TWO reasons 1) when you start to piece together a room one by one without having a true clear vision, it starts to feel disconnected. and 2) when it takes YEARS to decorate a space, your style is bound to change a little!
I knew I needed to take advantage of the vaulted ceiling and decided to get all new furniture in here. I went with a black canopy which I still LOVE to this day. It’s classic and timeless and a little industrial.
Adding Brick Wallpaper
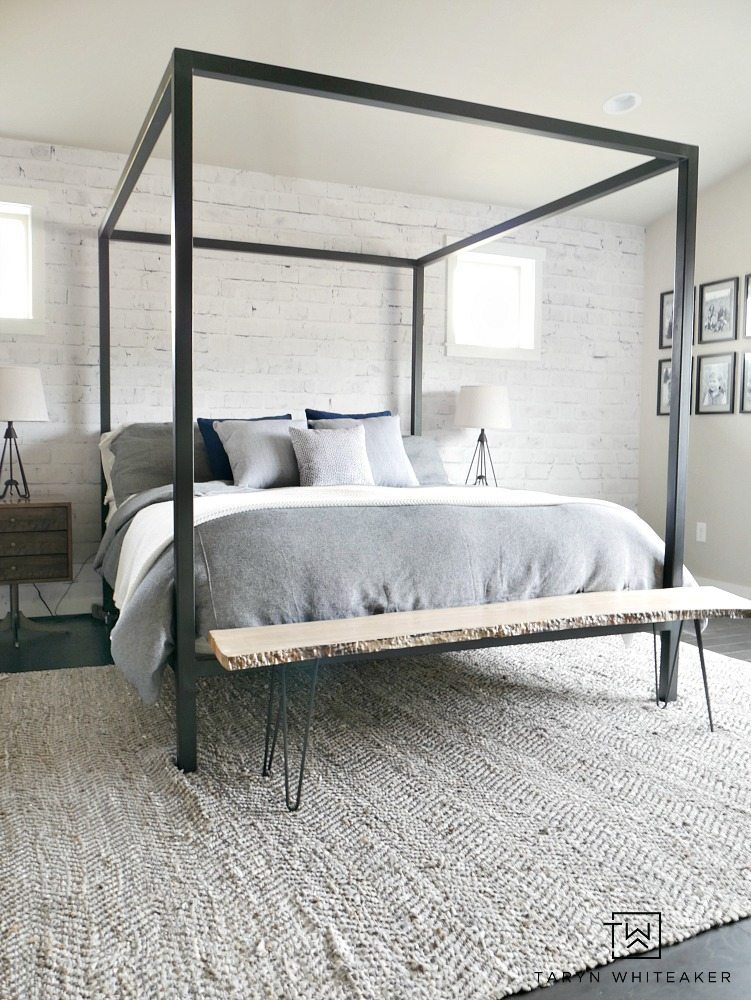
Time for a wall treatment! The walls had been pretty bare up to this point and it was time for something new. I added this faux brick wallpaper to create an accent wall. It’s subtle but also adds texture.

As we transitioned this space I decided I really wanted to make it a retreat for us, a place where we could lounge and watch TV and have our own place to hang (without the kids). We added this black tuft sofa and ottoman and it made this place so so cozy.

The seating area was the perfect addition for our big built in project! We added these built-ins and custom steel fireplace to make a big impact in our room.

This next update was SO small, yet made SUCH A HUGE DIFFERENCE! Can you spot it? I never liked the light fixture in here but it took a while to find the right one. Replacing the old one with this more industrial modern chandelier made a really big impact.
Faux Wood Beams
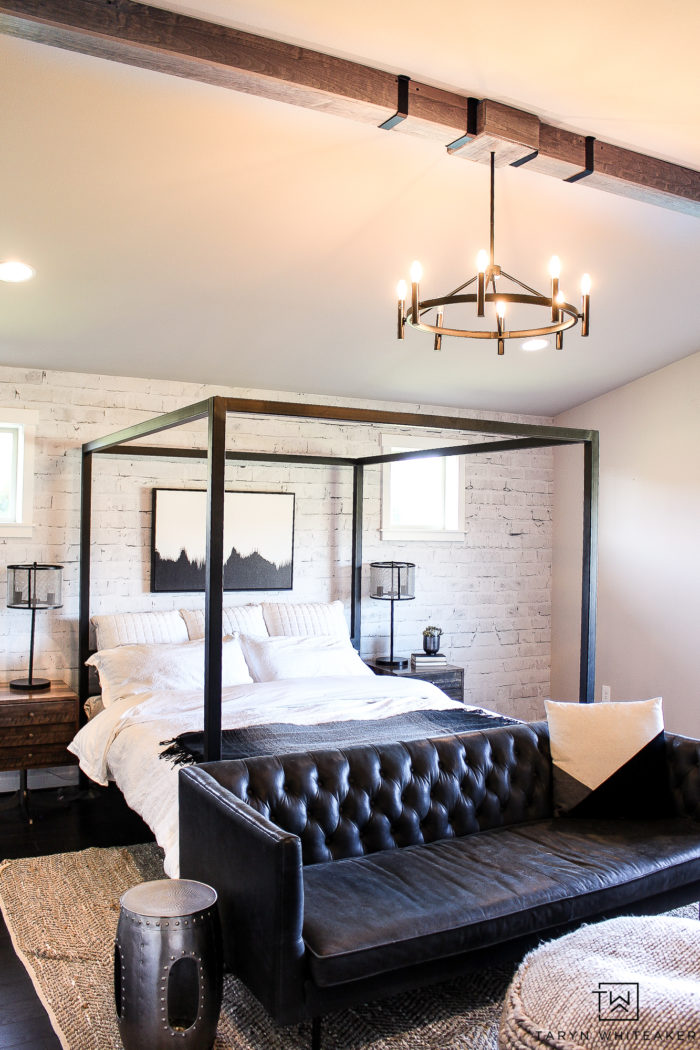
Let’s talk about those vaulted ceilings. One of the things I have wanted to do in this space from the very very beginning was install faux wood beams into our bedroom. I wanted to take advantage of the tall ceilings and draw attention to them and this was also the perfect time to add some more wood elements in here.
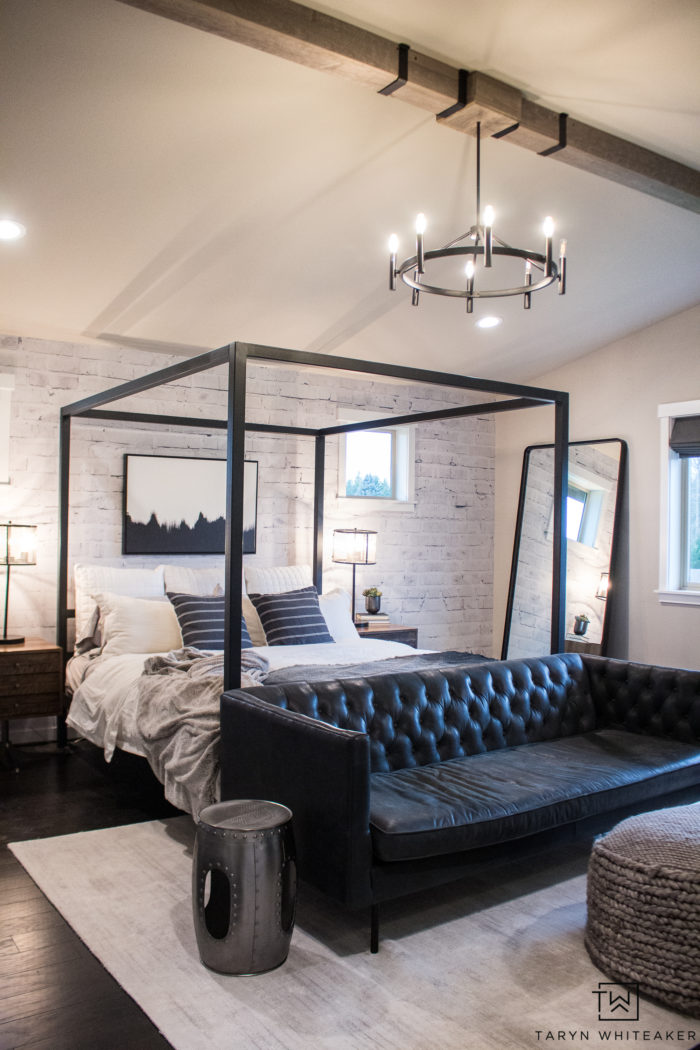
And with the addition of one big oversized mirror and a new luxe rug and this space is complete!
Whew all those update were a lot. Looking back it made me realize how important it is to have a clear plan in place so you aren’t buying things piece by piece and then realizing that the look isn’t coming together as expected. It’s better to set a clear design plan and slowly work in completing it. It’s also a reminder that even though we think we may have a plan, things will change form time to time as the vision evolves.

About Taryn Whiteaker
Hi! I’m Taryn! The voice behind Taryn Whiteaker Designs. I launched this brand over 11 years ago when I became a stay-at-home mom. What started as a small craft and mom blog eventually grew into a full time design and DIY site. My goal has always been to inspire others (especially women!) with design ideas, DIY tutorials, entertaining ideas and give you the tools you need to complete them yourself!


This is SO gorgeous, Taryn!! I love every detail. What paint color did you use?
Hi! This color is Colonnade Grey by SW