The last month has been focused on freshening up our backyard so it feels a little more like us. I have shared our balcony makeover and our outdoor dining space already, now it’s time for one last project before I give you a full tour of our backyard for the first time. Today, I’m going to walk you through the steps of installing a trellis on brick exterior. It might be easier than you think!
Installing a Trellis On A Brick Exterior
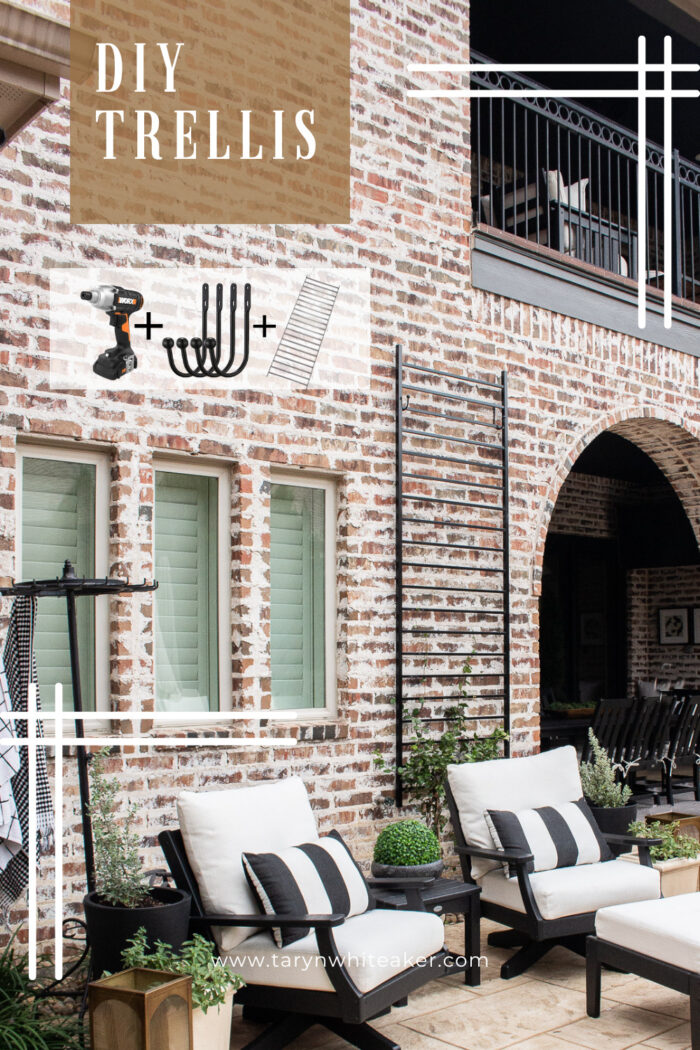
Installing trellises are an easy wall to add a charm an exterior, adding both a decorative element and fresh greenery. Large trellises can get pretty expensive when buying them from higher end retailers, but I have a hack for you. Each of these 8ft trellises cost me just over $100.
Before Space
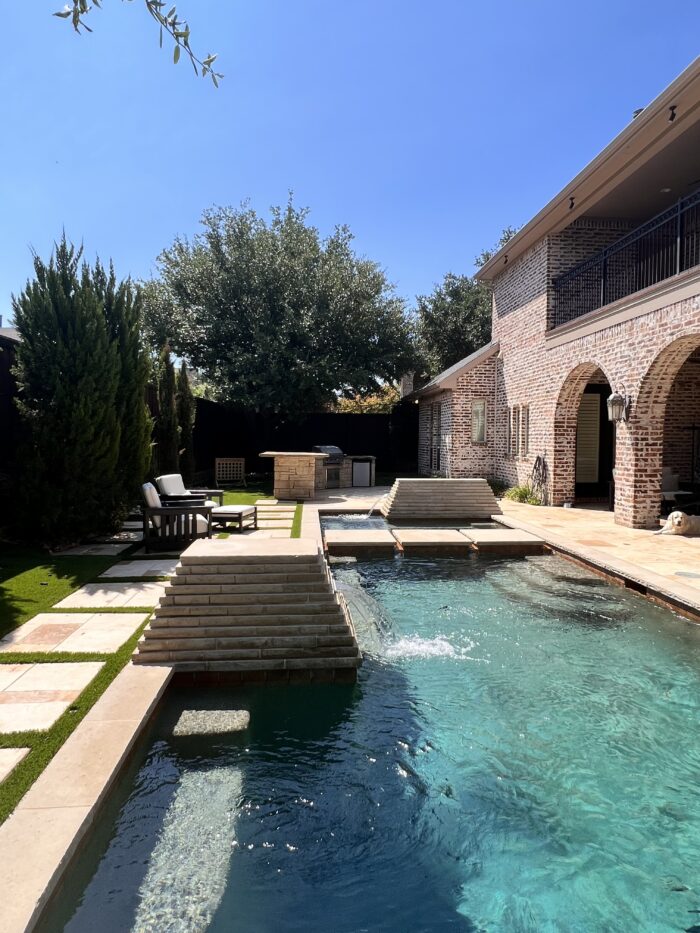
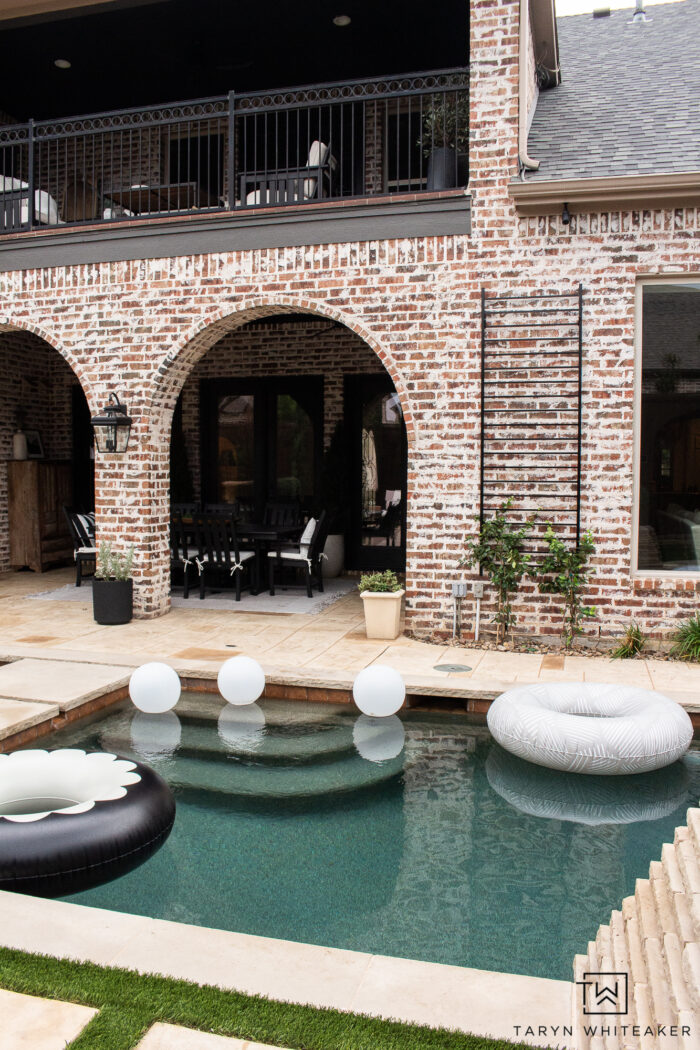
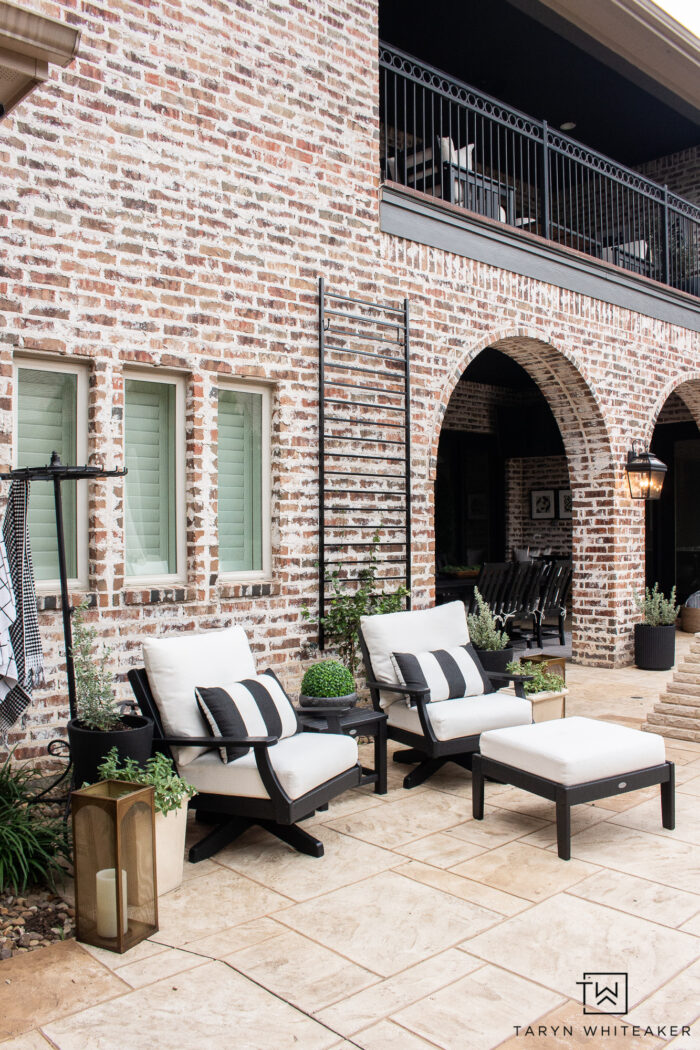
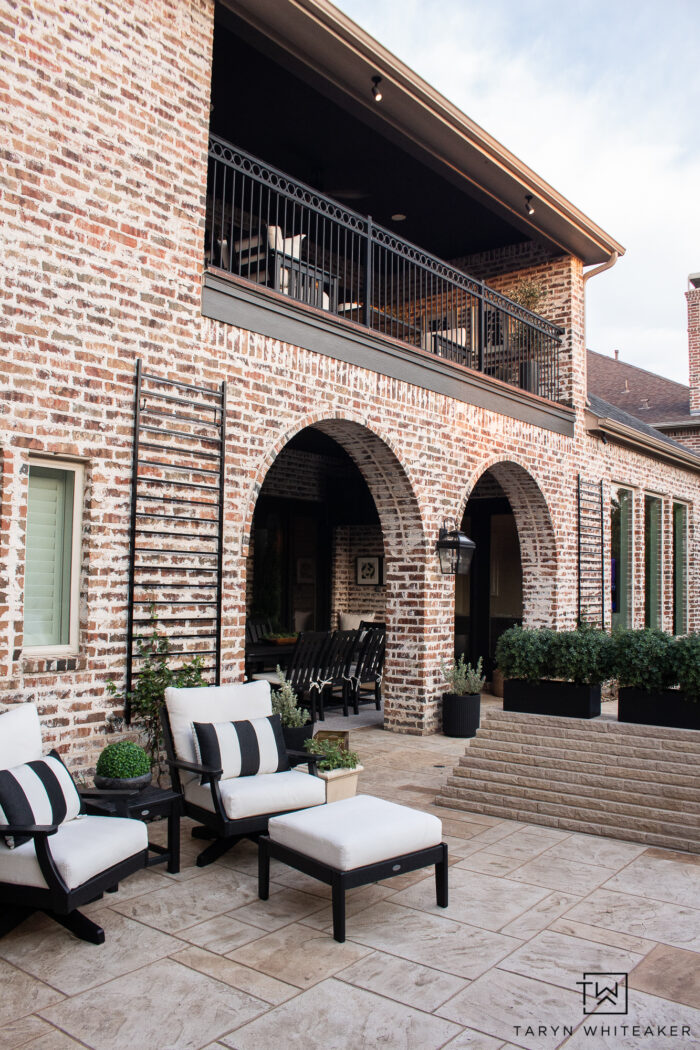
Our backyard is full of so much character with the german schmear brick exterior, but it also feels a little over powering. There is just so much of it, a lot of flat surfaces and a lot of beige. My goal is to bring more dimension to the back of our house by painting the porch ceilings Black Magic and trim Urbane Bronze. Next step is to add some greenery.
How to Build a DIY Trellis
DIY Trellis Supplies
- Black Metal Curtain Hooks
- Black Metal 3′ X 8′ Fence Panel
- WORX Impact Driver
- Masonry/Brick Drill Bit
- Star Jasmine Climbing Plants
Step 1 Measure
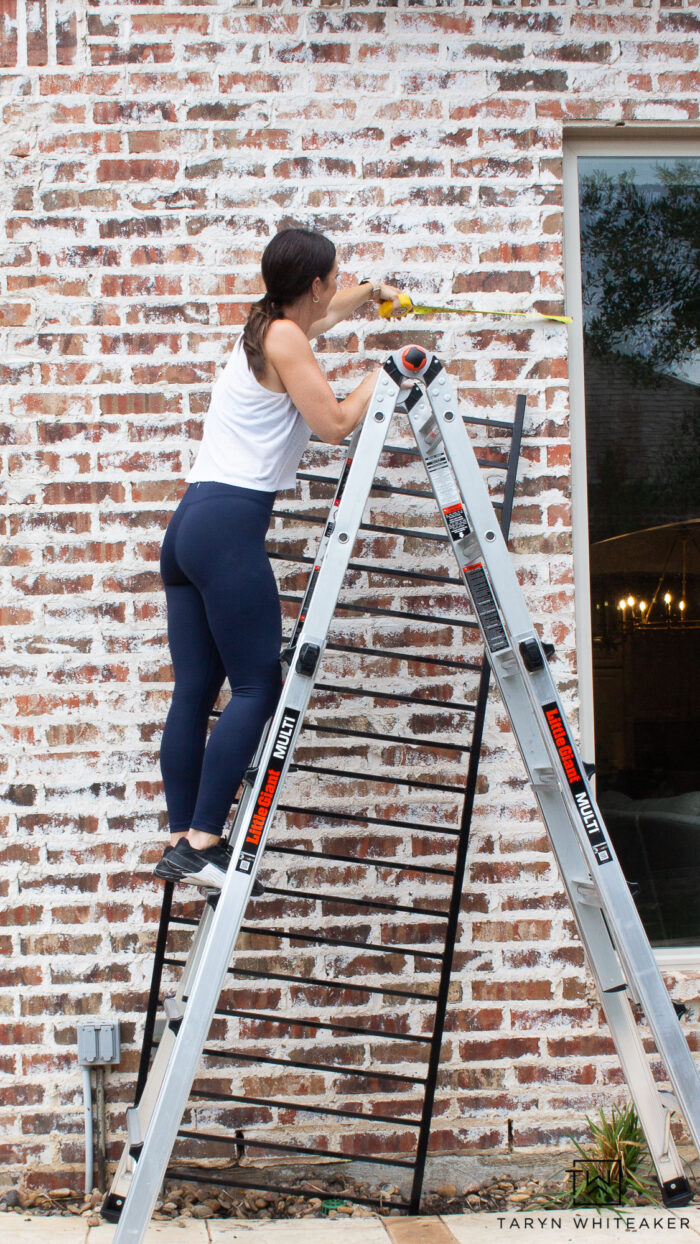
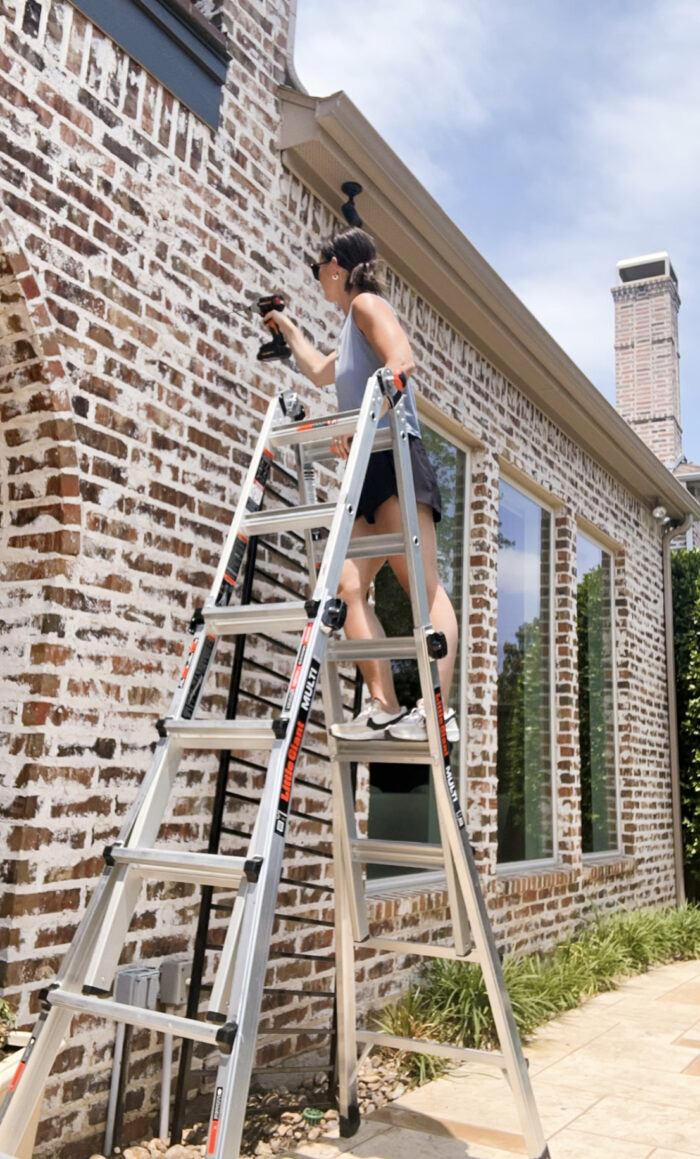
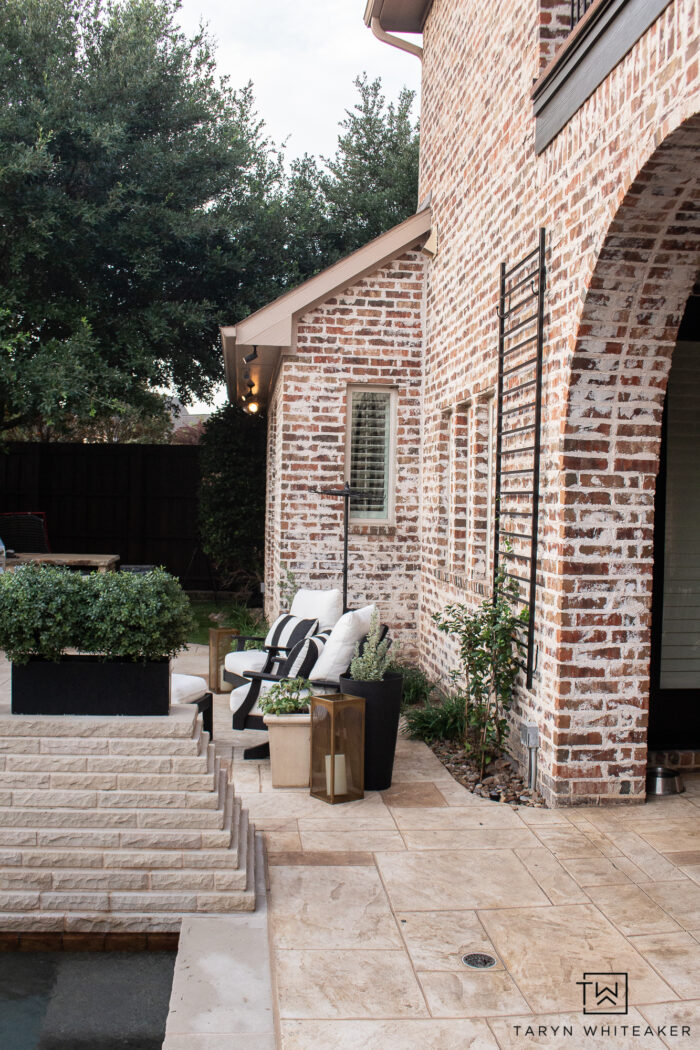
My fence panels are 36″ wide and you want to install the hooks about 3″ in from each side. So I found the middle of the wall, and marked 14″ out on either side. This is where my top hooks will go. I decided to hang my trellis a bit higher, I needed to go above the electrical boxes, but I also wanted to take the trellis up as high a I could on the brick.
Star Jasmine can grow up to 3-6 ft a year and grow up to about 30 ft vines. My plan is to take it up as high as I can on these trellises and then once it hits the top, I will add wires across the top horizontally so they can continue to grow over to the brick and arches.
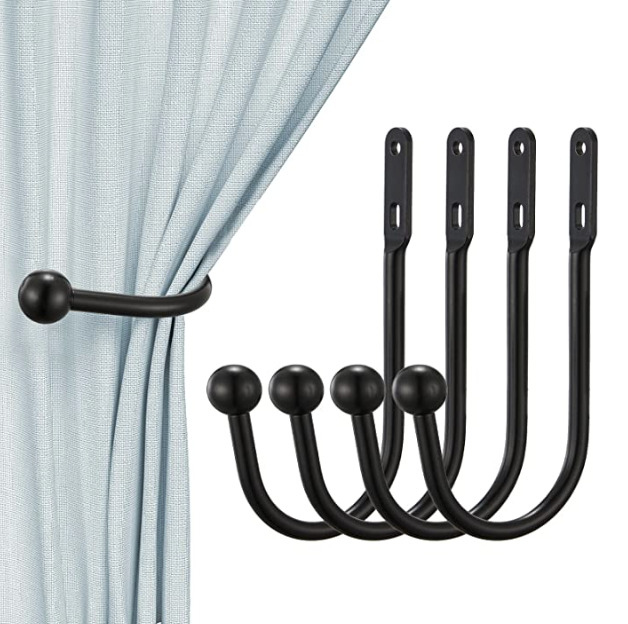
I purchased these Black Metal Curtain Hooks on Amazon for $7.99 and I hung them on all four corners of the trellis. 28″ apart. Here’s how I installed them into the brick.
Tips For Drilling Into Brick
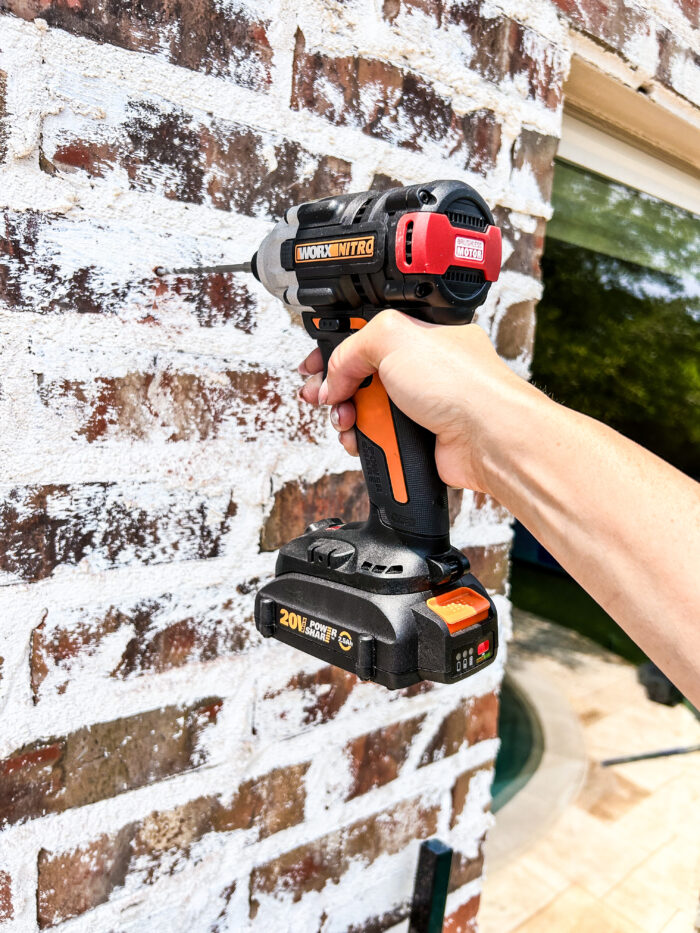
Ok, so I wanted to make this project super easy and not over complicate things. Drilling into the brick takes a little more time and muscle than drilling into siding, but that’s when having the right tools comes in handy! Having the right kind of drill and the right bit makes alllll the difference in the world. Now is it super fast? No. You do need some patience but it’s completely doable.


When drilling into brick, concrete or tile, I always use my WORX Impact Driver. It gives you extra power for driving into harder materials. On the front of the drill there is a button that allows you to select up to three different power levels. I used the strongest one for this project!
Also one quick tip when drilling into brick, tile, concrete etc, is to keep a cup of water nearby and use it to cool off your bit. It will get really hot from the friction and it can break off if it gets too hot!
Out of curiosity I did try using my WORX Power Drill for a second to see if I noticed a big difference and I DID! For sure.
Choosing the right bit is also VERY important. Not all bits are created equal. I ended up trying three different masonry bits throughout the project and this one ended up being my absolute fav!
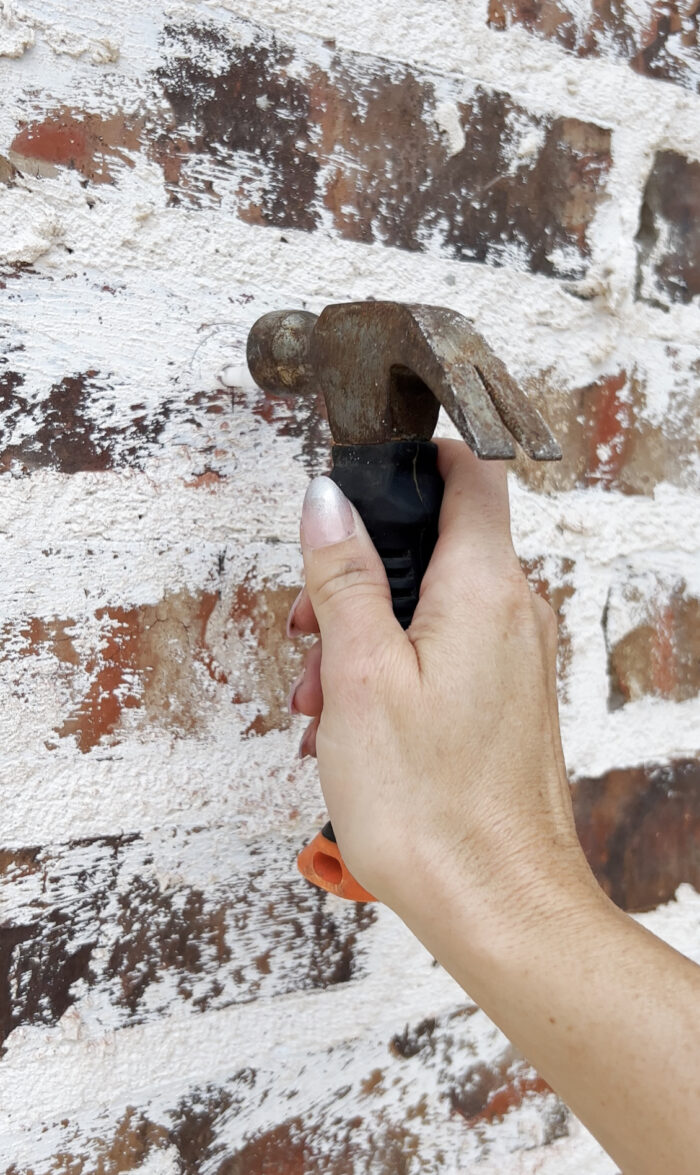
Once your holes are drilled, install masonry anchors into the brick. Then attached the hooks.

Once I have the top hooks installed, I can hang the trellis and easily mark where the lower hooks need to be installed. I try and have the lower hooks as snug as possible. If anything, it help the trellis not move/sway how too far with any strong winds, etc.
Choosing Plants
I love climbing plants, especially on brick. I think they add such a charming and classic look. I did a lot of research on which plants to choose with the Texas heat and Star Jasmine seemed to be a clear winner for me. 1) It smells amazing 2) It doesn’t die off in the winter. They will stay green year round. 3) It is drought tolerant which is key for Texas summers.
DIY Wall Trellis
I can’t wait to watch these beauties grow! I wonder how tall they will be in a few months. I just imagine these big lush vines cascading over the brick and creating this English Countryside look back here.
Watch the Process
About Taryn Whiteaker
Hi! I’m Taryn! The voice behind Taryn Whiteaker Designs. I launched this brand over 11 years ago when I became a stay-at-home mom. What started as a small craft and mom blog eventually grew into a full time design and DIY site. My goal has always been to inspire others (especially women!) with design ideas, DIY tutorials, entertaining ideas and give you the tools you need to complete them yourself!


I like your idea to use metal deck railing for the trellis. The tuck pointing on your house is really odd. What’s going on?