• Skip to primary navigation
  • Skip to main content
  • Skip to primary sidebar
  • Skip to footer
  • Home
  • About
  • Contact
  • Partner with Taryn

Taryn Whiteaker Designs

DIY and Interior Blog

  • Our Dallas Home Tour
  • Shop My Pics
  • Home Styling
    • Room Reveals
      • Our Current Home
      • Our First Home
    • Seasonal Home Tours
  • DIY Projects
    • DIY Home Decor
    • Crafts & Sewing
    • Before and Afters
    • Before and Afters
    • Furniture Builds and Makeovers
  • Seasonal Decor
    • Christmas
    • Easter
    • Fall
    • Fourth of July
    • Halloween
    • Spring
    • Valentine’s Day
  • Printables
  • Entertaining
    • Parties
    • Tablescapes
  • Fashion
  • Travel

October 28, 2022

Installing a Tongue and Groove Ceiling

Disclosure: This post is sponsored by WORX Tools, all opinions are my own!

I have a long list of “DIY Bucket list Projects” and I have a feeling I’m going to check a lot of those off with this new house! I’m always up for a challenge, a learning experience and for a good before and after! I was able to check one of those items off with my first big DIY project on this house! Today, I want to talk about my experience installing a tongue and groove ceiling treatment in the new office and the tools I used!

This was my first time installing a plank ceiling and when it comes to ANY first time project, having the right tools is key. It may feel like a large expense up front, but investing in the proper tools that make the right cuts will save you time and money in the long run and will also make your project more professional. I’ll be sharing all the tools I used for this project and which ones I recommend!
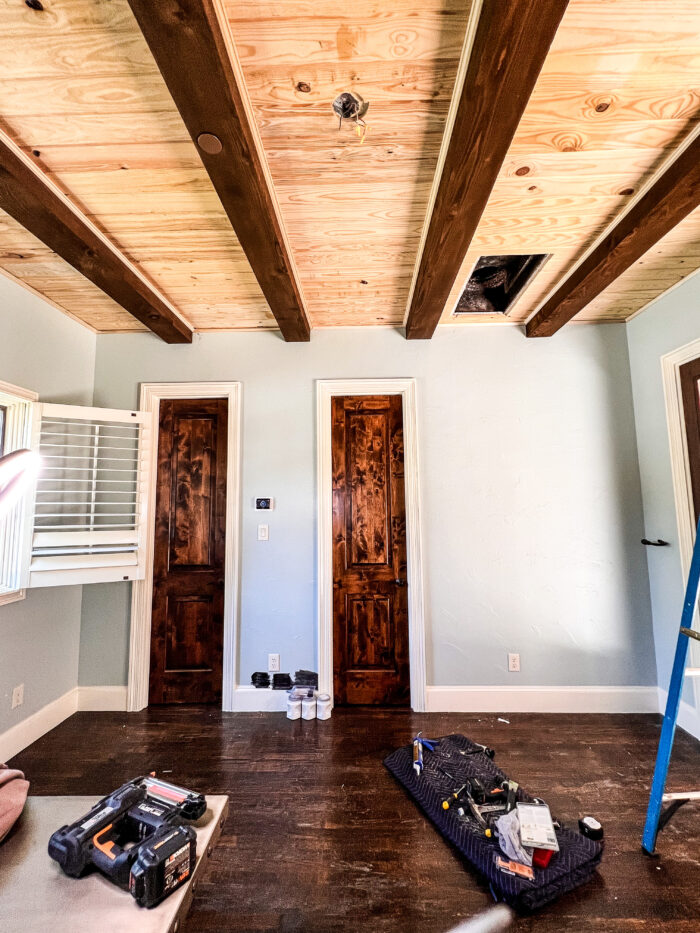
Office Space Before

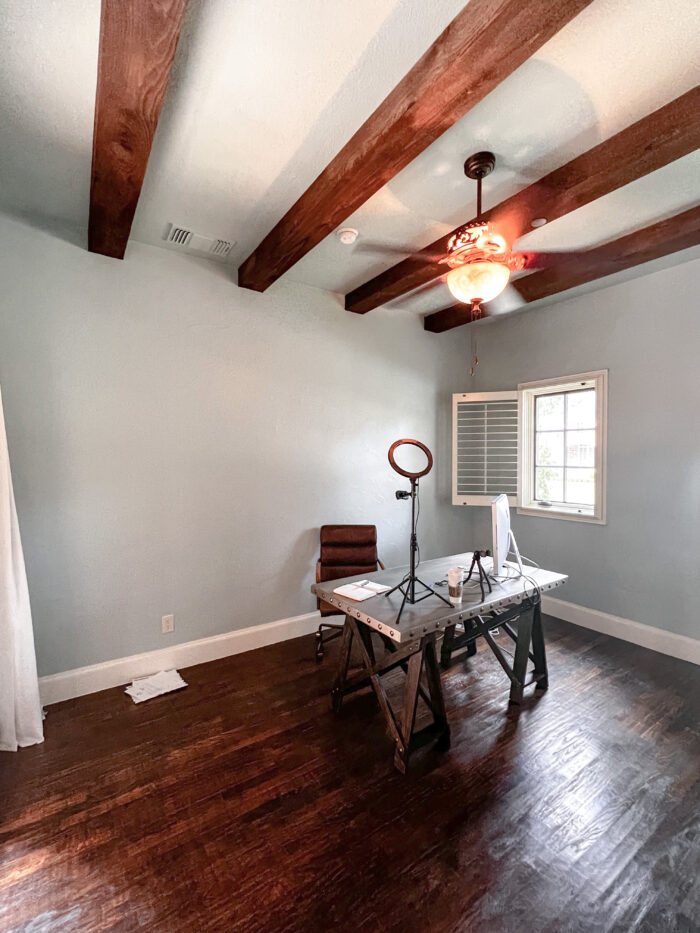
Here is what this space looked like when we first moved in (see our full house tour here)! I adore the wood beams we have throughout the house and only want to accentuate them even more. My goal was to modernize this space and bring even more character to it. You can see my vision for this space here.

My first project in here is installing a tongue and groove ceiling between the beams to give it more texture and dimension.

Installing a Tongue and Groove Ceiling

Supplies

Tips for Installing a Tongue and Groove Ceiling! Get this plank look on your ceiling using boards and WORX Tools.
  • Brad Nailer
  • Miter Saw
  • Circular Saw
  • Jig Saw
  • Drill (I LOVE the Switchdriver!)
  • Work Table / Saw Horse
  • Mallet
  • Tongue and Groove Planks
  • Shoe Trim Moulding
  • Liquid Nails
  • 2″ Brad Nails
  • Wood Filler
  • Sand Paper
  • Measuring Tape

Installing A Plank Ceiling

Worx Miter Saw

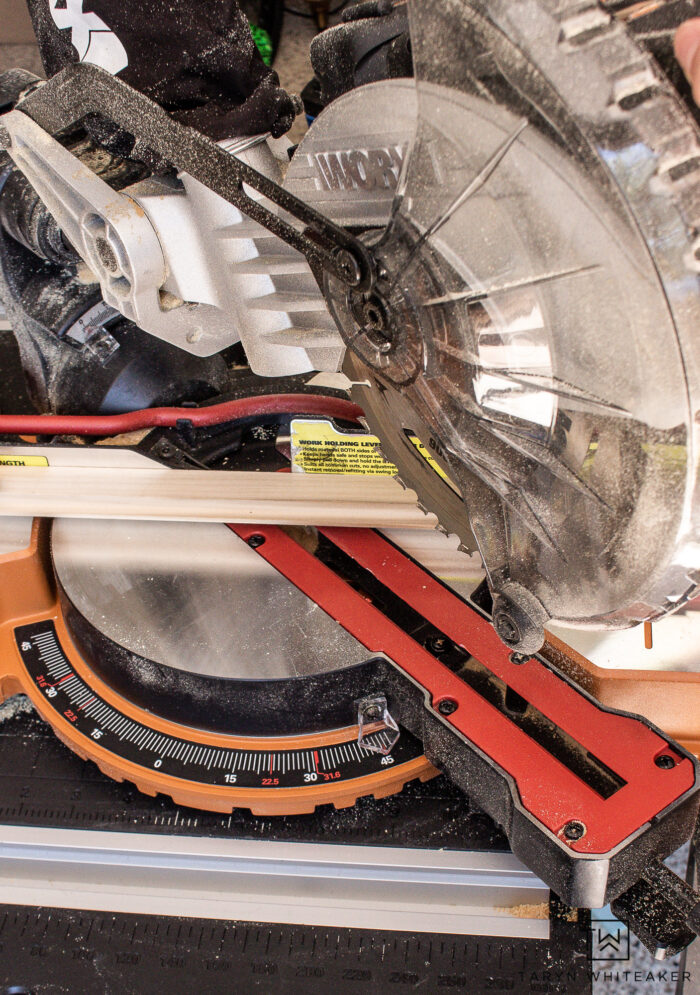
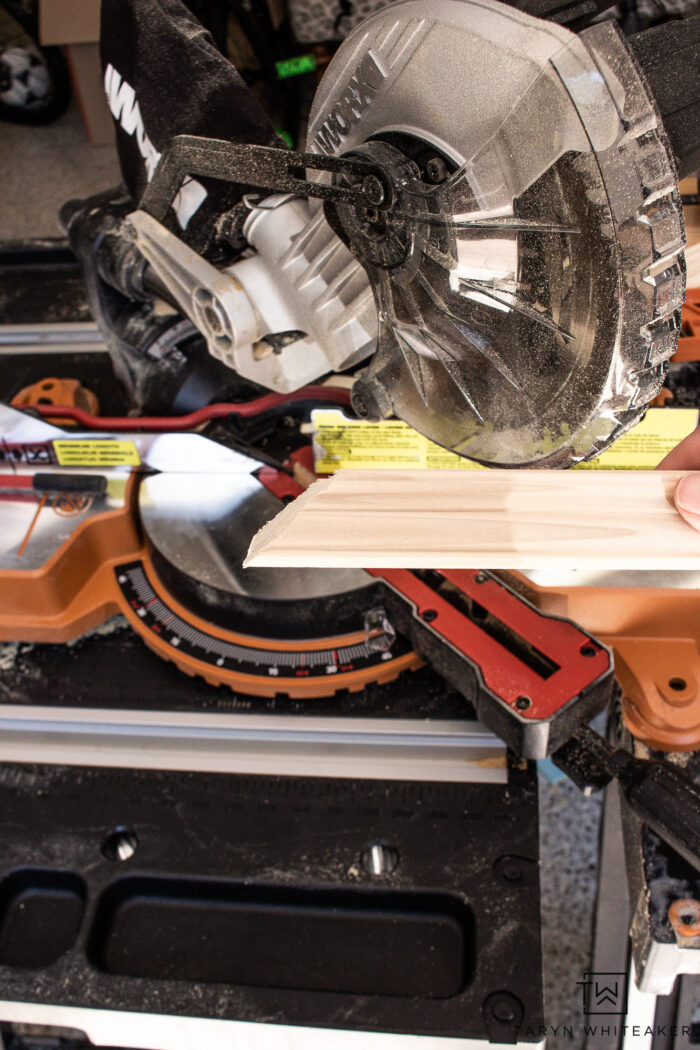
Cut your planks down to size. I used my WORX Tools Miter Saw to cut all of my tongue and groove planks to the proper size. This saw is one of my favorites and really helped improve my DIY projects. I love how it is battery operated so I can set it up anywhere. It’s also a sliding compound saw so it can cut wider pieces of wood as you slide it out and push it back in when you cut. This was a game changer! You want to set it to a zero angle when cutting straight lines. We’ll talk about the different angles below.

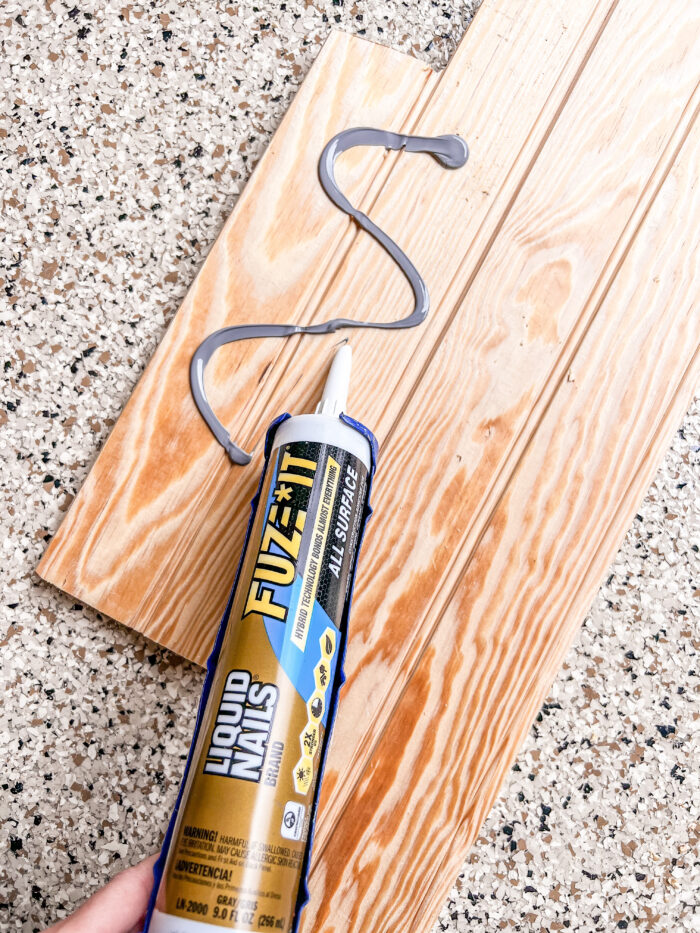
Attach your planks to the ceiling. There are a few different ways to attached tongue and groove on the ceiling. The important part is that it is done securely. Ideally every board would go into studs but for my walls, the studs run the same direction as the planks, so it would only be possible to have 1 out of every 5 planks be installed into a stud. Which isn’t going to work. So instead, I used a combination of liquid nails and a brad nailer.

I would first put a good amount of liquid nails on the back of a plank, push it firmly to the ceiling and then put about 5 nails into the board.

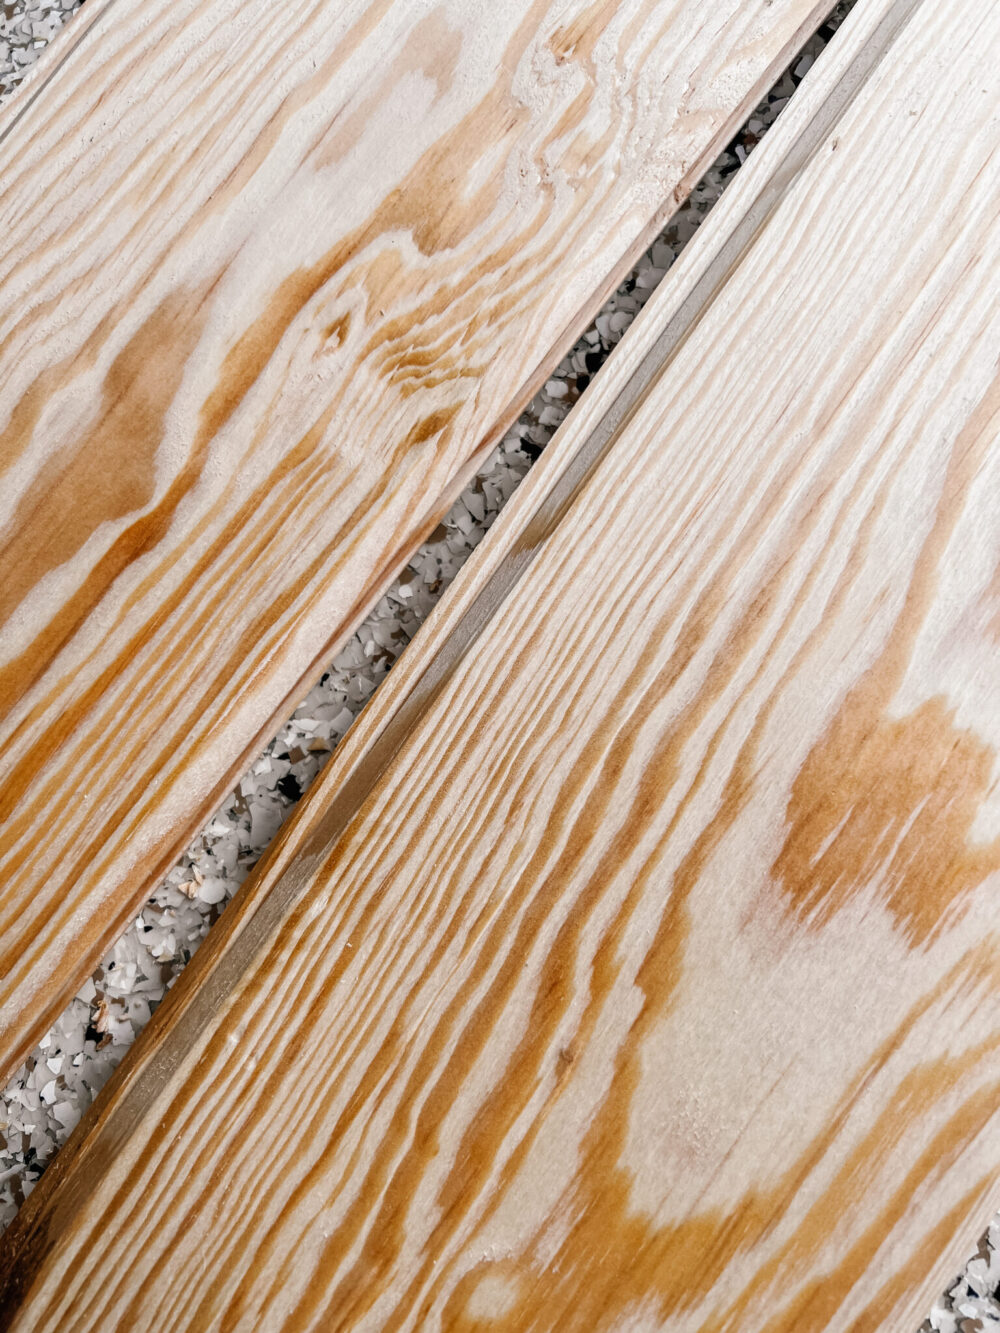
The whole point of the tongue and groove system is that they attach together seamlessly, the tongue goes into the groove of the next board, and so on and so on. They slide together pretty well for the most part, but sometimes I would use a mallet to push them together and get a tight fit. You want to make sure the pieces are all straight and level as you go.

Cutting around the vents and lights. To cut around the vents and light boxes I used a trick using my drill and jig saw. My jig saw is one of my top tools in my collection! It gives you the opportunity to make really custom cuts and cut out ANY shape you want!

To cut a circle or square for the boxes here is what I do. First, using a 1/2″ drill bit, drill into each corner (or if doing a circle then somewhere along the outer edge. Then, take your jigsaw and use the hole from the drill bit to be the place where you start cutting the shape out. This allows you to start your jig saw blade at any point.

Tips for cutting shapes out of tongue and groove boards.

Perfect.

Tips for Cutting Ceiling Trim Moulding

While it is possible to get a perfectly clean line when installing wood planks, more often than not there will be slight gaps or variances do to inconsistent ceiling and wall sizes. To cover the raw edges of the tongue and groove and I added a single piece of decorative Shoe Trim Moulding to each board. This also added a decorative element and additional detailing on the ceiling.

Cutting any form of crown moulding can be really tricky and take a lot of practice. I had to really think this through and even laid in bed one night trying to figure it out. BUT I finally got it!

When cutting the corners, you want to set your Miter Saw to a 45 degree angle. If you are cutting a piece of moulding that is going to be coming into the corner from the right, turn your handle to the right. If you are cutting a piece that will be coming in from the left side of the angle, move your handle to the left 45 degree on your saw.

This the tricky part. How you place your moulding in the saw is super important. You want to place it in the saw at the same angle it will be sitting against the wall/ceiling. Since I’m using a corner trim, the flat part needs to be on the top, just like it will go against the ceiling.

Hold it in place with the safety handle and cut it.

Tips for Installing a  DIY Tongue and Groove Ceiling! Get this plank look on your ceiling using tongue and groove boards and decorative trim.

I installed the trim using my brad nailer, filled the seams with wood filler and then sanded it down smooth.

All done! Now time for paint and primer.

Timeless Moody Office Design

Tips for Installing a Tongue and Groove Ceiling! Get this plank look on your ceiling using boards from Lowes and adding decorative trim.

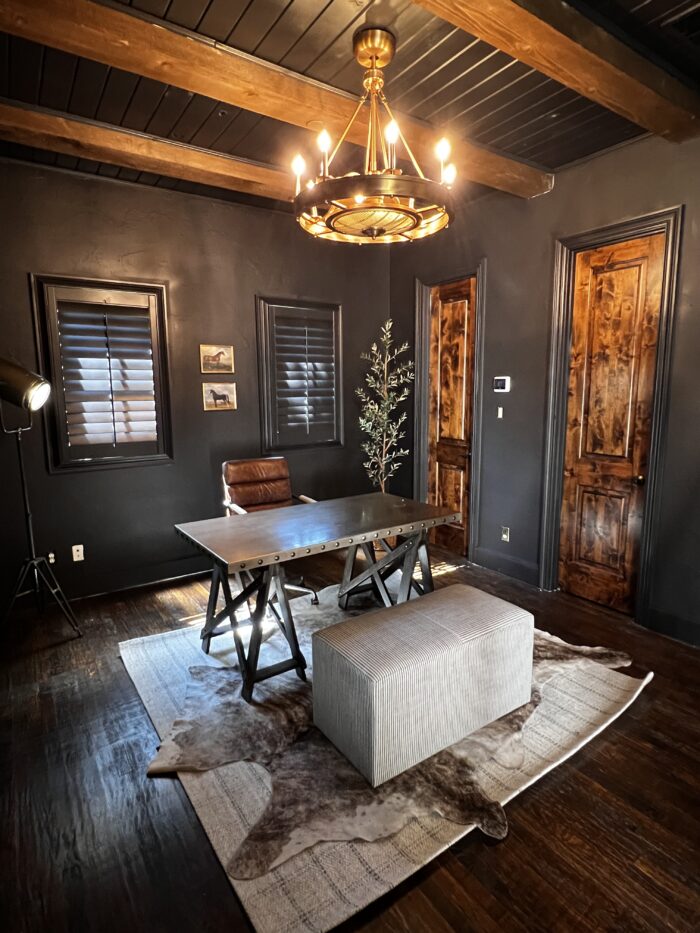
To finish off the design, I painted the walls and all the trim Sherwin Williams Black Magic. This was my first time using this color and it is so GOOD! It’s a very warm black. It pulls together brown and wood tones so nicely.

Moody guest room with tongue and groove ceiling painted in a Black Magic.

Our office also doubles as a guest space! You can see more on that on Instagram. We have phase 2 coming up in here soon with a murphy bed system!

WATCH THE VIDEO:

Shop The Decor

About Taryn Whiteaker

Hi! I’m Taryn! The voice behind Taryn Whiteaker Designs. I launched this brand over 11 years ago when I became a stay-at-home mom. What started as a small craft and mom blog eventually grew into a full time design and DIY site. My goal has always been to inspire others (especially women!) with design ideas, DIY tutorials, entertaining ideas and give you the tools you need to complete them yourself!

You May Also Like:

  • DIY Wall Trellis-7
    Installing a Trellis On Brick Exterior
  • TarynWhiteakerDesigns_BoysSportsBedroom-6
    Installing Thin Brick Tiles
  • home, home design, ceiling fans, fandeliers, nonlighted fans, lighted fans, home reno, neutral home, modern home, bedroom design, office design, outdoor patio, outdoor living
    My Top Ceiling Fans to Elevate Your Home

Filed Under: ALL POSTS, Before and Afters, DIY Projects, Sponsored

Reader Interactions

Comments

  1. Karen says

    October 28, 2022 at 7:47 am

    Who makes the ceiling fan?

    Reply
    • Taryn Whiteaker says

      October 28, 2022 at 7:48 am

      Here’s the link! https://bit.ly/3wmLqsq

      Reply
  2. Mary Bostard says

    October 28, 2022 at 8:02 am

    Love it!!

    Reply
  3. June says

    October 28, 2022 at 7:37 pm

    Whoo, that turned out great! And the trim adds a amazing design interest.

    Reply
    • Taryn Whiteaker says

      November 1, 2022 at 7:53 am

      Thank you so much!

      Reply
  4. Sharon C says

    November 2, 2022 at 11:28 pm

    This room has gone from ok, to WOW!!! What a transformation Taryn, it’s absolutely stunning! Great job,well done.

    Reply
    • Taryn Whiteaker says

      November 13, 2022 at 9:12 pm

      Thank you so much! I appreciate that!

      Reply

Leave a Reply Cancel reply

Your email address will not be published. Required fields are marked *

Primary Sidebar

Looking For Something?

CONNECT

Meet Taryn

Taryn Whiteaker

Hi and welcome! I'm Taryn and the voice of style behind Taryn Whiteaker Designs. Sharing our journey of modernizing our European style home in Dallas. Thanks for stopping by and don't forget to subscribe to my mailing list to get all the latest updates! Read more...

Footer

THIS SITE

  • Home
  • About
  • Contact
  • Partner with Taryn

Privacy Policy

If you are interested in learning more about data that might be collected by this site you are encouraged to read the Privacy Policy

COPYRIGHT POLICY

All images on this site are copyright of Design, Dining and Diapers, LLC. Unless otherwise noted. You may not use these images without written permission. If you would like to feature a project shown on Design, Dining and Diapers you may use a maximum of 2 images and include a visible link back to the project.

More From The Gram

tarynwhiteaker_designs

Taryn Whiteaker Designs
My goal with every room is to make it feel warm, i My goal with every room is to make it feel warm, inviting and extra cozy. It’s often the final finishing touches that truly transform the vibe of a room. I picked up some final styling pieces from @wayfair , I am obsessed with both side tables. They are both statement pieces. And the personal photos, candle, heart trays and leather pillows are why bring the warmth and personal touches into this space. 

Comment SHOP for everything I added in here! 

#wayfaircreator #wayfair #ad #valentinesday #wayfairpicks
I finally found the perfect family and pet-friendl I finally found the perfect family and pet-friendly sofa that passes the designer test! This is the 5-Seat Modular Corner Sectional from @7thavenueco in the color Oatmeal Beige. We ordered it in the extra-deep seat option for ultimate coziness. The material is water-repellent, stain-resistant and you can also throw all covers in the wash!

We cannot say enough great things about this sofa, we all love it and just sink into it. It definitely passes the family test. Plus, it truly is gorgeous. It looks very chic. 

Comment SOFA and I’ll send you the link to this exact one! 

#familyroomdecor #partner #homedecor #neutralhomedecor #interiordecorating
If you are looking for another family trip this wi If you are looking for another family trip this winter, we loved our time at @bigcedarlodge ! There is so much to do in winter, and it was fun to see pics of all the snow over the past week! Here are a few notes that we took away from our 3 nights earlier this month! Save this post for your next trip…

#bigcedarlodge #ozarks #bransonmo #familytravel 

(Hosted)
Snow days in Dallas. ❄️ #dallaska #snowdays Snow days in Dallas. ❄️ 

#dallaska #snowdays #snowmuchfun #iceicebaby
What’s on the list for 2026?? Swipe through to s What’s on the list for 2026?? Swipe through to see all the spaces on my list and my initial ideas. Will I get to all of them!? I would love to but I also know I probably won’t, and that’s ok. But here is my lofty goal list. Kicking off the first one this week! 

1. Family room refresh 
2. Laundry Room Makeover
3. Primary Bedroom and attached seating area 
4. Formal Living Room 
5. Cozy Reading Nook in Hallway 
6. Finish the Staircases
Making use of an overlooked spot in our upstairs h Making use of an overlooked spot in our upstairs hallway! Love how this little vignette came together with fun finds from over the years. 

#neutralhome #organicmodern #decorating #neutraldecor
The biggest project we’ve done yet! I still have The biggest project we’ve done yet! I still have two more projects left to do in here to add some more warmth and texture, but the changes made so far are 🙌🏻. Classic, elegant, timeless and feels so fresh. 

So far: 
Replaced railings with custom ones
New carpet runners
Installed Gold Stair Rods 
Swapped out the chandelier for a statement piece 
Had the walls skim coated to level 5 finish and painted!

Sharing more details on the blog! Click the link in my bio. 

#houserenovations #interiordesigns #neutralhomedecor #staircases #renovation
Help me pick a chandelier for our back stairwell! Help me pick a chandelier for our back stairwell! The very last one was my initial pick, but now y’all have me questioning a few others after my stories today…

Comment SHOP if you want links to any of them! 

#interiordesign #homedecor #neutralhome
Comment STAIRS for the links to the gold stair rod Comment STAIRS for the links to the gold stair rods I used! $600 vs. $4000 is a huge difference for two staircases! Love the elevated, timeless look. They add such an elegance. ✨ #homedecor #diy #diyhomedecor #lookforless #interiordesign
Follow on Instagram

Copyright© 2026 · Brunch Pro Theme by Shay Bocks · Hosting by 3116 Digital