Disclosure: This post is in partnership with PaverTurf and Milestone Tiles, all opinions are 100% my own.
I seriously am so excited about today’s post and based on all the response on Instagram, you are too! When we got the plans for our backyard, I loved that Yardzen included an area of turf in our design. It’s something I hadn’t though of before and loved how it brought dimension to the space. As soon as I saw the design, I knew I wanted to work with Gary from PaverTurf on the project. We had been in contact for a while now ( I think almost two years!), I was waiting for the perfect opportunity to try out his patented turf product. Today, I’m going to walk you through the process and share tips for installing your own turf.
I have always loved the look of turf grids but was intimidated by the cost and not knowing where to start. PaverTurf is an incredible company as it makes it SO easy for homeowners to add turf to their own yards and do it themselves. Is turf an investment? Yes. But I believe you save a good amount by working with PaverTurf and being able to do the install yourself. They are a one stop shop!
COUPON CODE! Use code TARYN7.5 to get 7.5% off your turf order!
DIY Turf Project
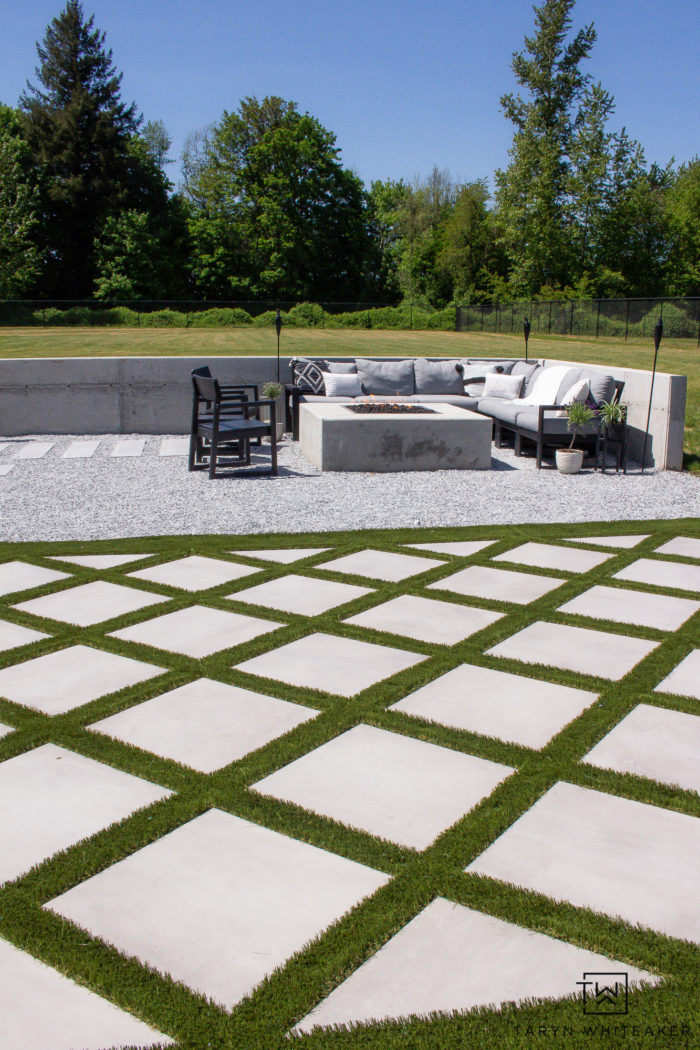
I couldn’t be happier with how this project turned out. It was tedious but it was also easy at the same time. The grid pattern gave our very monochromatic backyard the pop of both color and pattern that it needed. It makes such a big impact!
I have been so happy with this product. PaverTurf is made in the USA using renewable and recyclable components including plant based backing technology, replacing a large portion of the petroleum-based polymers. The turf fibers have Antimicrobial, IR Reflective, & Anti-Static Technology making it a clean and safe turf.
You can take a closer look at the fire pit area in this post here!

I love how it separates the fire pit area from the walkway. Right now I don’t plan on putting any furniture on here because I love the design element. But that doesn’t mean you can’t. You could easily put a free standing fire pit or a conversation set. It would also be a great space for yard games.
We may end up moving our chaise lounges over here eventually, but for now I like it just like this.
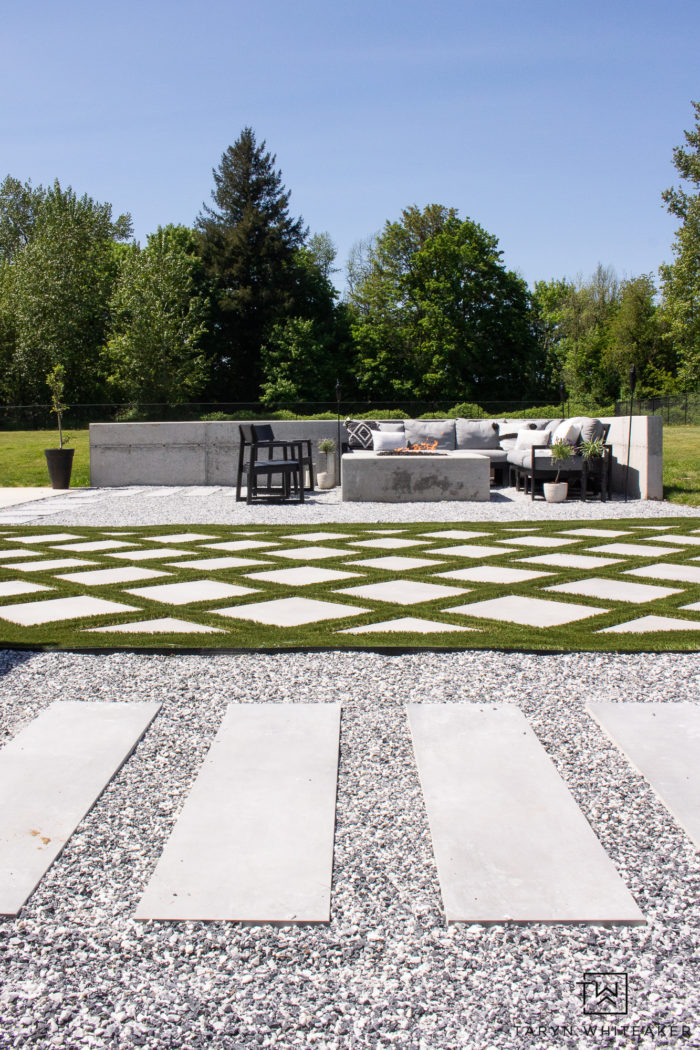
Here is a wider pic for you to see full space! I have lots more pics coming!
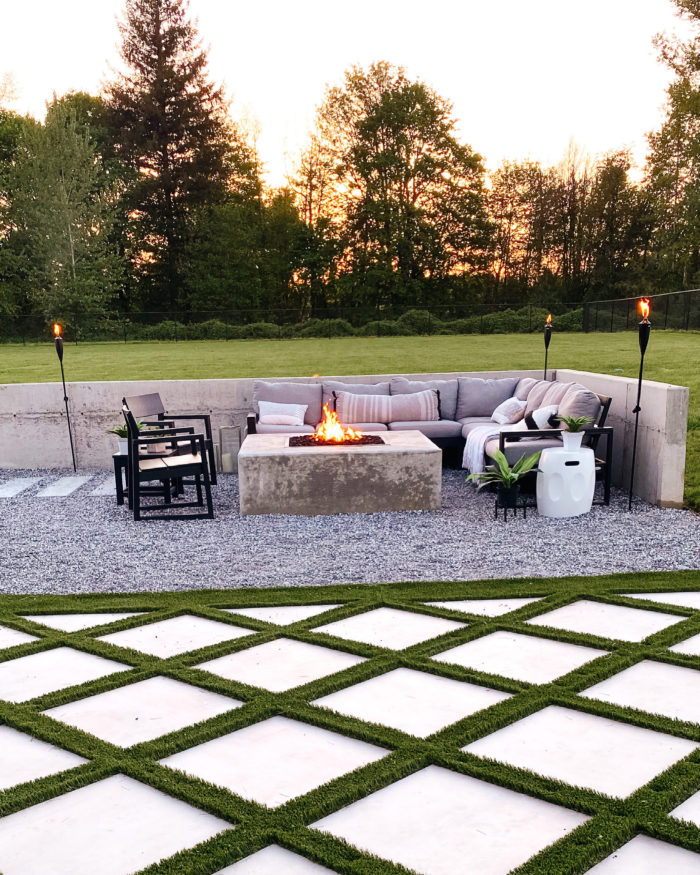
Evenings out here are my absolute favorite! Sometimes we come out here for just 20 minutes before dinner and it’s all I need for a little refresh. I recently grabbed these cute Tiki Torches on Amazon, love the little extra glow they bring!
Tips For Installing Your Own Turf

Ok! Let’s get down to how to do this on your own. This may seem like there are a lot of steps, but I assure you it isn’t as overwhelming as it seems! Gary, the owner of PaverTurf, has as a great tutorial on the site, he also provided me with a lot of additional tips that I’ll share with you today.
Planning For Your Turf
Before you begin, there are a few key elements you need to decide before you are ready to order your turf. Measure your space! Be very careful with your measurements because the turf is cut VERY precise.
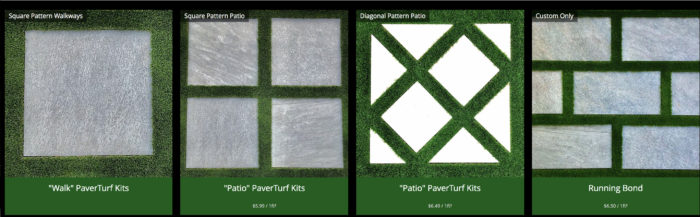
Decide on your design! I went with the grid on a diagonal for a more classic look that also pairs well with my more modern decor. I love the design element it brings to the backyard. You can see all of the different PaverTurf template options here. They have great options for basic walkways to larger scale areas.

Pick your pavers. I went with these beautiful 24″ porcelain tiles from Milestone Tiles. I chose “Greige” for the turf design and “ash” for the rest of our backyard.This is the +ONE line. It is slice, modern yet classic and I highly recommend them. They are definitely a luxury tile that does not disappoint.
You do not have to use this specific tile within the turf, if you have another option that you prefer, you just have to provide PaverTurf with the detailed dimensions.
Once you send PaverTurf your measurements and paver choice, they will do all the math for you and create your own personalized template for your yard!
How To Install PaverTurf
Supplies:
- PaverTurf
- Pavers
- Weed Barrier (provided)
- Adhesive Strips (provided)
- Base gravel – crushed 5/8 minus
- Green Silica Sand
- Landscaping Staples
- 6″ Spiral Turf Nails
- 20D Nails for interior sections
Use code TARYN7.5 to get 7.5% off your turf order!
Suggested Tools
- Tamp
- Gravel Rake
- Wheelbarrow
- Hammer
When You Receive Your Box
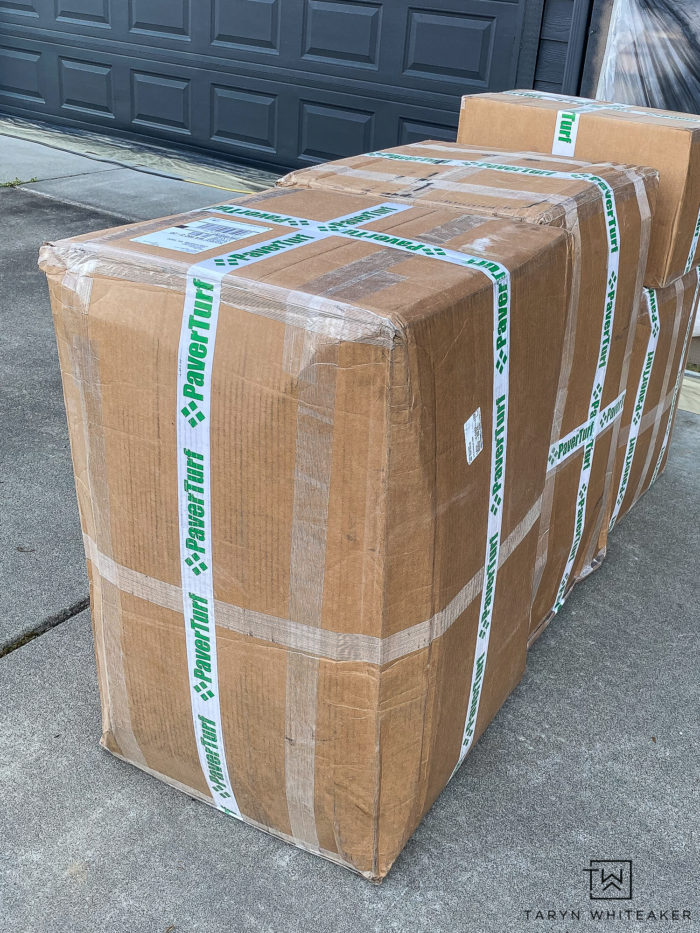
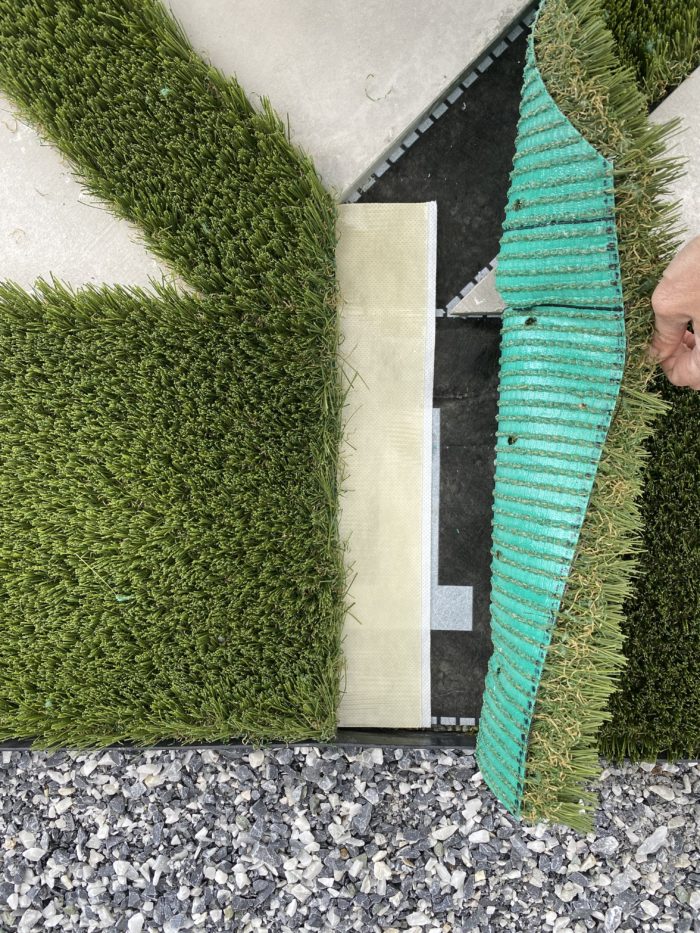
Your turf will arrive rolled up in boxes. Depending on the size of your project it may come in multiple pieces. Mine came in three sections.
As soon as the turf arrives, take it out of the box and lay it as flat as possible to help the turf relax. It’s best to have it lay out in the sun for at least a few hours (or longer) before installing your turf.
Prepare Your Surface
You will need to prepare your surface for the turf. We had previously removed our grass from this section of the yard, but if you haven’t done this already this is your first step.
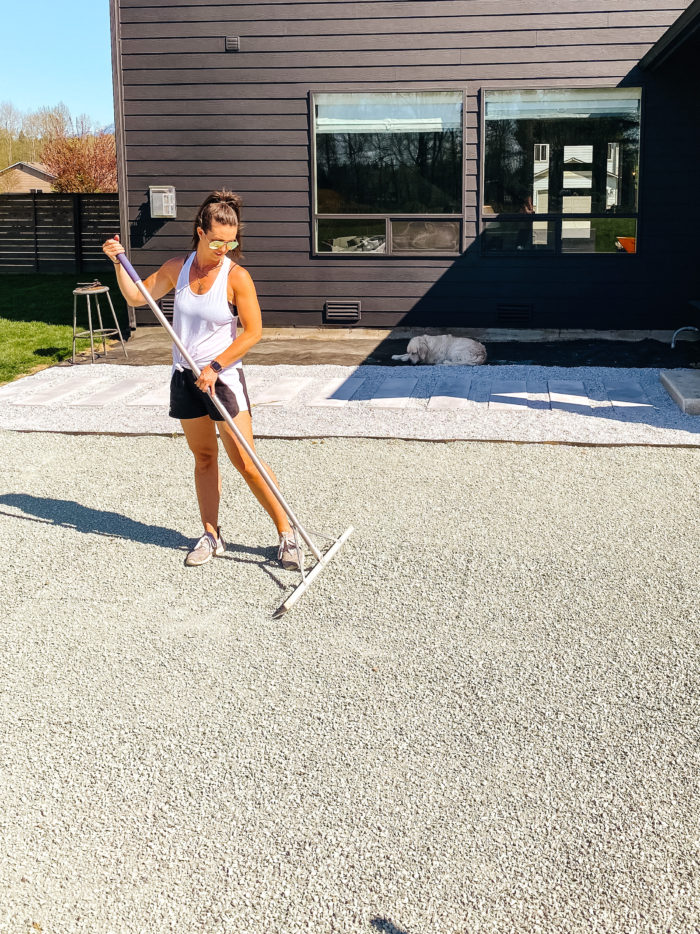
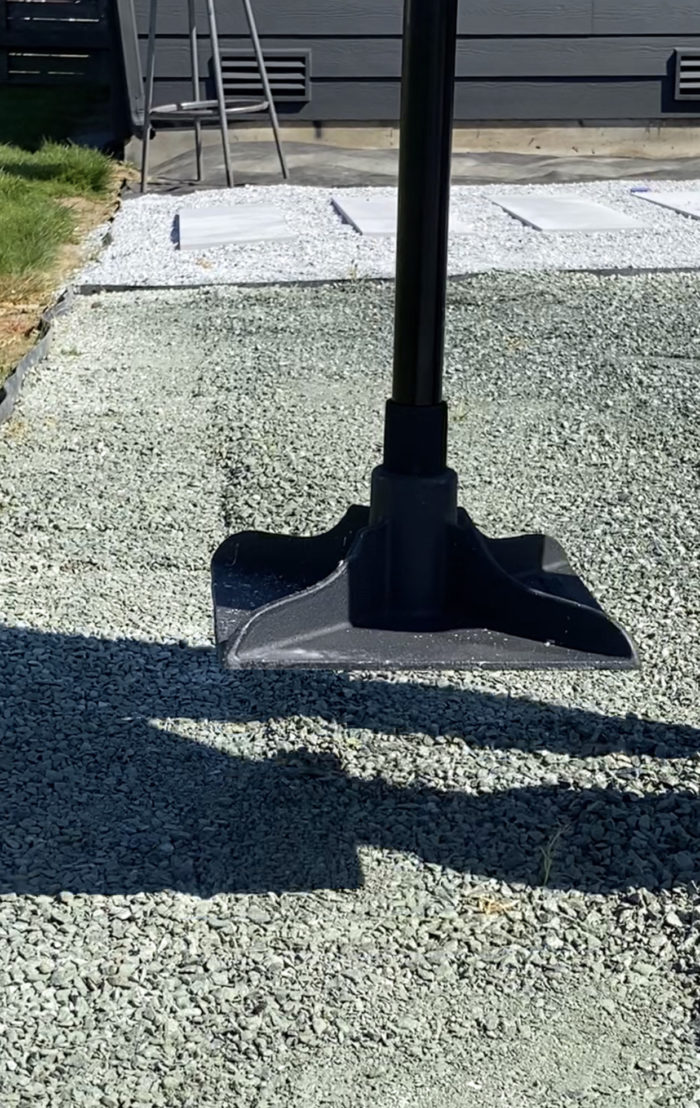
Next, you will need to bring in your crushed quarter minus gravel. This is what we used for the base of the rest of the yard as well. We did about 2″. Rake is out as smooth and level as you can and then wet it down with a hose and use a tamper to compact it. For a small space a tamper is great, but if you are working with a larger space, you can rent a plate compactor at Home Depot ( we used this when we did the base gravel for the rest of the yard).
Secure Your Template
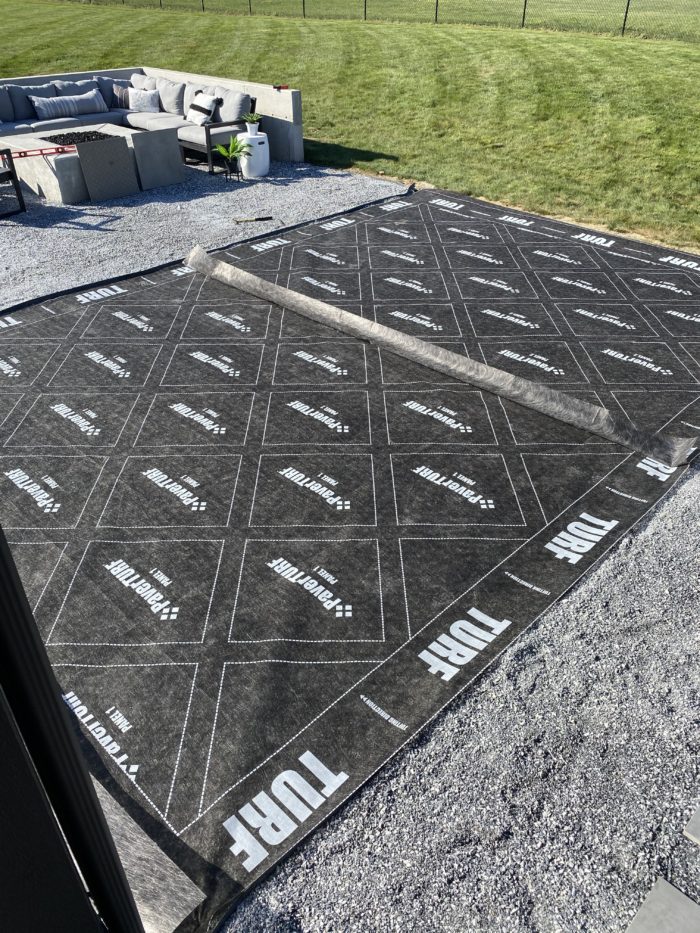
I think this part of PaverTurf is so brilliant. They actually print your personalized grid pattern directly onto the weed barrier. Practical and so user friendly. Secure this with Landscaping Staples. You will see where the pattern overlaps, it’s very easy.
Place Your Tiles On The Template
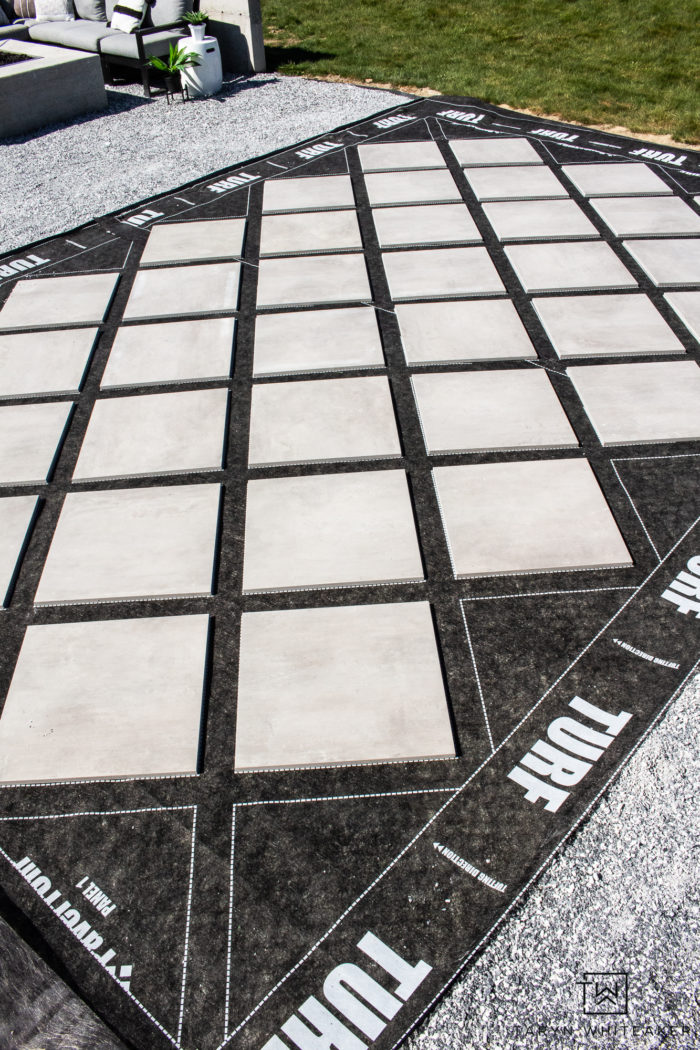
The template makes it SO easy to lay the paver tiles down. You simply place them over the squares. If you’ve ever laid your own pavers and had to do all the measurements, you will appreciate this SO MUCH.
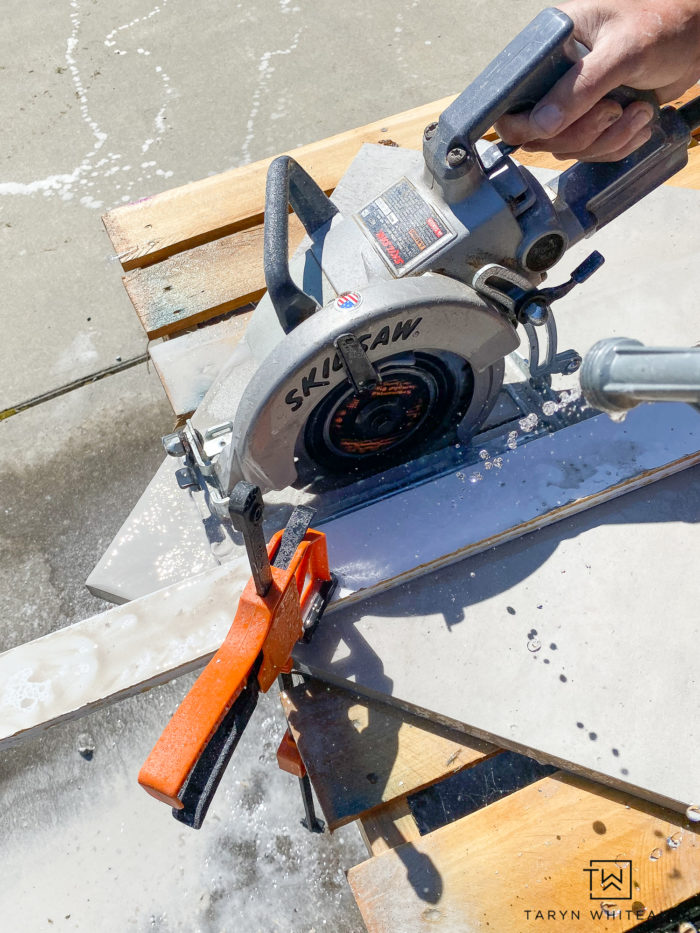
To cut the edge pieces, my Father-in-law used a commercial grade circular saw with a diamond blade. We created a guide for it by clamping a straight piece of wood onto the tile and the table. I held a hose directly on the blade while he cut to cool the blade down. This worked great for us and cut the tiles very clean. Together it only took us about 45 minutes to do all of the cuts for this space.

I mean, how pretty does this look already? My love for symmetry is at a high right now.
Installing Your Own Turf
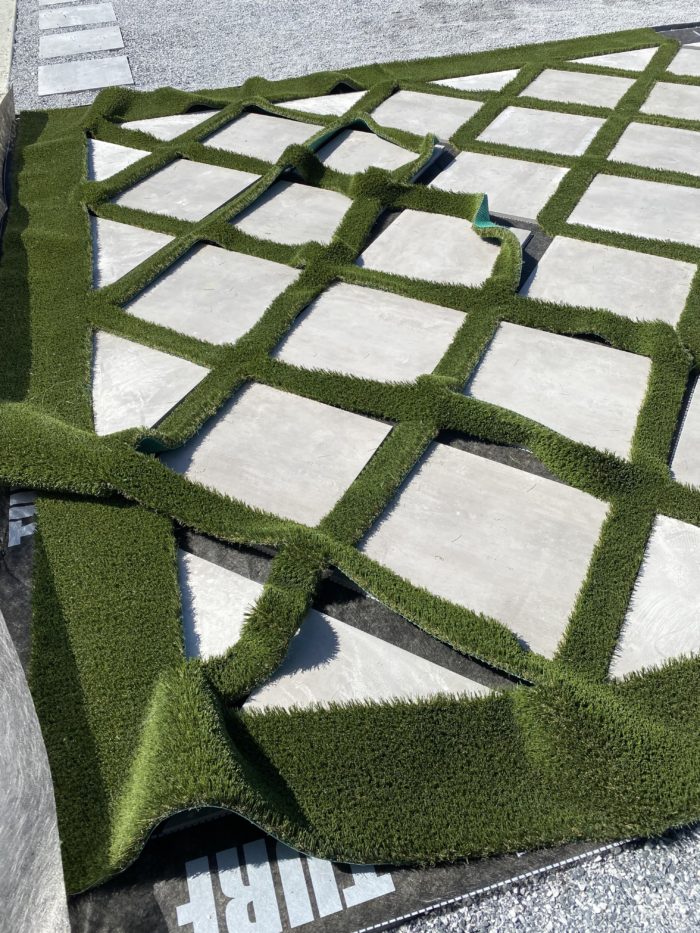
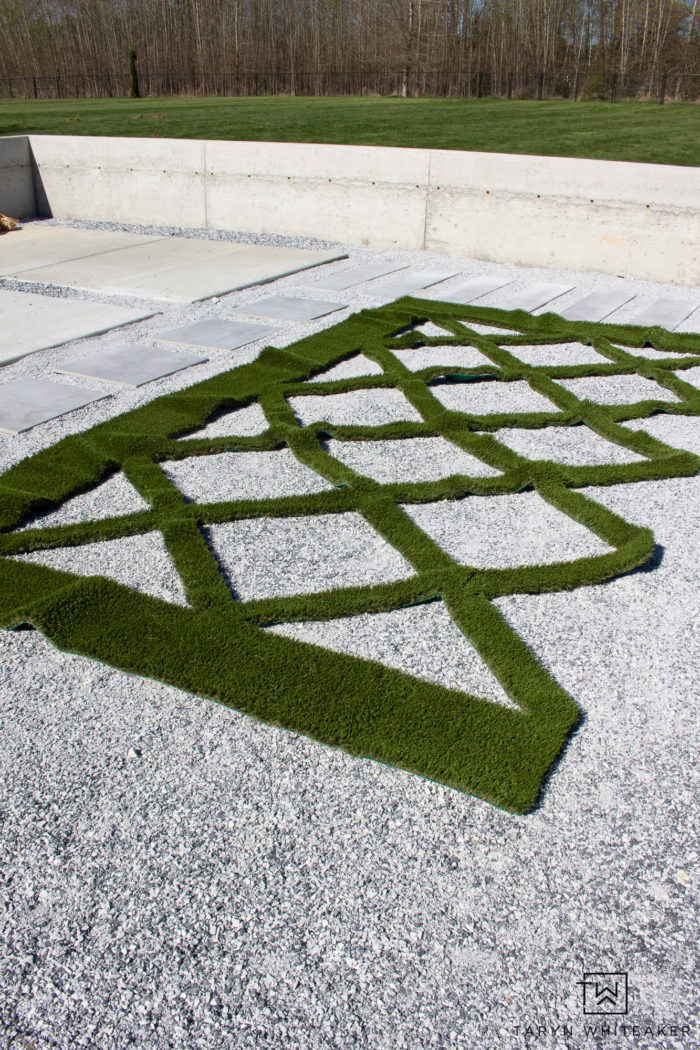
Ok, not let’s get into tips for installing your own turf. Once the tiles are in place, you simply start at one end of the of the design, and guide the turf over the tiles and gently press it into place.
PaverTurf recommends that you have the grass bristles point the direction of your focal point. You will see the subtle difference in the grain of the turf. I had mine point toward our fire pit.
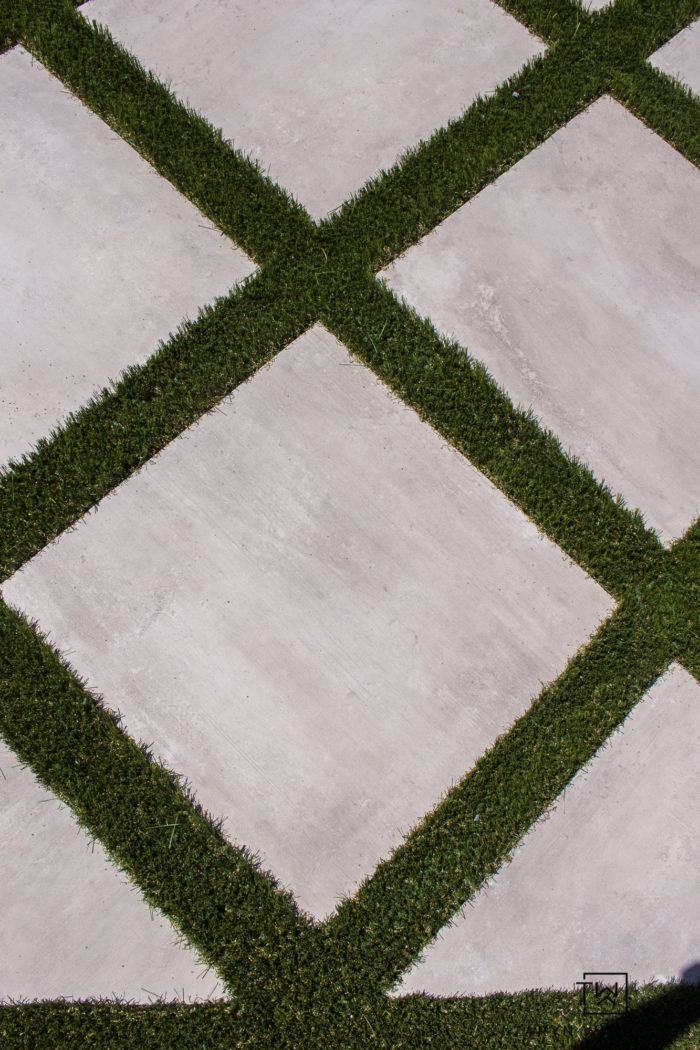
I also wanted to show you an up close picture of the Miltestone Tiles we used in the turf. They have a gorgeous finish on them that you can’t always see in the pulled back photos. These really are luxury tiles.
Secure The Turf
Once you have the turf in place, it’s time to secure it! First, place the included adhesive strips at each of the turf seams. This is where the turf pieces intersect. Gently push down on the turf to help it stick to the full surface.
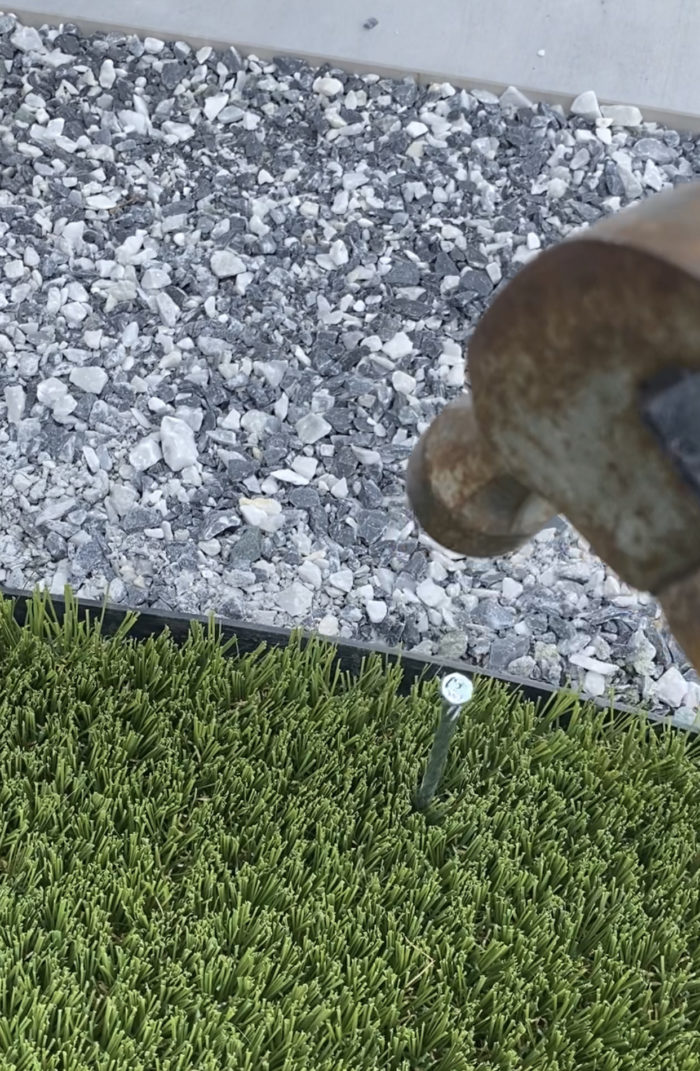
Let’s get nailing. Literally so. many. nails. PaverTurf recommends placing 6″ Spiral Turf Nails every 12″ around the parameter of the turf. I did this on the outside and the inside of the larger strips of my turf.
When you put the nails in, try and clear a path within the turf so the nail doesn’t push too many of the grass fibers into a clump. Also be careful not to drive the nails too deep, you want to keep them flush with the turf so they don’t create divots. Once the nails go in you can always brush the grass back up as well.
Next, place 20D Nails every 6″ on the strips in between all of the tiles. Based on my experience, I would place the nails closer to the outside of the strip and rotate between and left and right side. Basically you want to make sure you keep the edges of the turf down, versus only placing nails in the middle of the strip.
I actually went back and added SO MANY MORE nails after I brushed the turf in the next step. While I was brushing it, I would see a lot of edges that were pulling up too easily, so I added more.
Fill Turf With Sand & Brush
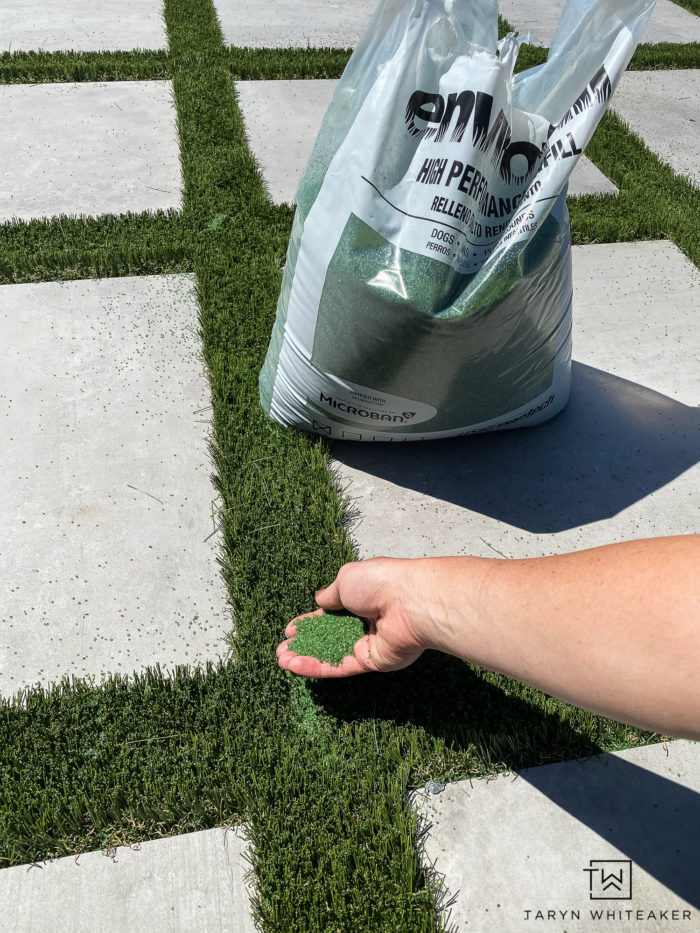
The last step is to add Green Silica Sand to the inside of the turf. You should use a sand that is specifically for turf but you can use “play sand” that you would use in a sandbox, if needed. The goal is to weight down the turf and get the sand down to the base of the grass bristols and almost level with the top of the paver to add ballast and help reduce any sharp edges between the turf and the pavers.
This part is very tedious. You can use your hands to scoop up the sand, I used a little gardening shovel as well. You just want to make sure you aren’t getting clumps of it on the turf. You just want to gently shake/spread it evenly all over.
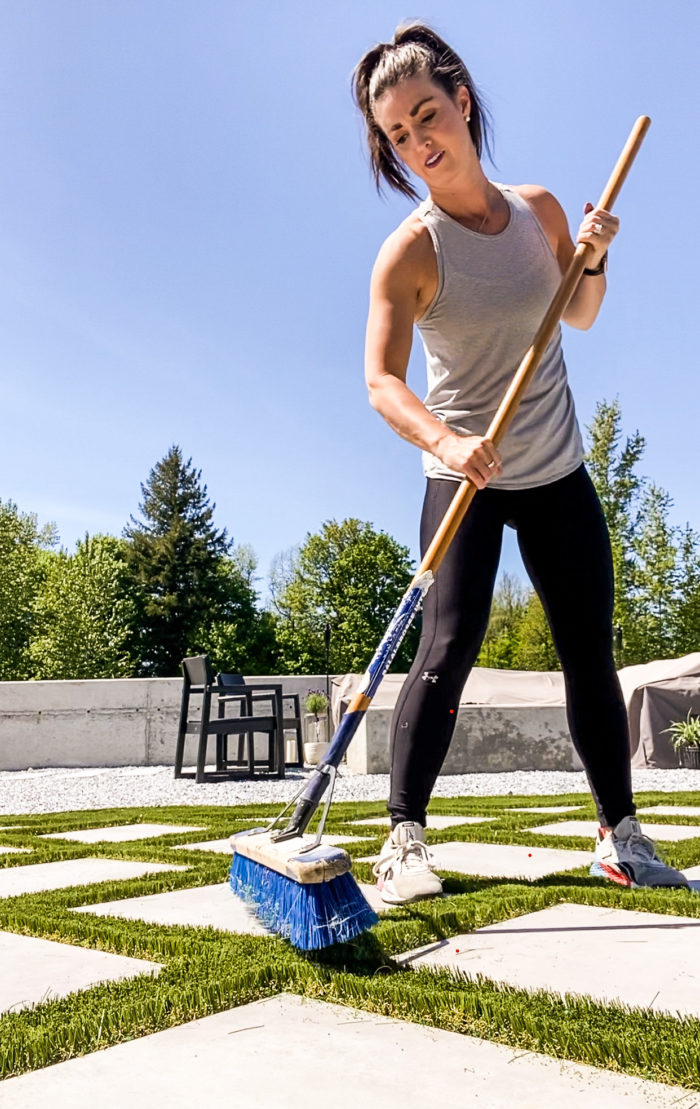
Next, take a broom and brush the entire turf area. This help the sand settle and turf fibers stand up better. Brush the bristols in the opposite direction of the grain to help it stand up. I will say that this part made a really big difference.
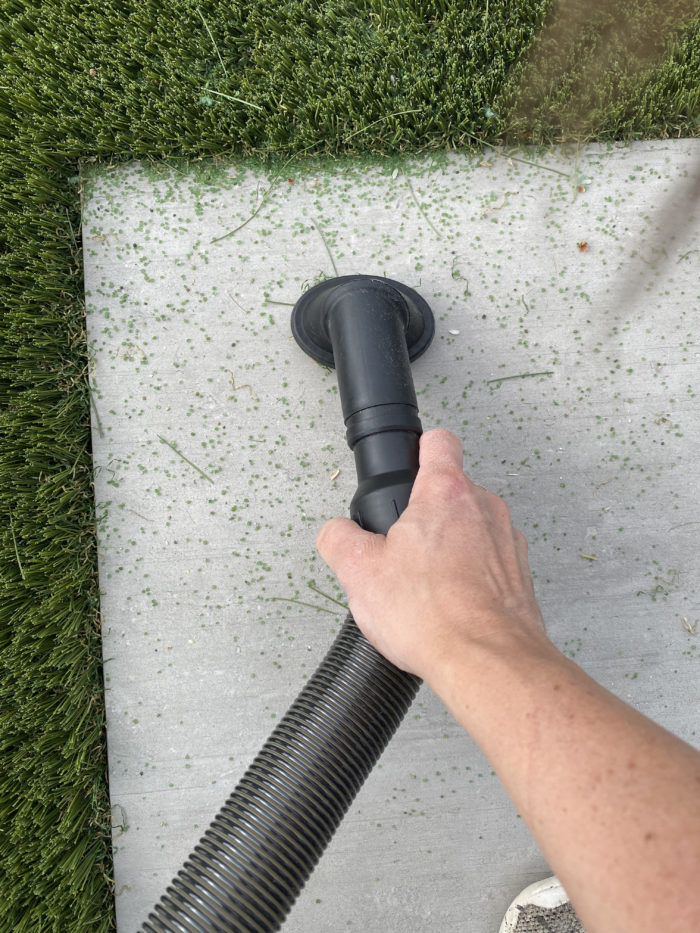
Lastly, take a utility vacuum to clean up any excess sand. Make sure sand doesn’t go under the turf backing or else it will push it up.
Turf Grid Landscape
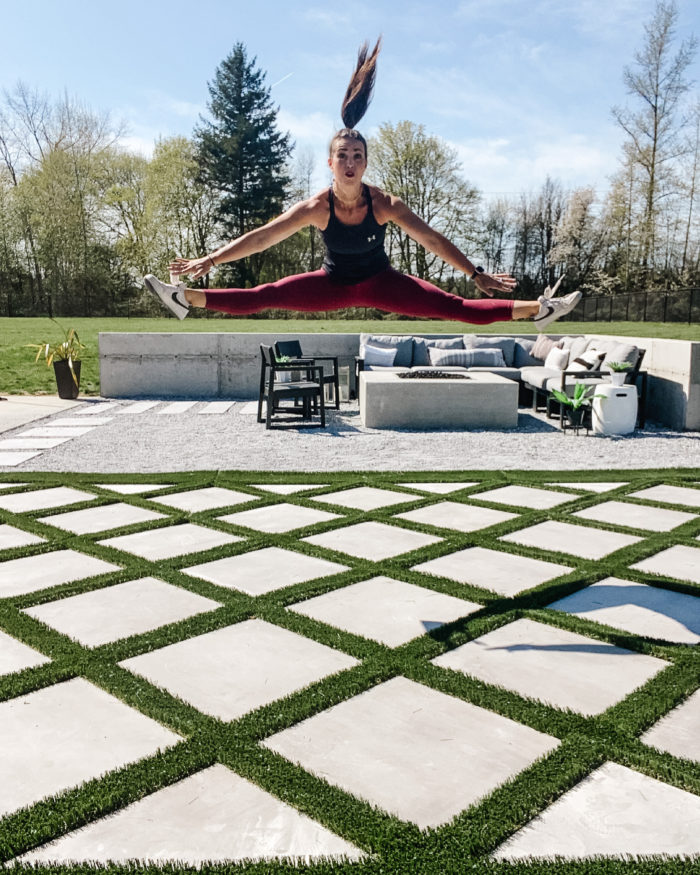
I shared this pic on Instagram, but seriously this is how I feel about this turf. It looks amazing and I am SO excited about it.
PaverTurf has a 10 year warranty but the turf itself should last anywhere from 15-20 years! So you will definitely get your money worth.
Discount Code
Head to PaverTurf to check out their product and see how you can use it in your own yard!
Use code TARYN7.5 to get 7.5% off your turf order!
Watch The Process!
About Taryn Whiteaker
Hi! I’m Taryn! The voice behind Taryn Whiteaker Designs. I launched this brand over 11 years ago when I became a stay-at-home mom. What started as a small craft and mom blog eventually grew into a full time design and DIY site. My goal has always been to inspire others (especially women!) with design ideas, DIY tutorials, entertaining ideas and give you the tools you need to complete them yourself!


Absolutely beautiful!!! I’m am curious, how big is you turf space? Also, not to pry but without pavers how much was just the turf? I read your post and and for some reason when you wrote about how long the turf last it got cut off. Thank you for posting tips and your experience ?
Ink Taryn, I love your blog and you are the sole reason we decided to try a paverturf patio! Our contractor just installed it this week and it looks amazing but…. Here comes the but!!! The sand is liters everywhere! They brushed it all in very nicely but if you even step on the turf area it just sprays sand! Did you have this issue and if so, how did you remedy it? I tried spraying it down quite a bit to clean it off but also thought it may push the sand down and compact it. No such luck, it still sprays up if you run your foot over it. Any advice would be so much appreciated!!
Sue
Hi! I’m so glad you love it! I did notice a lot of excess sand, I ended up not using all of mine on it. I would reach out to someone at PaverTurf and see if they can help you.
Love it. Question, i see these pavers are just installed over gravel and not sand. Do they feel secure?
Yes… They do feel secure, you just have to get everything very level first. I followed the directions on the PaverTurf site, you can head over there for more info!