Disclosure: This post is sponsored by The Home Depot, all opinions and product selections are my own.
IT’S REVEAL DAY! It’s time to reveal our small laundry room makeover that we have been working on over the past 5 weeks with the New Year New Room challenge! It is amazing how much a space can change in such a short amount of time. It feels so good to get another space checked off the list.
Let me start off by saying that we have a teeny tiny laundry room. It boggles my mind that the room I use (almost) the most is the smallest room in our entire house. About 4 years ago I gave it a temporary makeover and put in a DIY Pipe Shelving to give it a little something. But this year, we went big and completely transformed it into a custom, finished laundry room with the help of The Home Depot!
Small Laundry Room Makeover
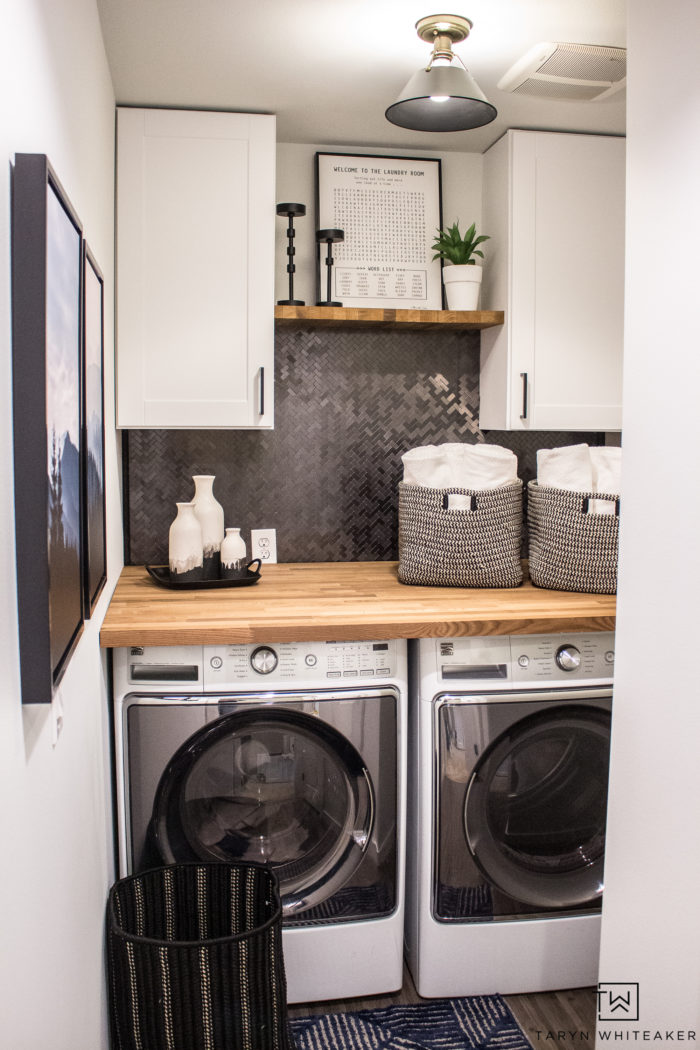
You guys, look at our laundry room!!!!! I seriously can’t believe how quickly this came together. I can honestly say that if you have a small laundry room like ours, you could get this project done in a whole weekend! So stop procrastinating and start!
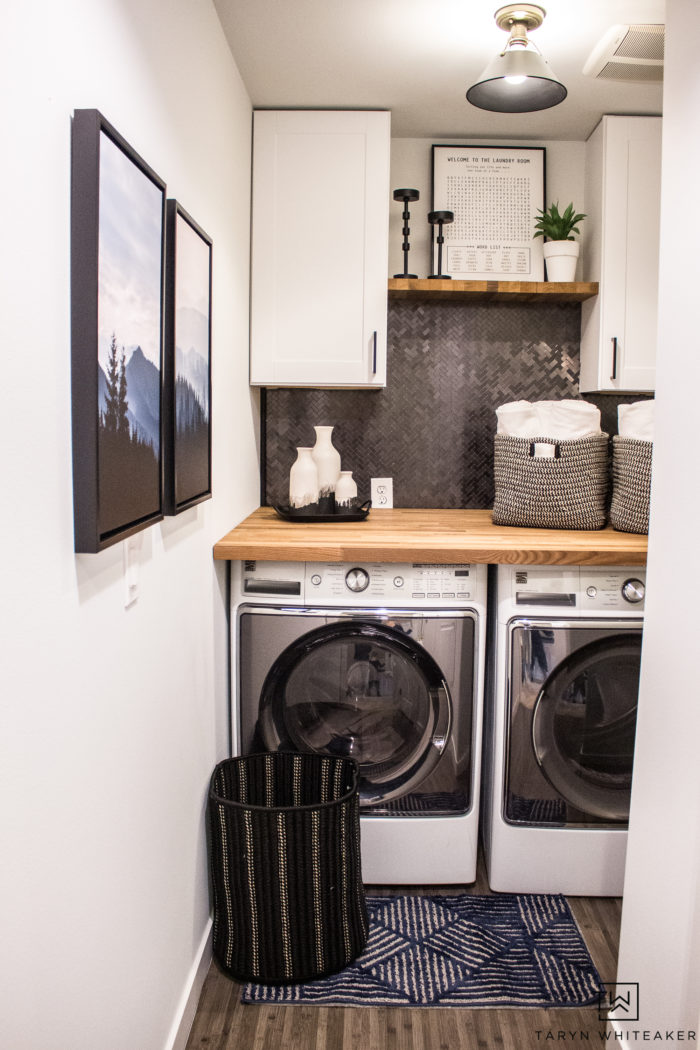
If you are someone who has a small laundry room and doesn’t know what to do with it, trust me you aren’t alone! It can be hard to figure out what to do with such a small space to maximize storage but also make it feel polished. I’m going to walk you through my thought process on the changes and what went right and what didn’t happen as planned.
Laundry Room Before
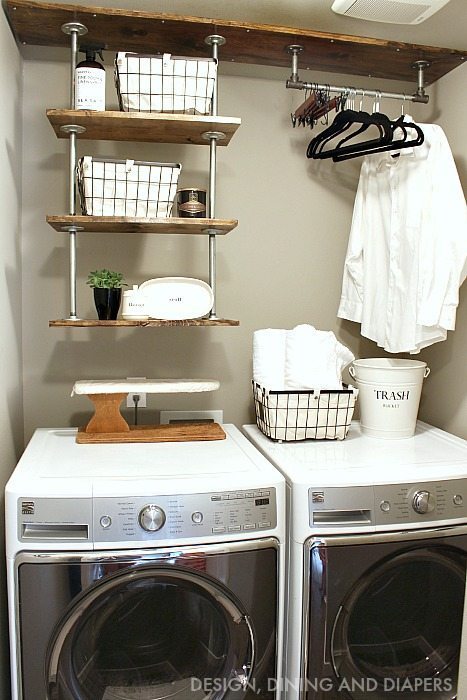
But before I dive in, let’s see how far this room has come! This is how it looked before. I had built some DIY Pipe shelving in here that was cute but I wanted a full custom look in here to make the space feel finished and go with the rest of the house. It was time for a change!
Butcher Block Countertop
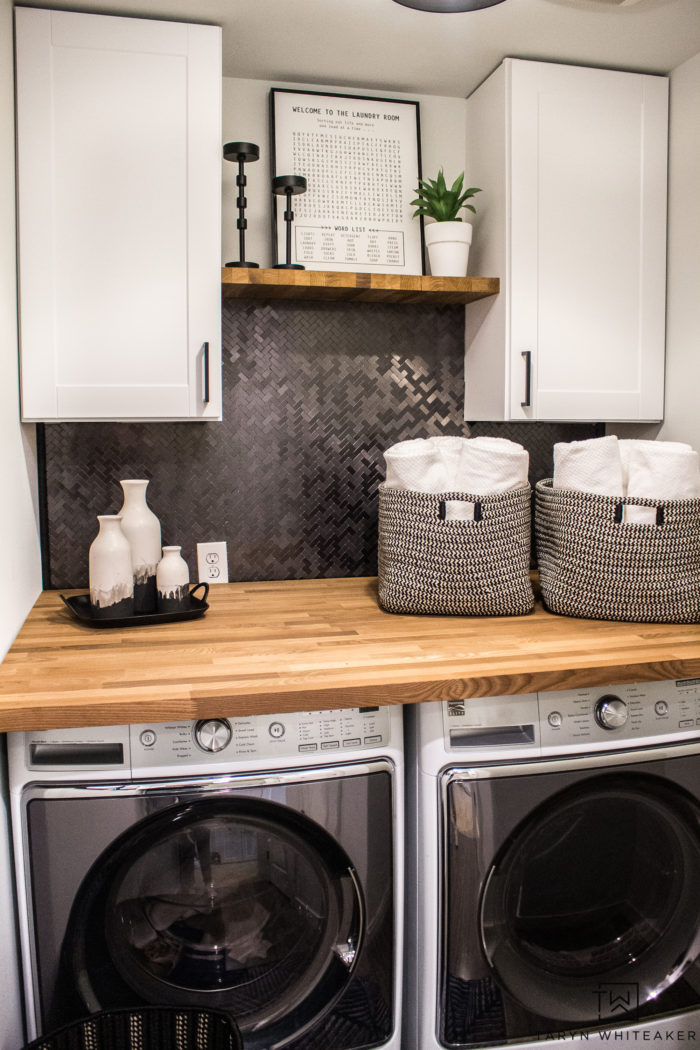
When designing this laundry room one of my top priorities was installing some cabinets to store detergent, my bin of mix matched socks and all that fun stuff. I did two Hampton Bay Assembled 36″ White Cabinets , I love these because they are already painted white and preassembled. They took maybe 15 minutes to install! I originally wanted to add a shorter middle cabinet but once we started installing them I realized we were short 1.5″ and it just wasn’t going to fit. So I went with plan B and added a floating shelf.
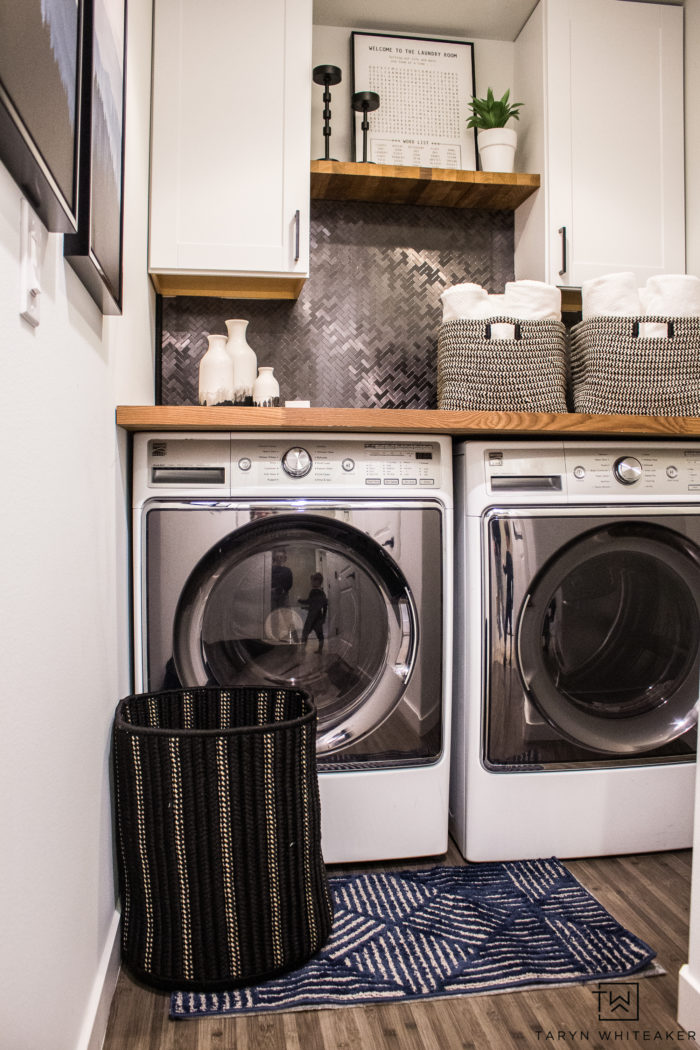
Adding a countertop was also a must! I throw stuff on top of the washer and dryer all the time and wanted a proper finished space to fold laundry and add a little decor. In every room I design I alway add some wood element and I thought the counter top was the perfect place to do it in here. I fell in love with this Butcher Block Countertop . It is absolutely gorgeous in person and I couldn’t be happier with it. We had to trim the countertop down about 10″ and that piece ended up working as the perfect shelf in-between the cabinets. Love when things work out like that!
This countertop would also be great for a kitchen island since it comes in such a wide piece!
DIY Adhesive Backsplash
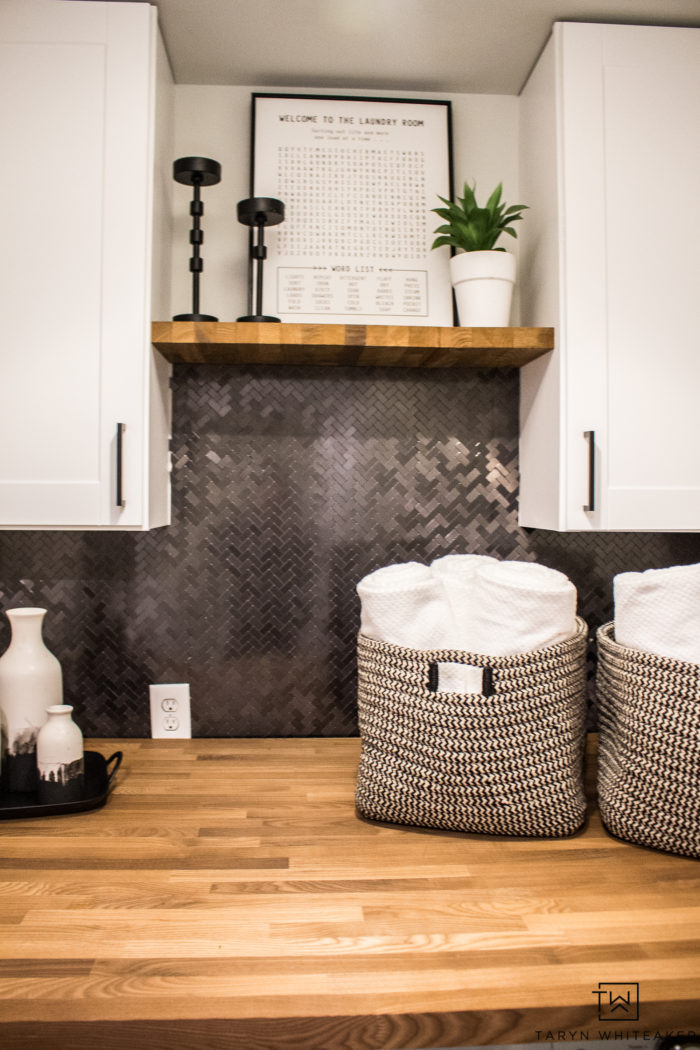
Ok let’s talk about this backsplash!!! Oh my goodness I cannot wait to tell you all about this Black Stainless Herringbone Adhesive Backsplash! Would you believe this is actually a stick on backsplash? No thinset, no grouting, so peel and stick? This pattern comes in 12X12 sheets and you peel off the back and literally stick it onto the wall. I started in the bottom center and worked my way out and then up.
Another thing I love about this product is that it is SO easy to trim and cut. Unlike regular tile where you have to have a special tile saw, this cute perfectly using a miter saw. I really love how it turned out. It adds so much. So if you are scared of tiling, start with this!
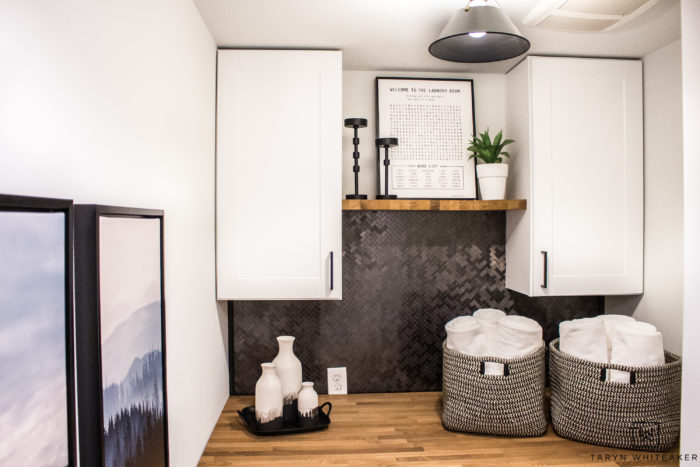
I ran out of tile, literally used every single little piece I had left, so I ordered more with the intention of taking the tile up to the ceiling. But now I’m debating if it even need it?!
Laundry Room Accessories

It’s probably because of my PNW roots, but I am always drawn to Forest Prints and nature prints. I love these modern woodsy prints and thought they would pull a good pop of color in the room while still keeping it neutral.
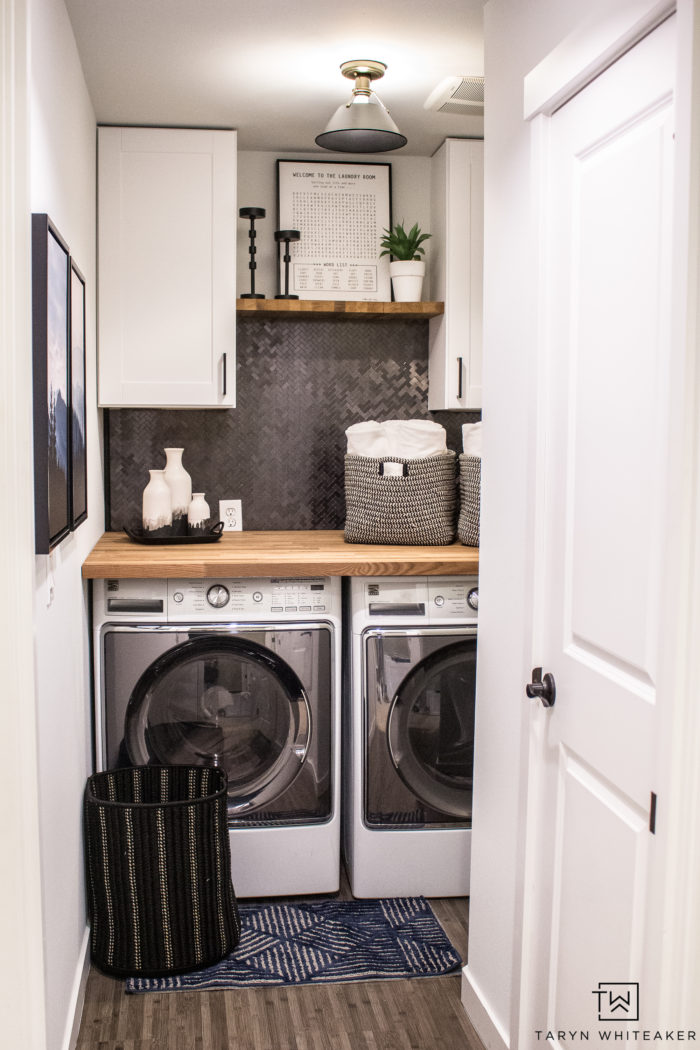
When accessorizing a laundry room, I instantly gravitate to baskets. They just feel so natural in there. I picked out a set of two of these 14″ Woven Towel Baskets for the countertop. They fit my rolled towels perfectly and who knows, I might even end up needed one of these larger guys for all the single socks we accumulate over here. Right?!
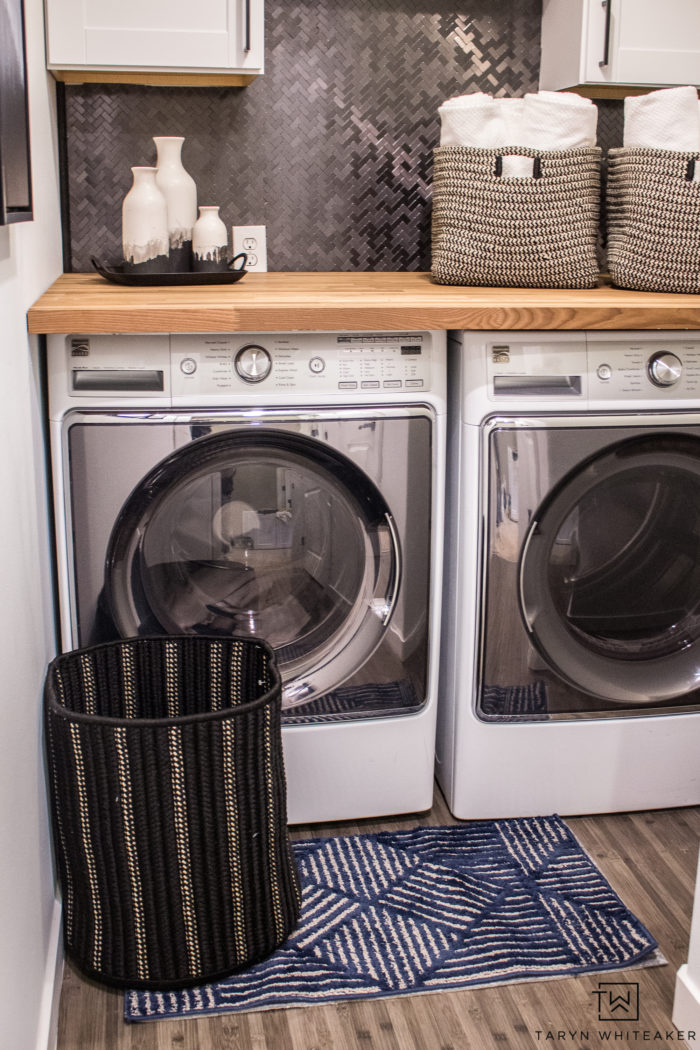
You can also find this Black Woven Laundry Basket at The Home Depot. I love the texture it adds to the space.
This blue geometric rug is from Mohawk Home. I decided to pick blue to add a little color in here and felt like it blended well with the forest prints.
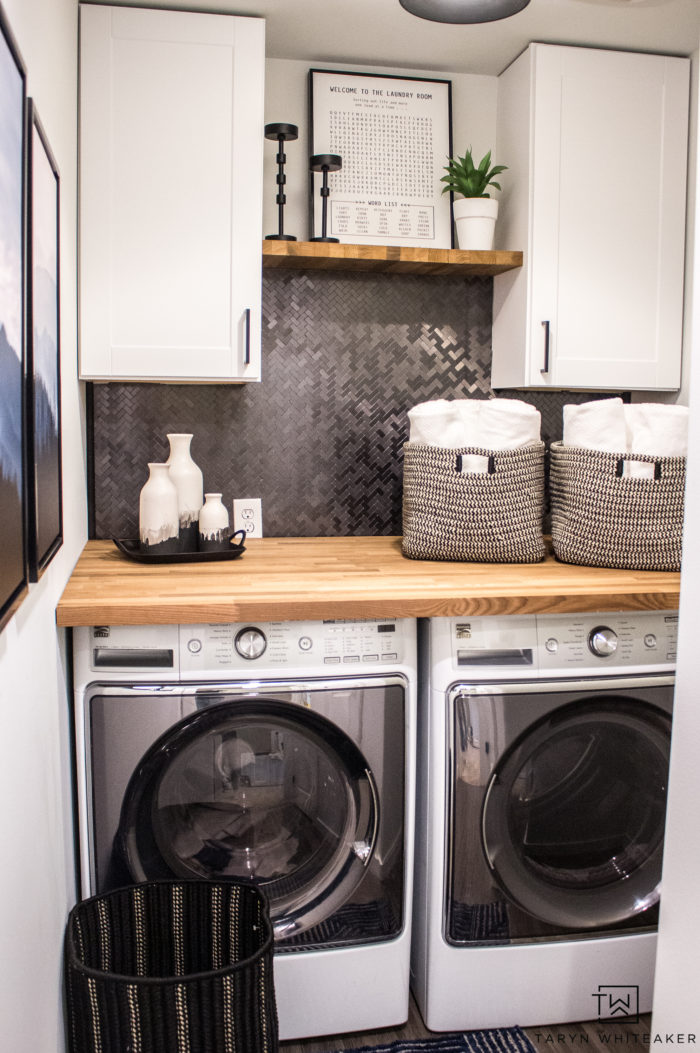
So what do you think? Did I make some good changes? It’s barely February and it feels so good to be crushing through the projects already!
Keep scrolling to shop this space and also visit all of the other bloggers who are participating in the makeover challenge!
Shop This Space!
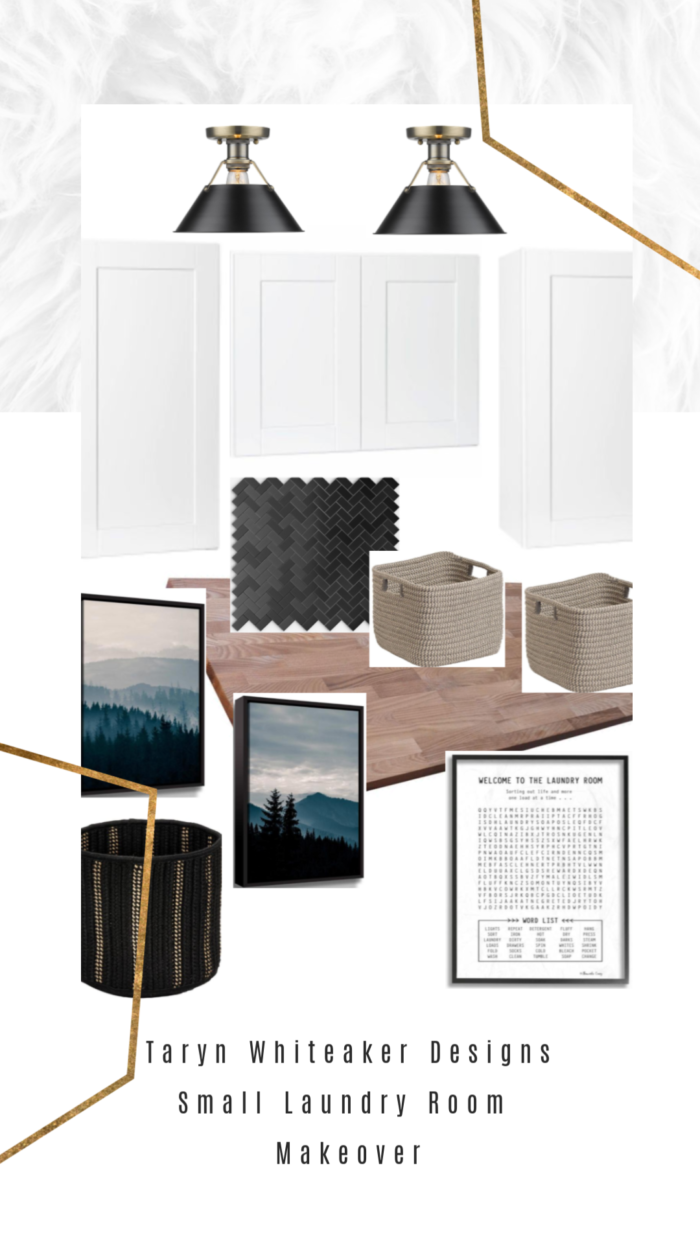
Hampton Bay Assembled 36″ White Cabinets | Black Stainless Herringbone Adhesive Backsplash | Butcher Block Countertop | Forest Prints | 14″ Woven Towel Baskets | Black Woven Laundry Basket | Laundry Word Search Print | Black Industrial Ceiling Lights



So, so, so good, Taryn! That back splash tile makes the room! Everything looks amazing!
Thank you, April!
Gorgeous, Taryn! I love the art prints and the new countertop material. We need something like that for sure! Great design packed into a tiny space!
Thanks, Krista!
What a great laundry room, Taryn! I don’t think I’d mind doing laundry in here! haha!
It has definitely made it better, I spend too much time in here lol
Taryn, this is awesome! So many good details! Love the tile and love the butcher block! Looks great!
Thank you so much!
WOW Taryn, your laundry room is absolutely stunning! Love the timeless beauty of everything you chose. I never would’ve guessed that was peel and stick tile.
Thank you! And right? It was my first time using it and I really love how it went on and how it looks.
This is a lovely room! Is the countertop attached to anything or does it just sit on top of the appliances?
That’s what I want to know, too! It would be awesome if it was just sitting there – that’s what I’d like to do with mine.
HI! We built a frame for the countertop to sit on top of, but it is not bolted down. It sits on top of the frame, about 1-2″ above the appliances. So if we ever need to service the appliances we can lift it off.
HI! We built a frame for the countertop to sit on top of, but it is not bolted down. It sits on top of the frame, about 1-2″ above the appliances. So if we ever need to service the appliances we can lift it off.
laundry never looked so good! Enjoy
OH THANK YOU SO MUCH!
I was hoping for an answer to the question I posed last night; however, it appears that my comment has now been deleted! Just because I asked a legitimate questions?? I hope that is not the reason and that I’ll eventually get an answer.
I want to do something similar with my small laundry room, and I’m wondering if I need to build some sort of support for the countertop or if it simply rests on top of the appliances. I like what you have done with your laundry room.
We’ll see if this gets posted–or posted and removed like my comment yesterday. I would like an answer, please.
Hi Peggy! At this very moment it is resting on top as I needed to figure out a few specifics before we properly install it. But yes, we will create supports underneath to properly secure it to the wall/studs. Home Depot has a great tutorial on how to install this butcher block on their site: http://bit.ly/2FJzIgK
Now my original question has appeared!
Oh my this is beautiful! What a gorgeous laundry space! And I looove that black herringbone peel & stick tile – such a pretty and dramatic statement! And your baskets are fabulous – amazing texture!!
What a beautiful and chic space!! I need to step up my laundry game. :)
Ah thank you!
What do I stain the butcher block to protect the clones from stains as well as protecting the board from getting watermarks?
Hi! I didn’t stain them, I just sealed them with a satin coat of Polyurethane to protect against the soap and water.
Wow! My laundry room is a similar small space, and your makeover has inspired me to redo mine! Love everything about yours, but have a question: on the left corner, it looks like there’s a trim piece where the backsplash tiles meet the wall. Is that a piece of black trim, and if so, is it a cord cover or did you have to trim/cover each edge where the backsplash meets the wall (can’t see the right corner)? TIA for the answer, and thanks again for sharing your beautiful work!
hi! I just used quarter round to help the edges look a little more polished.