Disclosure: This post is sponsored by Walls Need Love. Design choices and opinions are 100% my own.
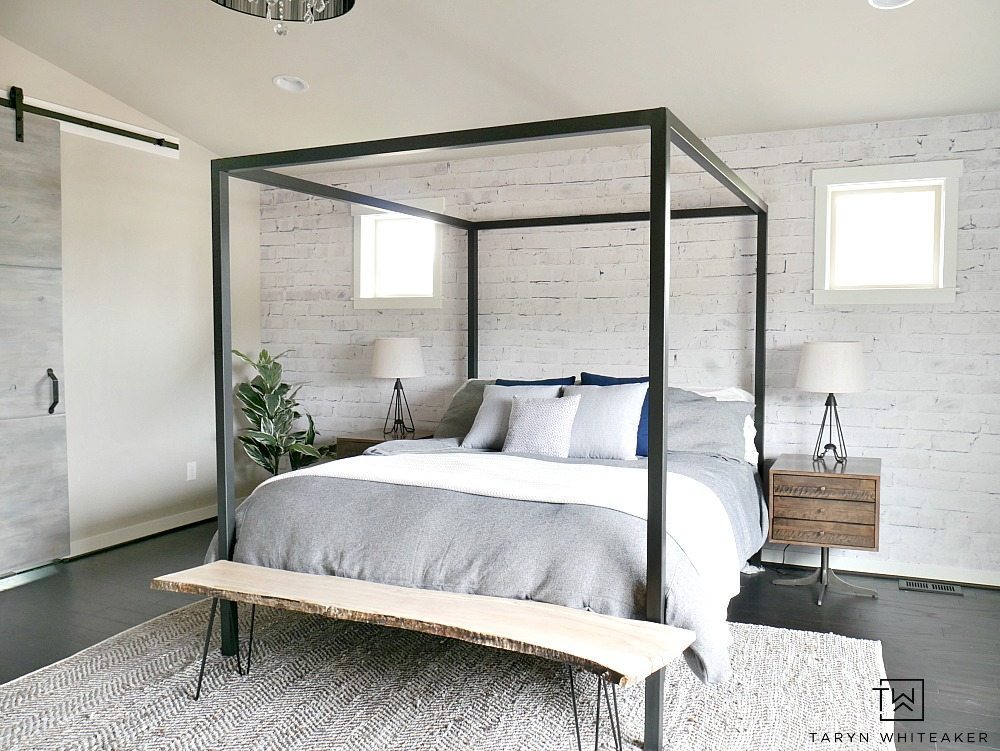
You’ve seen many updates on our room makeover over the past few months and this next one is a big one! It was time to add a little dimension to the space and make it a little more interesting and cozy. So I decided to add an accent wall using this White Washed Brick Wall Mural by Walls Need Love. And I LOVE it! Its subtle enough to not overtake the room, but busy enough to add a great texture to the wall. And you want to know the best part? It is completely removable so it won’t damage your walls. I’ll show you all the details, keep scrolling.
White Washed Brick Wallpaper
Also, before I go any further, I want you know that Walls Need Love is offering all of YOU 25% off your order until Oct. 15. So if you are eyeing something on their site, now is the time to take the plunge!
This is the first time I’ve shown you individual updates as they’ve happened to a room, versus waiting for to do one big full room reveal. When I’m working on big room makeovers I am constantly making design changes and trying to figure out the exact style I’m going for and sometimes that changes along the way. You may have noticed the look and feel of this room slowly shifting with each update and it’s because it has! With each big update I start to see my vision come together and see what I need to work on next!
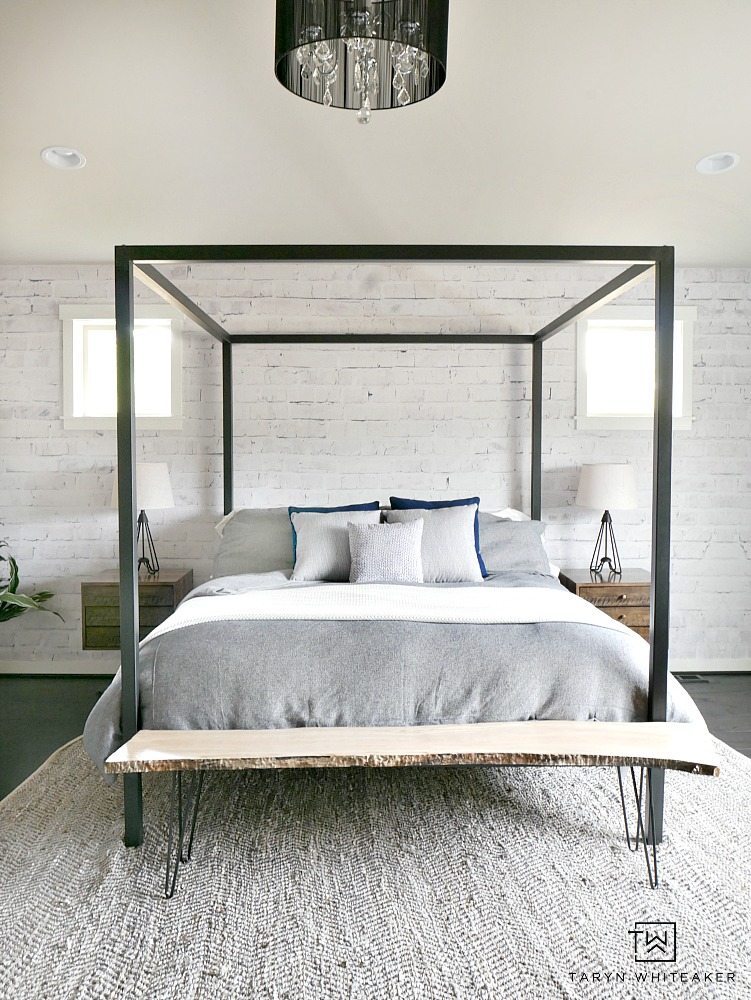
I went with the White Washed Brick wall mural because it had the industrial look I was going for and honestly, I have always wanted a brick wall in my home! Since a real one isn’t in the plans anytime soon, this is the perfect solution. It is very easy to install and it can be removed at any time without damaging the walls! (Have you ever tried taking off real wallpaper? If yes, then you know how amazing this is)
When ordering your wall mural, there are three different sizes available to fit your wall size. You’ll want to order one up, and just remove the excess. However, if you are like me and have larger wall sizes, they can also do custom prints to accommodate your wall size. THANK YOU!!!
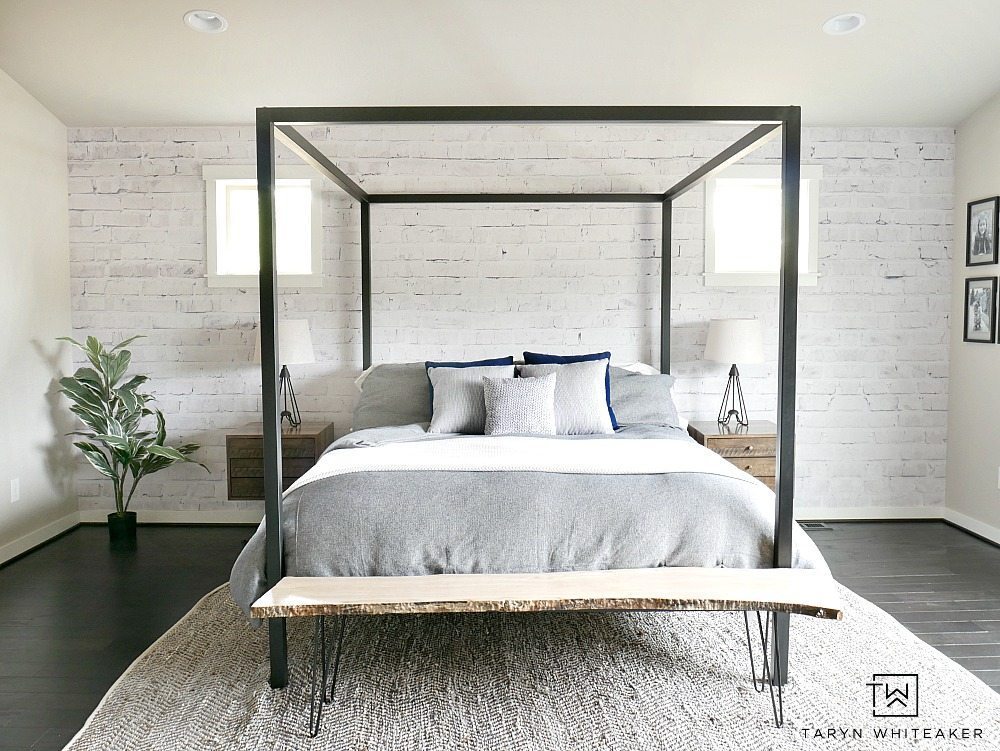
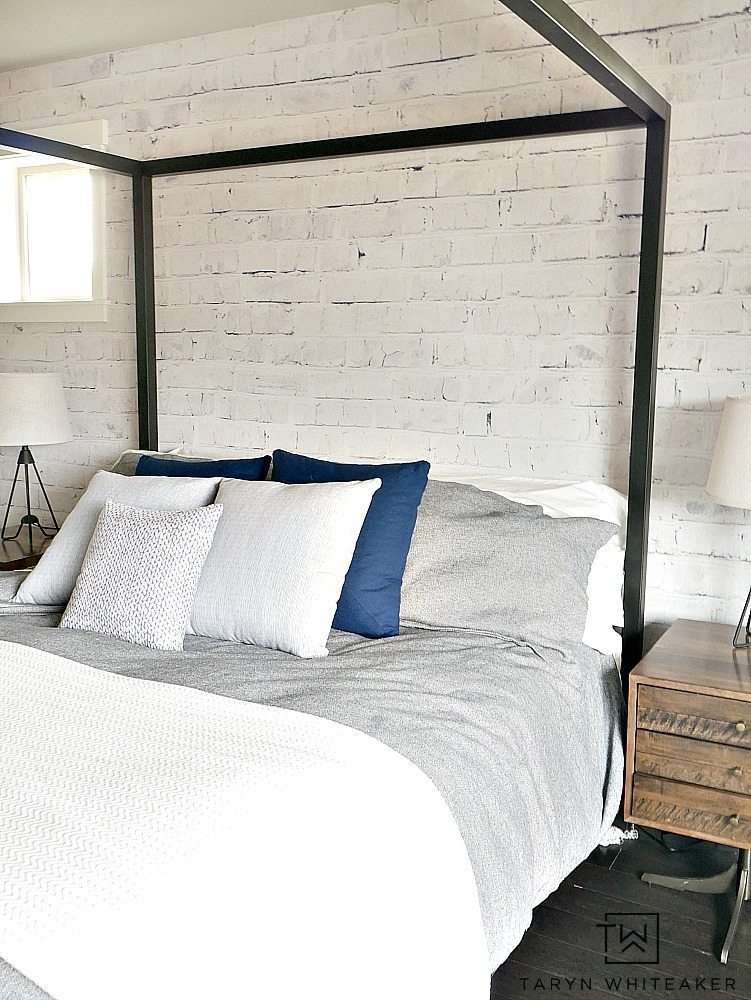
The only thing I will say is that the picture on the mural is not very crisp if you are looking at it close up. Walls Need Love even states this on their werbsite. The mural looks very pixelated in person but once it’s on the wall it looks great. I think these mural are perfect for big accent walls or office spaces.
I am so giddy looking at these pictures because I am seeing our vision for this space final come to fruition. The modern lines mixed with lots of texture is making me so happy. I still have a ways to go before it’s styled to perfection, but this wall paper is really pulling the whole look together.
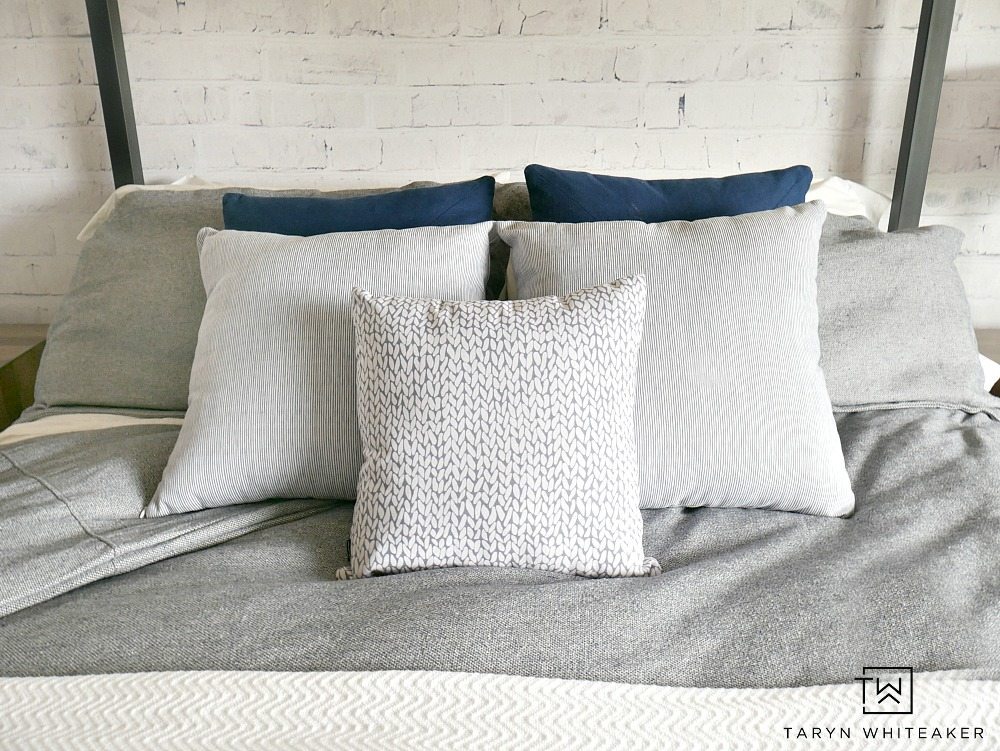
Now that I have the brick wall up, I’m starting to play around a little more with the overall look and feel of the room. I had black pillows on during the last update I did, and now I’m playing around with some indigo blue and lighter gray. I think these colors give it more of a refreshing look. I found these gray and white water color striped pillows and the gray knit throw pillow on Walls Need Love and they really brighten things up. (Just an FYI, the gray is a little lighter in person than on the website. The color difference didn’t bother me but just wanted to let you know in case you are expecting a dark charcoal gray)
If you are thinking about adding a Walls Need Love wall mural to your home, I want to show you just how easy it is! I’m going to give you a little peak into how the process went for me.
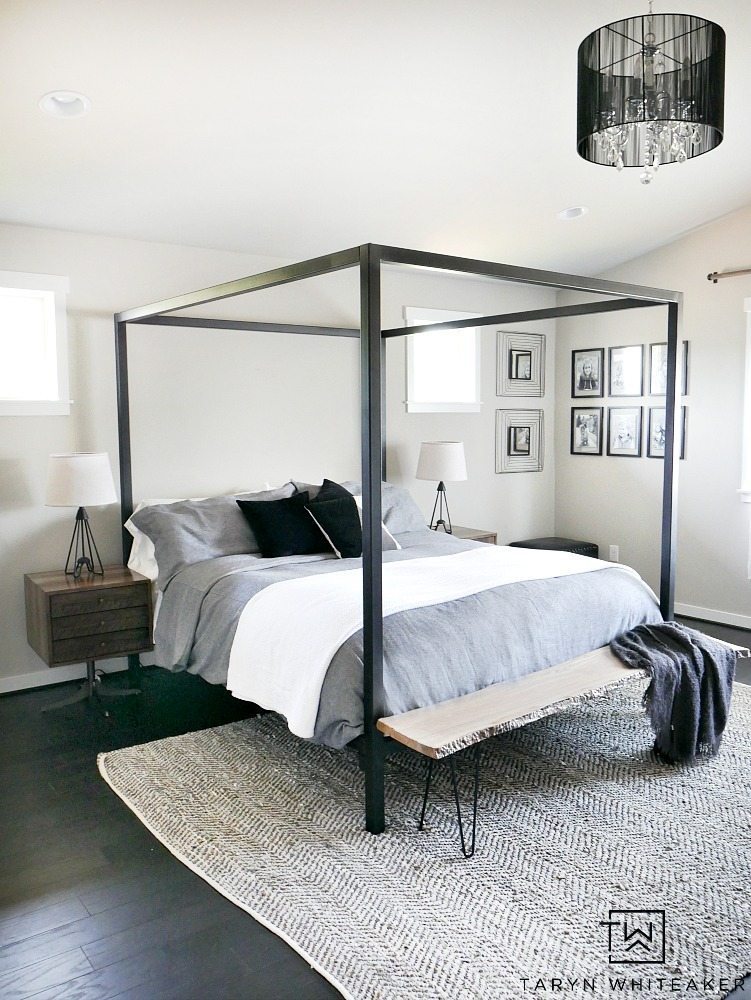
So here is the ‘before’ picture. This is the last update I gave on the room. Look at that difference!
Tips For Installing Removeable Wallpaper
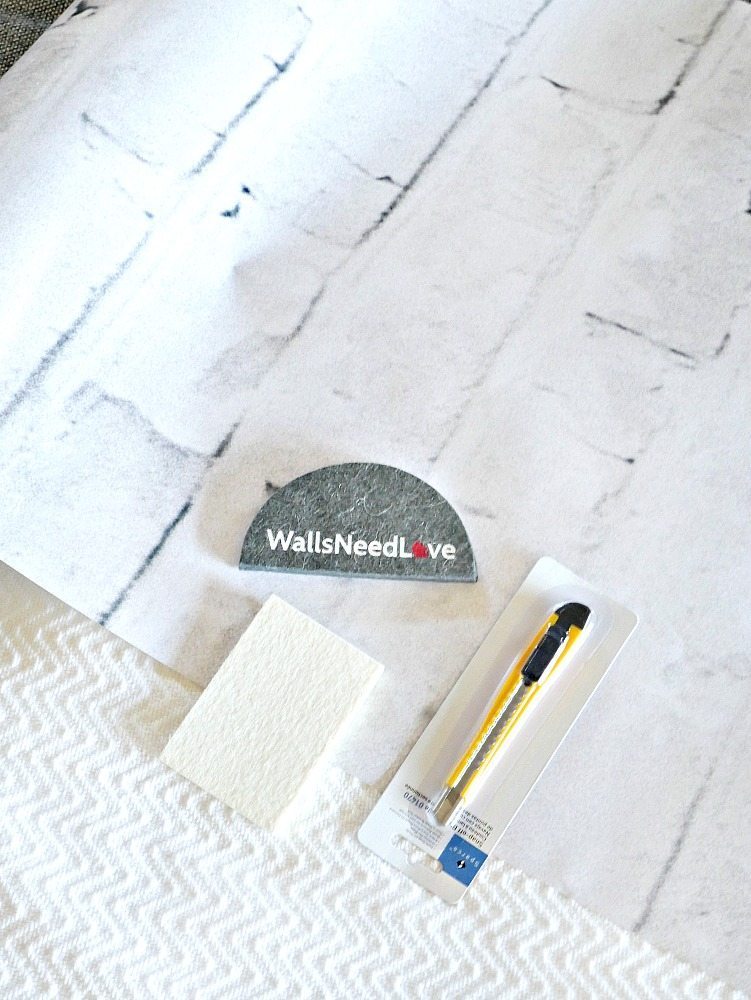
First off, when you order your wall mural, Walls Need Love sends you everything you need for the installation. A sharp blade for cutting the excess fabric, a cleaning sponge and a felt piece that helps you get the air bubbles out.
Other things you will need are: a level, a stool/ladder and a pencil.
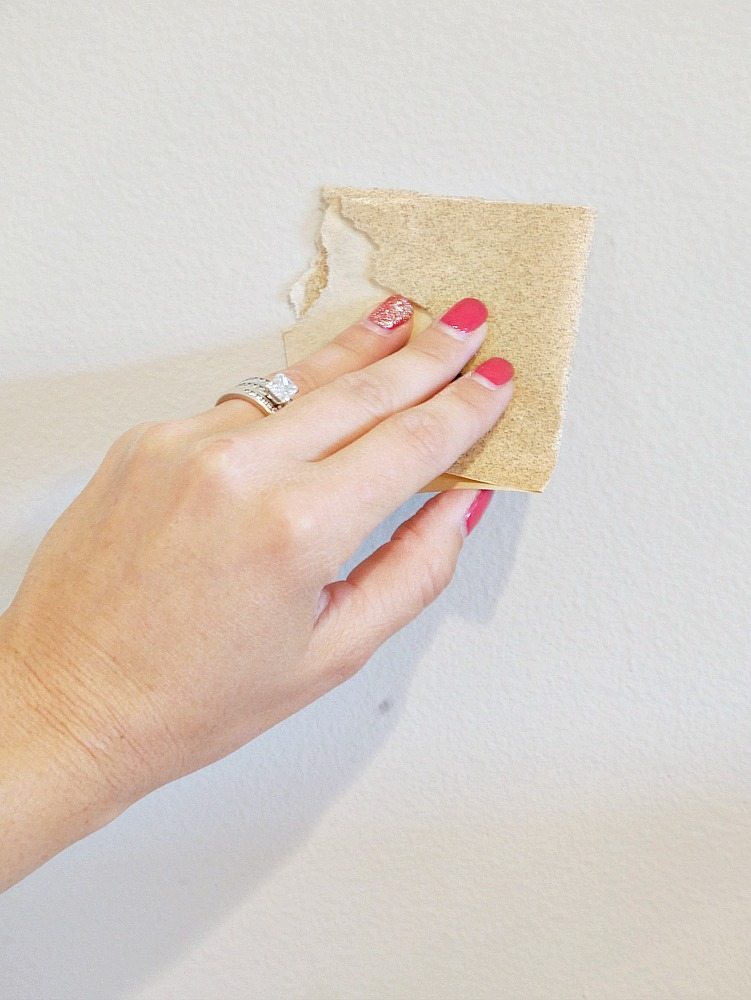
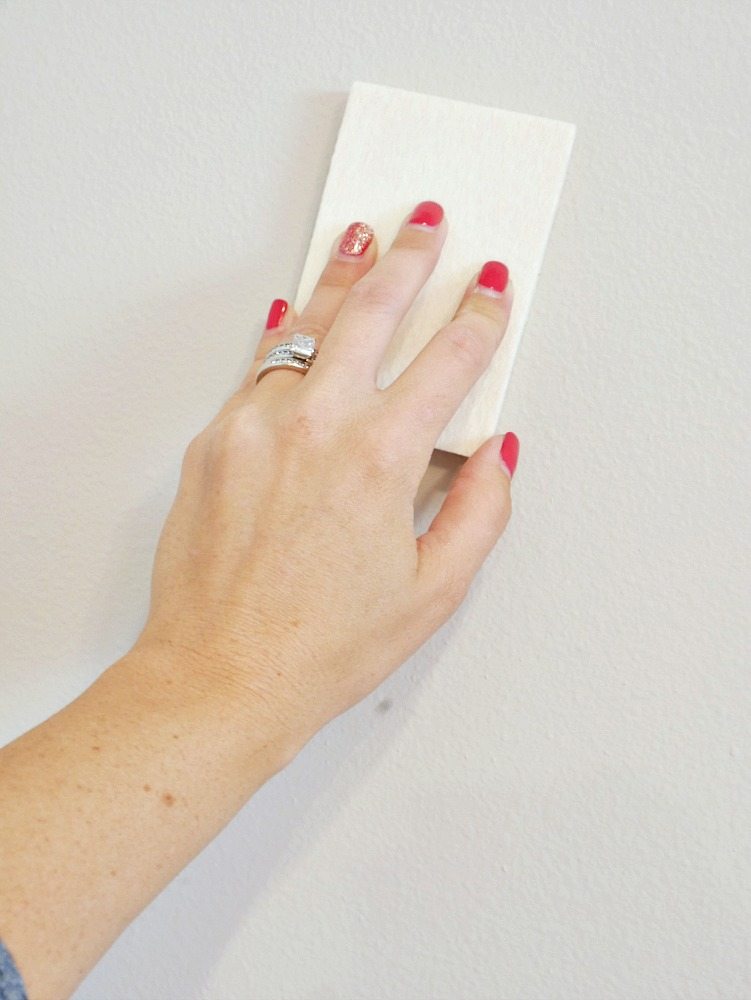
You will want to start by sanding down any old nail/screw holes in your wall to make everything nice and smooth.
Then, wipe the walls down to remove any dust.
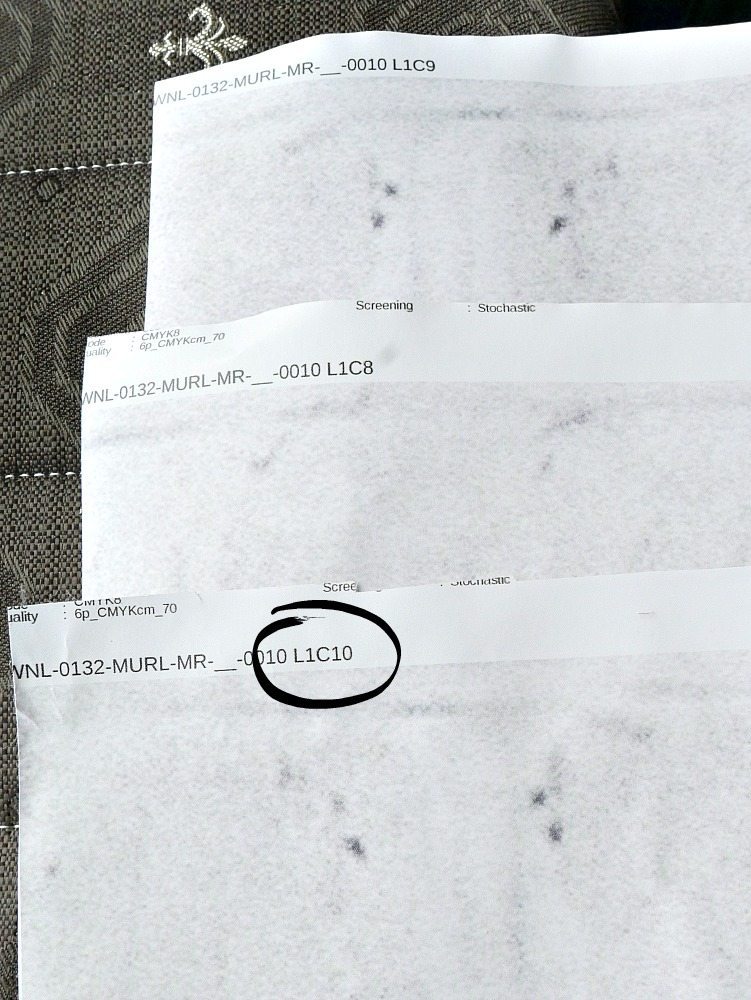
This next part was a little confusing to me. When you unroll the wall mural, it is all on one roll. You have to cut each strip on the white lines. Now, there are tiny little numbers on the ends of each panel and those numbers indicate the order that you install the design.
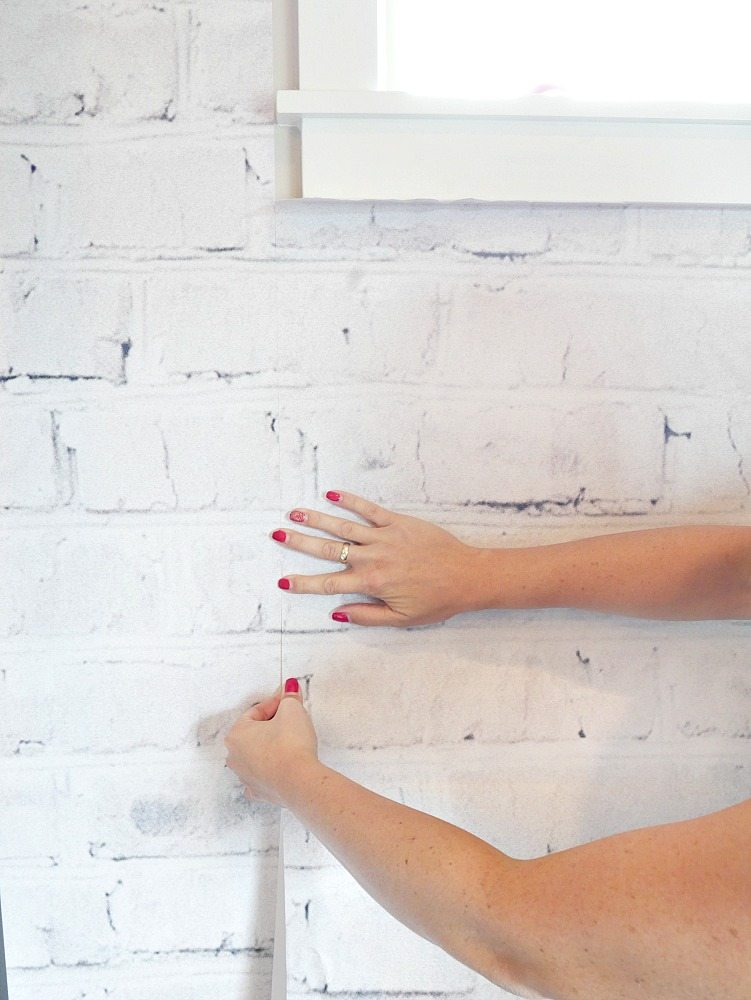
When it come to the install, you want to first find the middle of your wall. That’s right, you start your panels in the center of the wall and work you way out. For example, my mural was 10 panels wide, so I installed panels 5 & 6 in the middle of the room FIRST.
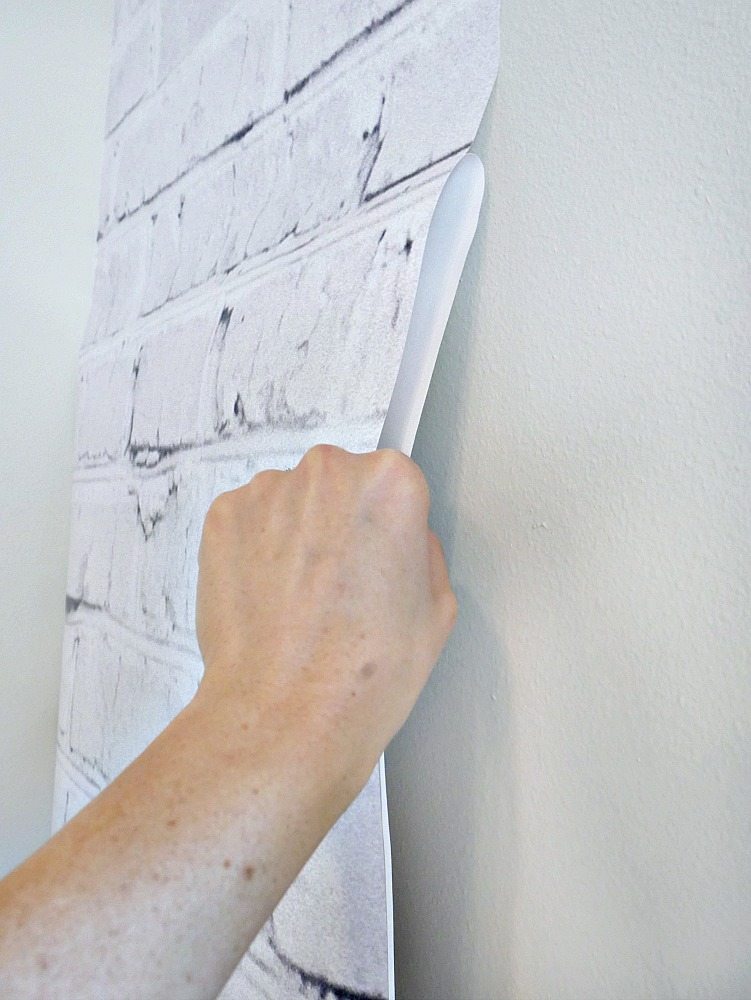
To install the panel, simply peel off the plastic backing and gently smooth it against the wall.
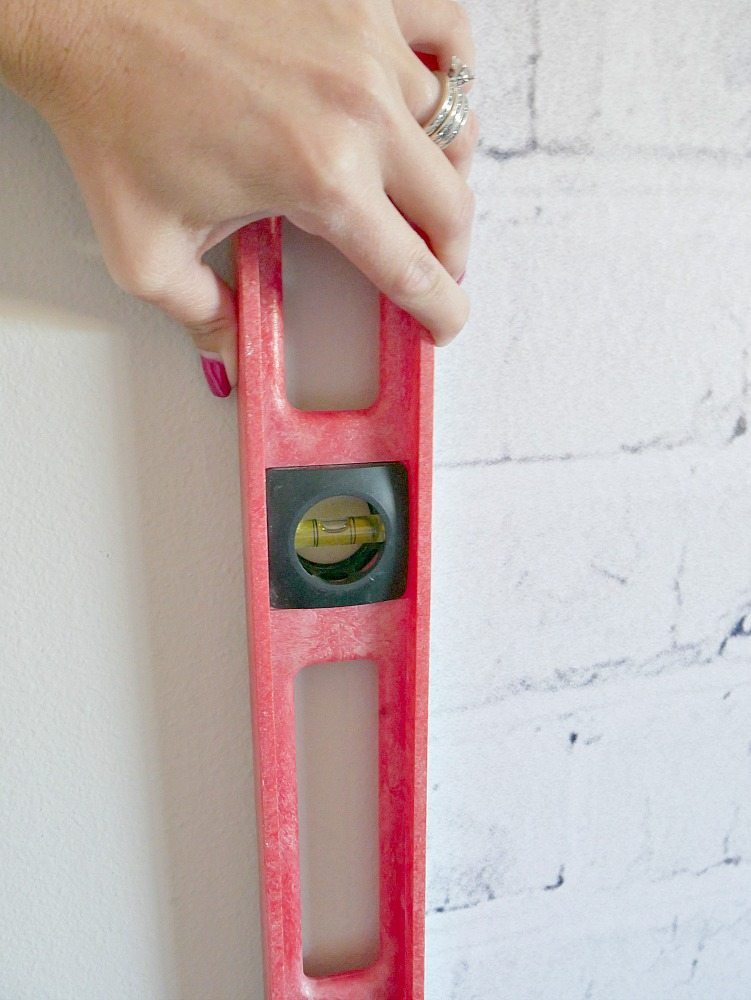
Putting up the first panel was probably the hardest, you need to make sure it’s perfectly level as you install it since this will be the guide for the rest of the room,
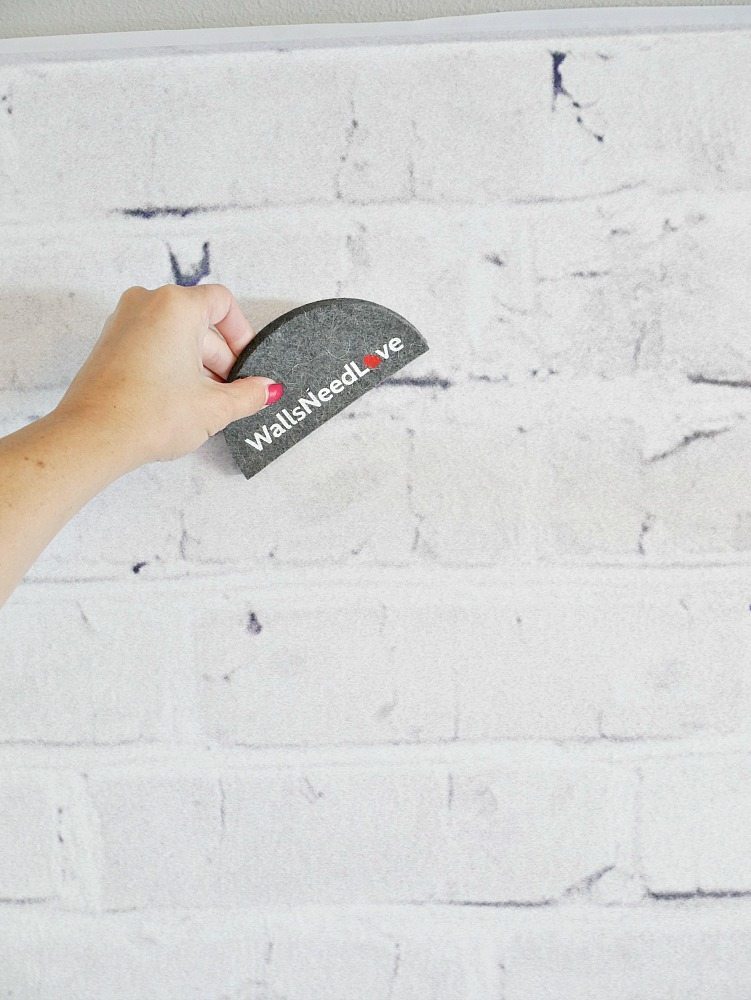
Once you have the panel in place, use the felt tool to press it against the wall and remove any air bubbles.
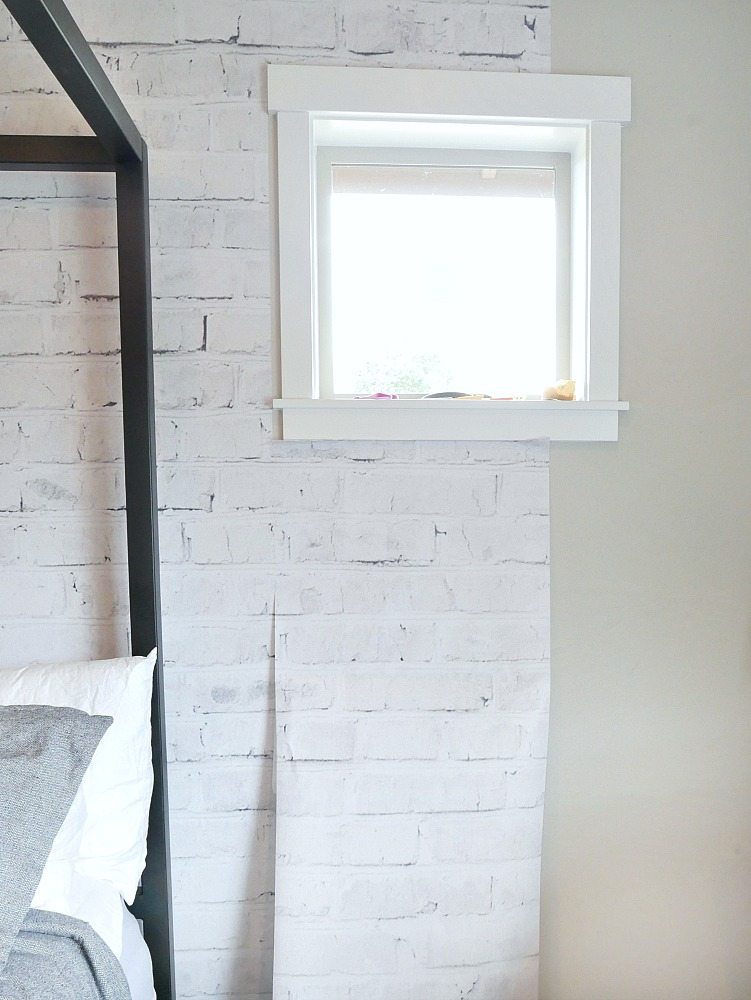
Going around the windows was a little tricky, it took a lot of patience . I very carefully cut the panel around the windows as I went down the wall.
Aside from the windows, each panel (after the first) went up really fast. I just started at the top and worked my way down making sure the patterned aligned.
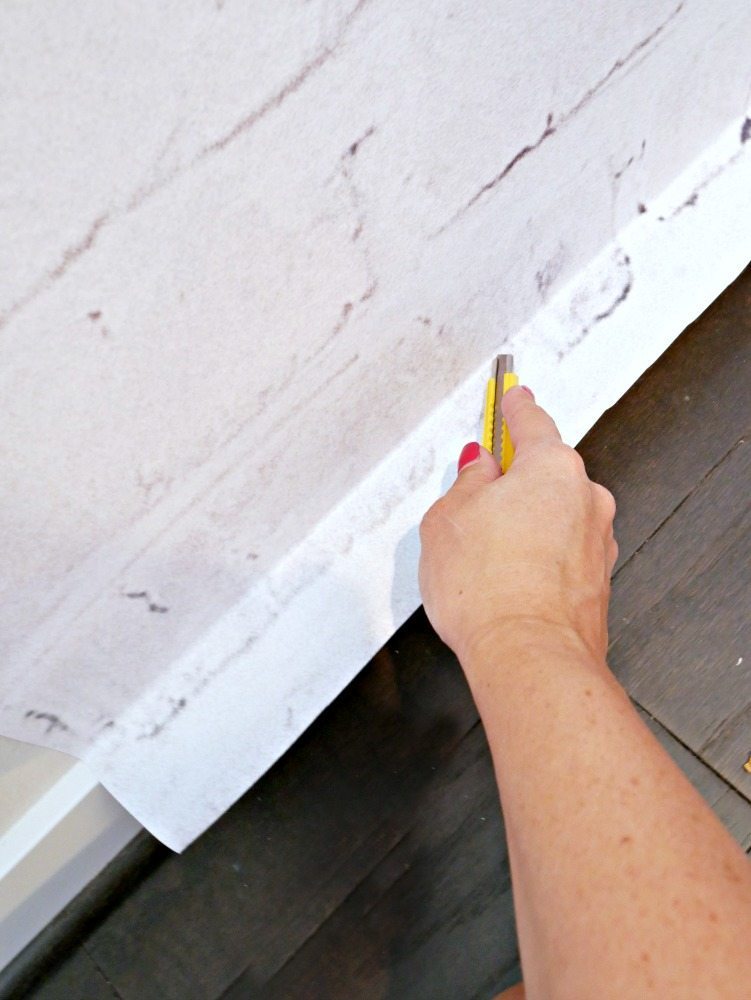
Once you are done, use the razor to cut off any access fabric at the top and bottom.
Does this sound like something you are interested in doing in your own room? You have to head to Walls Need Love and check out all of the different wall murals you can choose from and all their cute accessories!
About Taryn Whiteaker
Hi! I’m Taryn! The voice behind Taryn Whiteaker Designs. I launched this brand over 11 years ago when I became a stay-at-home mom. What started as a small craft and mom blog eventually grew into a full time design and DIY site. My goal has always been to inspire others (especially women!) with design ideas, DIY tutorials, entertaining ideas and give you the tools you need to complete them yourself!


Ooooooh , boy do I love how your white brick wall looks, perfect in your room with bed, etc. Makes such a difference in room, completes it perfectly. Looks so real if we didn’t know wasn’t real bricks, incredible.
Would love to have that in our room which have decorated to be vintage comfy. cottage. Will be going to site to drool for while tomorrow, time for shower and bed at this late hour. We’re kinda night owls.
Have great week.
Thank you! I think this would look great in a vintage cottage space. :)