Disclosure: This post is sponsored by Adobe Photoshop Elements, all opinions are my own.
Every Christmas I look for ways to include personal touches that I know my kids will love and will make the holiday even more special. Whether it’s making homemade ornaments, engraving names on a special gift or monogramming stockings. This year, I took it up a notch and created personalized Christmas wrapping paper that features my sweet kiddos and all our fun adventures this year!
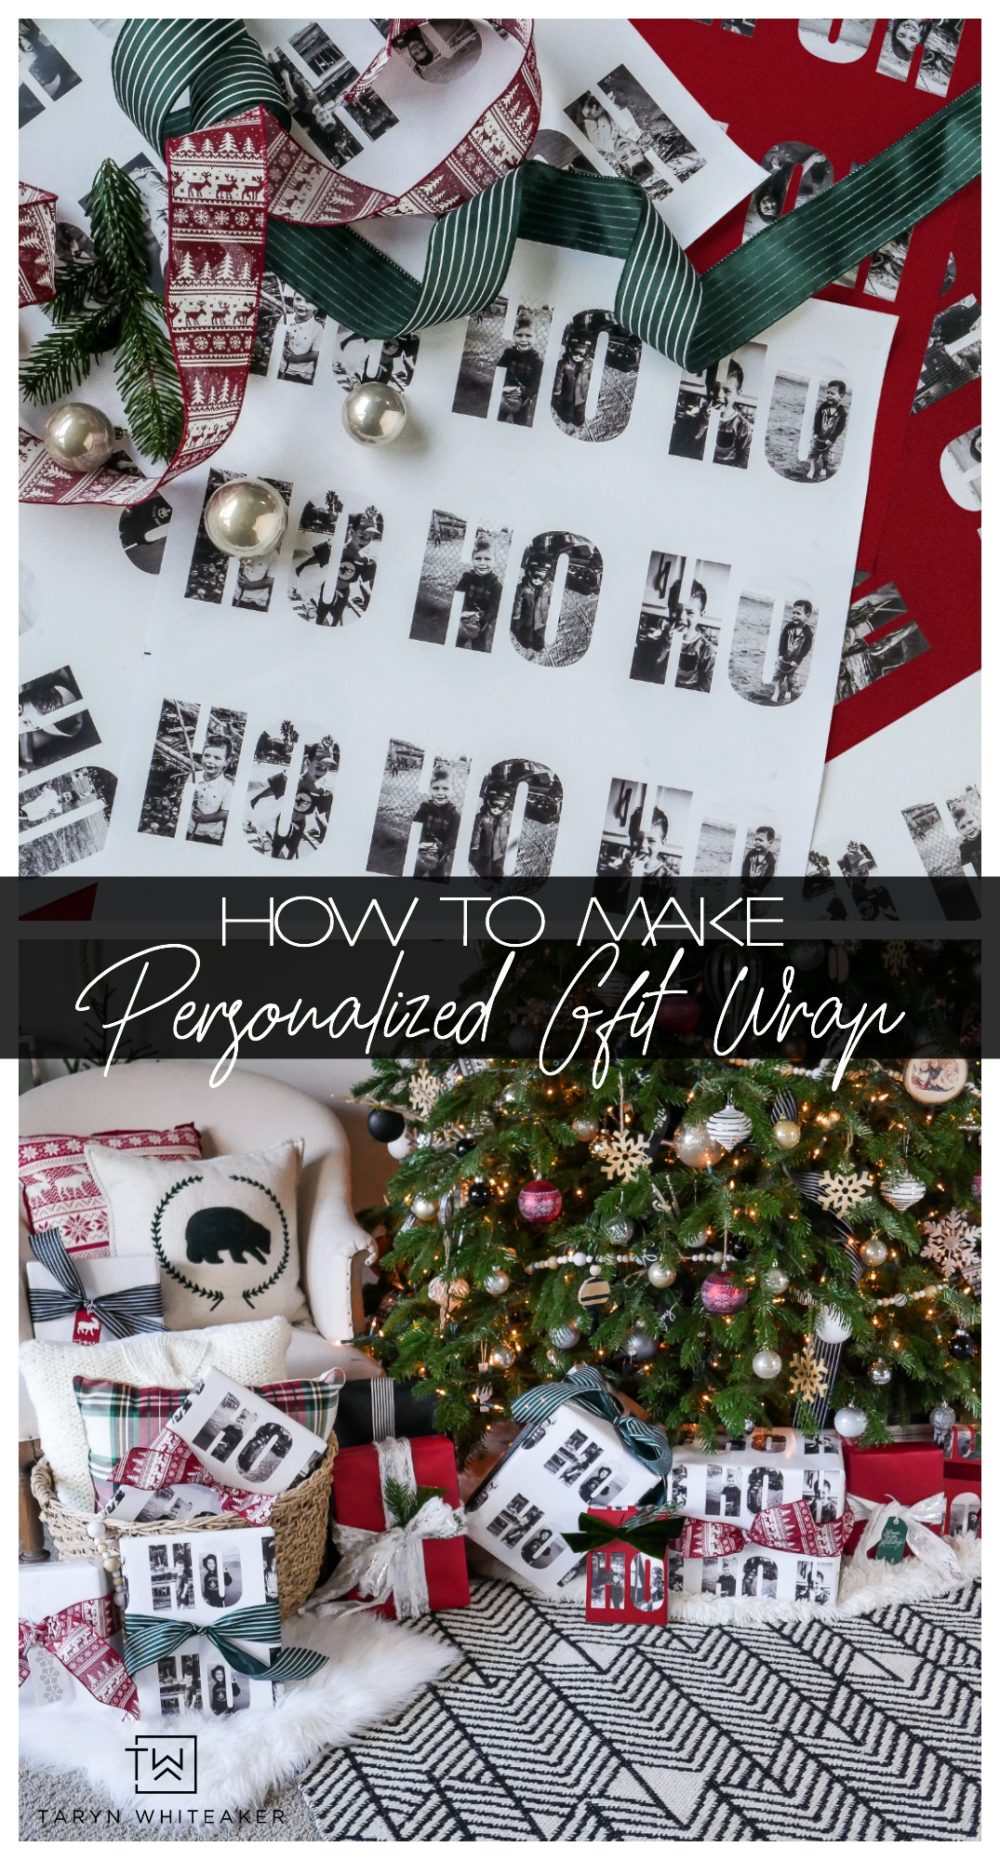
For this project, I used the Multi-Photo Text Guided Edit in Adobe Photoshop Elements. It is part of the guided fun edits and is SO easy to use. I had so much fun playing around with the tool to create my own custom wrap. I’m going to walk you through EXACTLY how I created my fun ‘HO HO HO’ paper and how you can make your own just like mine! Your kids will love it!
Personalized Christmas Wrapping Paper

I didn’t tell my kids I was working on this project. I kept it a secret until they saw the presents under the tree and their reaction was priceless. The minute they walked in the door they saw the big fun ‘HO HO HO’ paper and then noticed their pictures on the packages. They all started jumping up and down and looked through all the presents to find which ones had their cute faces on them.

I kept hearing, “Hey! That’s me!” They absolutely loved it and I love having pictures of fun memories from this year under the Christmas tree.

How To Make Your Own Wrapping Paper
So are you ready to create your own? First, you need to download your own copy of Adobe Photoshop Elements. You can download a free trial here.

Once you install the program, you want to open a blank file. When you get to this screen, you will want to resize the width to 19 inches and the height to 6.76 inches. This will give you the perfect file size to fit the width of your gift-wrap! Then click the Multi-Photo Text option on the upper right hand corner of the screen.

Now let’s create your multi-photo text! First you want to click the “Type Tool” on the right hand side. Then you will draw a text box and type in your text. If you are doing the ‘HO HO HO’ just like my paper, I used the Impact Regular Font in size 350. But you are welcome to do any wording of your choice! Just click the green check mark when you are done.

Step 2 is to turn your letters into photo frames. You simply click the button on the right hand side that says “Create Frames” and then the letters will instantly transform. Click the first letter, and then hit the “Computer” button on the right hand side under the fourth step. This will allow you to select images you want to use from your computer.
Adobe Photoshop Elements has an easy edit to turn your photos into black and white like I have on my paper. You can click here to learn how to do that!

Repeat this process until every letter is filled with a different photo. During this process you are able to resize the photos and move them around to fit into the letters and make sure those pretty faces are shown! Your last step is to create a clear background for printing! Under Step 5 on the right hand size click “Clear” and your background will become transparent.

If you would like to give your wrapping paper a little pop of color for the holidays, instead of clicking the “clear” background, you can choose “color” and pick the color of your choice.


When you are done with your letters, click the “Next” arrow and it will give you the option to save. Save this file as a JPEG and save it onto your computer.
PRINTING YOUR CUSTOM WRAPPING PAPER

Next up is creating and printing your paper! There are several companies that allow you to create your own customized wrapping paper but for this project I had mine done through Overnight Prints. Remember when I had you resize your file those specific dimensions? This is where it will come in handy. Simply upload your file that you saved onto your computer and it will automatically fill the paper and tile! Now all you have to do is click next and order your paper!
PLEASE NOTE, THIS PAPER COMES IN SINGLE SHEETS OF WRAPPING PAPER. BIG ENOUGH FOR ONE SHIRT BOX. I ORDERED 7 SHEETS PER KID TO HAVE ENOUGH FOR LARGE BOXES, ETC.

When the paper arrives you will have a roll of single sheets of wrapping paper and your pretty design all printed out! This paper is great quality; it is a thick glossy paper.

I wrapped my presents very particularly so that you could see as much of the photos as possible and allow for ribbon.
Personalized Christmas Wrapping Paper
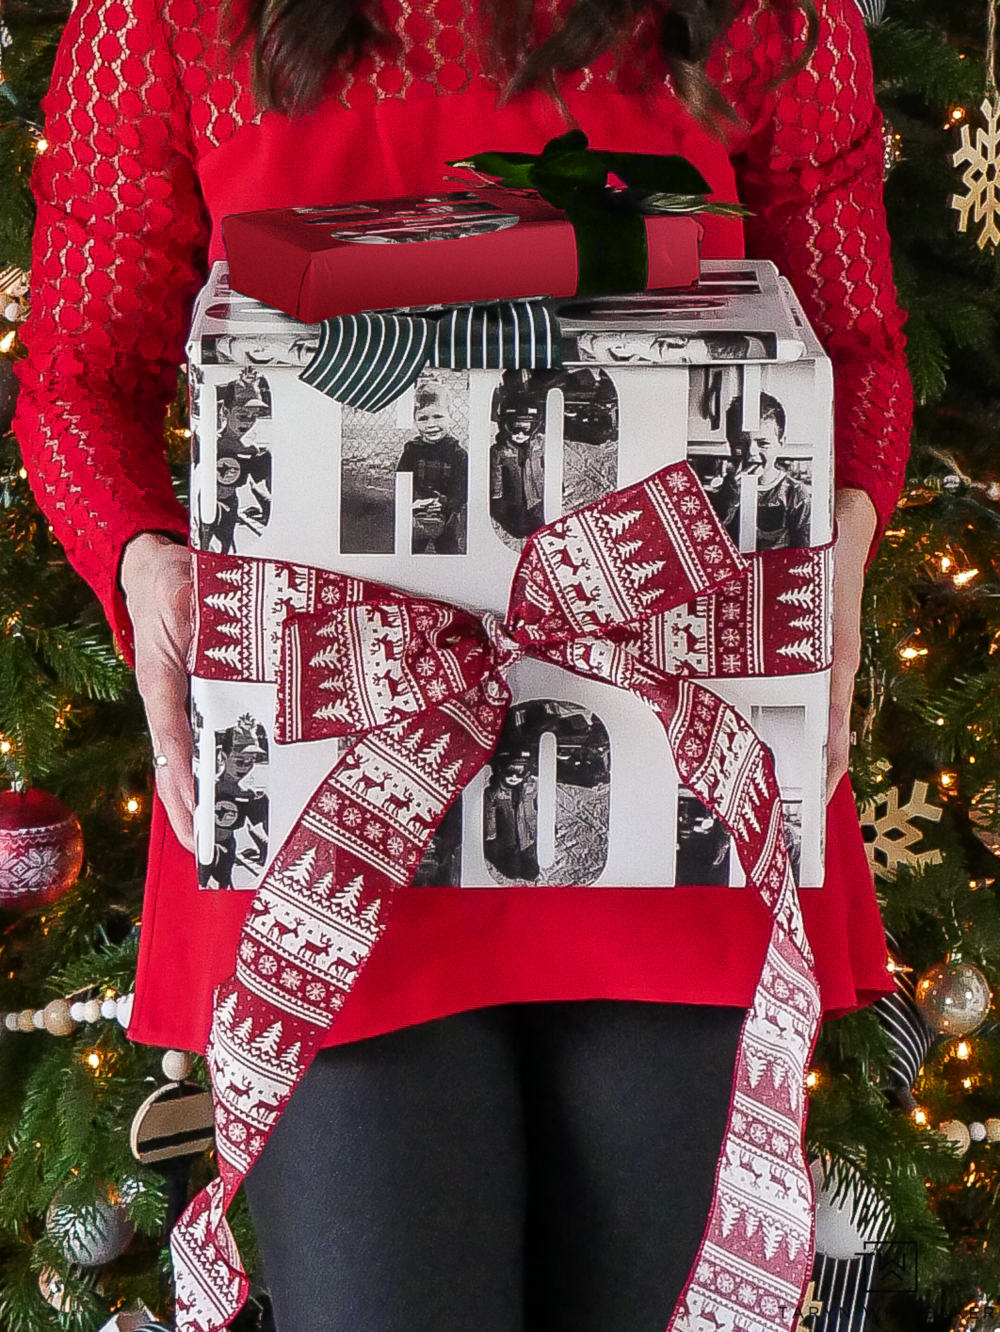
Wrapping is one of my favorite activities during the holiday season and this just made it even more exciting. I love how special these packages are and what a fun new tradition they will become for our family. I could see these also being so special to give to grandparents!

Now excuse me while I go play Santa!

Don’t forget to download your free trial of Adobe Photoshop Elements so you can play around with this fun Multi Photo Text Guided Edit and all of the other ones they have to offer. If you like editing photos, especially of your kids and family, I highly recommend getting your free trial so you can explore all it has to offer.
Watch how I made it!
Happy wrapping everyone!
SAVE TO YOUR PIN BOARDS!
About Taryn Whiteaker
Hi! I’m Taryn! The voice behind Taryn Whiteaker Designs. I launched this brand over 11 years ago when I became a stay-at-home mom. What started as a small craft and mom blog eventually grew into a full time design and DIY site. My goal has always been to inspire others (especially women!) with design ideas, DIY tutorials, entertaining ideas and give you the tools you need to complete them yourself!


Leave a Reply