This post is sponsored by Concreate. All opinions are 100% my own.
You all know me by now, I love industrial decor and natural textures! I use elements of both in all of my spaces. When I stumbled up on Concreate, I KNEW I had try out their concrete panels. They look gorgeous and have that beautiful industrial chic look that I love. You can install these panels on both a wall or flooring and in so many different spaces. But today I want to talk all about installing a Concreate Wall in our garage gym.
Installing A Concreate Wall
Isn’t it so pretty? When quarantine started one of the first projects on our list was to finish our garage space and build out a home gym (among other things). You can view the full plans for the garage.
We have slowly been working on 1) clearing out the garage and all the mess and 2) Building out our home Crossfit gym. It’s finally coming together!
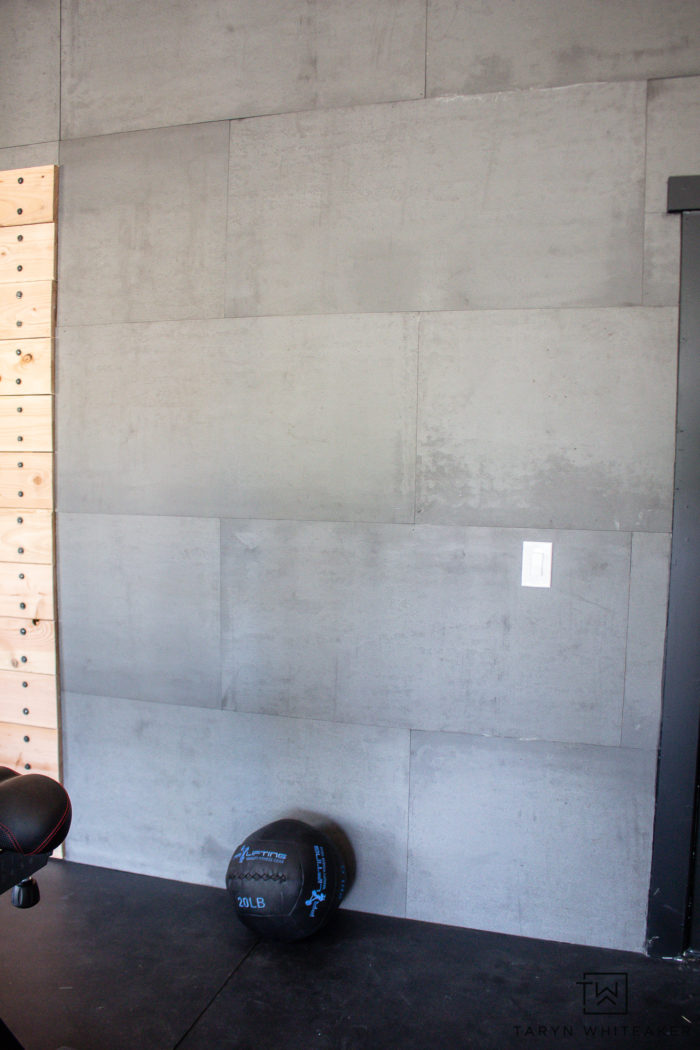
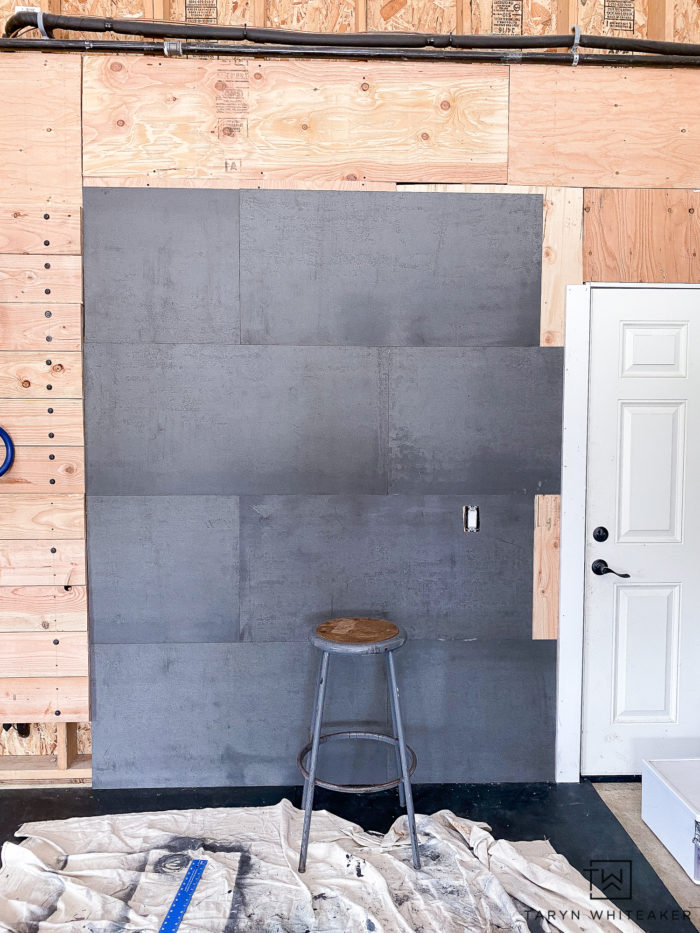
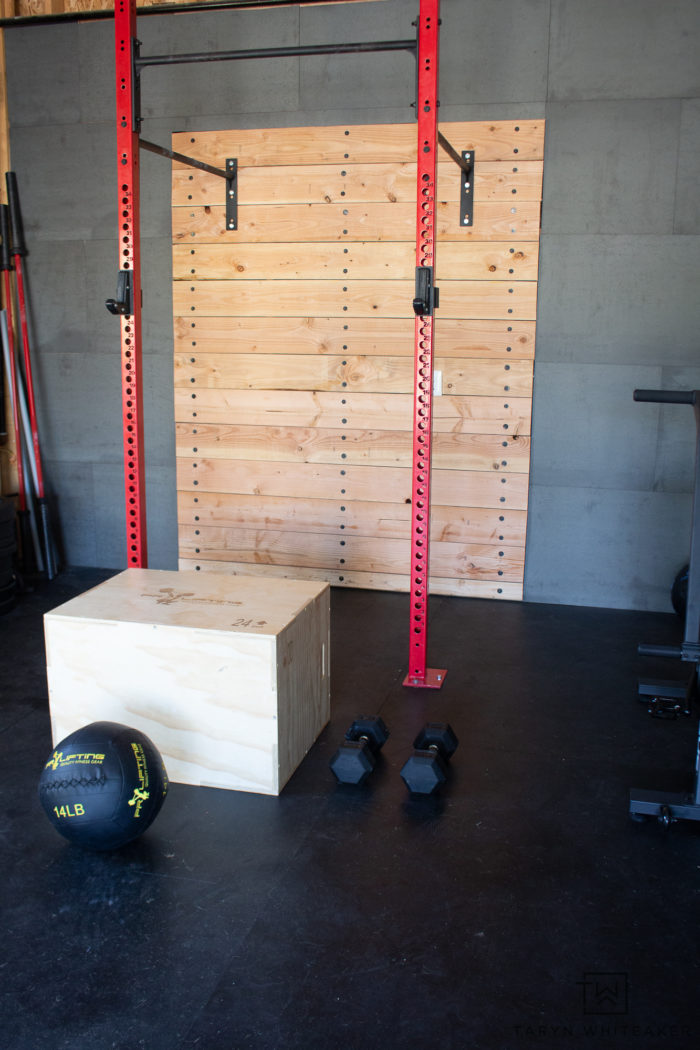
I went with the Metal Gray Wall Tile. All of the tiles are 24″ X 48″. They are great for covering large spaces and make a huge impact.

These panels are so easy to install and they took our open studded garage from blah to a (almost) fully finished space.
If you have a fireplace to refinish or want an accent wall in your home, I highly recommend checking them out. ANYONE can do this!

This Space Before
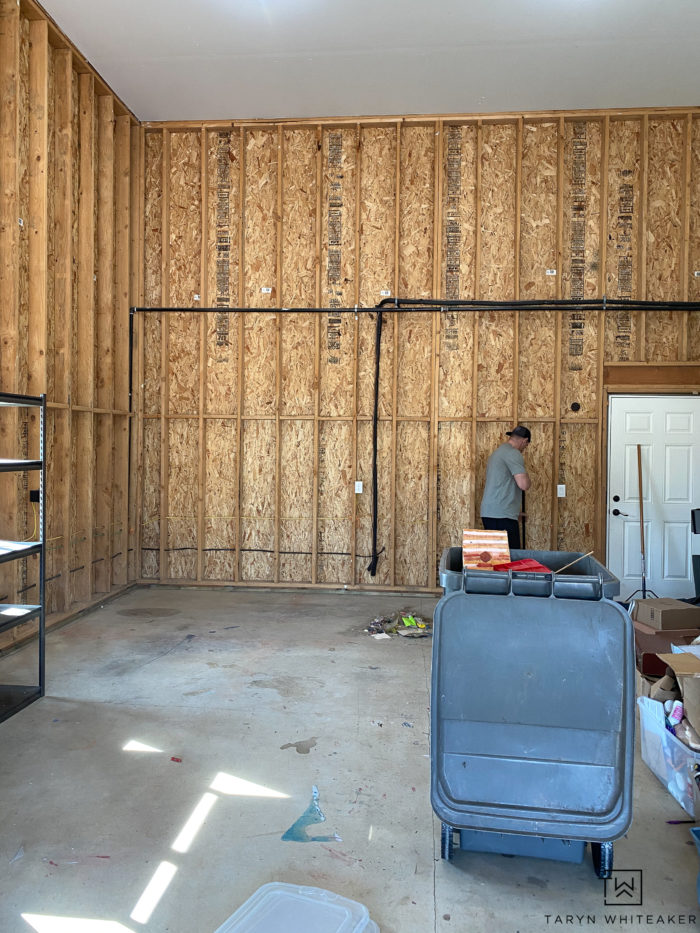
This is what our garage looked like the first weekend of quarantine right after we cleared it out! I can’t believe how far it’s come in just a few months!
How do you install Concreate?
Supplies You Need
- Materials to prep wall if open studs (I used plywood but could also be drywall if your wall is already finished)
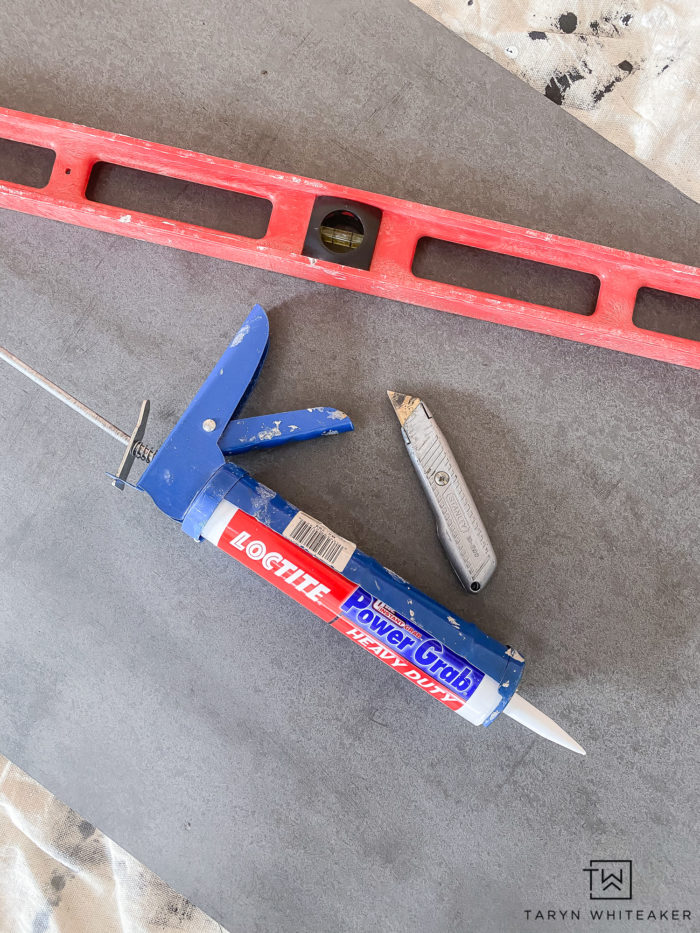
- Liquid Nails (make sure for concrete and wood)
- Circular Saw
- Utility Knife
- Level
- Pencil
- Measuring Tape
- Mask
- 36″ T Ruler
Prepping Your Walls
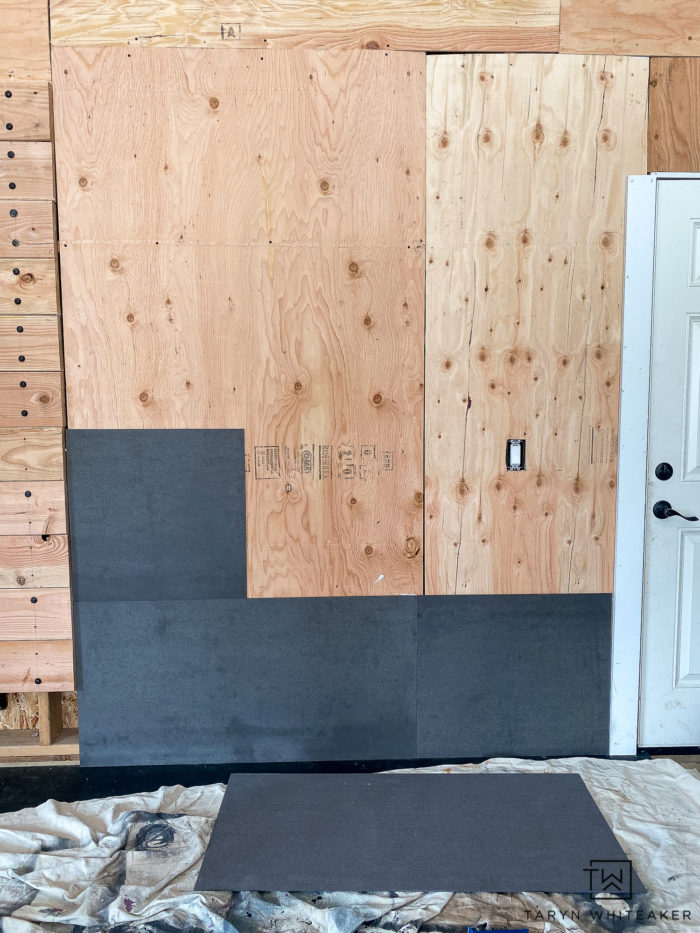
The first step is to prep your walls for the Concreate! You want to install them on a smooth, level surface such as plywood or drywall. If you already have a wall you are using you are good to go. Since our garage is down to the open studs, we needed to prep ours.
I chose to install plywood over the studs since it is the less expensive route and after all, it’s our garage.
Decide your Layout
There are a variety of ways you can lay out the panels. Everything from vertical, horizontal, staggered, etc. Just like decided a tile pattern. For me, it came down to what would work best around the equipment and doorway.
We decided to go with a staggered horizontal pattern, I felt like we could get the most out of our pieces and there wouldn’t be any odd breaks in the lines.
The whole wall took me about 1.5 days. I had to do a lot of cuts because of the layout of our space. But if you were doing a blanket wall in your home with would take a day, max.
Adhering the panels

The panels are only about 1/8″ thick, so they are easy to work with and not that heavy.
To adhere the panels it is super simple! You just need Liquid Nails and a caulking gun. You can get it directly from Concreate or at the hardware store.
You want to apply a generous amount onto the pack of the panel. Especially the edges so they don’t pop up! To put in perspective, I went through about 7 tubes for this project.
Then gently press the panels onto the wall and make sure they are secure and all the glue is sticking to the wall.
Some of my corners were popping up a bit, so I put one small finishing nail in with my nail gun to hold it down.
Cutting the Concreate Panels
Cutting the Concreate panels was much easier than I thought! You can view a full video tutorial on their site.
I thought since they were concrete and thin they would either break easily or be difficult to keep a straight cut line and that was so far from the truth. It was very easy to cut them to size in some of the tricky areas.
There are two ways you can cut the panels, 1) using a Utility Knife or 2) a circular saw.
I started out using a Utility Knife. You simply want to score the back of the panel a few times using a ruler, and then gently snap the piece in half.
For some of the more intricate cuts I tried the circular saw and this works PERFECT. I ended up doing the rest of my cuts with the saw. Since the pieces are thin, it had no problem cutting them and the lines are super straight.
I do suggest wearing a mask when cutting the panels, it gets very dusty!
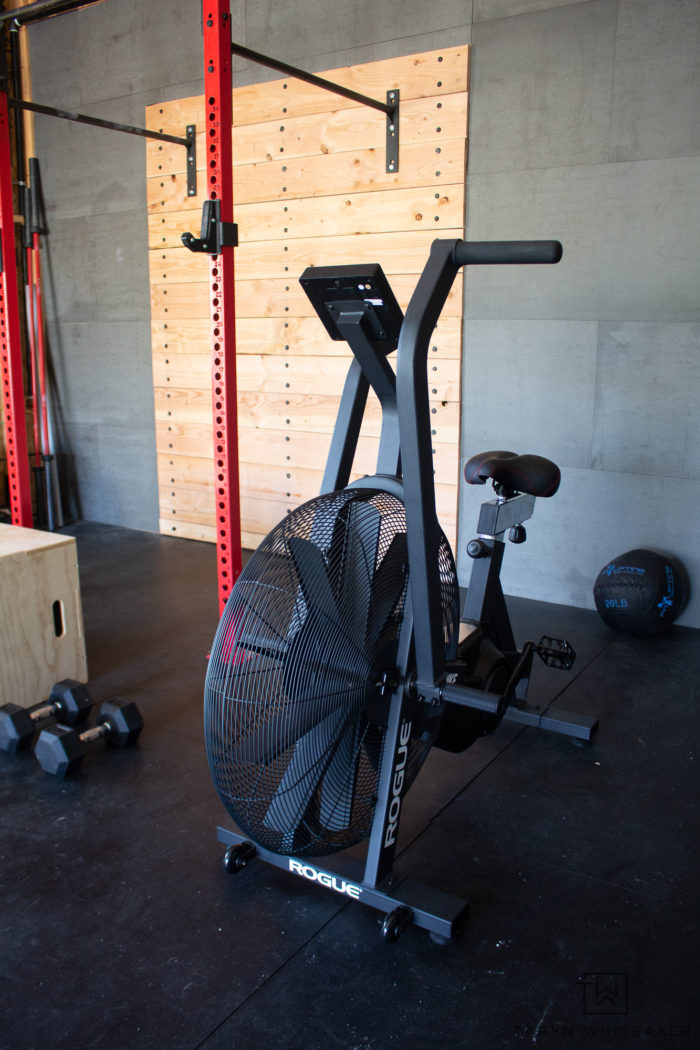
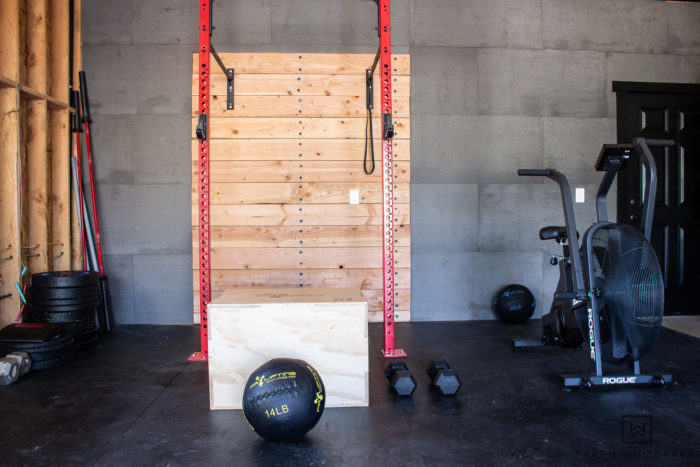
Industrial Chic Home Gym
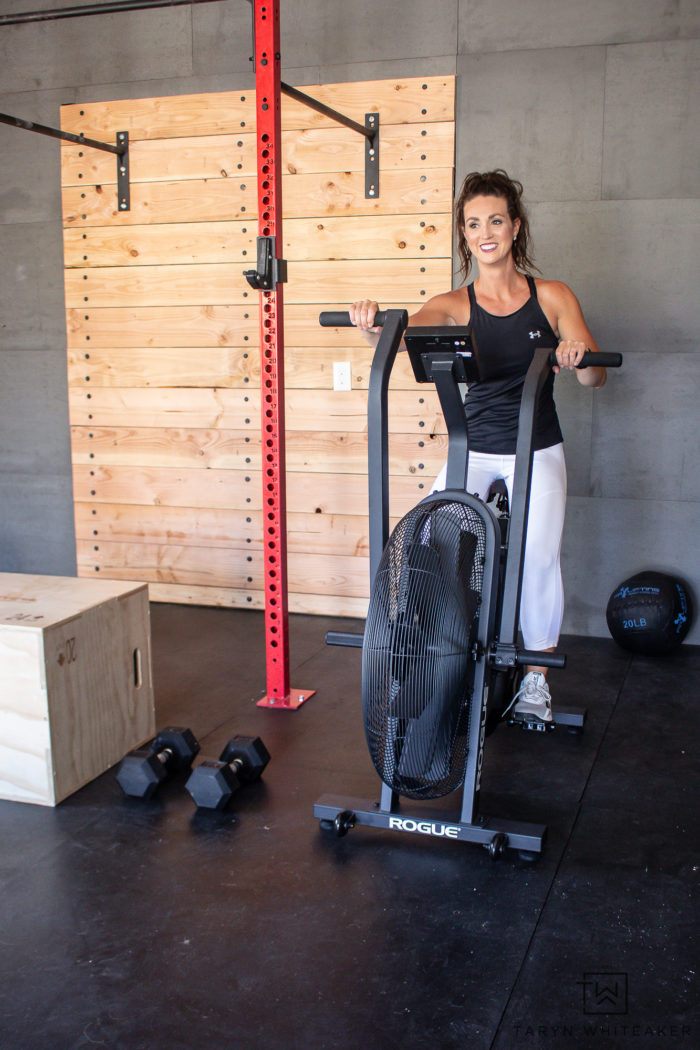
I absolutely love how our home gym is coming together. We still have a ways to go before our entire garage is complete. But it’s getting there! Between working out 5 days a week and working on my DIY projects in here, we spend A LOT of time in our garage and it feels great to have it look a little more finished. It truly is an exstenion of our home!

So what about the part above the Concreate wall? We are TBD on that right now, it depends on what we end up doing to the adjacent wall on the left. We may drywall up to the top or we may end up taking the Concreate all the way up. Stay tuned.
Head to Concreate to see all of their products, panels and color options!
About Taryn Whiteaker
Hi! I’m Taryn! The voice behind Taryn Whiteaker Designs. I launched this brand over 11 years ago when I became a stay-at-home mom. What started as a small craft and mom blog eventually grew into a full time design and DIY site. My goal has always been to inspire others (especially women!) with design ideas, DIY tutorials, entertaining ideas and give you the tools you need to complete them yourself!


Why did you put the concrete on walls? Was that to help secure the bars onto in order to hold the weight of some doing chin ups on bar?? to hold more weight??
Hi! These panels are designed to be decorative WALL panels. They do make them for flooring as well, but they are made differently. Since this space was open studs before, I wanted to finish the walls and have them look nice and also industrial. They do not support the rig, that is installed directly into the studs on the wall and the through the garage floor. This was done prior to us installing the Concreate.