Alright, friends! It’s time for Part 2 of the fireplace refresh! A few weeks ago I shared Part 1 with our white wash stone look for just $6. Now it’s time to take it one step further with a German Schmear Stone Fireplace. This part only cost me around $45.
My goal for this fireplace makeover was to make the fireplace feel less ‘heavy’ in the room. I love stone fireplaces, but ours was very brown and with such a bright white downstairs, it felt like a distraction. I want it to feel less like a focal point and more like a cozy accent corner. So that is my ultimate goal! I’m not done quite yet and I feel like it will all come together once the furniture is in, but here is where I’m at right now.
German Schmear Stone Fireplace

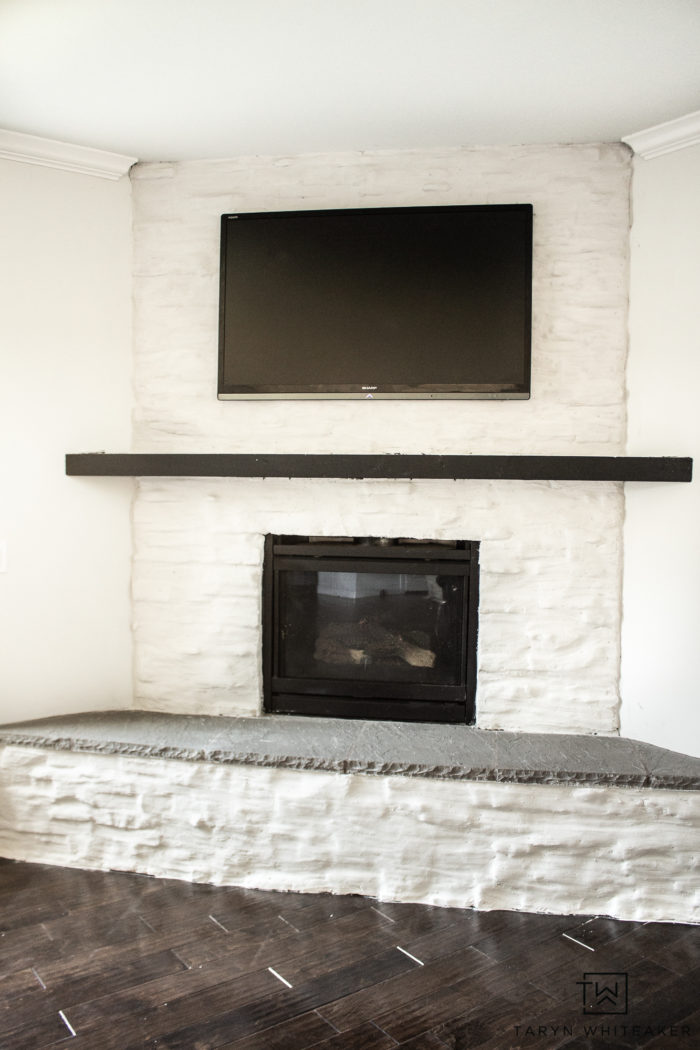
White Wash Stone Fireplace
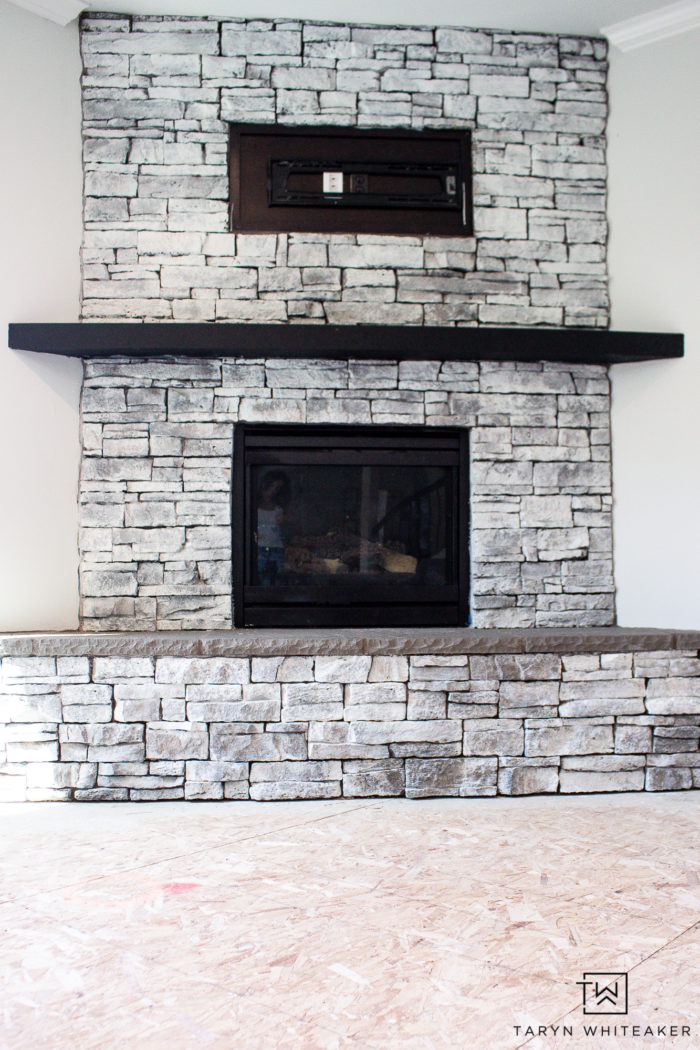
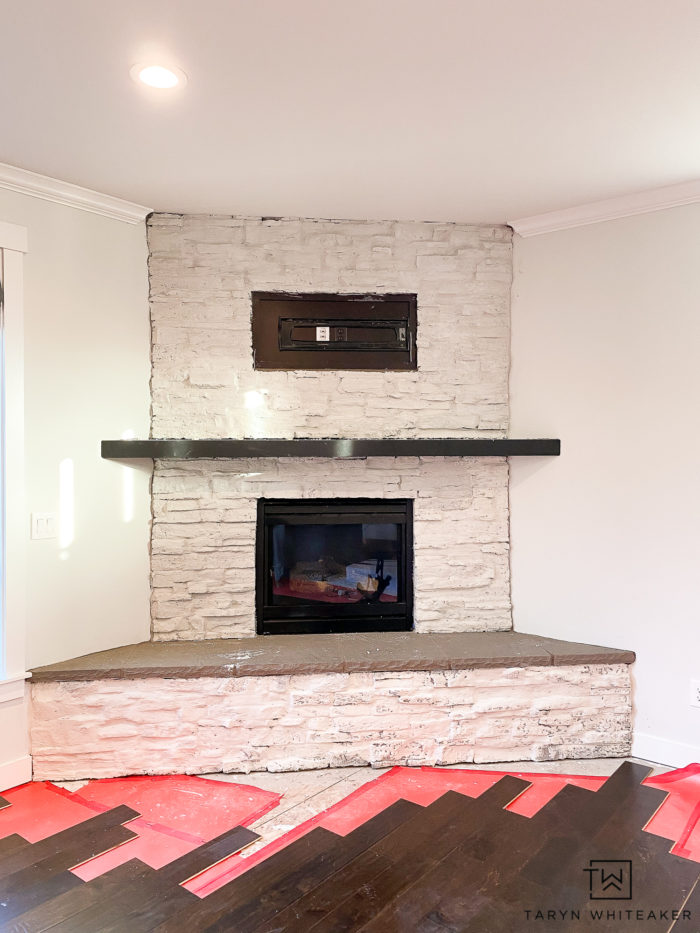
After phase 1, here is how the white wash stone fireplace turned out. I did the whole look for just $6 with a can of left over sample paint mixed with water. You can view the blog post for all of the details. This is a great look if you like a farmhouse or cottage look.
But for me, I needed something a little less busy. I felt like the white accentuated the stone lines and I was going for a cleaner, more modern look. So it was time to try something new.
Fireplace Inspiration
I headed to Pinterest to see what I could find on next steps for my fireplace. I spent HOURS reading different tutorials and looking and different fireplace ideas. I ultimately settled on three posts that served as inspiration for our fireplace.
- I loved the fireplace from Chris Loves Julia and how they filled the grout lines in around their stone. I also used their feedback on what mixture for the plaster. I wanted more coverage than this, but this was a great start.

- I love everything Emily Henderson does. And her cabin fireplace was also a great place to start. I like how they went over the rocks a little more and gave it a different look. (Ps after looking at this again, I sorta wish I would have gone a little darker with my plaster and given more of a contrast).
- I was ultimately drawn to this fireplace from an episode of Fixer Upper. They built this stone fireplace and then plastered over it to give it more of a french country look. The house is a lot “warmer” than ours is, so I couldn’t get away with going so tan, but I ended up loving this more coverage look.
So with all of that said, here is what I came up with!
German Schmear Over Stone Fireplace
I went with a lighter plaster, I tried a variety of more gray, versus white and this is what we settled on. It feels a little stark right now especially with the white walls, but I am hopeful that once we get the new mantel on (coming soon) and furniture, it will all work!
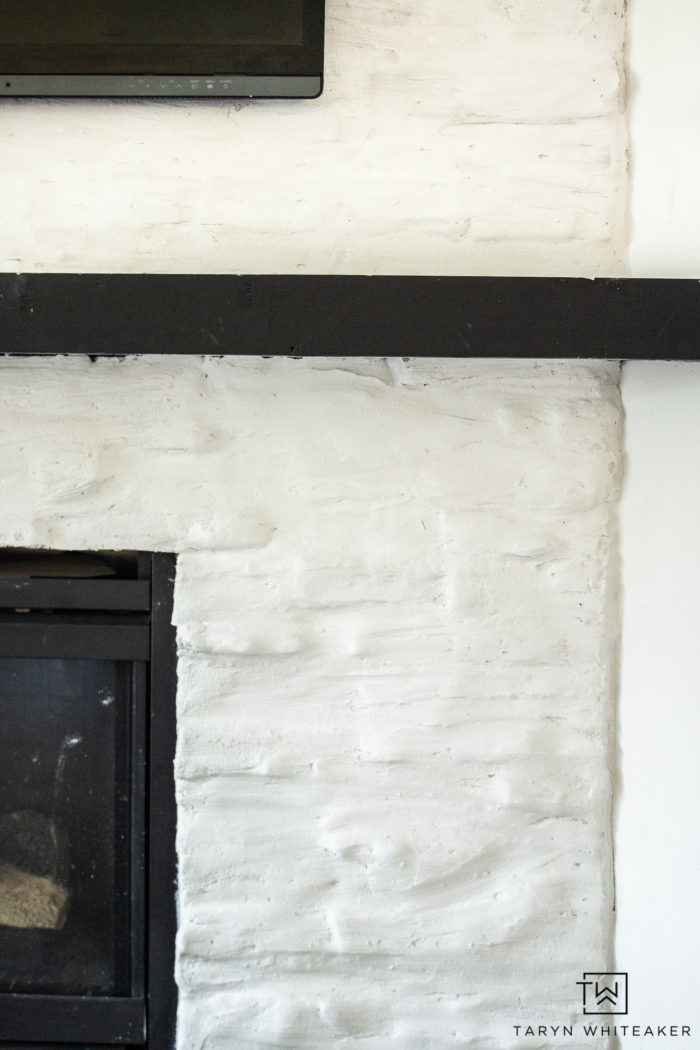
I will note, there is definitely a rustic feel to this. It’s more of a French artisan look to me. But it is also a ‘cleaner’ look than a white wash or normal German Schmear. This is going to come down to personal preference.
German Schmear Supplies
- White Mortar
- 5 Gallon Bucket
- Mortar Mixer
- Charcoal Concrete Color
- Putty Knife
- Multi-Purpose Sponges
- Ziploc Gallon Bags
Plastering Over Your Stone Fireplace
Step 1: Mix your mortar. I tried a variety of mixtures and what I found it this. 1) work with small batches so it doesn’t dry out as quickly and you won’t waste any mortar. 2) Tint your mortar so it isn’t stark white. I did a teeny tiny bit of the Charcoal Concrete Color . Just work in very small amounts, a little goes A LONG ways. I had to throw away a couple batches because it got too dark.
NOTE: The plaster will dry about 50% lighter than how it looks when you mix it. So maybe try a few sample runs and wait until it dries for you to see the results.
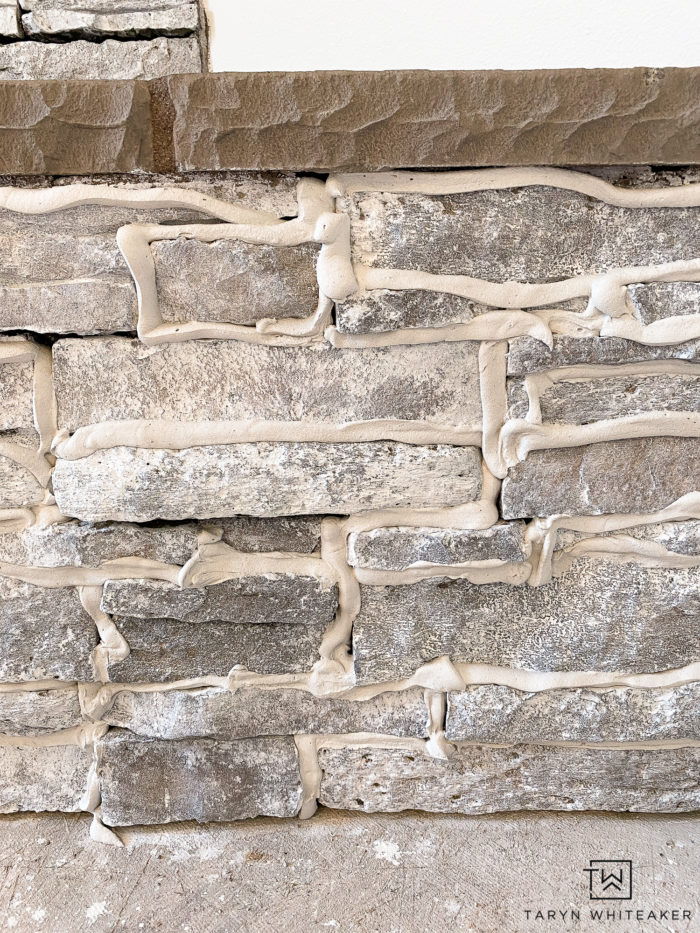
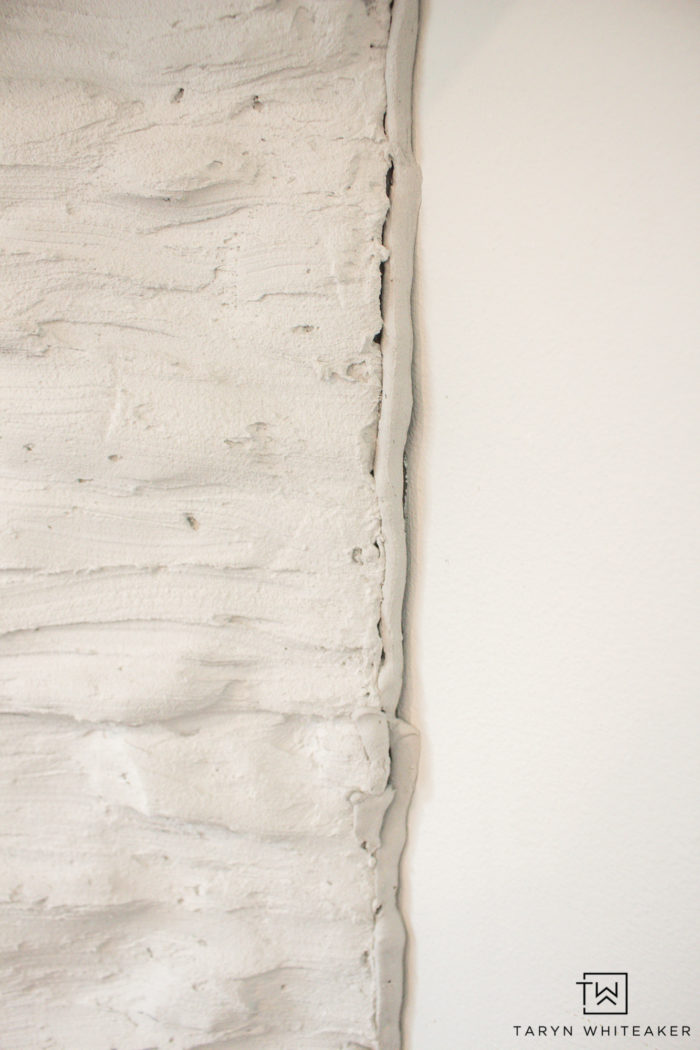
Step 2: For the first coat, I took a gallon freezer bag and used it as a piping bag to fill in all of the cracks. Again, I worked in small sections so I would do about 4 sq feet and then move on to step 3.
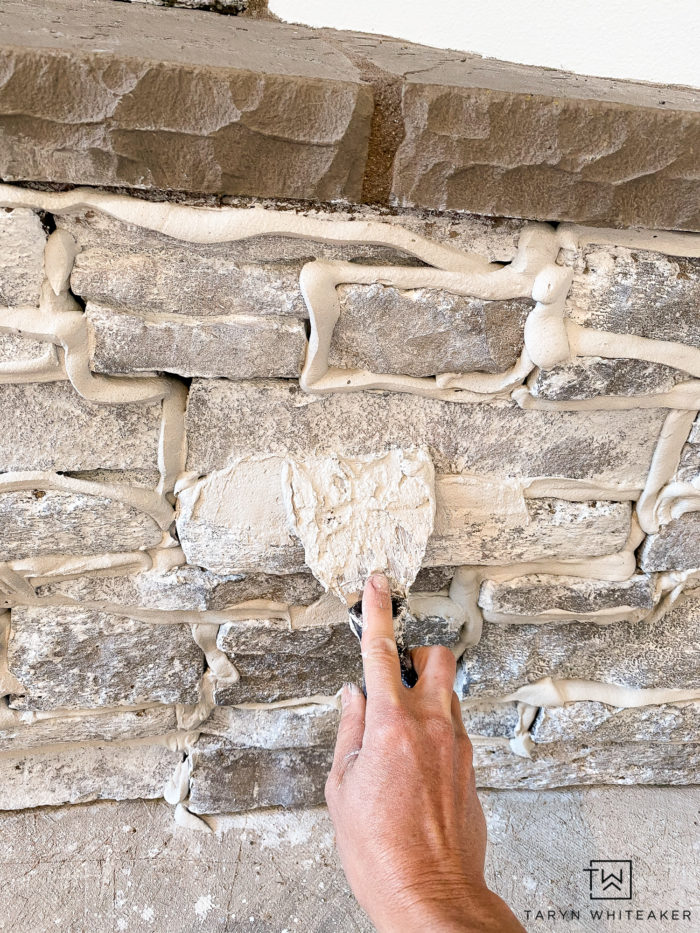
Step 3: Take a putty knife and put an additional layer on top of the grouted sections and smooth it out as much as possible.
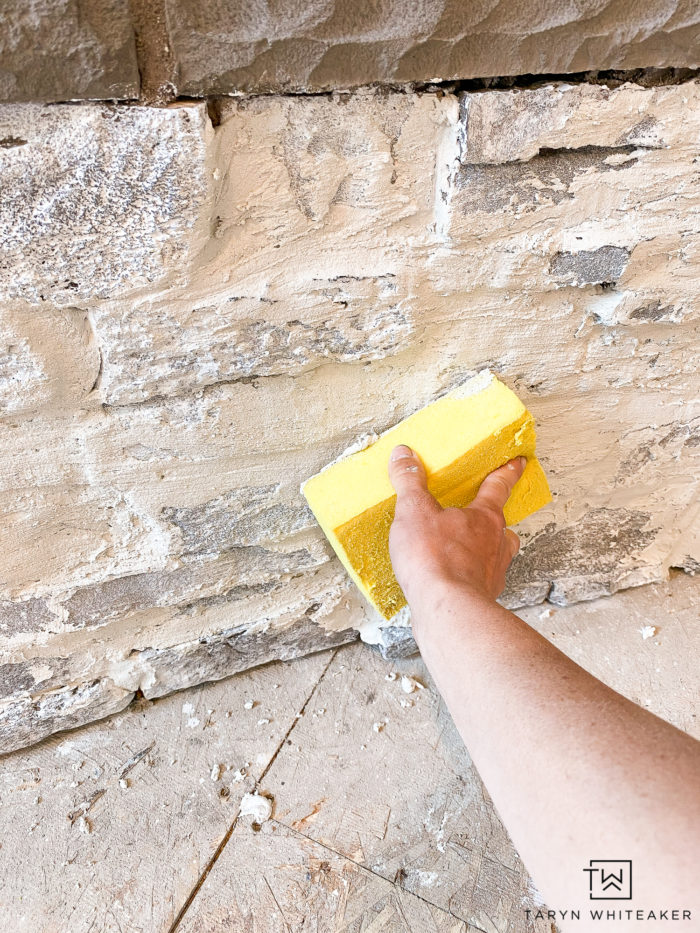
Step 4: Using your sponge get it wet and smooth out the mortar.

TIP: the wetter the sponge, the smoother the plaster will get and also using the RIGHT and CLEAN sponge makes a huge difference! I really liked these Multi-Purpose Sponges.
The left is the Multi-Purpose Sponges with a smoother surface, the right is the original sponge I used that left it a lot rougher. I feel like I maybe could have done fewer layers if I used the right sponge from the start!
First layer done! If you like the look of some stones popping out, one layer will be plenty for you. I played around with different shades of white/gray in this process, knowing that I would be doing a second layer and could cover them up.
I originally wanted to keep the lighter white color, but now that it’s done I am almost wanting to go darker. Best part is, you can always go over the plaster again if you want a new shade.

Step 5: Time for the second layer! This time I skipped the piping bag technique since the lines were already covered and went straight for the putty knife. I also worked in sections again. Spreading and then going over it with a sponge.
The above pic shows the left side that I went over with a sponge and smoothed out and the right side that is wetter and freshly applied with the putty knife. It lightens up a lot and this also shows the importance of the sponge.
Step 6 : To finish off the look, I took a piping bag at the end and did a layer around the whole boarder to create a really polished look. I used my sponge to smooth this out too.
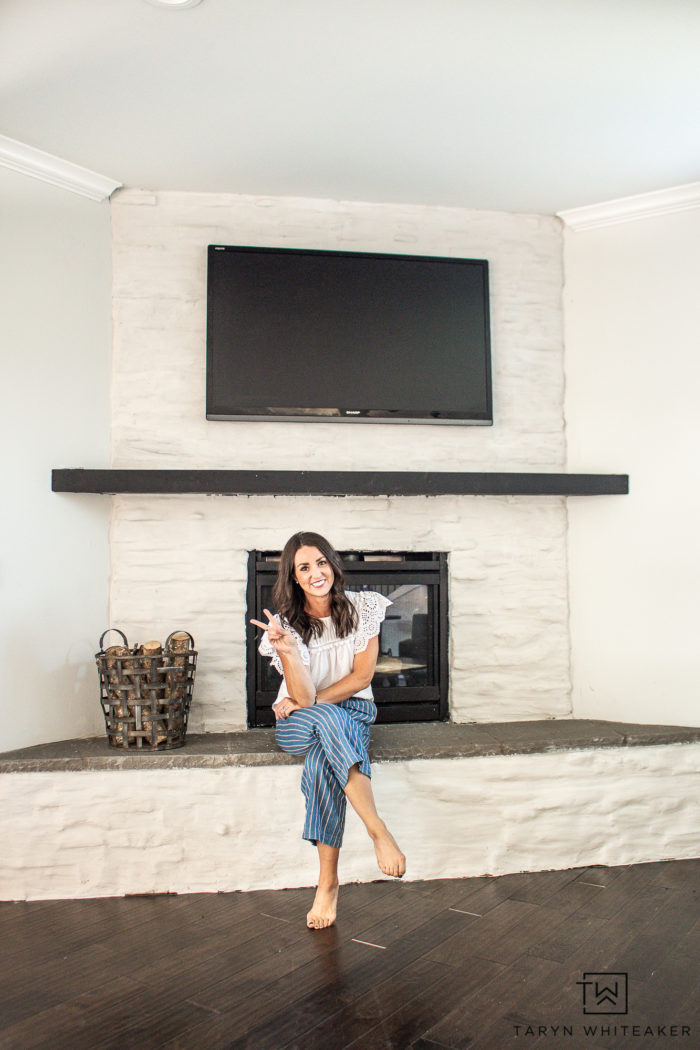
White Stone Fireplace Makeover
I am finally getting happy with it! Am I obsessed with it? not quite yet, but I am enjoying the cleaner brighter look. I am still not done yet, the mantel is in the works and then playing around with styling!
About Taryn Whiteaker
Hi! I’m Taryn! The voice behind Taryn Whiteaker Designs. I launched this brand over 11 years ago when I became a stay-at-home mom. What started as a small craft and mom blog eventually grew into a full time design and DIY site. My goal has always been to inspire others (especially women!) with design ideas, DIY tutorials, entertaining ideas and give you the tools you need to complete them yourself!


Wow, I feel like I’ve read 50 posts about schmearing stone fireplaces but none resulted in THIS LOOK. It’s exactly what I’m hoping for. Question for you, it looks like the plaster came out a warm off white…but you used the charcoal concrete coloring?
Hi! Thank you so much! Yes,I kept working with it until I got the look that I wanted. The plain plaster is a little more off-white itself, The gray makes it a little less yellow. I added very little, but the plaster was definitely more gray when I applied it, it lightens up a lot once it dries.
This is beautiful! I just started and looking for more inspiration I found you! I love the more covered look. I have 2 questions if you don’t mind, do you feel mixing the mortar vs buying premade is a better final product? And, I did a bottom corner as a test area and the mortar between the rocks cracked as it was drying, Is this due to not using the piping method you show above?
Hi! I mixed my own so I could add the dye, and also use it in batches. With the premade mortar it can dry out if you aren’t using it all at one time. I’m not sure about it cracking, but if there was a lot of air/space behind the mortar between the cracks, it could crack as it dries. you might need to pack it in there.
Thank you for this! I’m wondering – what ratio did. you use to mix your mortar in small batches? It looks great!
I’m curious about this, too! I have all of the supplies to recreate this look but am just nervous about figuring out the ratio. Thanks!
It’s hard to give an exact ratio, I just started with a little water mixed, and then added a little more, or you can add more mortar if it gets too thin. You just have to play around a little bit until its like peanut butter
Was the original fireplace there when you bought the home, or did you diy it before the german schmear thing?
The fireplace was original to the home.
What did you do for the hearth? It looks darker – did you just paint it? If so, what color? Looking to do something similar to mine
Hi! I didn’t do anything to the hearth, I left it the same. I might just look different with the different paint or photo.