• Skip to primary navigation
  • Skip to main content
  • Skip to primary sidebar
  • Skip to footer
  • Home
  • About
  • Contact
  • Partner with Taryn

Taryn Whiteaker Designs

DIY and Interior Blog

  • Our Dallas Home Tour
  • Shop My Pics
  • Home Styling
    • Room Reveals
      • Our Current Home
      • Our First Home
    • Seasonal Home Tours
  • DIY Projects
    • DIY Home Decor
    • Crafts & Sewing
    • Before and Afters
    • Before and Afters
    • Furniture Builds and Makeovers
  • Seasonal Decor
    • Christmas
    • Easter
    • Fall
    • Fourth of July
    • Halloween
    • Spring
    • Valentine’s Day
  • Printables
  • Entertaining
    • Parties
    • Tablescapes
  • Fashion
  • Travel

June 3, 2019

DIY Modern Ball Jar Succulents

Disclosure: This post is sponsored by Ball Jars(R), all opinions and creative are 100% asy own.

We have been using our outdoor space so much lately. I have it all decked out in summer prints and we have been spending as much time out here as possible. I wanted to create a new centerpiece for out here that went with my black and white theme but also incorporated fresh greens. When you think of jar projects, most people instantly think of farmhouse style decor. But I’m here today to show you how you can create DIY Modern Ball Jars by using the right style of jars and picking modern paint colors and patterns.

DIY Modern Ball Jar Succulents

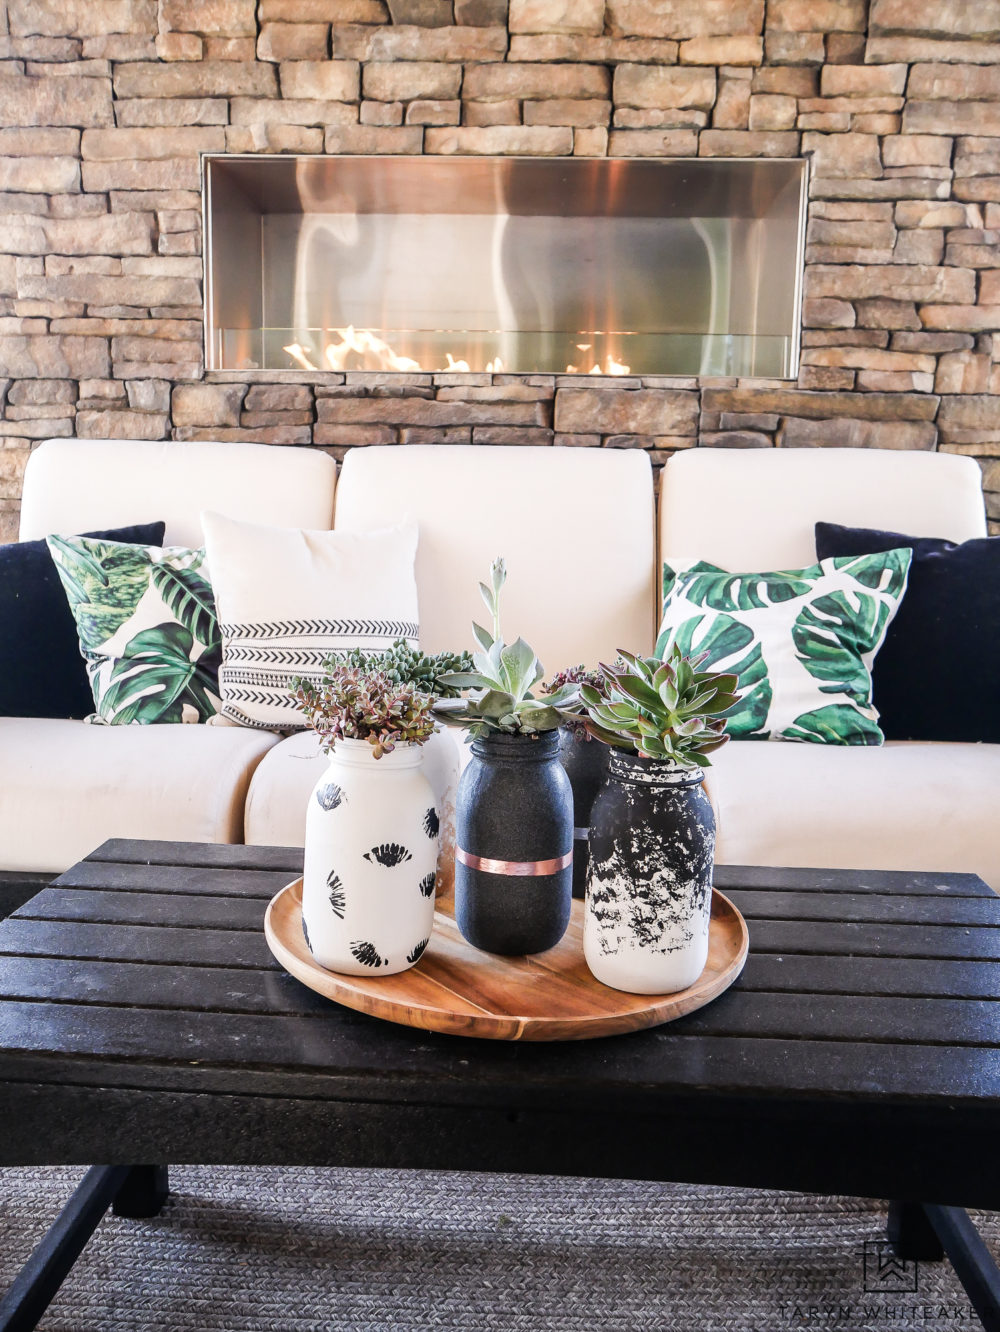
Succulents are always a great addition to any summer space. They are so easy to take care of and they add a little tropical or dessert look to your space. If you are worried about keeping succulents alive, then you can alway opt for candles inside or use them for flatware or straws at your next bbq.

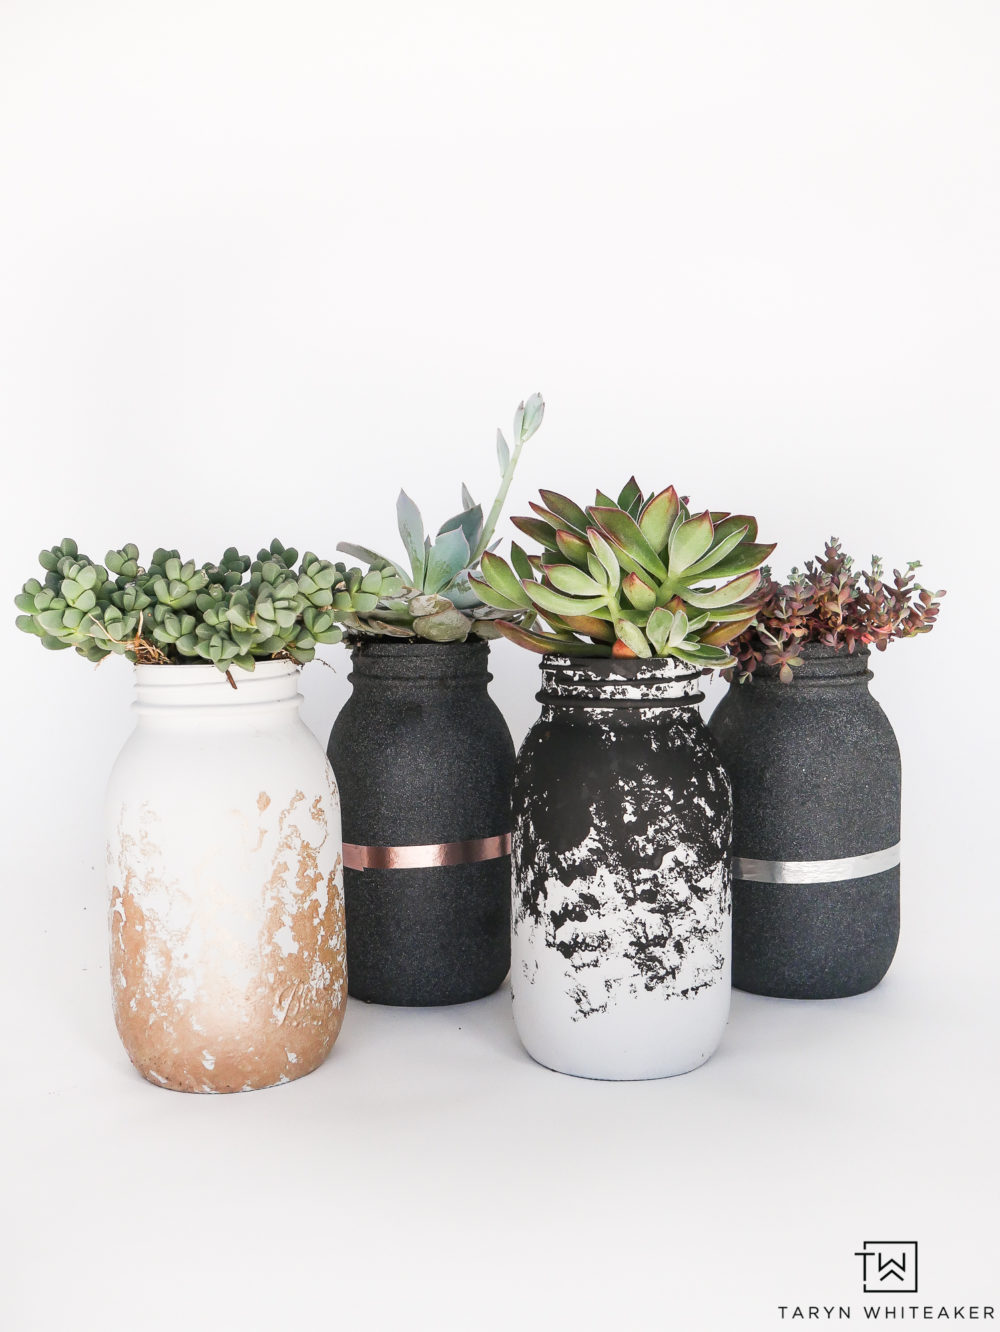
I wanted to use black, white and metallic for these modern jars, but I knew it would be a little tricky. These colors could easily turn into Halloween and not summer! So I’m going to walk you through every step to make sure you can create your own!

Decorative Ball Jar Tutorial

I started with the smooth sized quart sized ball jars. I like that they have a smooth side to make them look more modern and the size is perfect for a larger centerpiece. They are only $3 each plus you can always find a coupon!

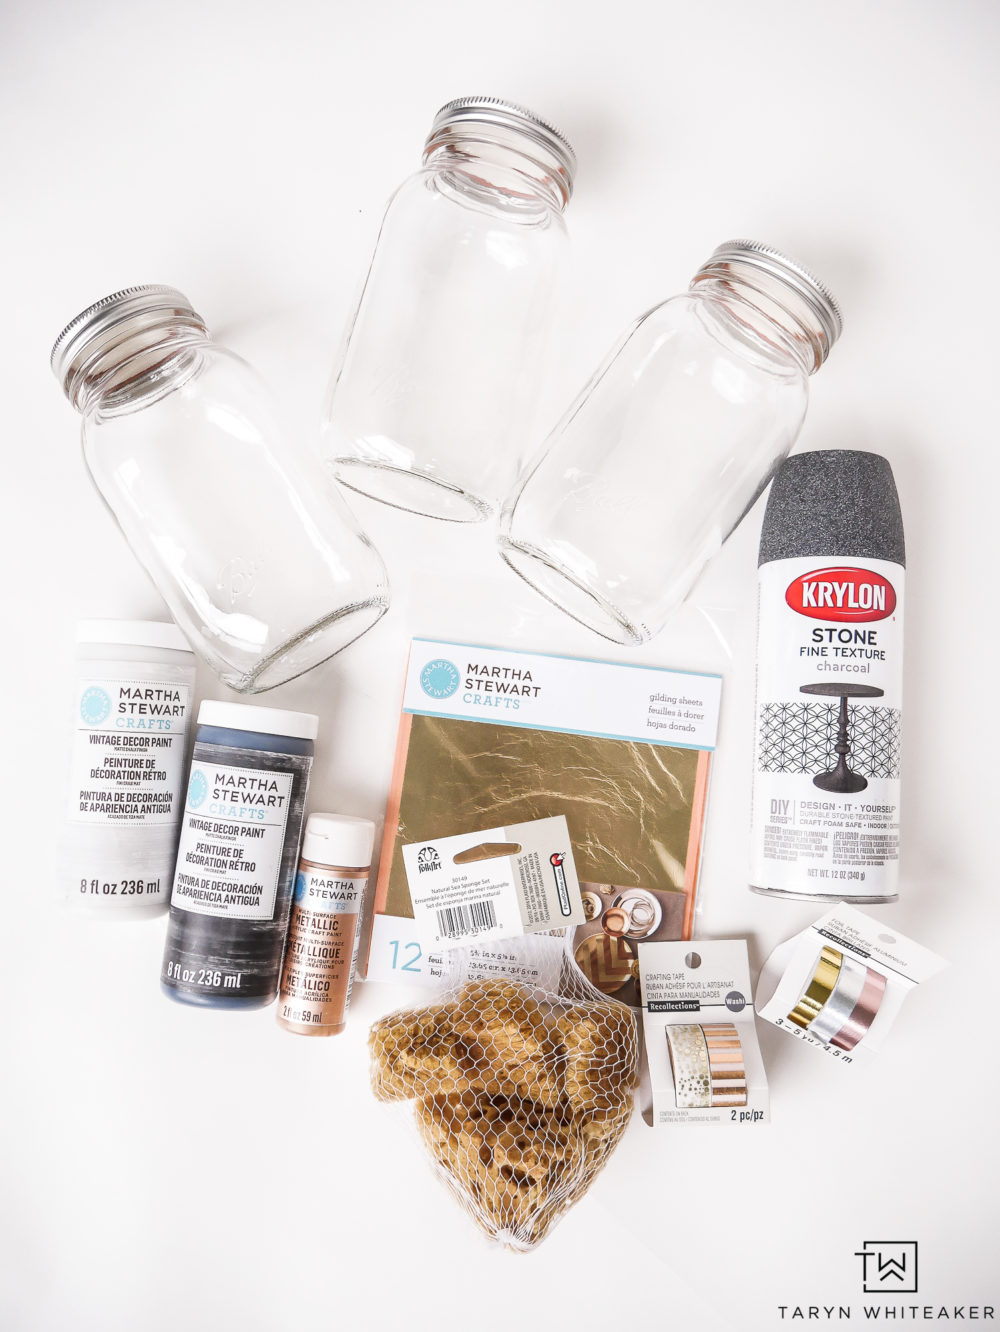
Next, I headed to my local Michaels Store and picked up a bunch of supplies to play with. I am a very visual person and I love to create projects as I go. I typically have a very good idea of how I want the project to turn out but I enjoy playing with different mediums until I get it right. Here is a list of everything I started with, I didn’t end up using everything but I wanted to show you how I grab my supplies when starting a project.

SUPPLIES

  • Smooth Sided Ball Jars
  • Martha Stewart Vintage Decor Paint in Smoke
  • Martha Stewart Vintage Decor Paint in Beetle Black
  • Martha Stewart Metallic Acrylic Paint in Rose Gold
  • Martha Stewart Gold Gilding Sheets
  • Krylon Stone Texture in Charcoal
  • Sponges
  • Metallic Washi Tape
  • Fan Paint Brush

Painting Glass Jars

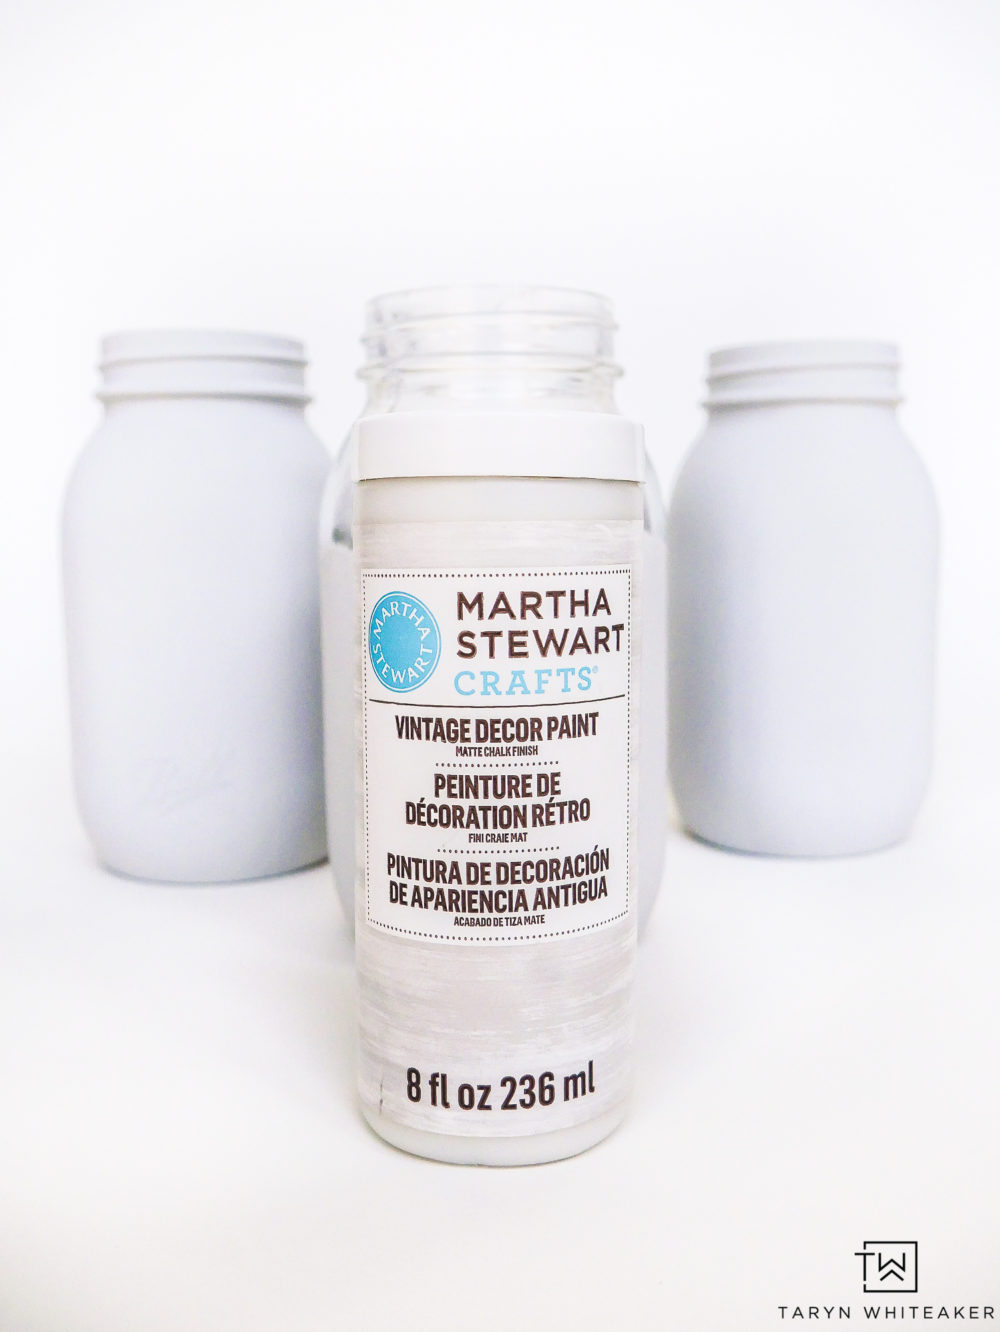
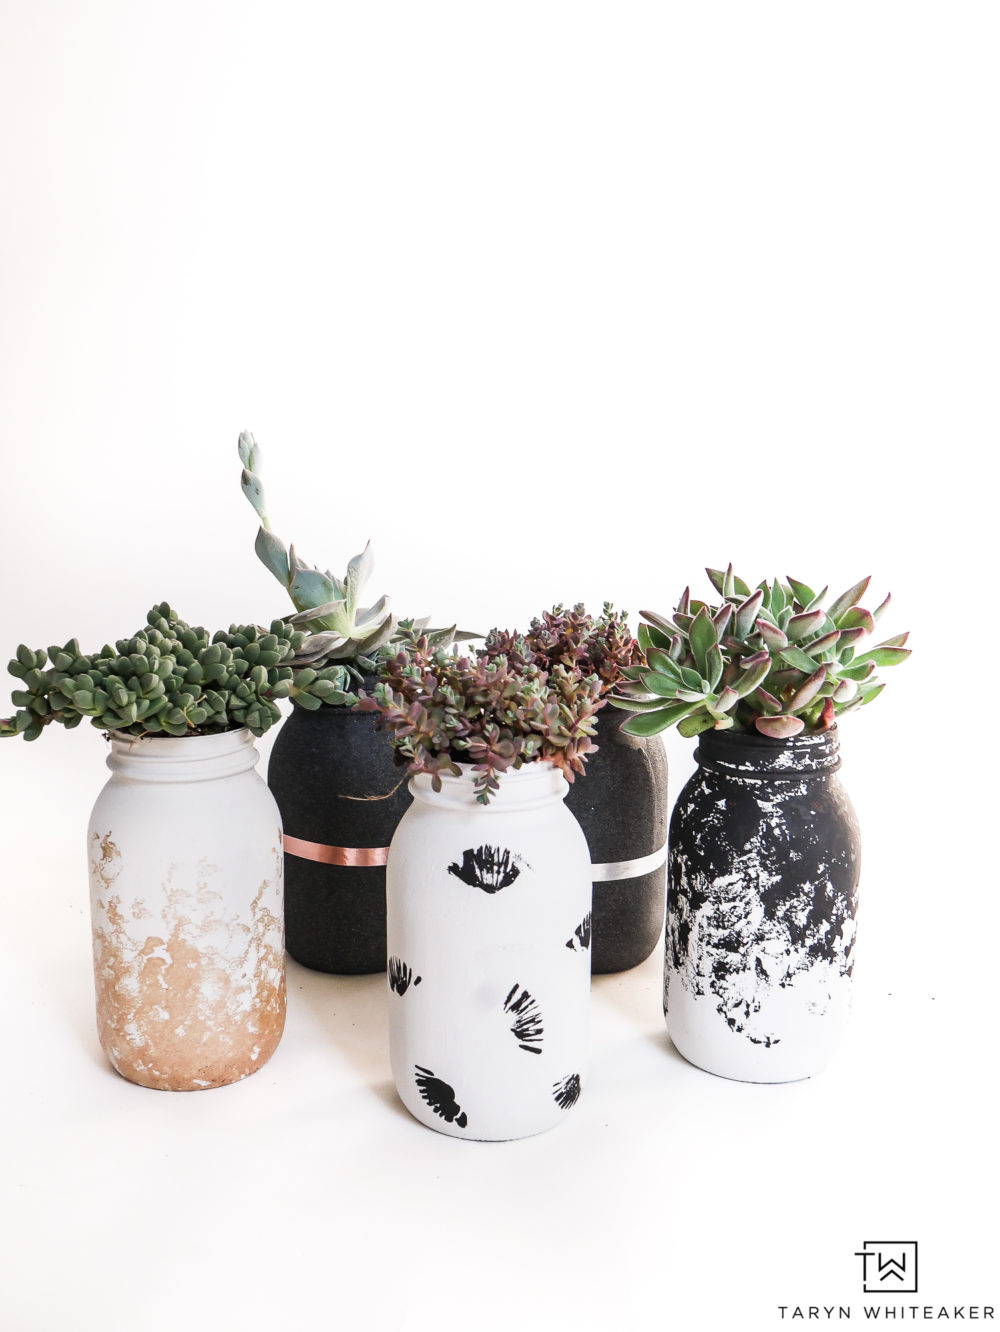
When painting ball jars, you need to make sure the paint you are using is specifically good for glass. Otherwise you risk the paint completely peeling off. Trust me, it’s happened to me before! This Vintage Decor Paint by Martha Stewart is SO great on glass. I started by painting three of the jars with TWO COATS of Vintage Decor Paint in Smoke . The first coat you can still see the brush strokes, but the second coat covered them all up.

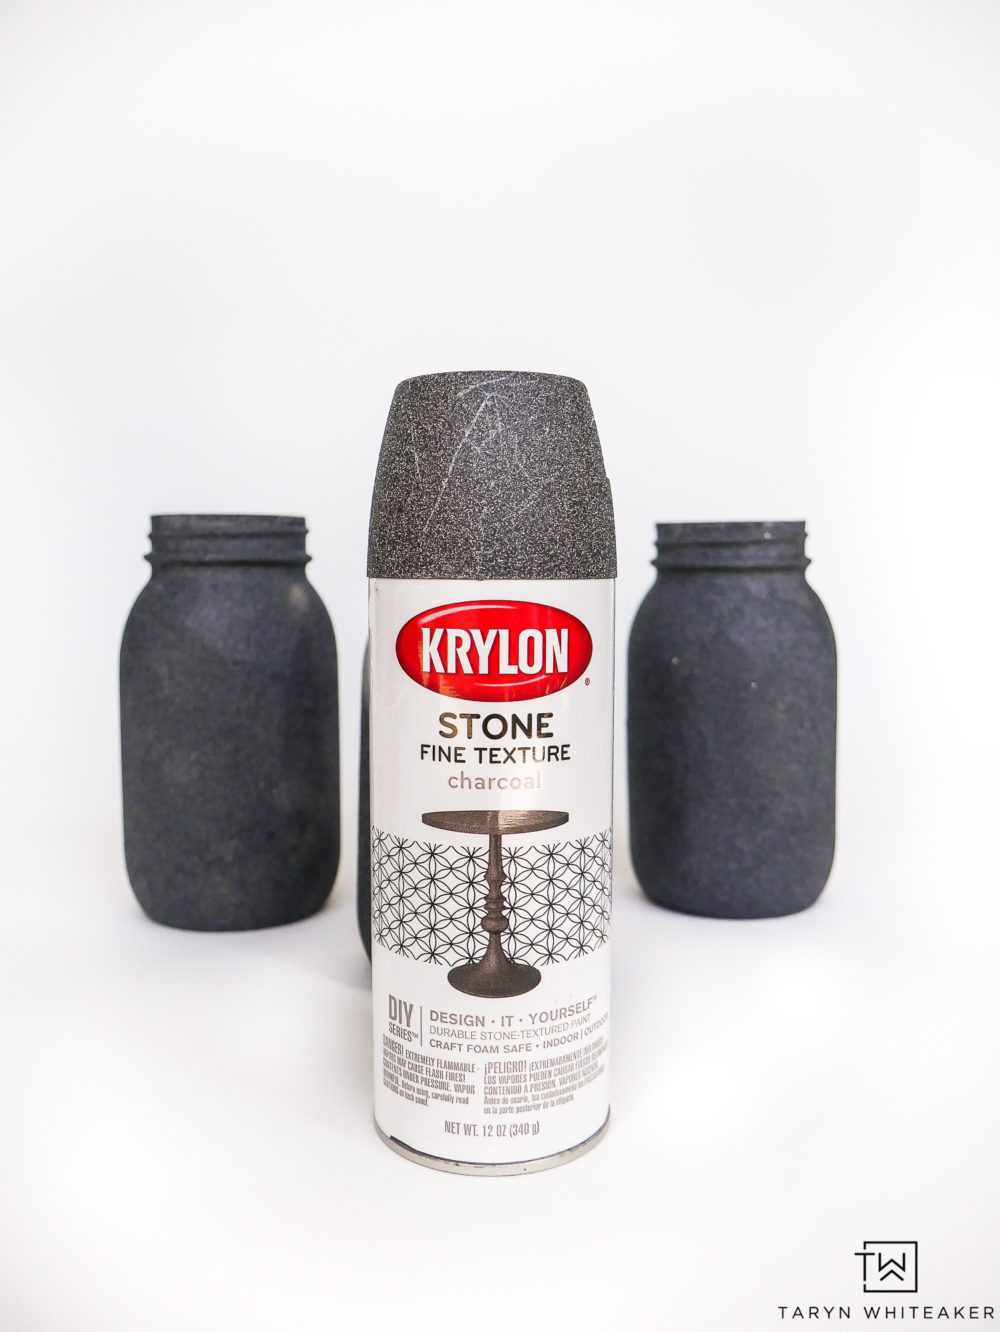
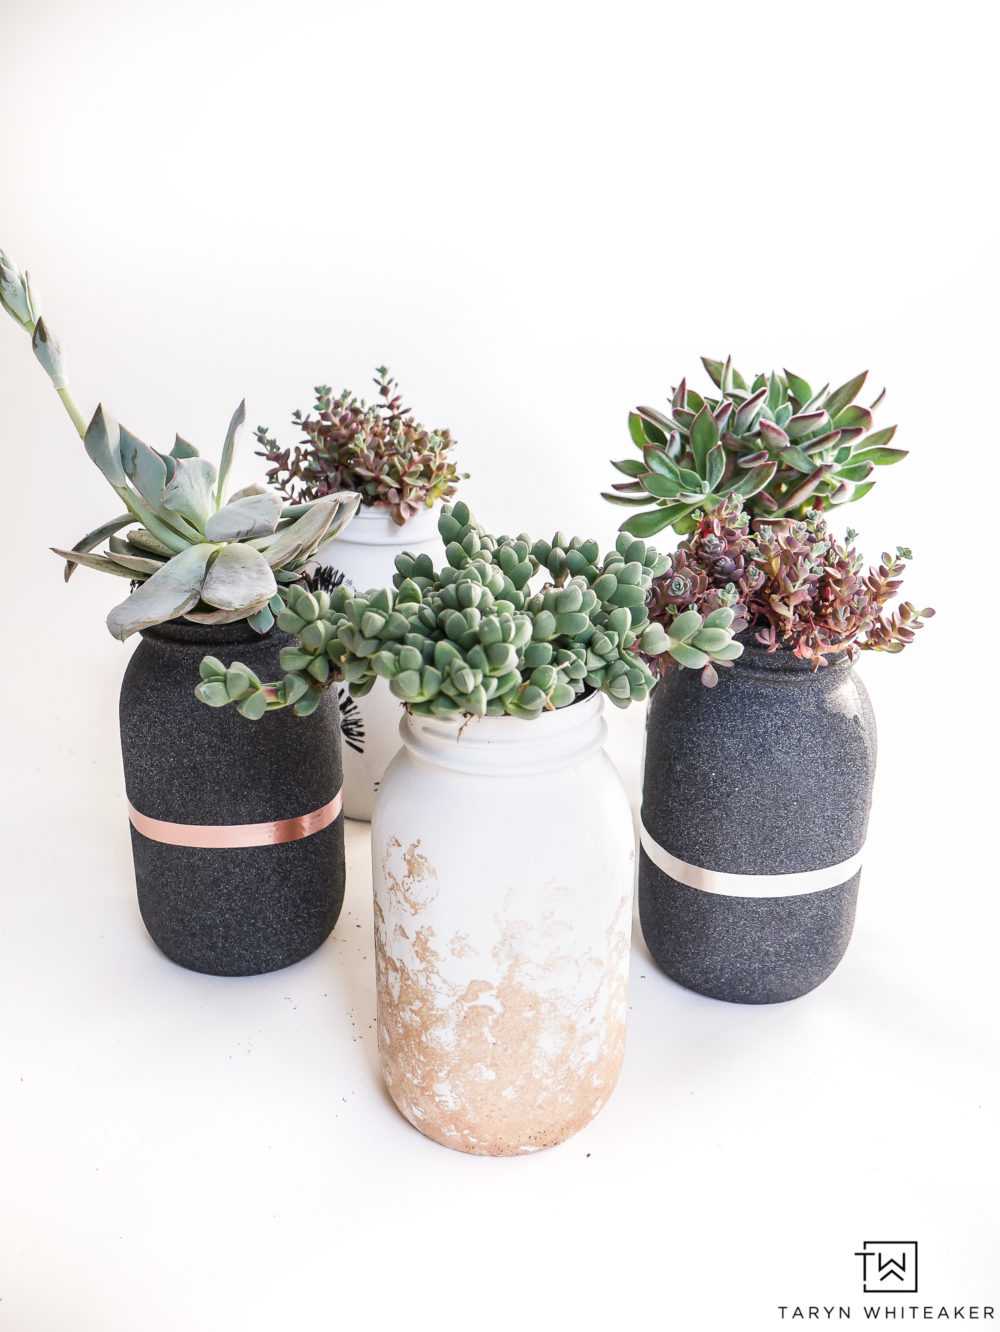
I love the look of concrete planters and have always wanted to try this Krylon Stone Texture in Charcoal .  It was extremely easy to use and I was amazed at the texture. It really feels like a true stone or sand paper. This added so much texture to my jars, I love it.

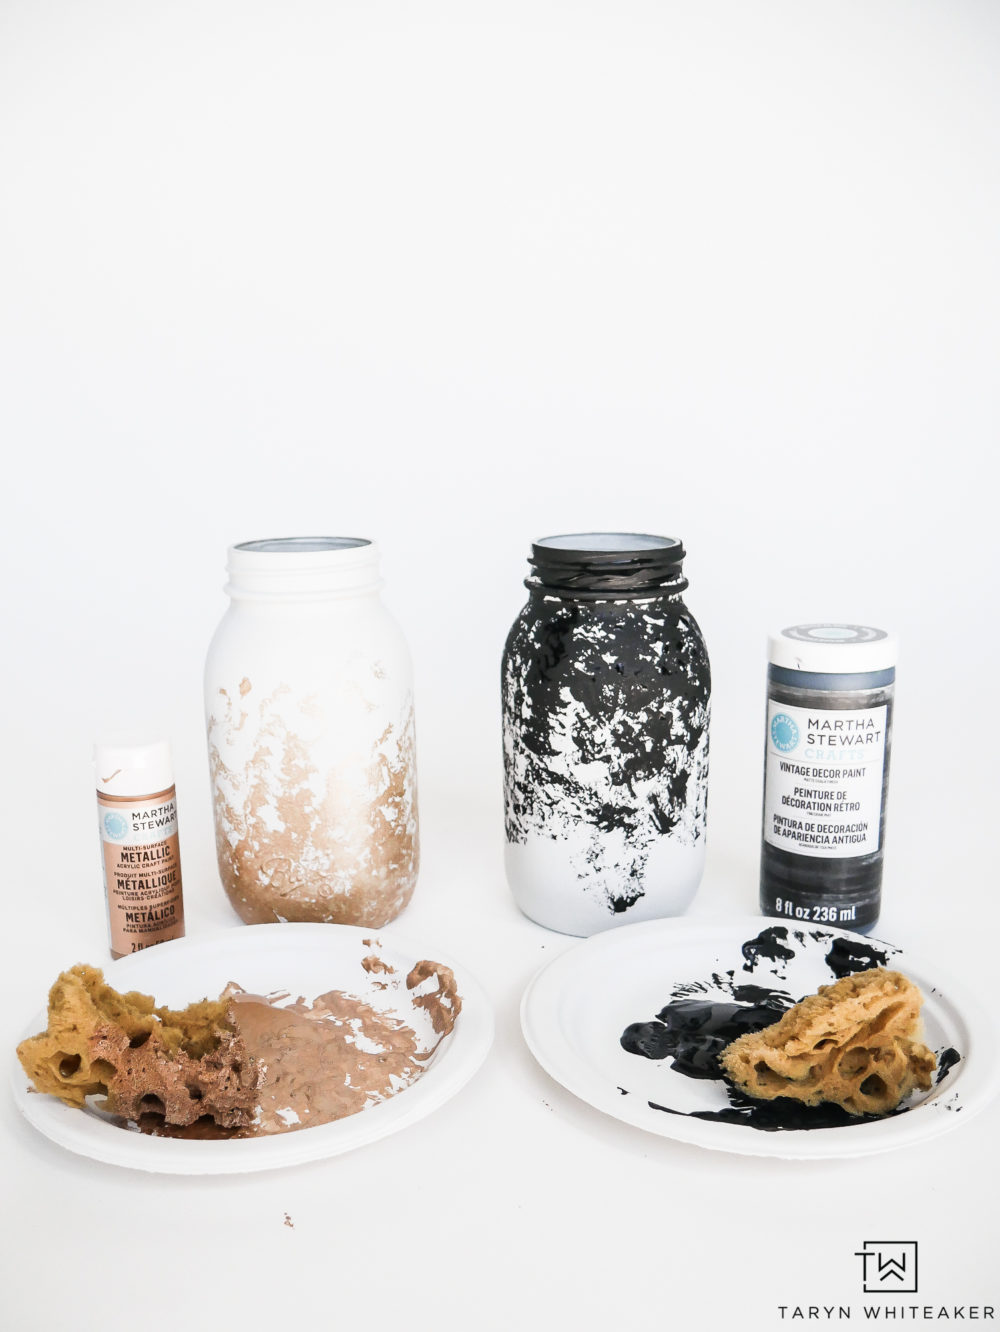
I let the jars dry overnight and then got started on the detail work. To give these a more modern ball jar vibe I wanted to keep them simple but also add texture and organic patterns to them. I took the sponges and did a fading effect using the paint. I did them in opposite directions to create an interesting look.

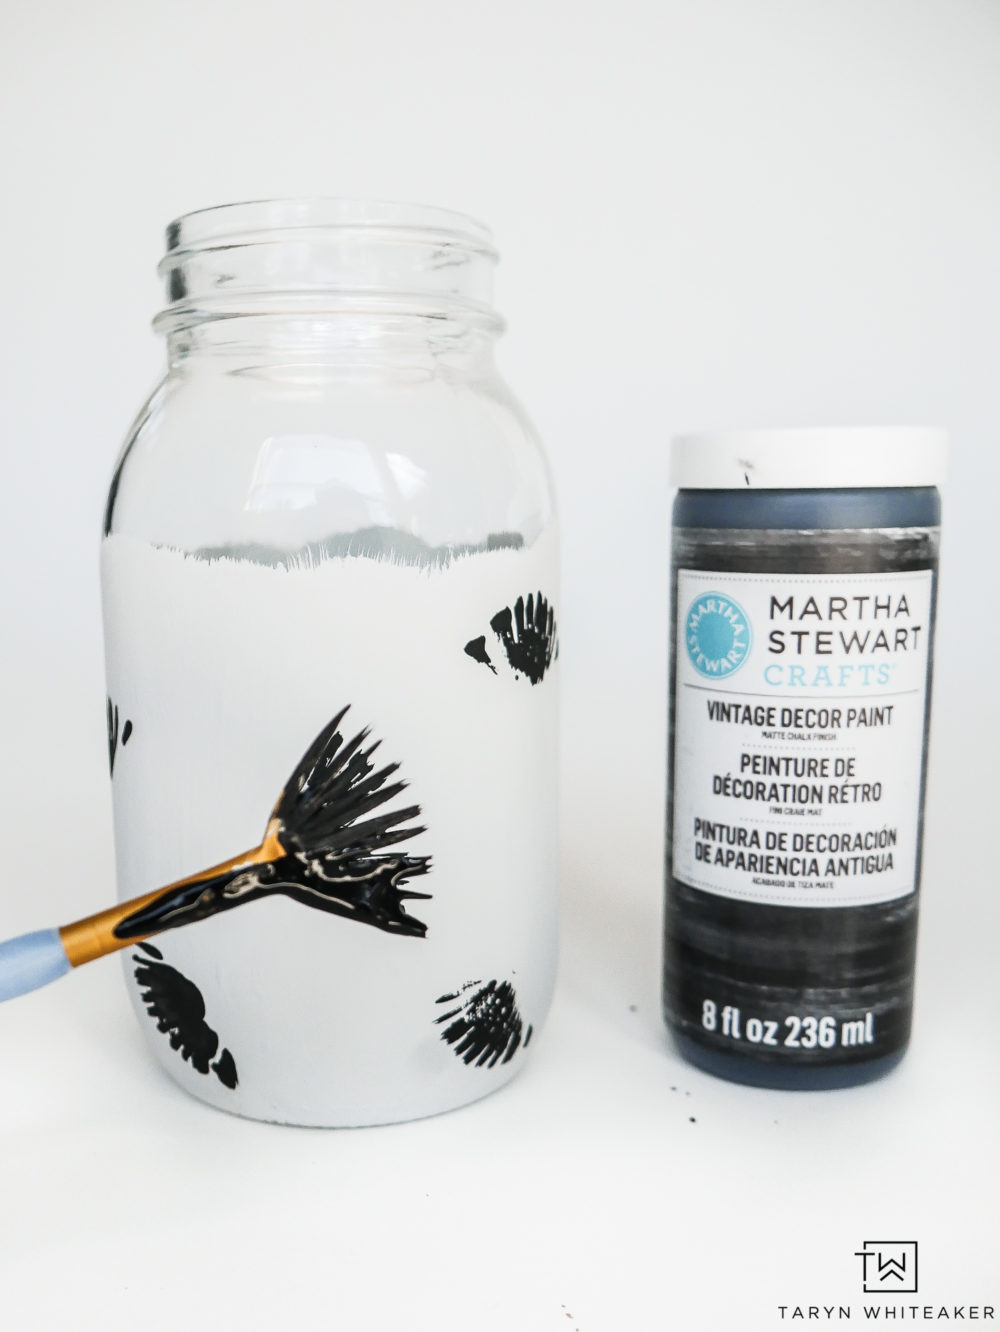
This jar turned out to be my favorite from the bunch! I used my Fan Paint Brush to create this tropical leaf print on the jars. I gently dipped it into the Martha Stewart Vintage Decor Paint in Beetle Black and then pressed it gently onto the jars.

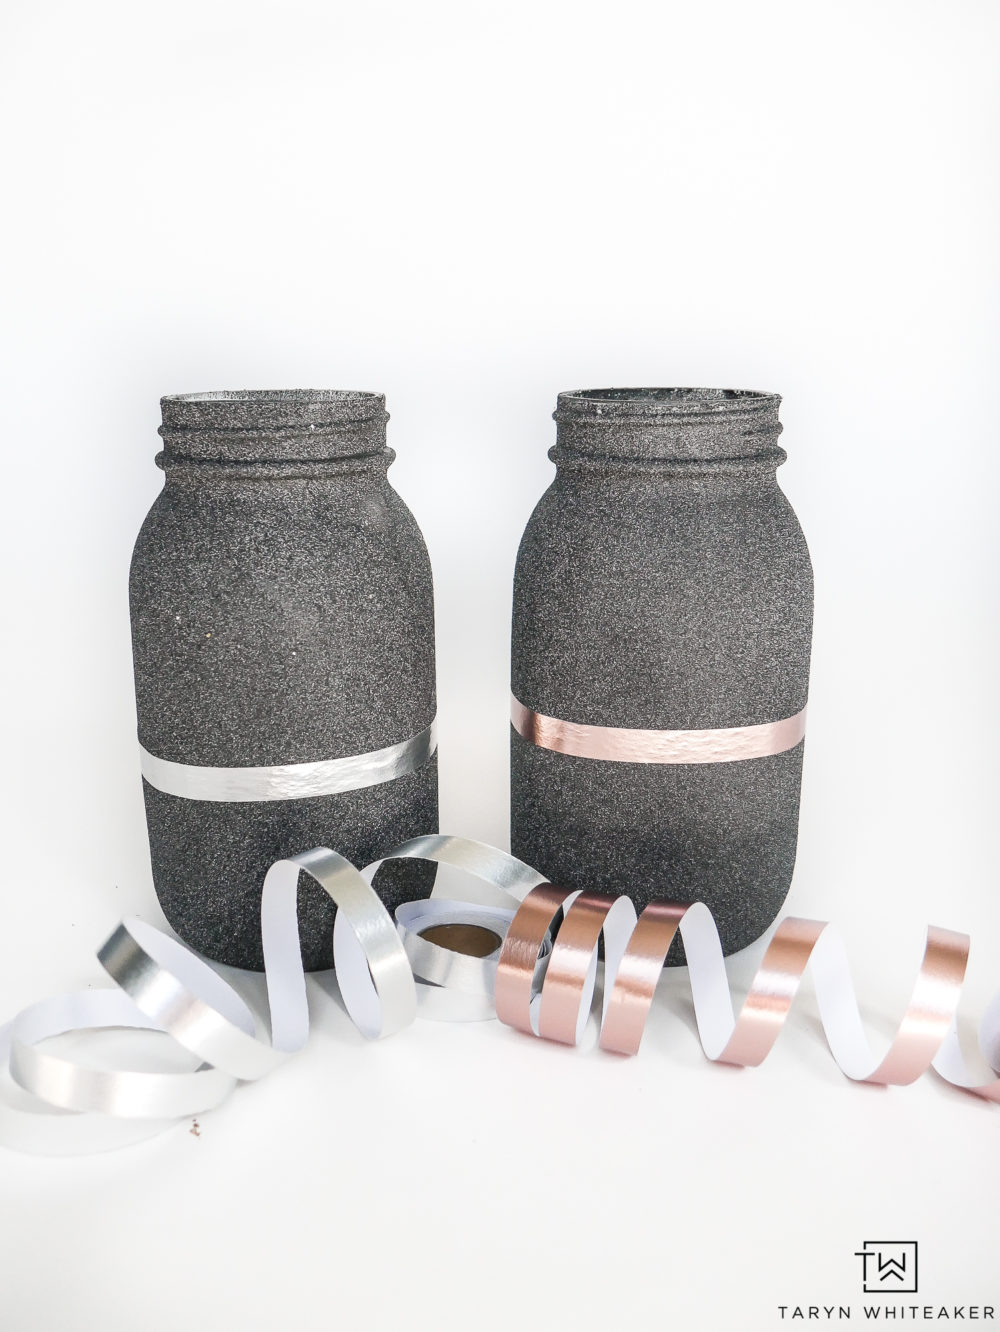
Since these jars already had so much texture from the paint and were already interesting, I kept it simple and just added a single band of Metallic Washi Tape to finish them off. I love how it looks like a metal band.

Jar Succulent Planters

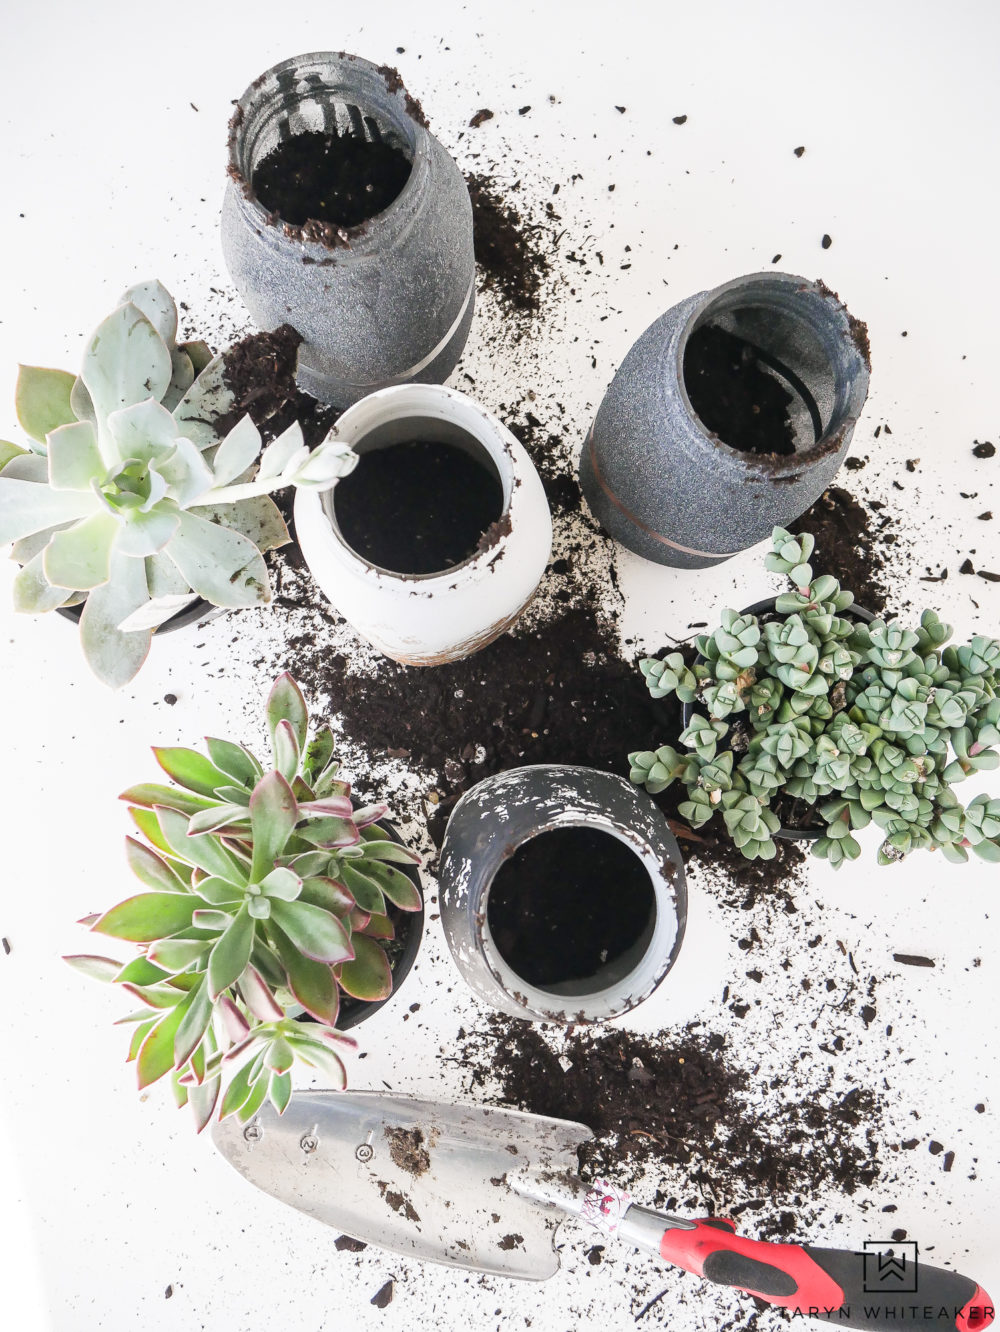
Next up, I filled them with some pretty succulents!

Black and White Jars

I spent a lot of time on this collection to get it right, to give it balance and create the modern jar look I was going for.

The possibilities with these are endless and I hope you like this different take on them.

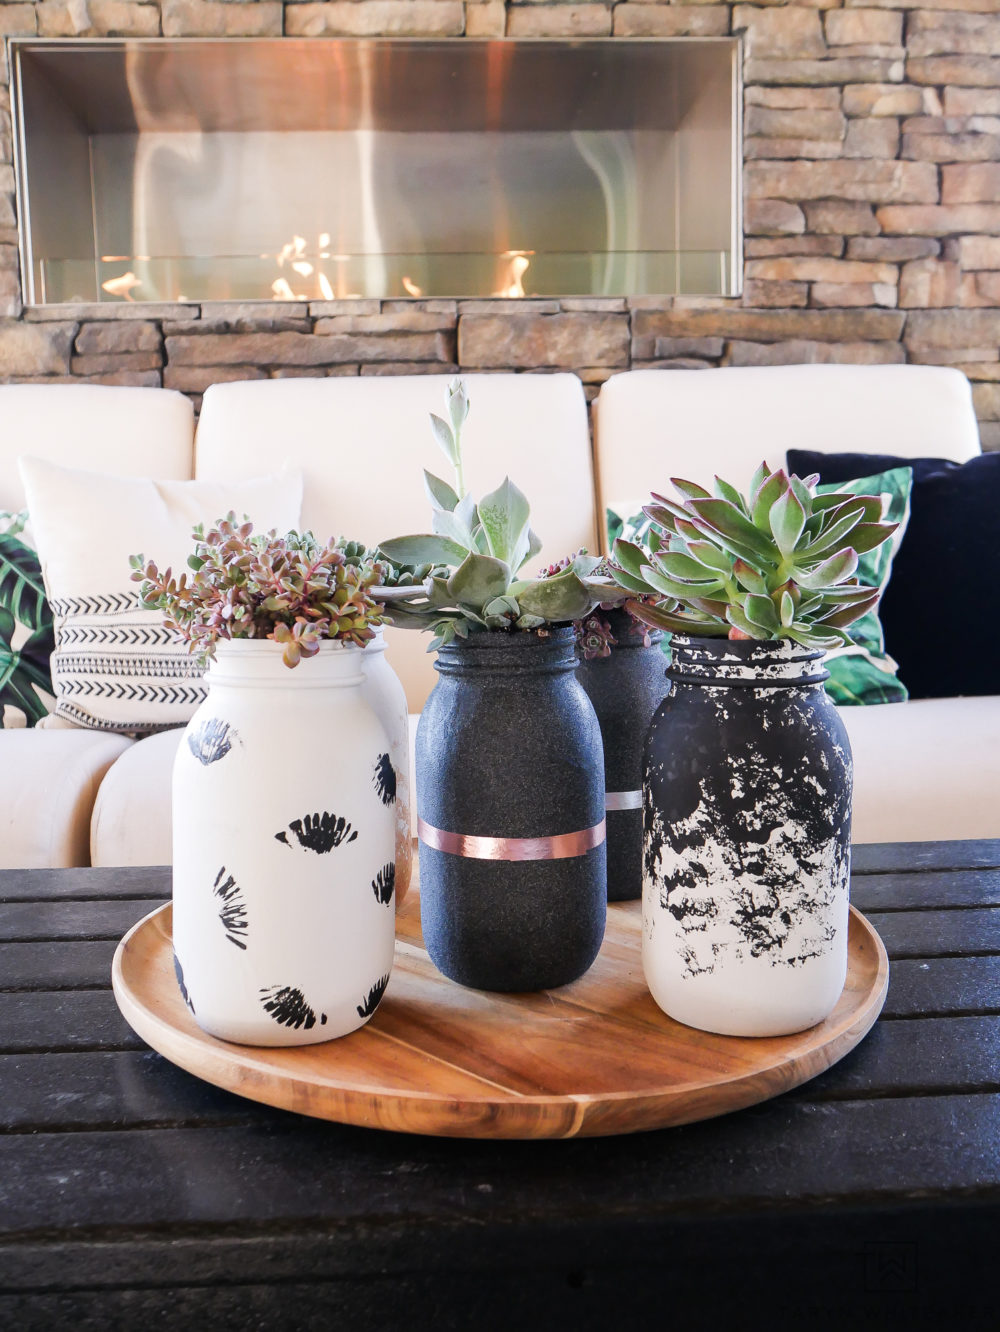
We are already enjoying them outside in our outdoor living space! Can’t wait to see them grow.

You can head to your local Michaels to pick up your own supplies, but don’t forget to download your coupon first! They always have the best deals!

About Taryn Whiteaker

Hi! I’m Taryn! The voice behind Taryn Whiteaker Designs. I launched this brand over 11 years ago when I became a stay-at-home mom. What started as a small craft and mom blog eventually grew into a full time design and DIY site. My goal has always been to inspire others (especially women!) with design ideas, DIY tutorials, entertaining ideas and give you the tools you need to complete them yourself!

You May Also Like:

  • Modern English Country Backyard-2
    Modern Spring Planter Ideas
  • Vintage Modern Home Theater _TarynWhiteakerDesigns-8
    Vintage Modern Home Theater Decor
  • Modern Transitional Family Room - Neutral Earth Tones
    Modern Transitional Family Room Decor
  • Coffee Table Books
    My Favorite Modern Coffee Table Books
  • IMG_3518
    Organic Modern Dining Room Updates
  • Modern English Country Backyard-32
    Modern English Country Backyard
  • TarynWhiteakerDesigns_PlanterBox-16
    DIY Modern French Country Planter Box
  • IMG_3568
    Moody Modern Halloween Table Decor

Filed Under: ALL POSTS, Crafts & Sewing, DIY Home Decor, DIY Projects, Seasonal Decor & Crafts, Sponsored, Summer

Reader Interactions

Leave a Reply Cancel reply

Your email address will not be published. Required fields are marked *

Primary Sidebar

Looking For Something?

CONNECT

Meet Taryn

Taryn Whiteaker

Hi and welcome! I'm Taryn and the voice of style behind Taryn Whiteaker Designs. Sharing our journey of modernizing our European style home in Dallas. Thanks for stopping by and don't forget to subscribe to my mailing list to get all the latest updates! Read more...

Footer

THIS SITE

  • Home
  • About
  • Contact
  • Partner with Taryn

Privacy Policy

If you are interested in learning more about data that might be collected by this site you are encouraged to read the Privacy Policy

COPYRIGHT POLICY

All images on this site are copyright of Design, Dining and Diapers, LLC. Unless otherwise noted. You may not use these images without written permission. If you would like to feature a project shown on Design, Dining and Diapers you may use a maximum of 2 images and include a visible link back to the project.

More From The Gram

tarynwhiteaker_designs

Taryn Whiteaker Designs
I finally have a drying rack! Here’s how I built I finally have a drying rack! Here’s how I built the custom drying rack for our laundry room to make it more functional. My @worxtools Switch Driver and Impact Driver were the real MVP’s of this project! Saving me time and energy. I love how it now doubles as a shelf to display antiques I’ve collected throughout the years and also helps me keep this place organized! 

Comment SUPPLIES for everything I used to build this piece! 

#worxtools #partner #dıy #diyhomedecor #homerenovation
Comment SHOP for all these pieces! What every 40-s Comment SHOP for all these pieces! What every 40-something girl is looking for this summer: cute, comfy, and sweat ready outfits for summer travels! I picked up these cute items from @halara_official to mix and match and I am obsessed with the material. Most of the items are made out of athletic material and are so soft. Perfect travel outfits, you still feel cute but very easy fabrics.

The price points are 👌🏼, almost everything is under $50! 

Use my code taryn2:for 20% OFF full-price items or Super code taryn26 : Spend $120 → 10% OFF / Spend $150 → 12% OFF
#halara #over40outfits #travelfit #traveloutfits #partner
Almost done! Since we vetoed the wallpaper on the Almost done! Since we vetoed the wallpaper on the ceiling, I still wanted a pop of pattern and decided to go with a little peel of a mural behind the washer and dryer! Just what it needed! 

Comment LAUNDRY to shop this space so far! 

#homedecor #diyhomedecor #wallmural #laundryroommakeover
It all started as a vision… comment REVEAL for a It all started as a vision… comment REVEAL for all the details on this bold, teen sports bedroom! 

#homedecor #diyhomedecor #kidsbedroom #sportsroom #beforeandafter
For the record he was very nice and helpful, but h For the record he was very nice and helpful, but had very little faith in me. 😉

PS. Happy Mother’s Day to all the strong, loving and beautiful mommas ❤️ 💪🏼 . 

#diyhomedecor #homedecor #renovation #laundryroommakeover
One of my favorite places to be. After 4 years in One of my favorite places to be. After 4 years in this house the porch swing is still in perfect condition, just time to replace the cushion and add some fresh outdoor pillows! 

Comment SWING for all the sources! 

#homedecor #exteriordecor #outdoorprojects #potterybarn #ballarddesigns
Still one of my favorite transformations to date…. 

Comment BEDROOM for all the sources. 

#homedecor #diyhomedecor #boysbedroom #kidsroom #homedesign
Comment SPRING and I’ll send you all my fav laye Comment SPRING and I’ll send you all my fav layered looks for spring, all affordable and budget friendly. Pieces I keep wearing over and over this season! 

#amazonfashion #amazonfinds #over40fashion #springoutfit #easyoutfits
Laundry room update number two! Walls have been sk Laundry room update number two! Walls have been skim coated and primed, first coat of paint on walls and trim. Cabinets are off and getting prepped… next up: installing dark wood ceiling, painting cabinets, hanging a surprise wall mural, and building a custom drying rack! 

Paint color: BM Cromwell Gray 

#homedecor #cromwellgray #diyhomedecor #homerenovation #diy
Follow on Instagram

Copyright© 2026 · Brunch Pro Theme by Shay Bocks · Hosting by 3116 Digital