Disclosure: This post is sponsored by National Hardware. All opinions and creative ideas are my own.
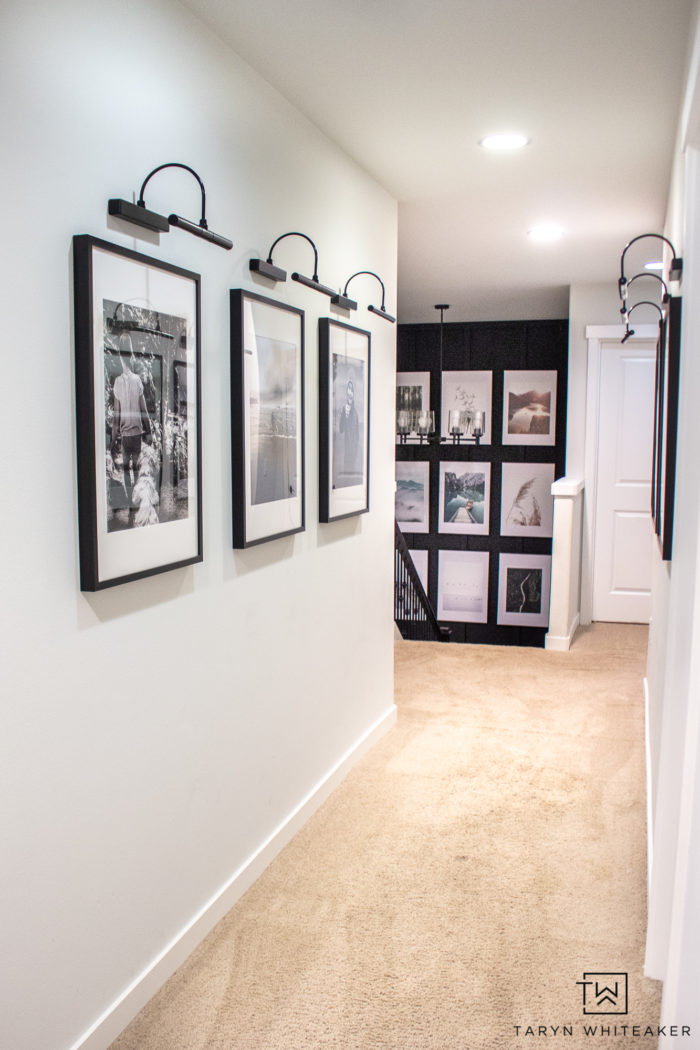
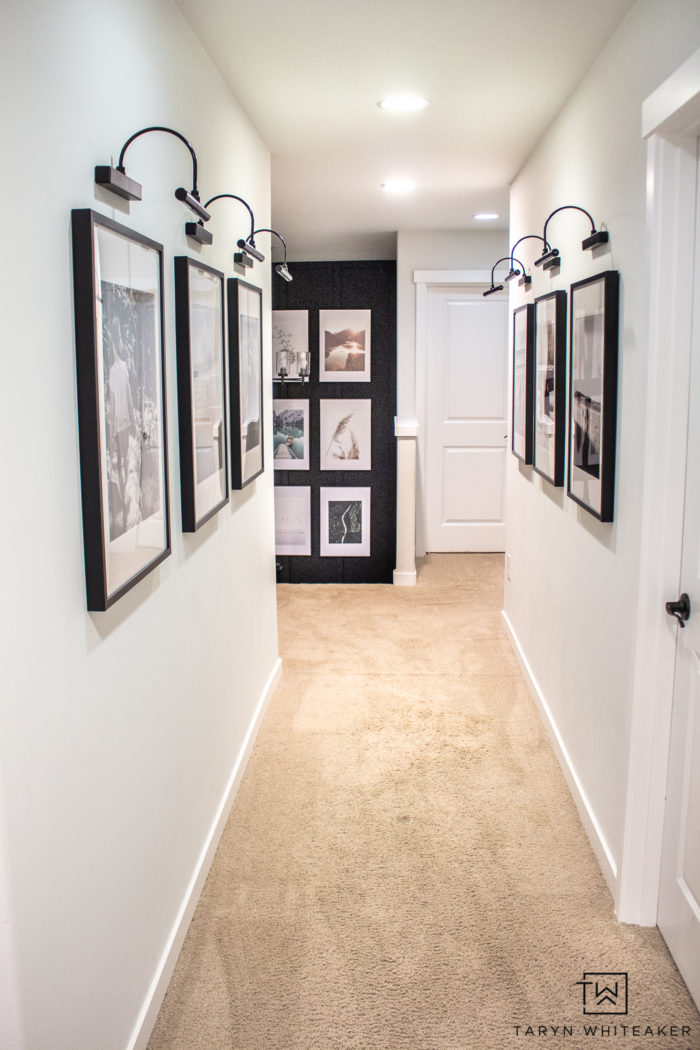
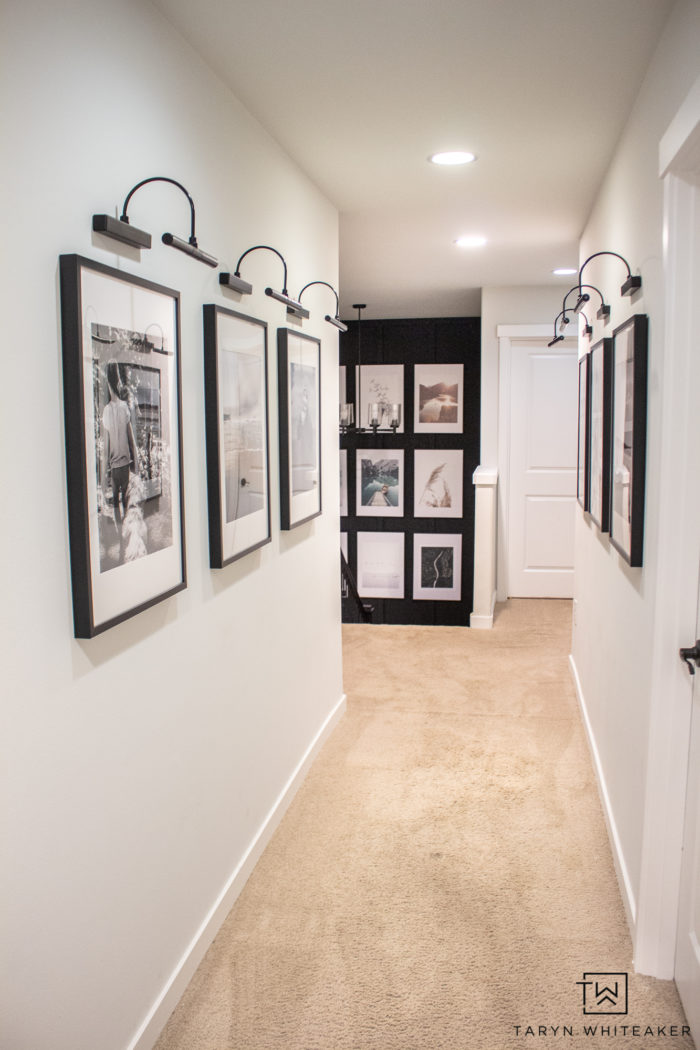
I’m squeezing in one last DIY project of 2020! I’ve had this makeover on my list for a LONG time and I’m so excited to finally tackle it! It’s another one of those spaces that almost everyone has, and don’t always think about doing something with. But once you do you wonder what took you so long? Our upstairs is one long hallway, one boring beige hallways. I thought it was time to spruce it up a bit and I am in love with how it turned out. I’m sharing the full reveal of our black and white hallway gallery wall today, you don’t want to miss out on a big tip for hanging pictures!
Black and White Hallway Gallery Wall
I want to add more personal photos to our home but I also want to be really intentional about it. I still want to maintain the overall aesthetic of our home but find a way to add more pictures of the kids and our favorite memories.
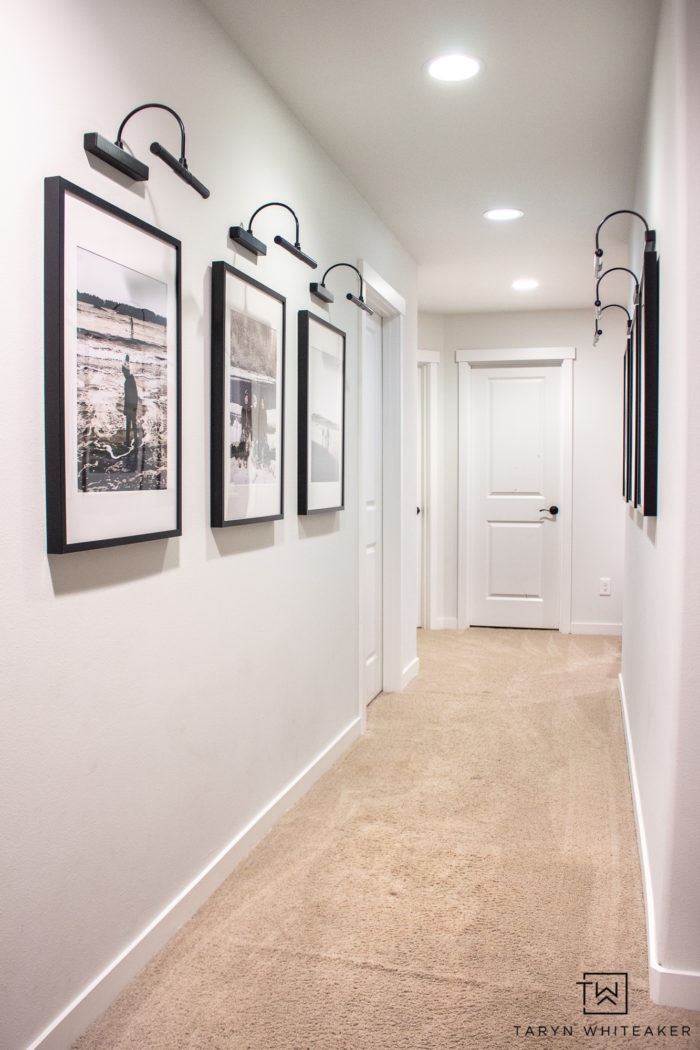
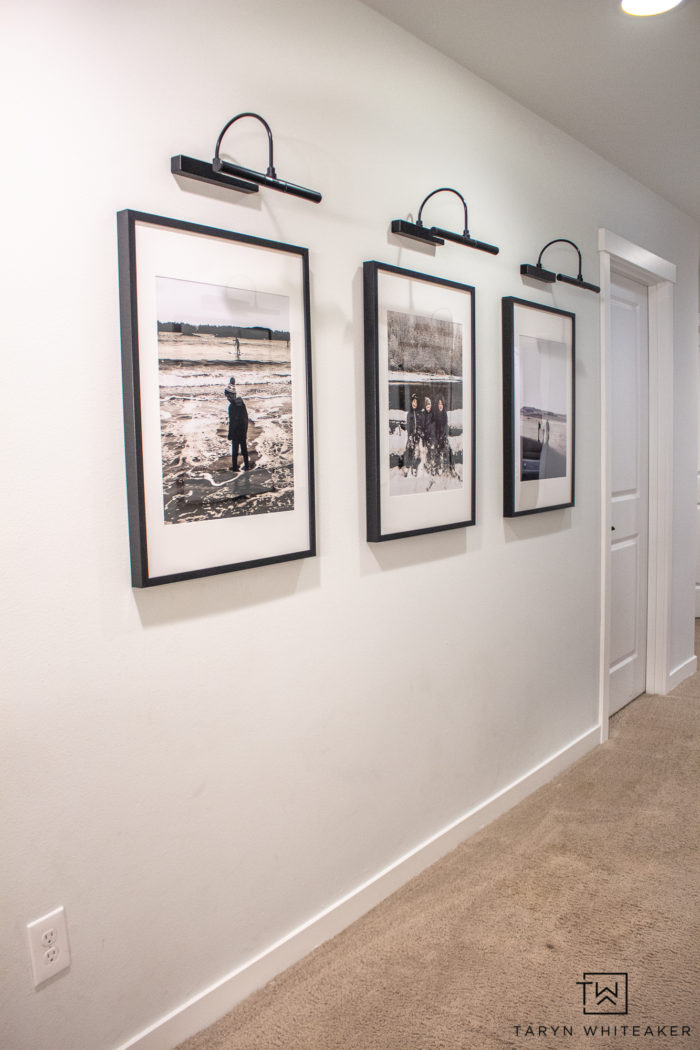
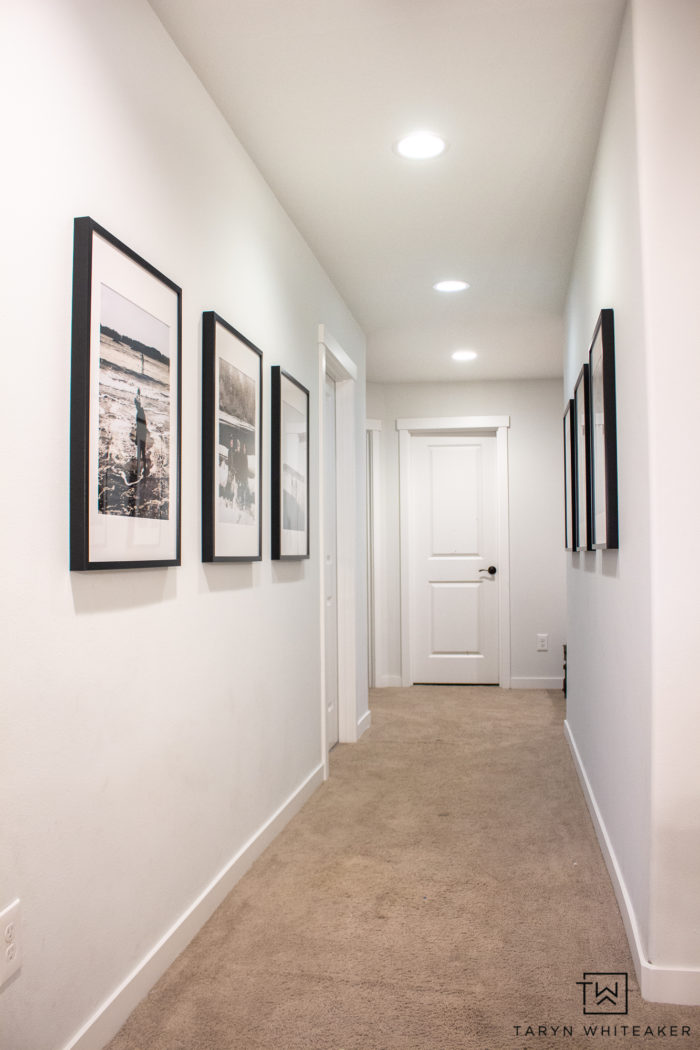
Creating this gallery wall down the hallway to all the bedrooms was the perfect place to add some of my favorite photos fo 2020 in 20 X 28″ matted frames and make it a little less boring. The love the contrast of the black and white, it feels modern yet classic at the same time.
So let’s dive in a little more to the details and how I put this together.
Tips For Creating A Hallway Gallery
Supplies

- Level Art Tool from National Hardware
- Picture Hanging Kit From National Hardware
- IKEA RIBBA 20X28″ Pictures Frames (similar ones on Amazon to what I used)
- Wireless Display Sconces
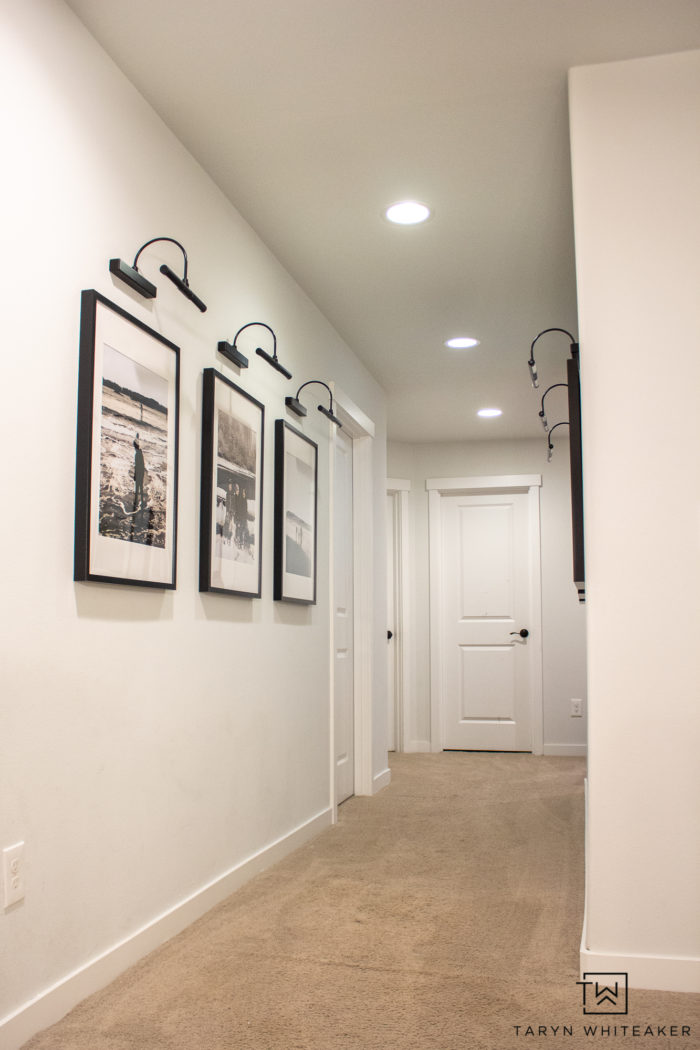
Before Hallway
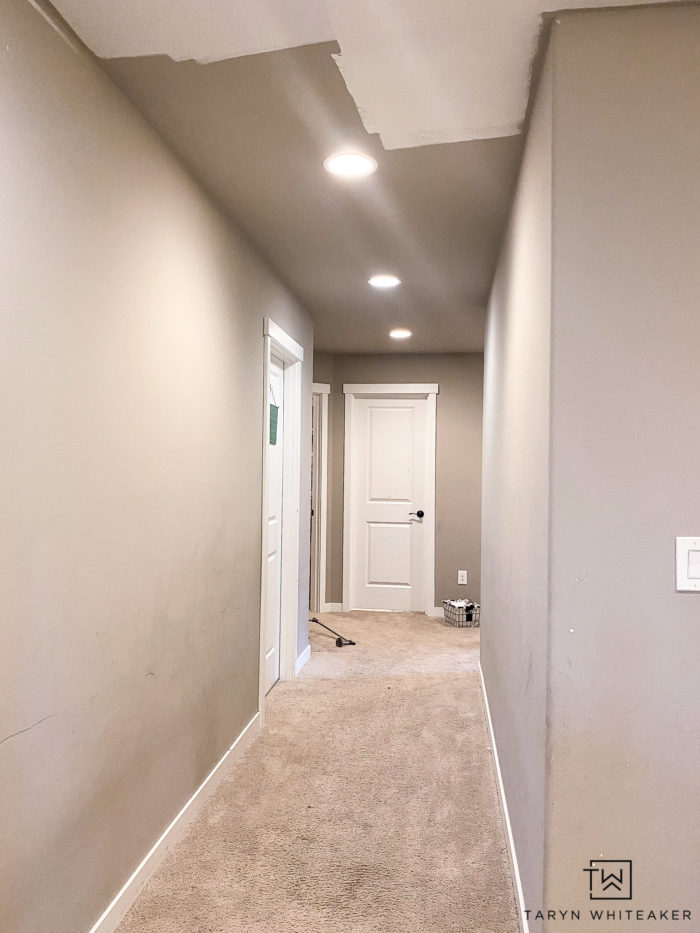
This is how the hallway looked before! It was a big beige box. So boring! Just waiting to be decorated.
In February I gave the ceiling and walls a nice coat of white paint to match the rest of the house. That feels like years ago at this point, but it instantly felt so much brighter. Just took me a little longer to get to the decorating!
Tips For Hanging Pictures
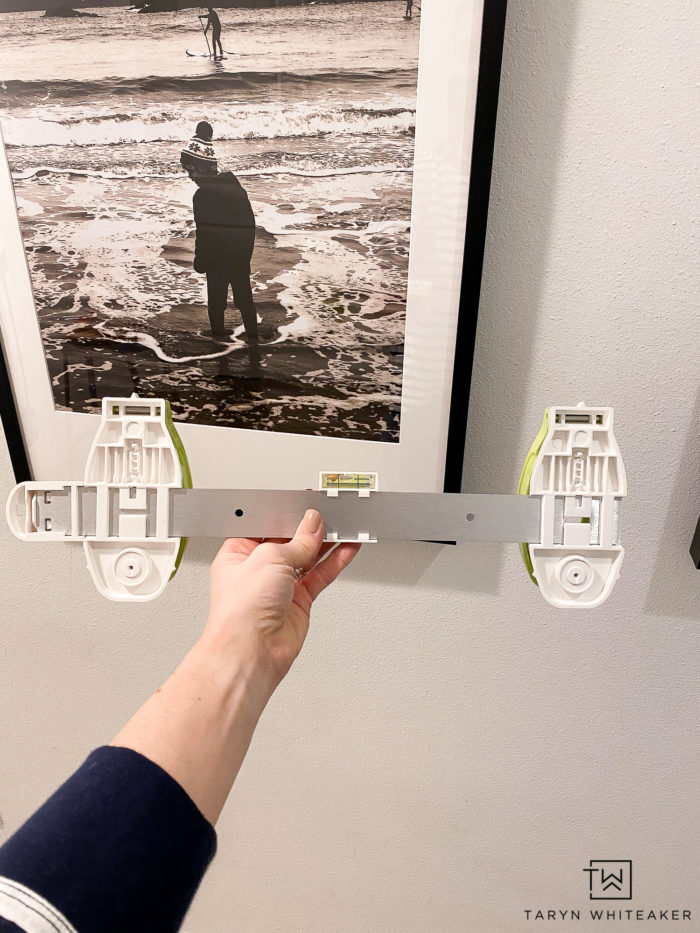
Ok do you guys want in on my newest secret for hanging pictures? This Level Art Tool from National Hardware is honestly one of the coolest ‘toys’ I’ve used lately. I will be honest I was a little skeptical at first to see how this worked and if the nails would be secure. I was blown away.
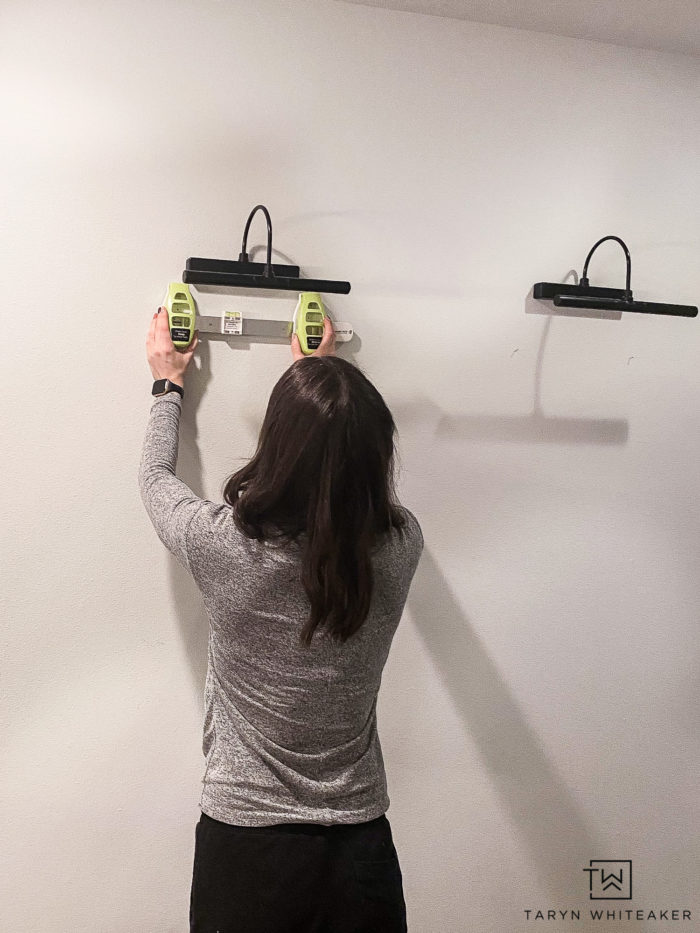
This tool has a built in level and also comes with nails to hang your pictures. You simply insert the nails in the small holes on the back, center it and make sure it’s level, and give those buttons one hard push. Seriously, this tool is the only thing you need to hang photos on your wall. Ok, maybe a measuring tape. But that’s it!
The nails go in really tight and at a great angle to insure they go into the drywall securely. It says each nail can hold up to 5 lbs, my pictures weigh 4 lbs (yes, I weighed them), and I used two nails. They feel secure and so far the nails haven’t slipped at all.
You can also use this awesome Picture Hanging Kit from National Hardware to hanging your pictures if they don’t have proper hanging gear on the back.
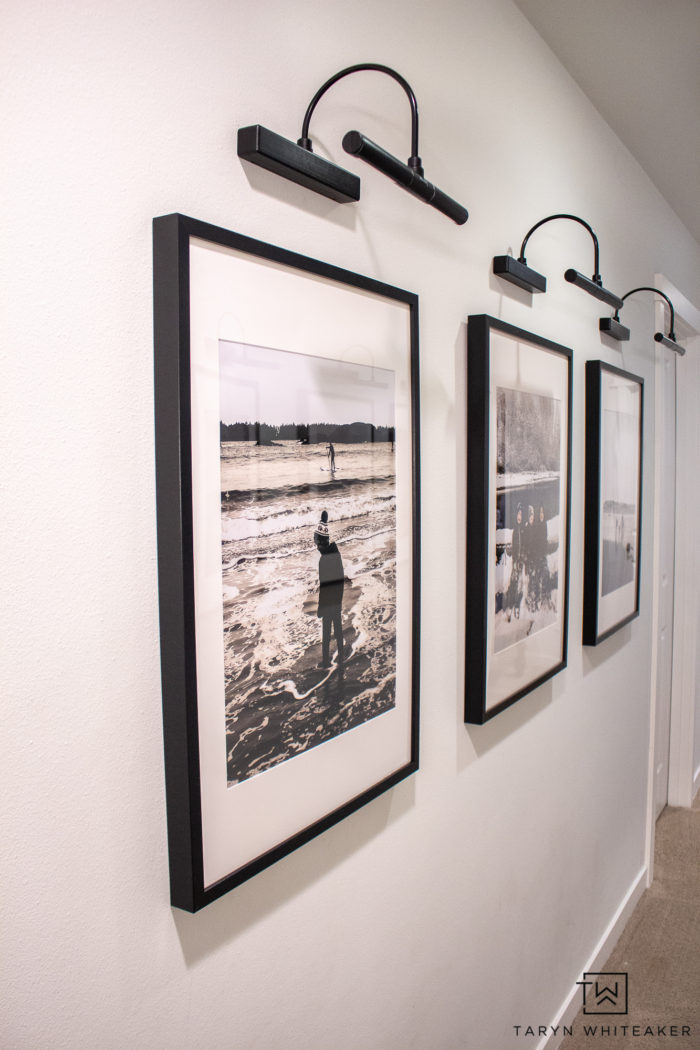
I used 20 X 28 matted frames with black and white family photos. To finish off the look, I added some wireless sconces! These are AMAZING!
Here is a quick video of the install!
[adthrive-in-post-video-player video-id="ulanhPOU" upload-date="2020-12-28T17:22:26.000Z" name="DIY Hallway Gallery Wall " description="" player-type="default" override-embed="default"]Black and White Gallery Wall
I am so glad I finally did something with this space! I love how it turned out. I feel like our house feels a lot more polished now that this space is done. It really is all about those little details that makes a home feel like it’s all coming together!
As I walk down this hallway I am reminded of so many wonderful moments with our kids. I really need to add even more photos around our home this years. Let’s put it on the 2021 goal list!
For more great hardware tips and tricks, head to National Hardware to see what new tools they offer!
About Taryn Whiteaker
Hi! I’m Taryn! The voice behind Taryn Whiteaker Designs. I launched this brand over 11 years ago when I became a stay-at-home mom. What started as a small craft and mom blog eventually grew into a full time design and DIY site. My goal has always been to inspire others (especially women!) with design ideas, DIY tutorials, entertaining ideas and give you the tools you need to complete them yourself!


Looks beautiful! Can you tell me where I can find the wireless sconces?
Hi! Here is a link https://amzn.to/37TDQJP
Hi Taryn looks fabulous ….love the black and white . Do you mind sharing where you got the wireless sconces. Many thanks
Hi! No problem, here is a link to the sconces https://amzn.to/37TDQJP
Looks beautiful!
Do you mind telling me where you got your pictures printed that large? Going to try and recreate!
Hi! I had these ones printed on Shutterfly I have also used mpix more recently and really liked how they turned out!
I’m struggling to pick out what size pictures to get off of Shutterfly or Mpix, the frames you posted say 14×22 do you mind sharing what you used for this project and the boy’s room sizing wise? I can’t decide and don’t want to mess it up! lol thank you!
Do you have a link to the picture frames?
Here you go! https://amzn.to/3o1zFkO
Hi I’m interested in the Black and White Frames from IKEA. I can not find them in that particular size. Could you share the link. Thank you.
Hi! Here you go! https://amzn.to/3o1zFkO
Interested in the brand and color white for walls and ceiling. I like the contrast between white trim.
Do you have the color info available?
Hi! The wall color is SW Reserved White and the trim is SW Pure White
Hi what size pictures did you print?
Hi! I believe they are 16X20
Beautiful! How did you decide on the spacing – both in between the frames and at the ends (between the last frames and nearest door frame)? Would you mind sharing your specific spacing, or any equation to use? It looks great!
Hi! I always start in the middle of the wall, so the design is centered. Then looked at portions. There is 9.5 inches between each frame.
Hello Taryn, I just came across your design and I love the setup. Im going to recommend your design to our client. I do have 1 question though, where did you locate your chandler? Thanks in advance!
HI! Here is the link to our chandelier. https://amzn.to/3IetLbe
Hi Taryn, what site/company did you use to upload and print your personal pictures (and to be edited b&w?)
Hi! I had them printed at Shutterfly online. I believe I converted them to black and white through LightRoom edited software but I am positive you can do it when uploading them through Shutterfly as well.
Hi Taryn,
Love the gallery wall. I am currently designing one myself and saw yours as the top inspo. I was wondering if you have any tips in regards to whether the frames should directly reflect each other on opposite sides of the walls or can they just be centered on that particular wall itself. Thank you!!
I have a similar question. Due to where we have door frames in our hallway, my walls are different lengths so it isn’t possible to hang frames at the same spots on each opposing wall. Suggestions on whether on the aesthetics of having the frames mirroring each other exactly opposed to centering them on each separate wall? Thank you!
Hi! I would center them on each wall!