Disclosure: This post is in partnership with The Poster Store. All opinions and product selections are my own.
Creating the perfect gallery wall can be a really daunting task! From how to pic the right pictures, the right size for the space, the arrangement and how high to hang them! There are a lot of things to consider when planning our your gallery wall and the key word right there is PLAN. Today I want to share some of my tips for creating a gallery wall!
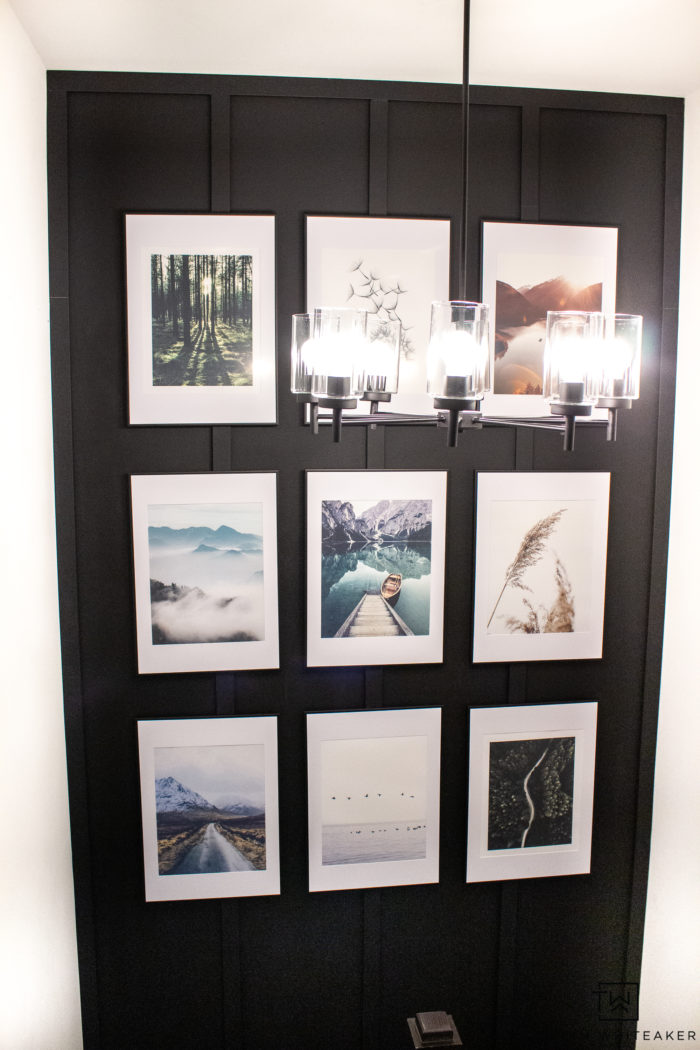
I have struggled for 5 years with what to do with this space in our staircase. Do I make a window? Do solid stone wall or add wallpaper? I finally decided on an oversized gallery wall filled with landscape prints from The Poster Store to create a really big bold look in here.

GET 30% OFF YOUR PRINT ORDER USING CODE TARYN30!
Tips For Creating A Gallery Wall
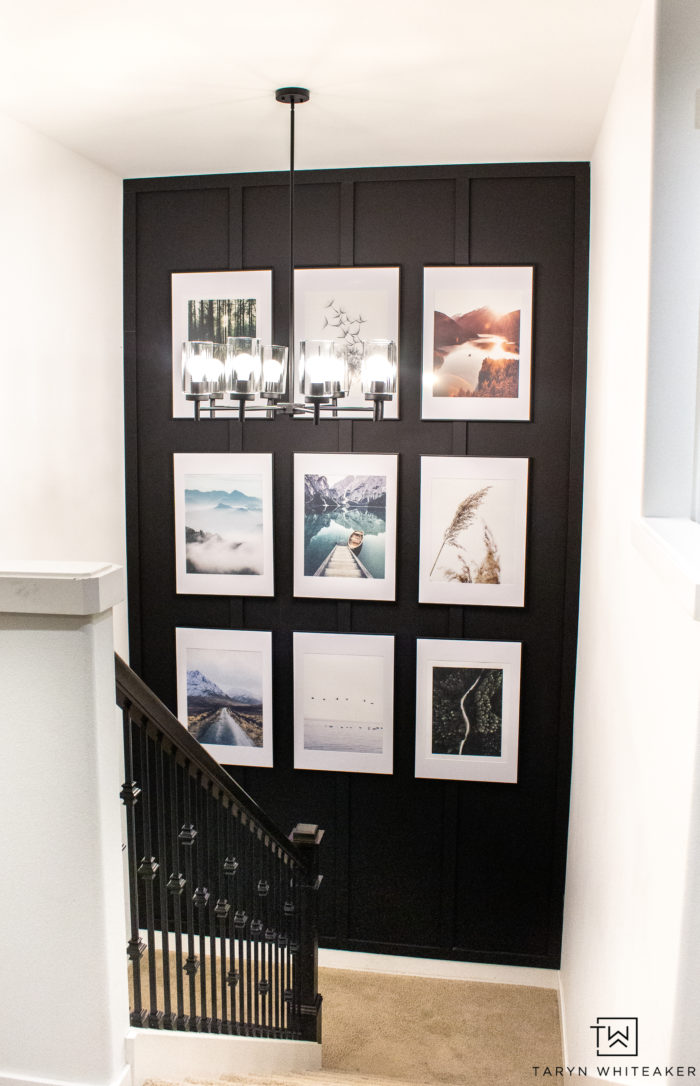
I absolutely love how it turned out. The wall now feels like a big art gallery and it has completely transformed this space. I truly believe this space came together so easily because of the amount of planning I did ahead of time. I didn’t have to arrange the prints on the floor or keep changing them on the wall, I had such a set plan ahead of time that it went up super fast.
Step 1: Save your favorite prints!
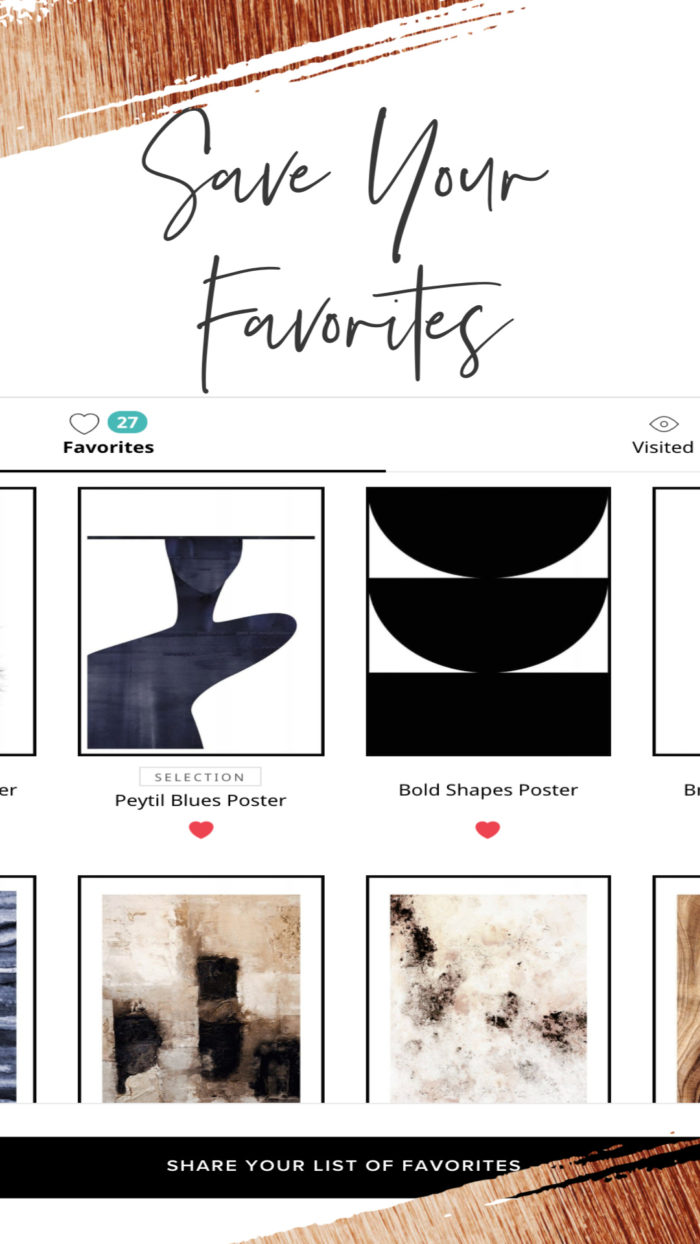
The first thing I did was jump onto The Poster Store site and start browsing through all of their prints. I used the save option to save every print that caught my eye. When I started this project I wasn’t sure if I wanted to go more ultra modern artwork or keep it landscape or even a mixture, so I just saved everything that I liked.
Once I went through the site a couple of times I clicked over to my save folder and looked through everything all at once. I started to look for any patterns or color palettes that would work well together. I edited my list a little bit and then took a screen shot of every pic so I could start my design plan!

TIP: If you are planning on doing a grid style wall like me and want the prints to all be the same size, I recommend sorting by poster size. After I had picked out some of my prints I realized they didn’t come in the sizes I needed so I had to switch some out.
Step 2: Plan Out Your Gallery Wall

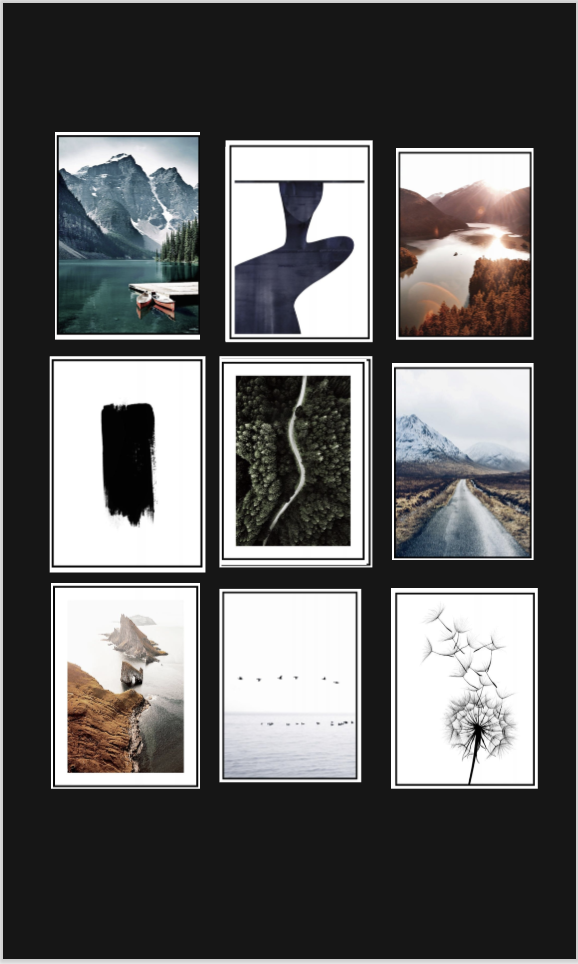
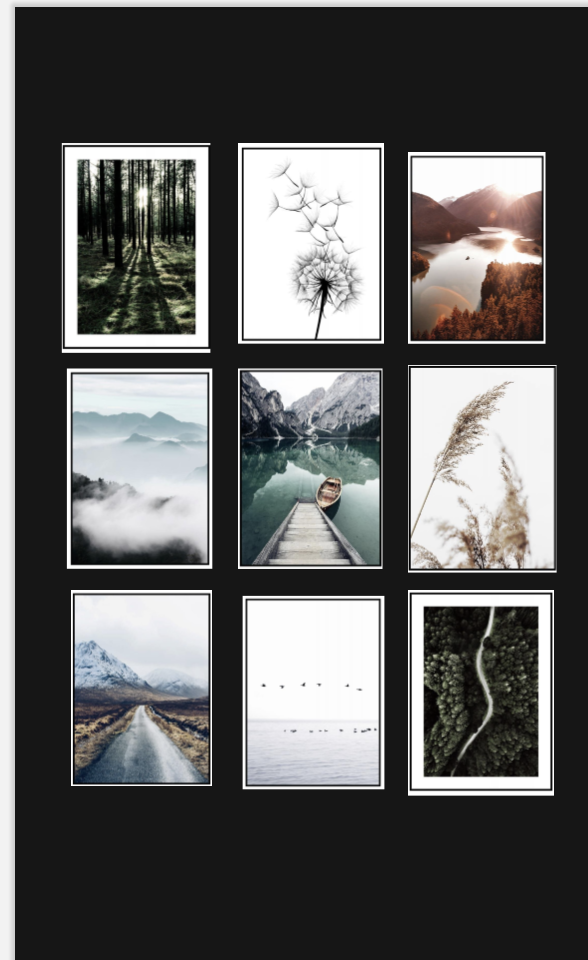
I love using PicMonkey for quick photo editing. It’s very user friendly and there is a free version. I started by creating a black background to match the size of our wall and then uploaded all my prints into the program. Having them all in once place makes it easy to see how everything will look together.
Step 3: Play Around With Picture Arrangements

At first I thought I wanted a more eclectic gallery wall with a mixture of sizes and orientations. But as I began to move the prints around I realized that this was not feeling very ‘me’. I crave symmetry and I needed to do a grid pattern.
Step 4: Pick Your Prints

Now that I have my arrangement, it’s time to choose which prints will flow well together. This was my first take. I really enjoyed the neutral tones of creams, black and blue and I enjoyed mixing some modern textures and landscape art with a few graphic pieces.
Prints:
| OCEAN WAVES|BEIGE ABSTRACT PRINT| MISTY MOUNTAINS |
| MOUNTAIN POSTER| | PETYIL BLUES POSTER| BIRDS POSTER |
| INDIGO PRINT |STAINED ART PRINT | BRUSH STROKE PRINT |
| CANOE ON THE LAKE | ETYIL BLUES POSTER | IABLO LAKE |
| BRUSH STROKE PRINT || MOUNTAIN ROAD POSTER | FOREST ROAD PRINT |
| BIRDS POSTER | DANDELION PRINT |
| FOREST SUNLIGHT | DANDELION PRINT | DIABLO LAKE |
| MISTY MOUNTAINS | BOAT ON LAKE | GRASS PICTURE |
| MOUNTAIN ROAD POSTER | | BIRDS POSTER | FOREST ROAD PRINT |
GET 30% OFF YOUR PRINT ORDER USING CODE TARYN30!
Step 5: Pick Your Frames

Once you are set with your print arrangement, it’s time to pick your frames! The frames you choose will ultimately decide the style of the gallery wall. Do you want a traditional beveled frame? Or a pop of luxe with gold?
I went with a clean modern metal black frame in size 20X28. In order to make the prints pop a little more, I added a passe partout or matte to the frame. You want to order size 20X28 Passee Partout to fit the frame and then the picture size is 16X20.
Creating A Gallery Wall
I am so happy with how this entire space turned out! This gallery wall is stunning and I am really happy with the quality of prints and frames.
GET 30% OFF YOUR PRINT ORDER USING CODE TARYN30!
DOES NOT APPLY TOWARDS FRAMES
About Taryn Whiteaker
Hi! I’m Taryn! The voice behind Taryn Whiteaker Designs. I launched this brand over 11 years ago when I became a stay-at-home mom. What started as a small craft and mom blog eventually grew into a full time design and DIY site. My goal has always been to inspire others (especially women!) with design ideas, DIY tutorials, entertaining ideas and give you the tools you need to complete them yourself!


I know this post is almost a year old but your gallery wall is beautiful! Can you tell me where you got your chandelier!? Thanks!
Hi! Thanks so much, here is the link to the light: https://amzn.to/3bpHvkU
Hello!
You are so talented and I love the gallery wall. I’m hoping to create something similar but had a quick question. As you mentioned in your blog that some of the prints don’t come in all the sizes. If I was planning to duplicate your projects picture/ frame sizes, would I need a 20×28 frame, print and passee partout?
Thank you!!
Sarah
Can I ask, how did you hang the photos, specifically the ones in the outer columns where the vertical piece of decorative wood doesn’t go through the centre of the picture? Gorgeous wall!
Hi! I put one nail in the vertical board and then another in the dry wall part to help push out the corner a little.
Hello,
I love your wall! Can you please give me information on how you did the wall with the strips? and also the black paint color? Thank you! I need to do this on my home ASAP. I fell in love.
what size are the photos? vrs the size of the frames?
Hi! Frames are 20X24 and prints are 16X20
Hi Taryn, Can you please tell me what you spacing is for the frames? I’m in the midst of replicating your gallery wall as we speak, and I want to get the spacing correct. Can you also include how far from the ceiling you went down.
Thank you!
I agree, I would love to know the space between each photo and the space from the wall to the frames! :)
I’d love this info also! Love this project!
Stunning. Can you please provide info on what you attached rod to on wall? Did you add any framing on the prints? Thank you!
What wood is on the gallery wall? Looms smaller than 1 x4, but bigger than fir strip