is post is sponsored by HART Tools at Walmart, all opinions are 100% my own!
Do you ever complete a project and then look back and wonder why it took you YEARS to do it?! Since we moved into our home 5.5 years ago I have wondered what to do with our staircase. It was one big greige box with 12 ft ceilings, no windows. It was blah. But it was a staircase after all and not a huge priority over the years, so I thought…. over the past few weeks I worked with my brother to give our stairway a complete makeover including a bold staircase gallery wall!
I cannot wait to show you the before and after pictures of this space, it is truly incredible. I worked with Hart Tools to complete this project. You can find all of their tools at your local Walmart and online! I truly believe that anyone can complete this project!
Ready…..
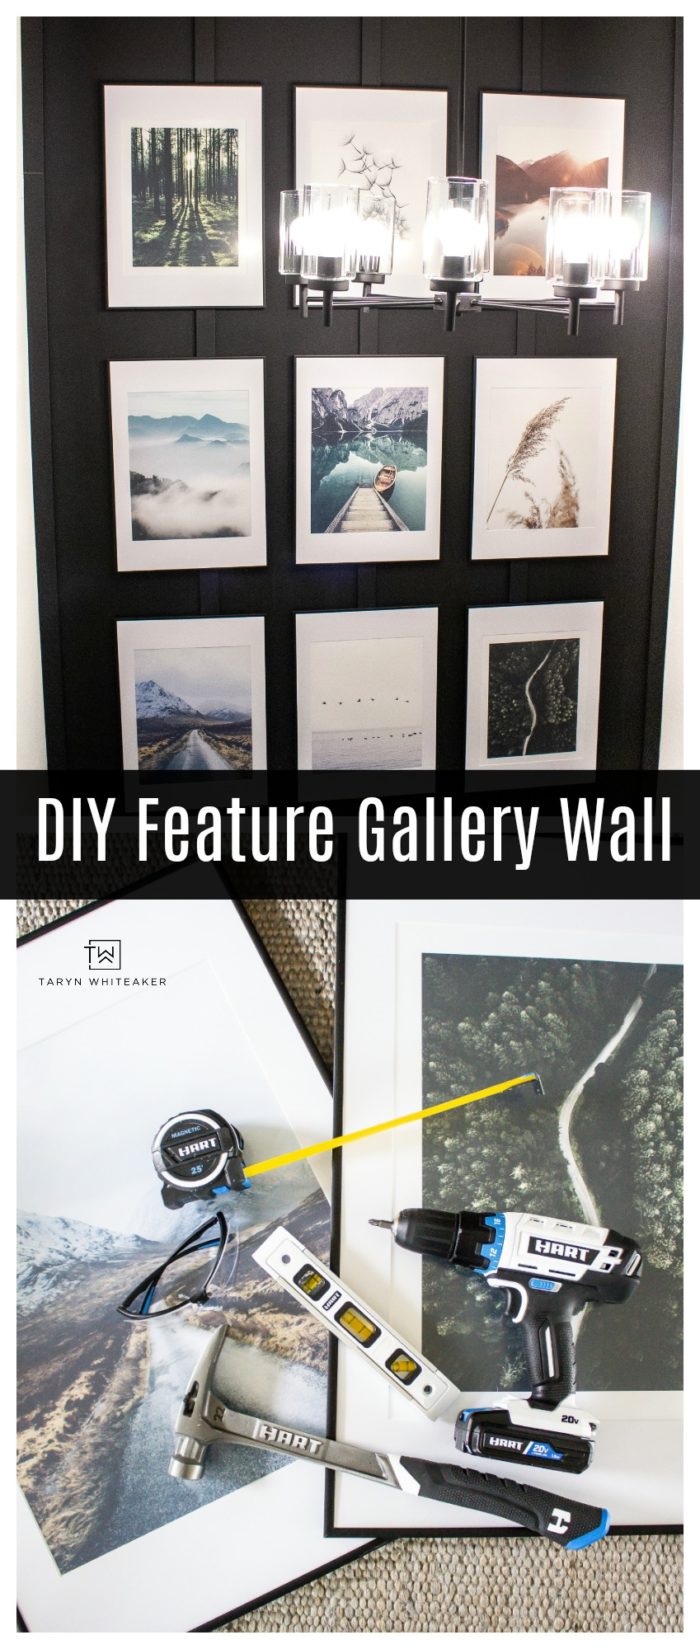
Staircase Gallery Wall
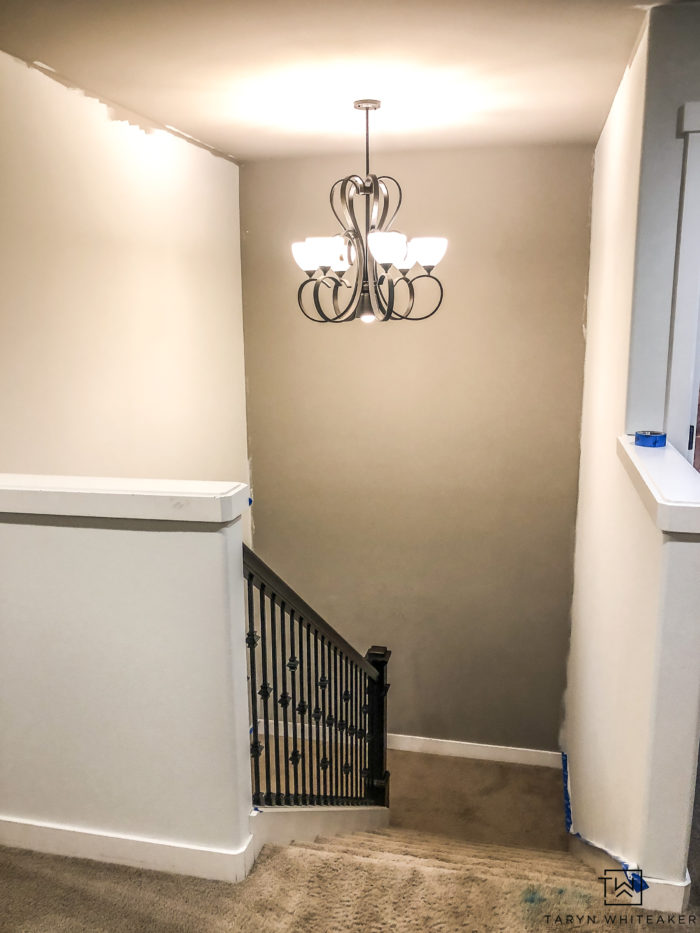
Before
AFTER
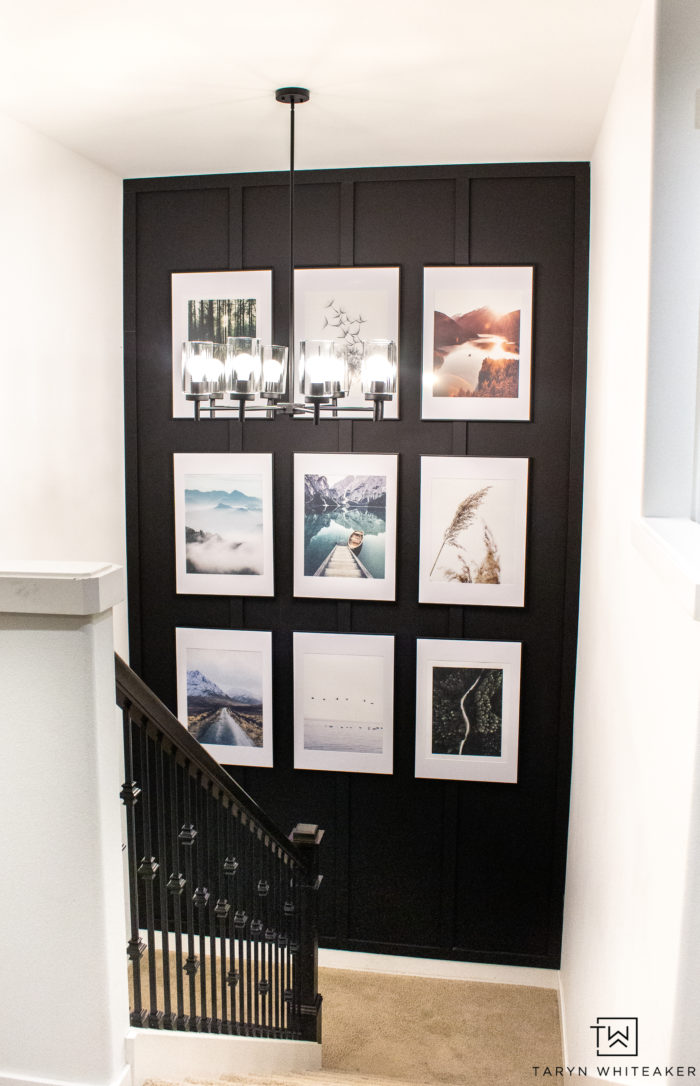
I seriously cannot believe this is our staircase now. And I don’t know why it took me so long to do something decorative here. When I asked my husband what he thought of the final look he said it definitely took our house from basic builder grade to custom home and that was music to my ears!
I don’t think I realize just how much of an impact it would make on the rest of the house. Since you can see the 12′ wall from our main living area downstairs, it definitely makes our entire downstairs feel more connected now. It carries the design up and it definitely catches your eye. Slowly but surely our house is becoming one cohesive look that I absolutely love.
Staircase Makeover
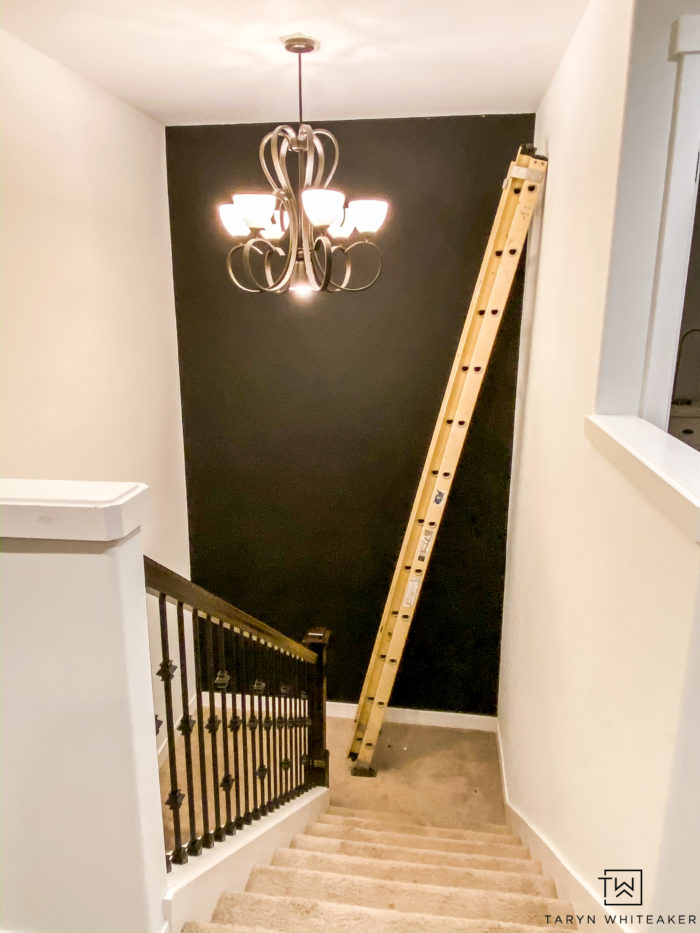
You guys, can you even believe this is the before? I forgot to take a pic of it before we started painting, but it was literally one greige box with marked up walls from the kids and a chandelier that didn’t fit my style. That’s it.
We started by painting the walls and ceiling the same shade of white that is in the rest of the house (we have slowly been painting over the greige over the past few years). Then added a black accent wall in the same shade at the bonus room, Rebel by Kilz, you can find it at Walmart too! I LOVE this color because it is a shade lighter than a true black. It’s more of a super dark charcoal. I love it so much.
DIY Wall Moulding
Not it’s time to bring out the tools! These are all tools that everyone should feel comfortable using. So I hope this inspires you to do a project like this in your own home!

Tools You Need:
- HART 22OZ Steel Hammer, Nail Starter
- HART 25-Foot Pro Grade Tape Measure
- HART 9-inch Torpedo Level
- HART 48-inch Aluminum I-Beam Level
- HART 20-Volt Cordless Brushless 1/2-inch Drill
- HART 10-inch 14 Amp Compound Miter Saw
Materials You Need
- 3″ pre painted trim (amount will vary per space)
- Paint (I used KILZ Rebel in flat)
- Finishing Nails
- Wood Filler (This is my fav!)
- Picture Hanging Hardware
- 20 X 28″ Picture Frames
- Modern Chandelier – Great budget option!
How To DIY Your Own Moulding Accent Wall
Start by painting your moulding. I like to buy the pre painted trim because it has a smoother finish and then I give it one coat of paint before I attach it to the wall.

Cut your moulding down to size. I LOVE the HART 10-inch 14 Amp Compound Miter Saw . It is so easy to use and makes the cuts so precise.

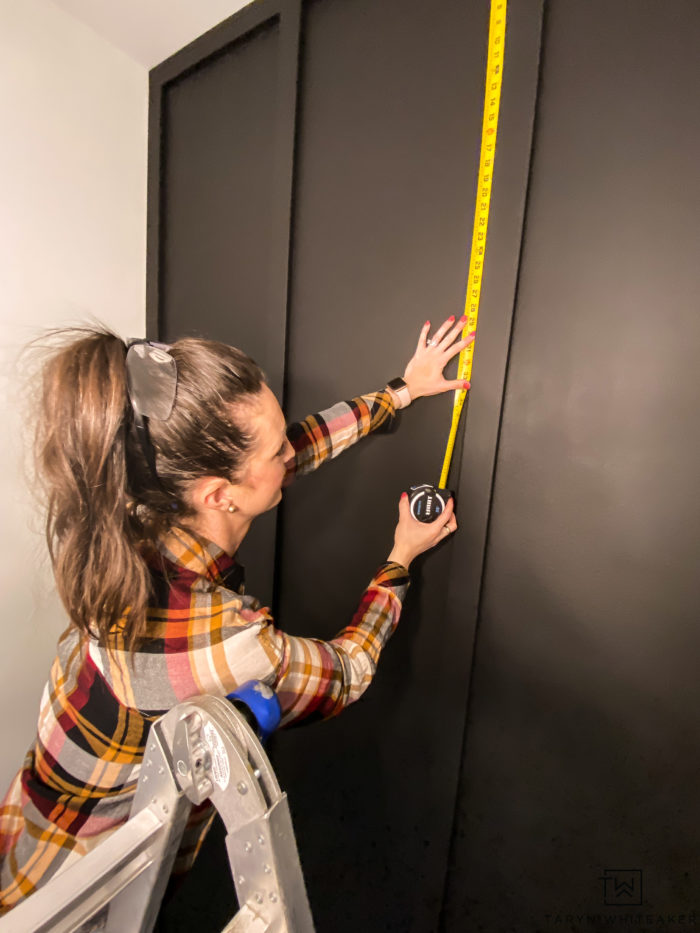
I like to lay the whole frame first, so the bottom and top pieces and then the side trim. Then I fill it in with the vertical pieces. You’ll want to measure the full distance in between the outside moulding pieces and find the equal distance between each of your vertical pieces.
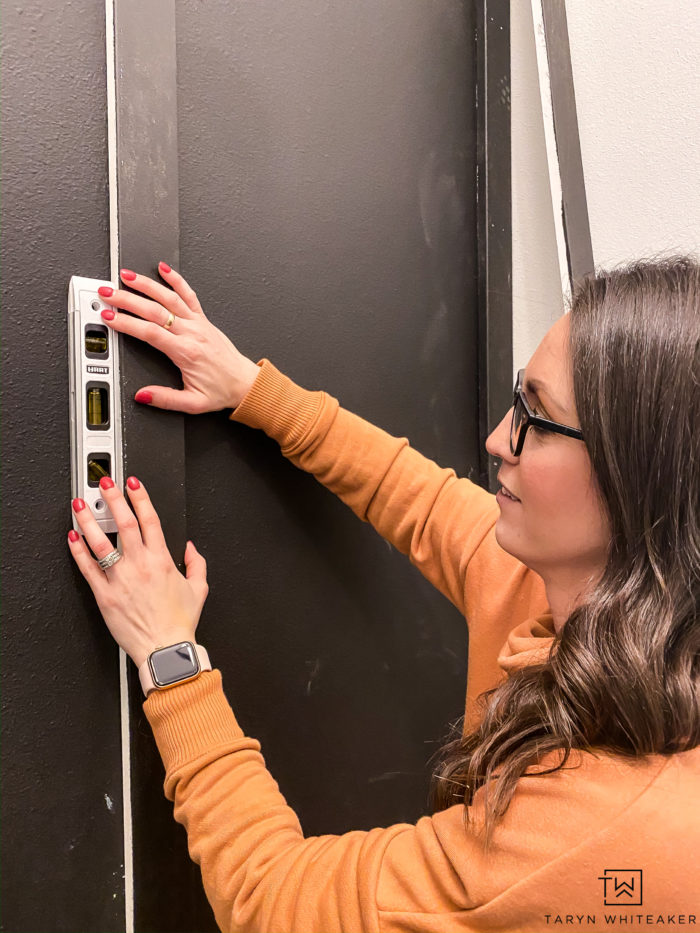
When installed the vertical moulding, keep a level handy to make sure your pieces are going up straight. I like this HART 9-inch Torpedo Level because I can keep it in my back pocket for easy use!

Attach the moulding using finishing nails.
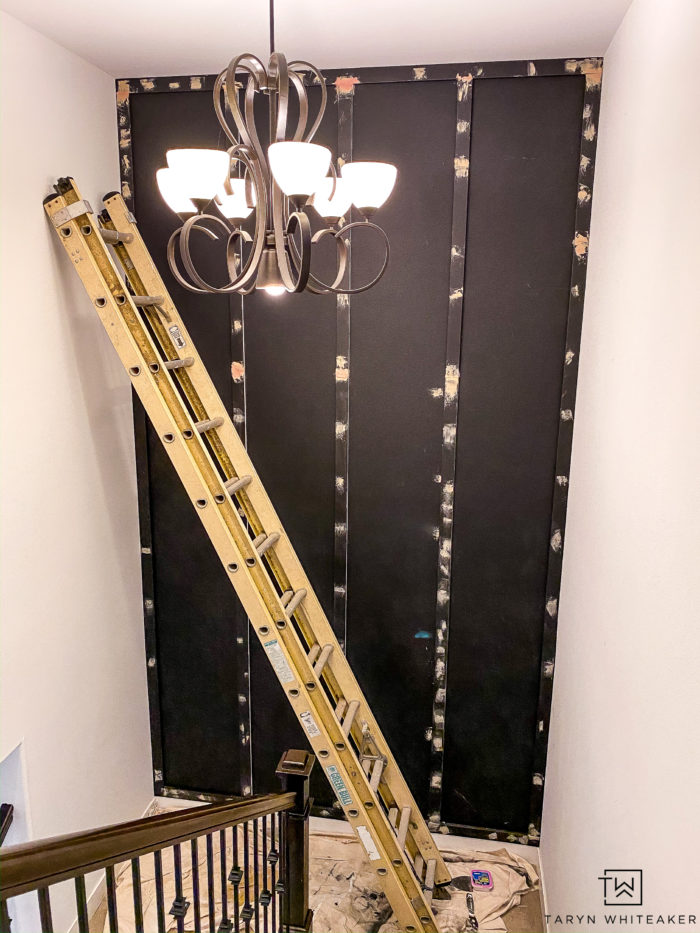
Once you have all your moulding up, fill the seams and nail holes with wood filler and then sand them down to a smooth finish.
Give it another coat of paint for a fresh finish.
Hanging A Gallery Wall
Now it’s time to hang your gallery wall! I had mine gallery wall all pre-planned out when I ordered my prints, so I didn’t have to worry about figuring out placement. I’ll be doing a separate post on some tips for creating a gallery wall soon!
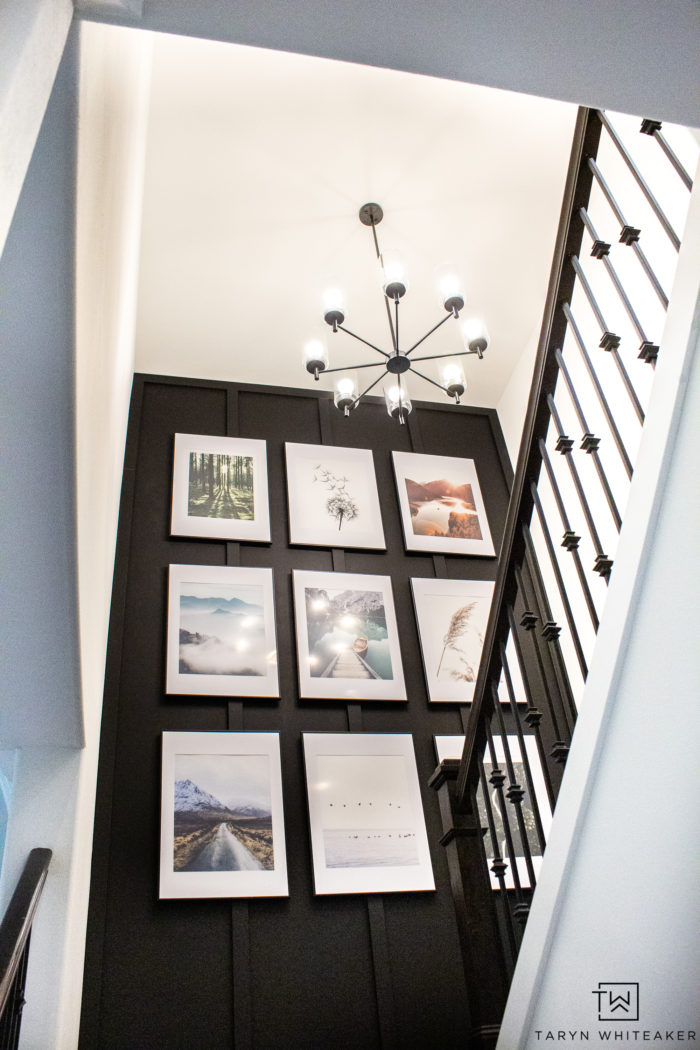
I wanted a clean modern look to my gallery wall so I did a grid style. Tree across, three down. Hanging a gallery wall takes patience and a lot of measuring.
Because this is a staircase that we walk through a million times a day and I have three little kids who run up and down it, I didn’t want the prints being too low, so I purposely had them hang a little higher.
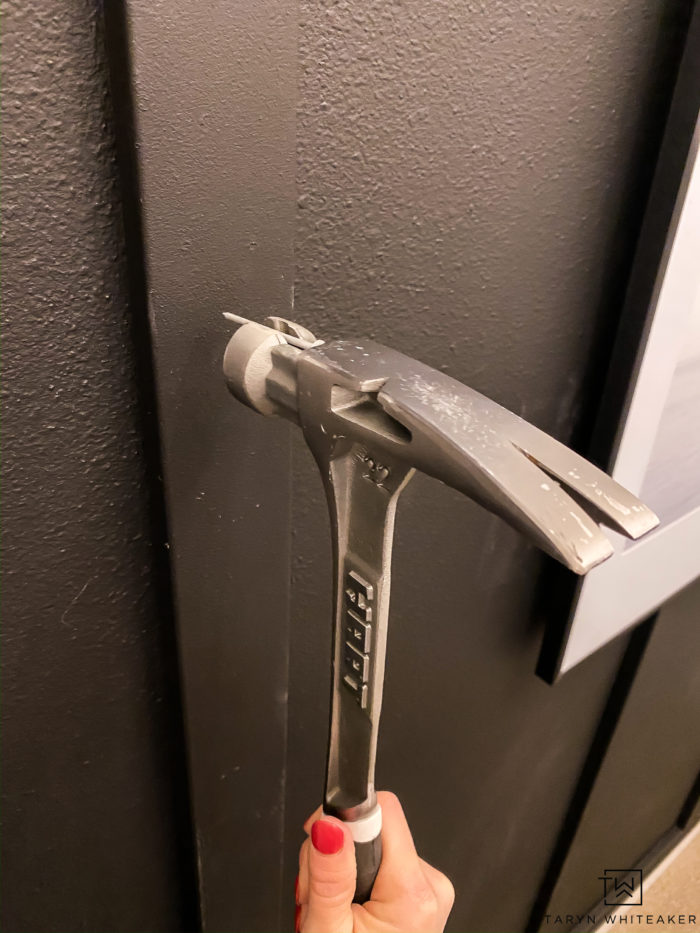
We hung the middle row directly onto the center piece of moulding, so we could nail directly onto them. This HART 22OZ Steel Hammer, Nail Starter. If you’ve never used a nail starting hammer before they are so cool! There is a small magnet piece in there and a spot for the nail to sit and you can literally put the nail in and hammer right into the wall and it will start it for you. So great if you only have one hand free while in the middle of a project.

For the prints hanging off to the side, we used dry wall screws to add some extra support.
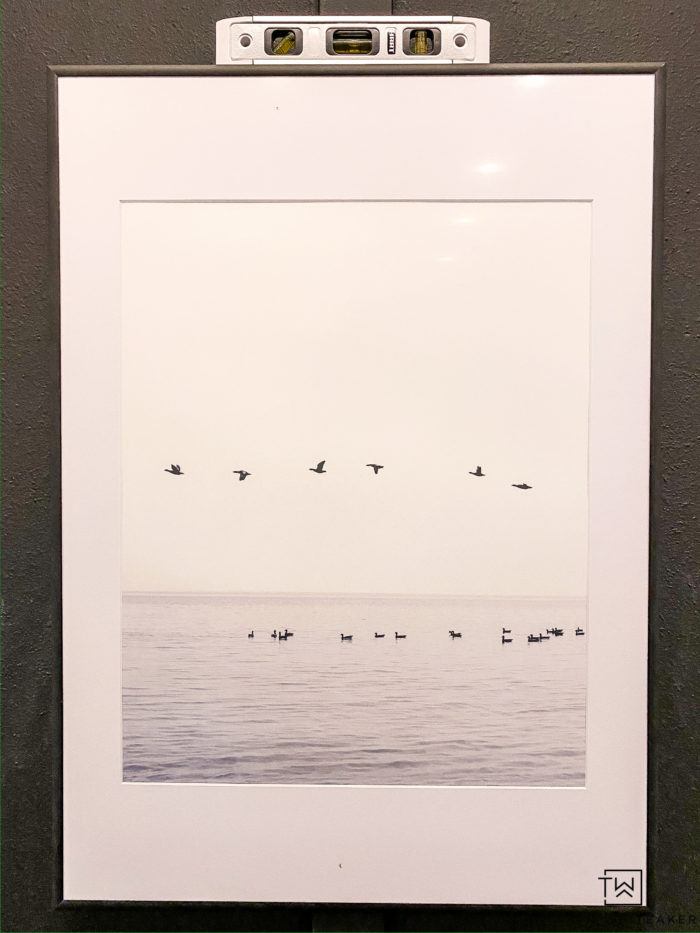
You can read this post on the prints I choose for the gallery wall and where to get them! Once the prints are up, whip out that level and make sure everything is straight! I love these 20 X 28″ Picture Frames.

I am SO happy with how this staircase gallery wall turned out. It looks night and day compared to what we started with. It really took a basic builder grade staircase into a unique bold look. You may notice that we also changed out the light fixture to something more modern to finish off the space!
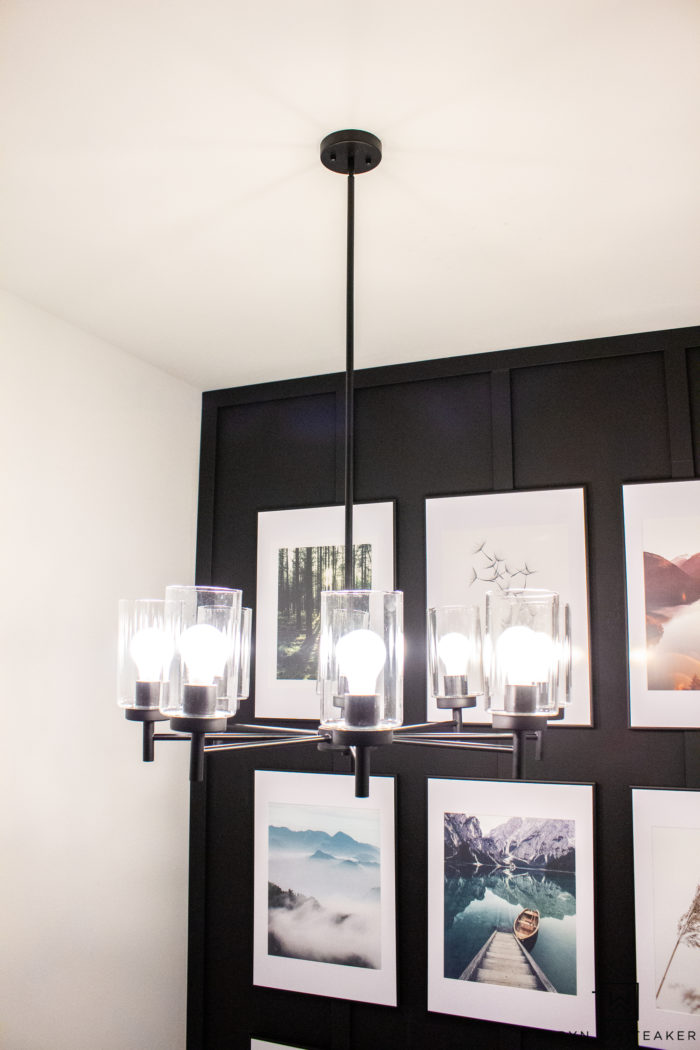
Let’s take a look at how easy it was to create this look! I also updated the chandelier with this more modern one! It was really reasonable for the size.
I love how our staircase gallery wall turned out! It was a great use of this space that was once just plain and blank. I love looking up at these pictures every time we go up and down the stairs and see beautiful places we’ve visited and some we have on our list! It feels so personal now. You could also do family photos as well or your own travel pics!

About Taryn Whiteaker
Hi! I’m Taryn! The voice behind Taryn Whiteaker Designs. I launched this brand over 11 years ago when I became a stay-at-home mom. What started as a small craft and mom blog eventually grew into a full time design and DIY site. My goal has always been to inspire others (especially women!) with design ideas, DIY tutorials, entertaining ideas and give you the tools you need to complete them yourself!


I love your wall…What a transformation!
I am having a hard time finding nice prints.
Where did you purchase yours?
I think that I am going to do the wall at the bottom of my stairs like this.
Was also thinking of putting up old pictures of my
Grandparents and my parents as children.
What do you think?
That sounds like a wonderful way to feature family photos. I will be doing a separate post on the prints really soon!
What size are the picture frames?
They are size 20X28″ frames with 16X20 prints.
Could you link to the picture frames by chance? I cannot find 20×28 frames that fit 16×20 pictures anywhere!
Hi! I used these for a different project but they will fit the size! https://rivr.link/TWD-KlIe7J
Love it!
Where did you buy the pre printed trim moulding?
Hi! I got it from Home Depot, you can get pre-painted trim there, and then I gave it a few coats of the Rebel color. It has a nice smooth finish.
Thanks Taryn! Found it girl girl!
Is the paint flat or semi gloss! I am doing this next weekend.
Did you get to do your project; if so did you use flat or gloss on your wall?
Pre-painted Trim*
I can’t seem to find it anywhere online.
May I ask where you found the new light? It’s exactly the look I’m going for in my staircase! You did a great job!!
Thank you! You can find it here: https://amzn.to/30bkKeK
Hi there!
Can you please share where you found your frames? :)
Thanks!
HI! You can find all the info on the prints and frames here: https://tarynwhiteaker.com/tips-for-creating-a-gallery-wall/
Can you please tell us where the prints are from?? I’ve gone down a rabbit hole trying to find something similar but I’m unsure where to find prints that look as good as those :(. Thank you!!
HI! You can find all the info on the prints here: https://tarynwhiteaker.com/tips-for-creating-a-gallery-wall/
Couple things for anyone trying this, from someone who just finished it.
1. It looks awesome
2. Unless your wall studs magically line up perfectly with the trim boards you’re putting up, you will need some adhesive along with the finish nails. I used liquid nails. Little more of a pain but not optional.
3. We needed some command strips to stabilize the pictures otherwise the side ones kind of sit slanty on the trim.
4. Have fun realizing that the straight looking corners and walls aren’t that straight. :)
I love this.
My biggest concern is my light fixture. Will it be in the way of the photos. Will it look crowded?
I don’t find that it is over crowded. The light fixture is more minimalistic, I find that it works!
Can you please tell me what did you use for wall
We just did your gallery wall!! And I’m in love! We used our family pictures and it turned out amazing!! Thank you!!
Oh that’s awesome! Thank you so much for letting me know, it means a lot!
Hi Taryn,
Can you please tell, what is the exact color code?
Hi! I don’t know the color code, but the color is called Rebel by Kilz Paint
Thank you Taryn.
What is your spacing between the frames? 2 inches ? 3 inches? And did you have to cut the mats to fit the pics?
This wall is beautiful! I’m planning to do this as well!
What is the measurement from your ceiling to the top of the frame on the top row? Same question for the bottom.
What is the measurement from the floor to the bottom of the frame on the bottom row.
Also what are the measurements from the side of your wall to the side of the frames?
What are the measurements in between the frames?
What is the width between the frames and the frames from the wall and floor? Or what is the width of your whole wall? I’m doing the same thing but think my wall isn’t quite wide enough for 20-inch wide frames. Mine is 76 inches wide which only leaves 4 inches from wall or between frames. Is that enough?