• Skip to primary navigation
  • Skip to main content
  • Skip to primary sidebar
  • Skip to footer
  • Home
  • About
  • Contact
  • Partner with Taryn

Taryn Whiteaker Designs

DIY and Interior Blog

  • My Home Tour
  • Shop My Pics
  • Home Styling
    • Room Reveals
      • Our Current Home
      • Our First Home
    • Seasonal Home Tours
  • DIY Projects
    • DIY Home Decor
    • Crafts & Sewing
    • Before and Afters
    • Before and Afters
    • Furniture Builds and Makeovers
  • Seasonal Decor
    • Christmas
    • Easter
    • Fall
    • Fourth of July
    • Halloween
    • Spring
    • Valentine’s Day
  • Printables
  • Entertaining
    • Parties
    • Tablescapes
  • Fashion
  • Travel

December 6, 2020

Installing A Stikwood Ceiling

Thanks For Sharing!

Disclosure: This post is sponsored by Stikwood, all opinions and product selections are my own!

The bonus room reveal is DONE! So let’s chat about some of the big DIY projects that took place in here. Starting with Installing a Stikwood Ceiling! I wanted to create a dark moody space in here and making the ceiling dark made such a difference! The Stikwood planks not only gave me the look I wanted, but it also added so much texture. Today I want to show you how easy it is to install, not only on a ceiling but on walls too!

Stikwood Plank Ceiling

Learn tips for Installing A Stikwood Ceiling in your own home! This easy DIY project is a great way to bring a moody vibe to your ceiling!

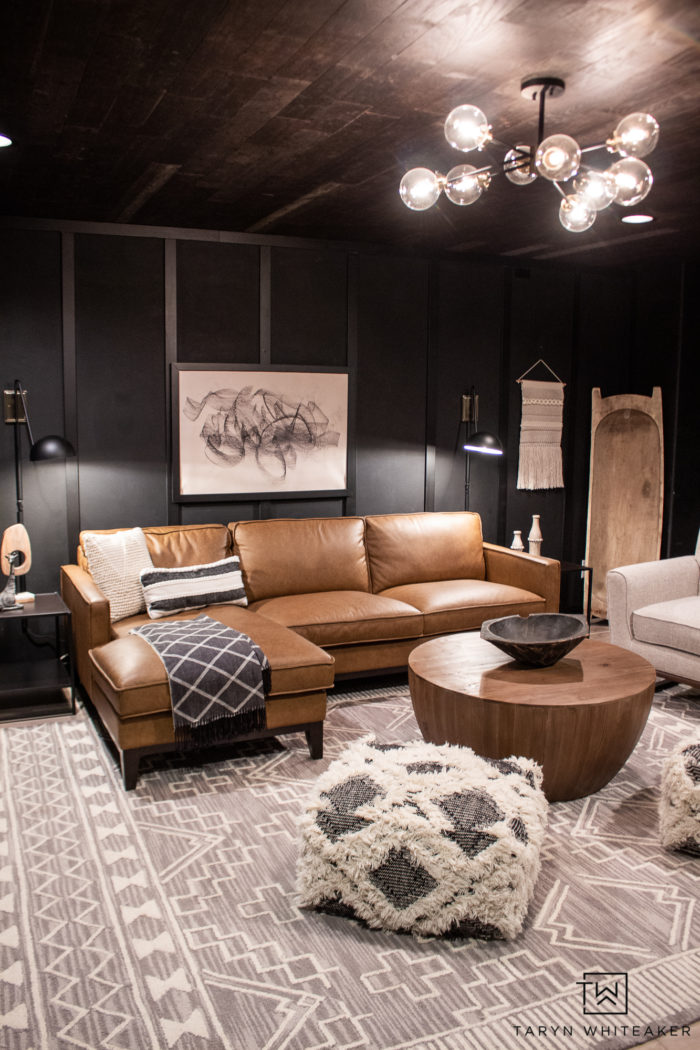
Doesn’t it look SO gorgeous! I went with the Charcoal Stikwood. It does have a good amount of brown undertones to it in certain lighting. If you like the darker look, they also have one called Onyx you may want to sample.

Installing A Stikwood Ceiling

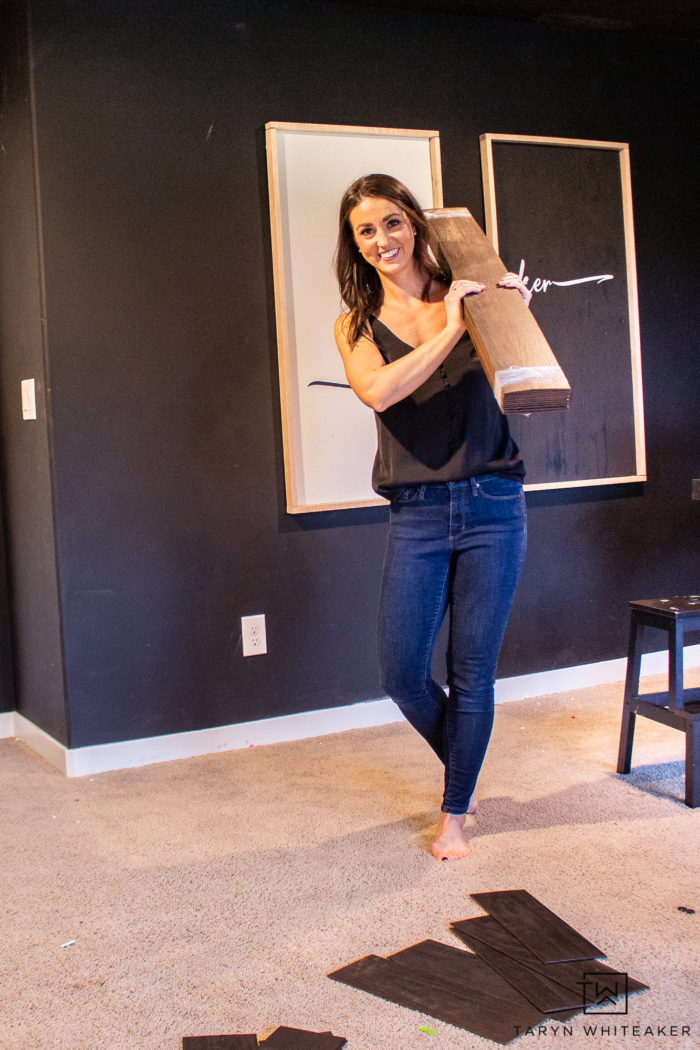
The Stikwood arrives all wrapped up in smaller boxes. It comes with a variety of plank lengths ranging from about 12″-48″ long.

I would encourage you to open a few boxes at a time and spread out the

Learn tips for Installing A Stikwood Ceiling in your own home! This easy DIY project is a great way to bring a moody vibe to your ceiling!

Installing the ceiling is no different than installed a wall! The adhesive strips are very strong and went right onto the ceiling with no problem! You just peel them off and then stick straight to the surface.

Learn tips for Installing A Stikwood Ceiling in your own home! This easy DIY project is a great way to bring a moody vibe to your ceiling!

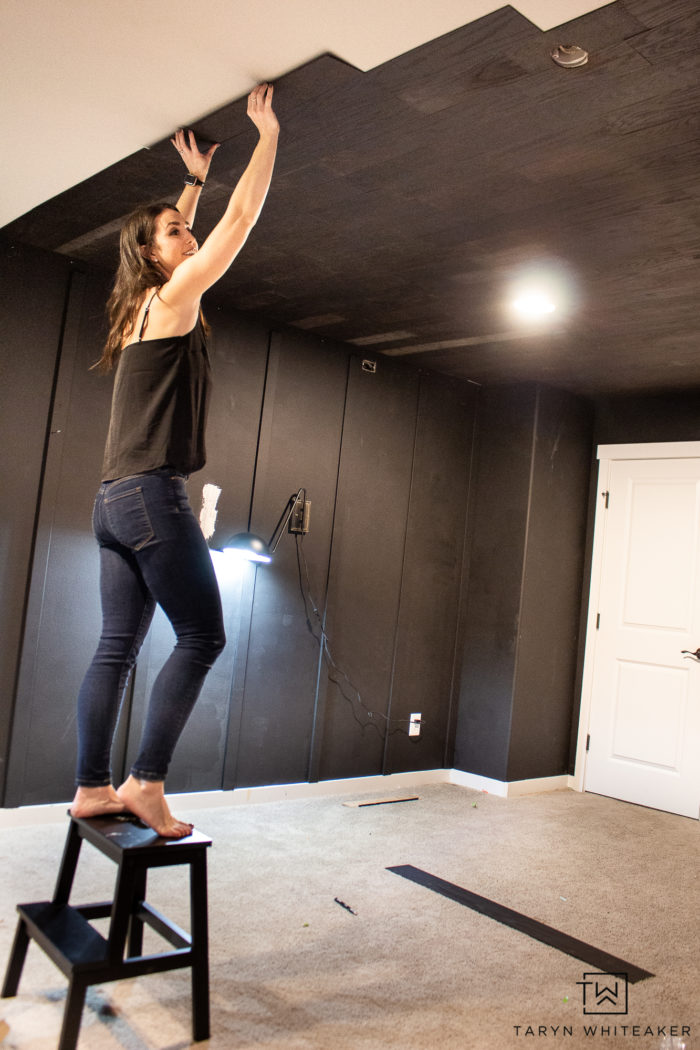
The Stikwood does come with a roller, I did not use it on the ceiling but if you were doing a wall you can use the rubber roller to help secure them to the wall and smooth out all the corner. I gently pushed mine onto the ceiling and made sure I pushed on all surfaces.

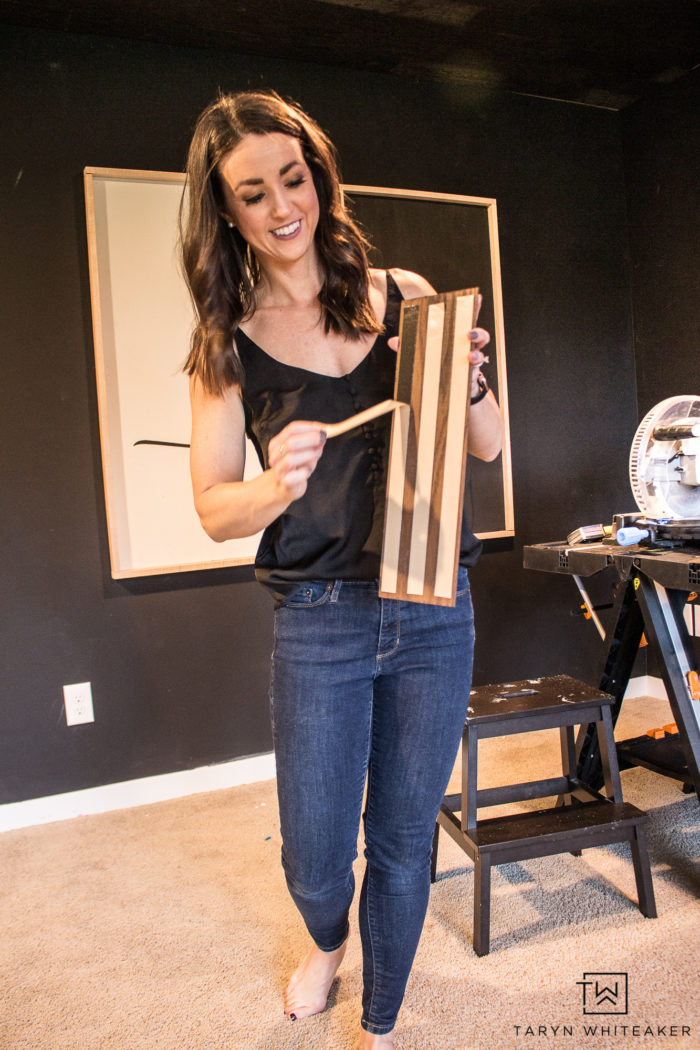
To trim the wood on the edge pieces, I used my chop saw. It worked perfectly! The wood it only about 1/4″ thick, so it does cut extremely easy. Just make sure to leave the strips on the back of the adhesive before you cut!

To cut around the canned lights, I used my small table saw. I drew out a template and then cut the circle shape.

Learn tips for Installing A Stikwood Ceiling in your own home! This easy DIY project is a great way to bring a moody vibe to your ceiling!

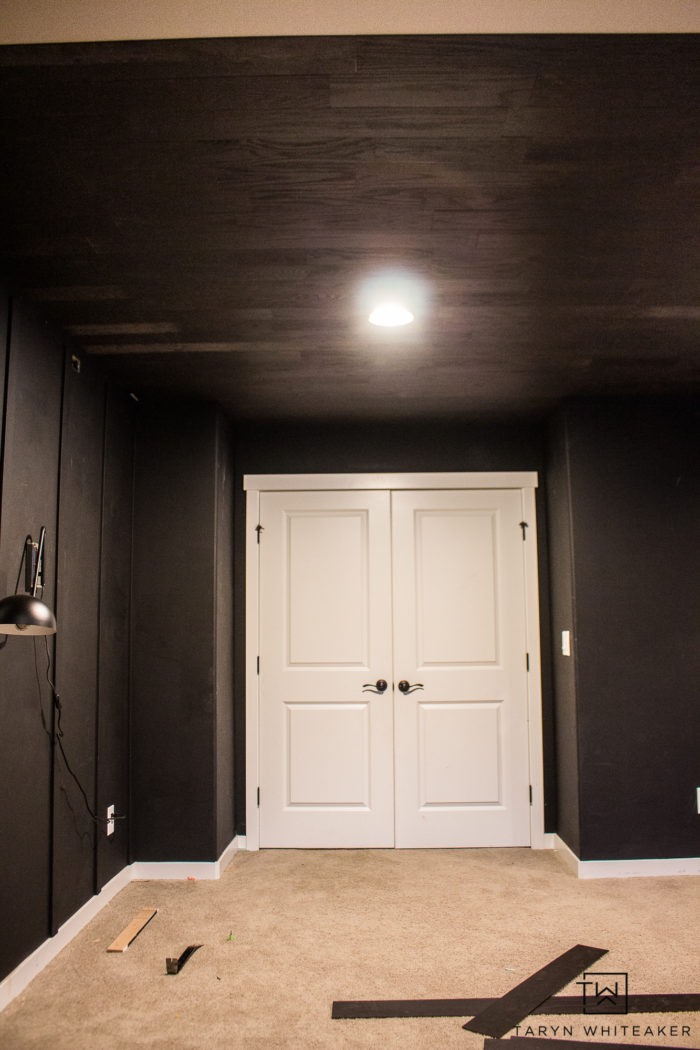
The whole project was very easy, but it is time consuming. Our ceiling is about 310 square feet, I did the entire ceiling myself and it took about 10 hours. Obviously if you had 2 or more people doing it at the same time it would be a lot faster! Or if you had someone pulling the strips off and someone else putting them up.

DIY Plank Ceiling Reveal

Learn tips for Installing A Stikwood Ceiling in your own home! This easy DIY project is a great way to bring a moody vibe to your ceiling!

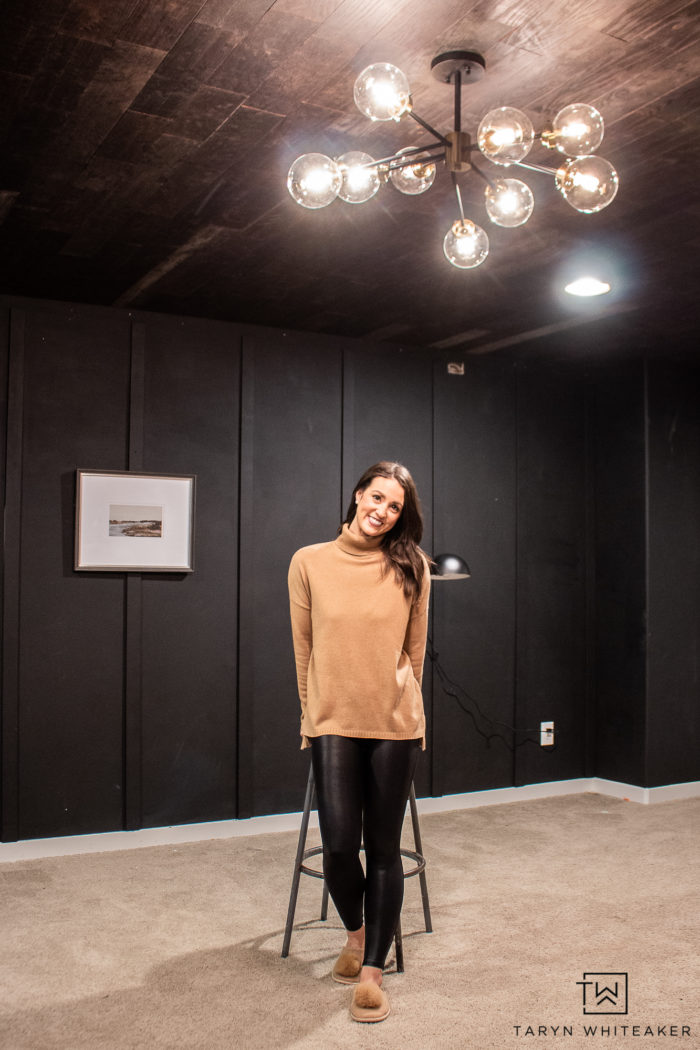
I absolutely love how it turned out!

Learn tips for Installing A Stikwood Ceiling in your own home! This easy DIY project is a great way to bring a moody vibe to your ceiling!

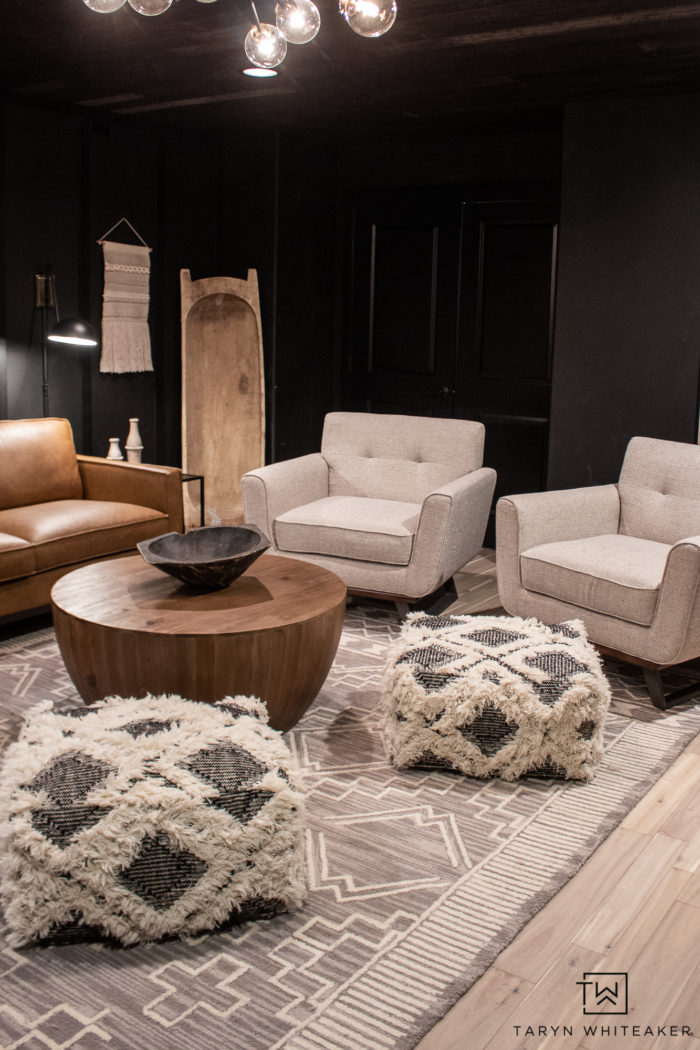
And it looks even more amazing now that the whole room is done!

Take a tour of the full room here, or head to Stikwood and browse their color samples!

About Taryn Whiteaker

Hi! I’m Taryn! The voice behind Taryn Whiteaker Designs. I launched this brand over 11 years ago when I became a stay-at-home mom. What started as a small craft and mom blog eventually grew into a full time design and DIY site. My goal has always been to inspire others (especially women!) with design ideas, DIY tutorials, entertaining ideas and give you the tools you need to complete them yourself!

You May Also Like:

  • Painted Porch Ceiling
    Painted Porch Ceiling
  • Tips For Installing Your Own Turf
    Tips For Installing Your Own Turf
  • Installing A Concreate Wall
    Installing A Concreate Wall
  • Modern Ceiling Fans
    Modern Ceiling Fans
  • Installing Deck Skirting
    Installing Deck Skirting
  • Tips For Painting An Outdoor Ceiling
    Tips For Painting An Outdoor Ceiling
  • Installing a Tongue and Groove Ceiling
    Installing a Tongue and Groove Ceiling
  • Bonus Room Makeover - Plank Ceiling is done!
    Bonus Room Makeover - Plank Ceiling is done!

Filed Under: ALL POSTS, Before and Afters, DIY Home Decor, DIY Projects, Our Home Projects, Room Reveals, Sponsored

Reader Interactions

Leave a Reply Cancel reply

Your email address will not be published. Required fields are marked *

Primary Sidebar

Looking For Something?

CONNECT

Meet Taryn

Taryn Whiteaker

Hi and welcome! I'm Taryn and the voice of style behind Taryn Whiteaker Designs. Sharing our journey of modernizing our European style home in Dallas. Thanks for stopping by and don't forget to subscribe to my mailing list to get all the latest updates! Read more...

Join The Mailing List!

Follow On Instagram!

Footer

THIS SITE

  • Home
  • About
  • Contact
  • Partner with Taryn

Privacy Policy

If you are interested in learning more about data that might be collected by this site you are encouraged to read the Privacy Policy and Cookie Policy for TarynWhiteaker.com 

COPYRIGHT POLICY

All images on this site are copyright of Design, Dining and Diapers, LLC. Unless otherwise noted. You may not use these images without written permission. If you would like to feature a project shown on Design, Dining and Diapers you may use a maximum of 2 images and include a visible link back to the project.

Copyright© 2023 · Brunch Pro Theme by Shay Bocks · Hosting by 3116 Digital