Disclosure: This post is sponsored by The Pencil Grip, but the project idea and opinions are 100% my own.
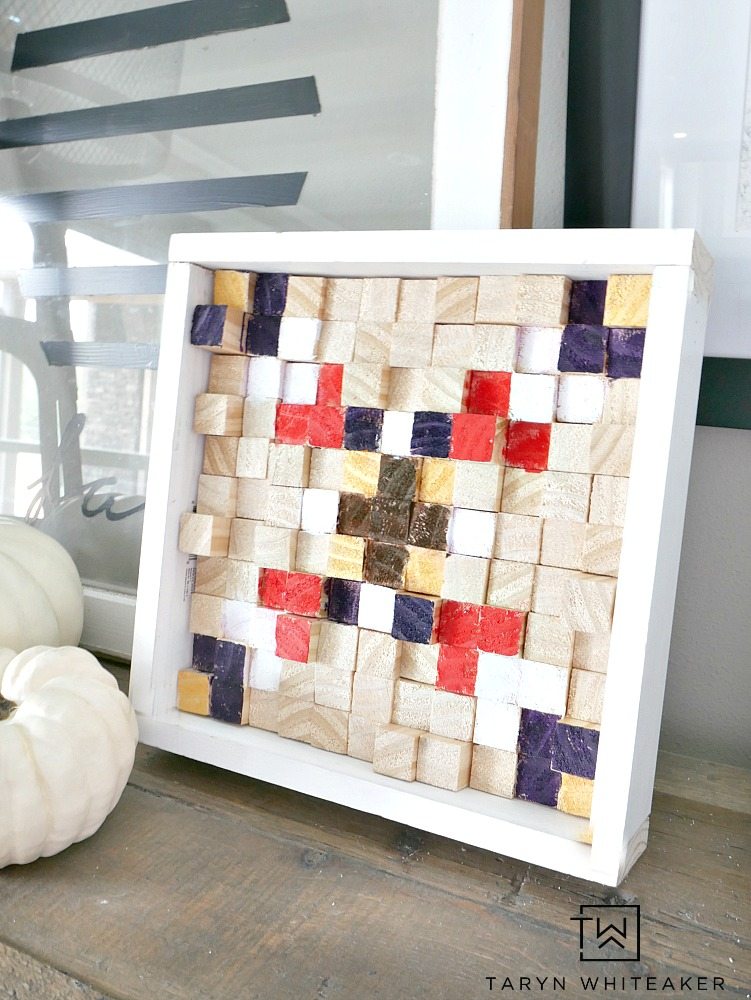
I’m starting to find myself really liking the whole boho/tribal look going on these days and I’ve found myself incorporating more of it into my fall decor this year. The look goes so well with earth tones and natural textures, which are my favorite. As you probably noticed with our fall mantel, I’ve been adding more pops of deep red and natural wood around our house and it’s time for some more! I want to show you a new piece I just made, this DIY Tribal Wood Block Wall Art. And the best part is, the paint only took 90 seconds to dry with the new Kwik Stix paint sticks!
Wood Block Wall Art
I have done A LOT of DIY projects over the years, and I’ve gotten pretty quick at making them. However, there is one think you typically can’t speed up, drying time. You know how the saying goes “It’s like watching paint dry”. That’s because it really is painful when you have to delay a project while each layer dries.
However, I recently discovered these Kwik Stix by The Pencil Grip. You can actually find them at Michaels and the paint dries in 90 seconds! I kid you not, this is the truth. Game changer for making painted signs, kids crafts and DIY projects.
Easy DIY Fall Decor
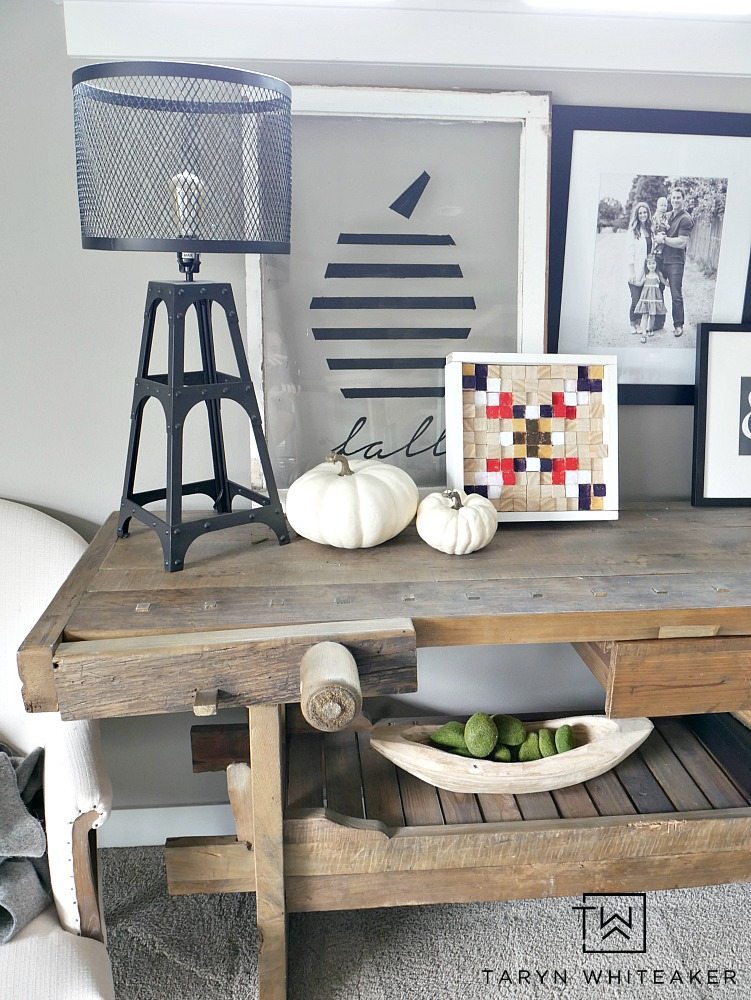 When I found out that you can use these tempera paints sticks on wood, I had an idea of what I wanted to do. I’ve been incorporating a lot more natural wood into our decor, that paired with a tiny pop of color made for the perfect project for this fall.
What I love about this project is that it’s something you can do with your kids because the paints are non-toxic and are SO easy to use. You really don’t have to worry about the mess of paint brushes and paint being splattered everywhere.
Ready to learn how to make your own wood block wall art?
DIY WOOD BLOCK ART TUTORIAL
SUPPLIES
- Kwik Stix Paint Sticks
- 1″ square wood cut into 121 pieces
- 11 1/4″ X 11 1/4″ square piece of wood
- Wood Glue
- 2 1/2″ white trim pieces
- Nail Gun
Fun with Kwix Stix
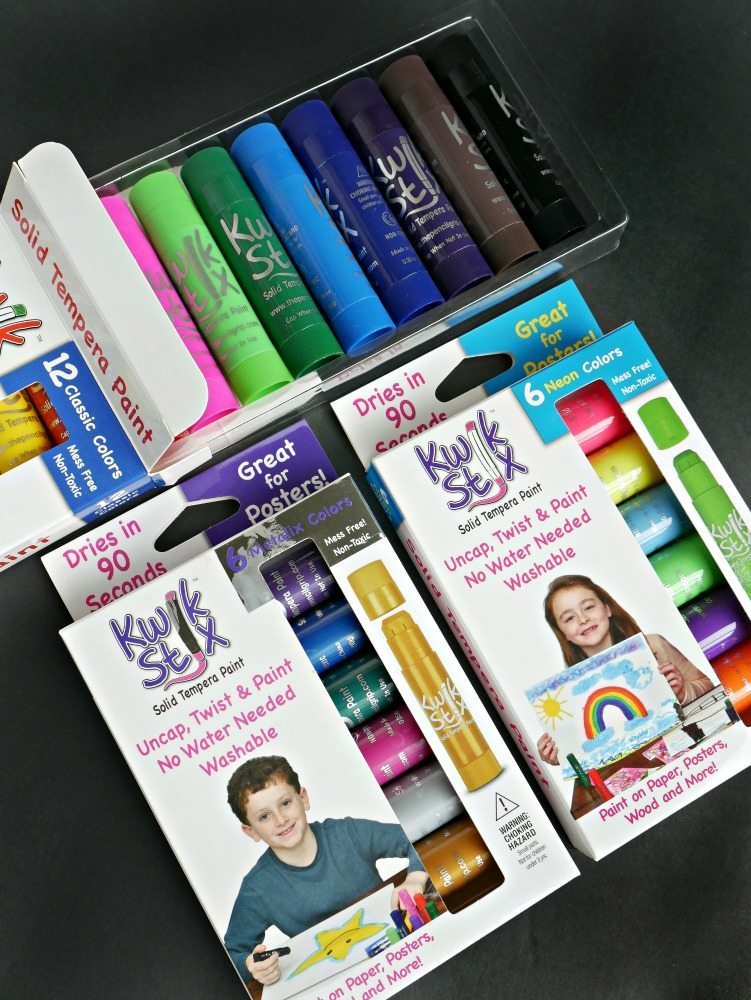
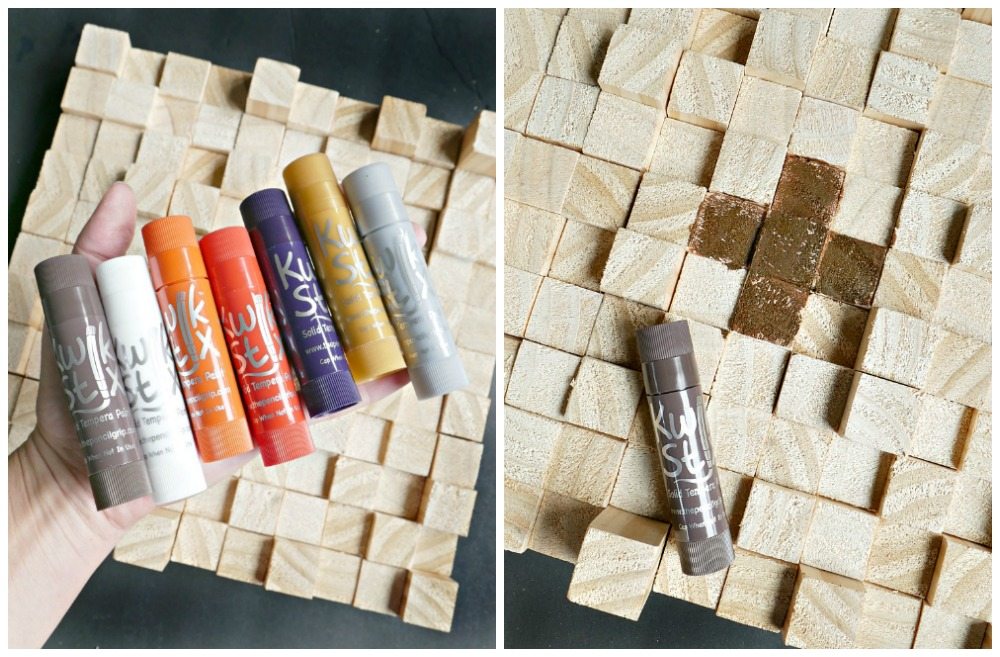
Kwik Stix come in a quite a few different color schemes, classic colors (used in this project), neon and metallic! The metallic paints are more translucent and the neon are super bright and fun.
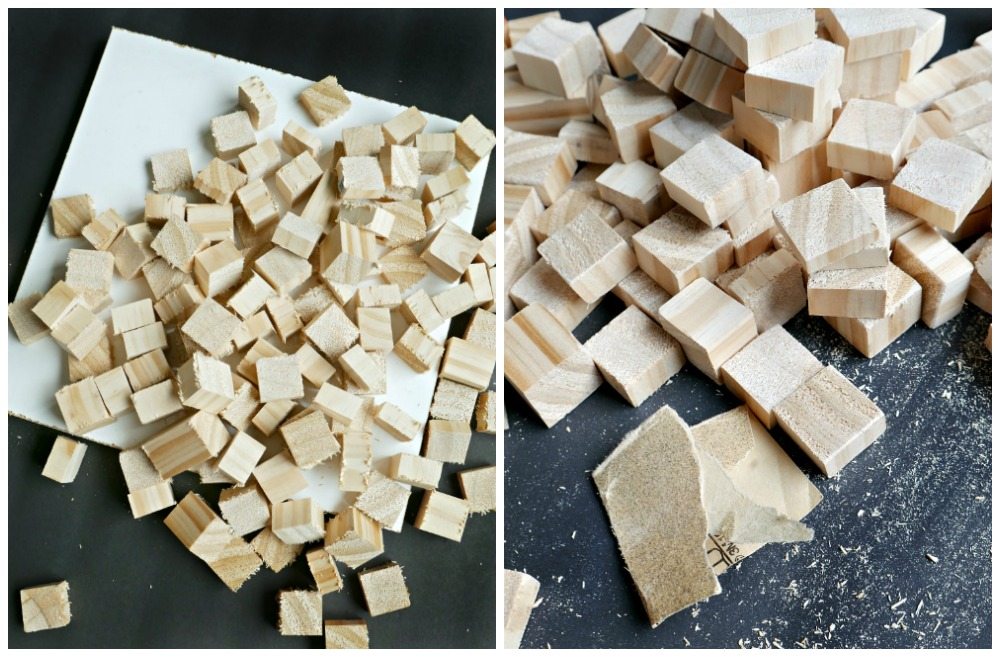
Start the project by cutting a piece of wood into a square, for this I used a 11 1/4″ X 11 1/4″. Then, pick up a 1″ wood cube stick and cut it into random sizes. All of mine are about 1/2″ – 1 1/2″. Then, you’ll want to sand down all of those rough edges. 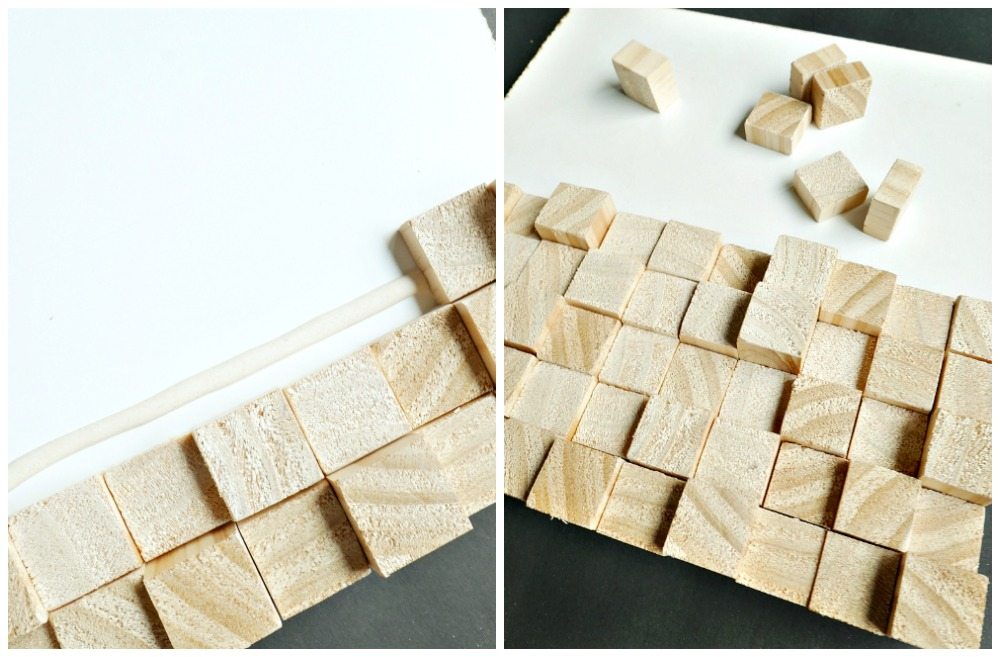
Place a few lines of wood glue and randomly place the wood squares onto the base. Keep going until you fill the entire space.
Next up, pick your paint colors! Since this will be used as a piece of fall decor, I chose a collection of deep earth tones. When I’m creating new pieces, I typically just create as I go, I generally don’t have a strict plan in place. I like to embrace the creative process. I knew I wanted a geometric tribal look, so I picked a dominate color for the center of the design and created a cross. 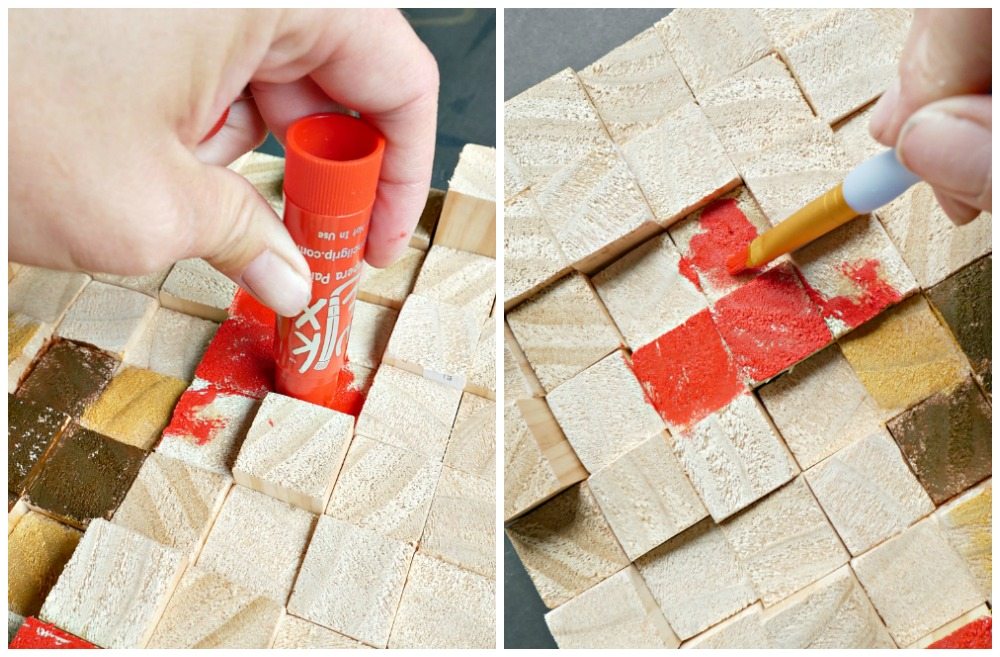
Then, I picked a few different colors and kept building on the design. To use the paints, you just twist off the top and then start drawing! In my opinion the paint has a similar texture to lip stick. It’s solid but also really smooth.
Now, here is my tip! If I had to do this project again, I would probably lay out the wood design first, then paint the squares so I could lift them up and roll the paint right on. THEN glue them down. Because I had already glued my pieces I had a little bit of a hard time getting into the corners so I used a brush to spread the paint into the small areas. If you hadn’t glued them down yet, the paint would be even easier to apply. Once you are done, each square literally only takes 90 seconds to dry. My kids were super impressed.
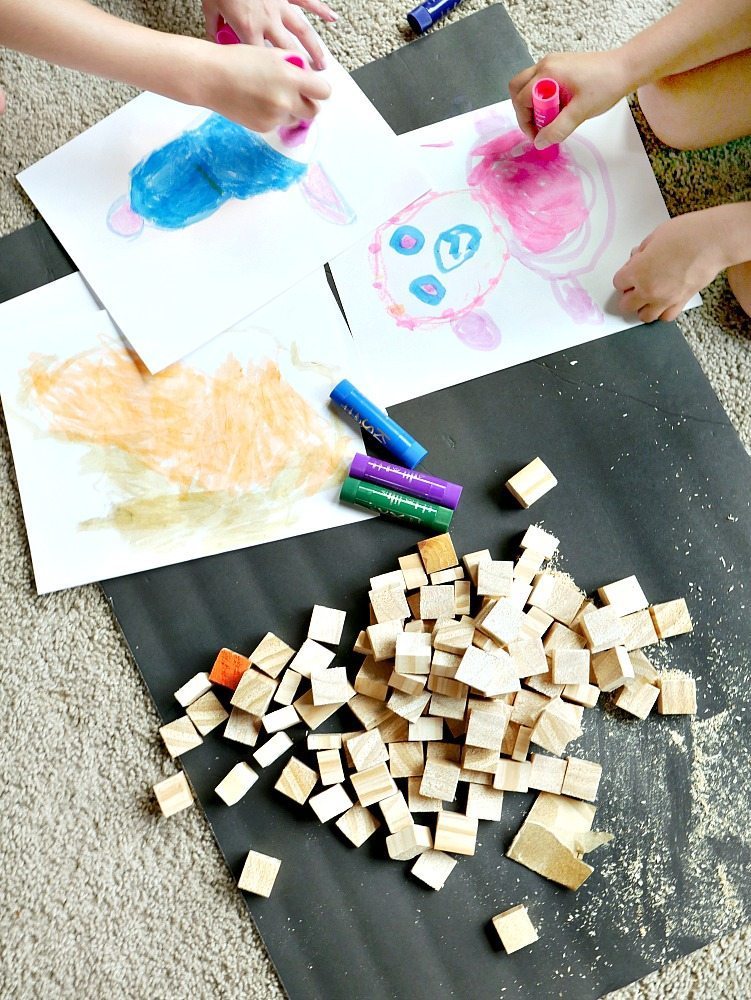
Speaking of kids, these paint sticks are AWESOME for kid friendly projects. The sticks are really easy to use, mess free, clean up great and dry fast. When I work on DIY projects and my kids are around, they are right by my side doing their own work. I love it. This is a 100% non-staged photo of what my work space looked like while doing this project. My kids took over my board while they did their own artwork with Kwik Stix while I worked on a tiny corner :)
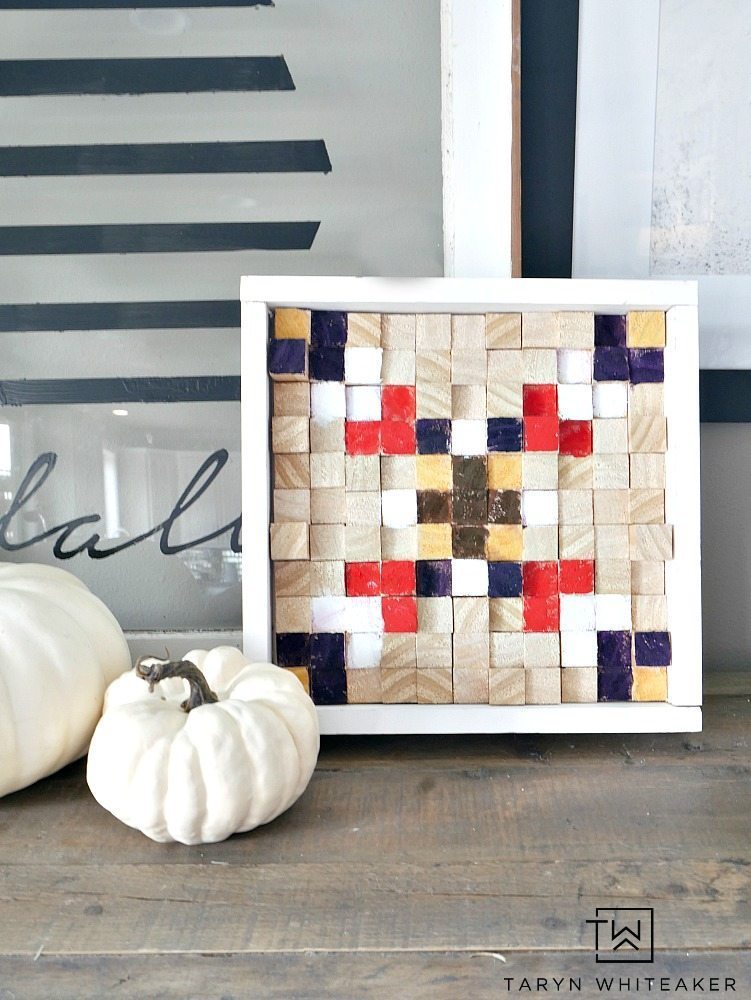
Hope you enjoyed this fun little projects. You can pick up your own Kwik Stix next time you are at Michaels!



90 second drying time? Yep, that is a game changer. I was not aware of Kwik Stix but will be looking for them on my next trip to Michael’s. Thanks for sharing with us at Merry Monday. Nice project too!