 . Back in the spring I revealed our
 DIY Garden Slat Wall
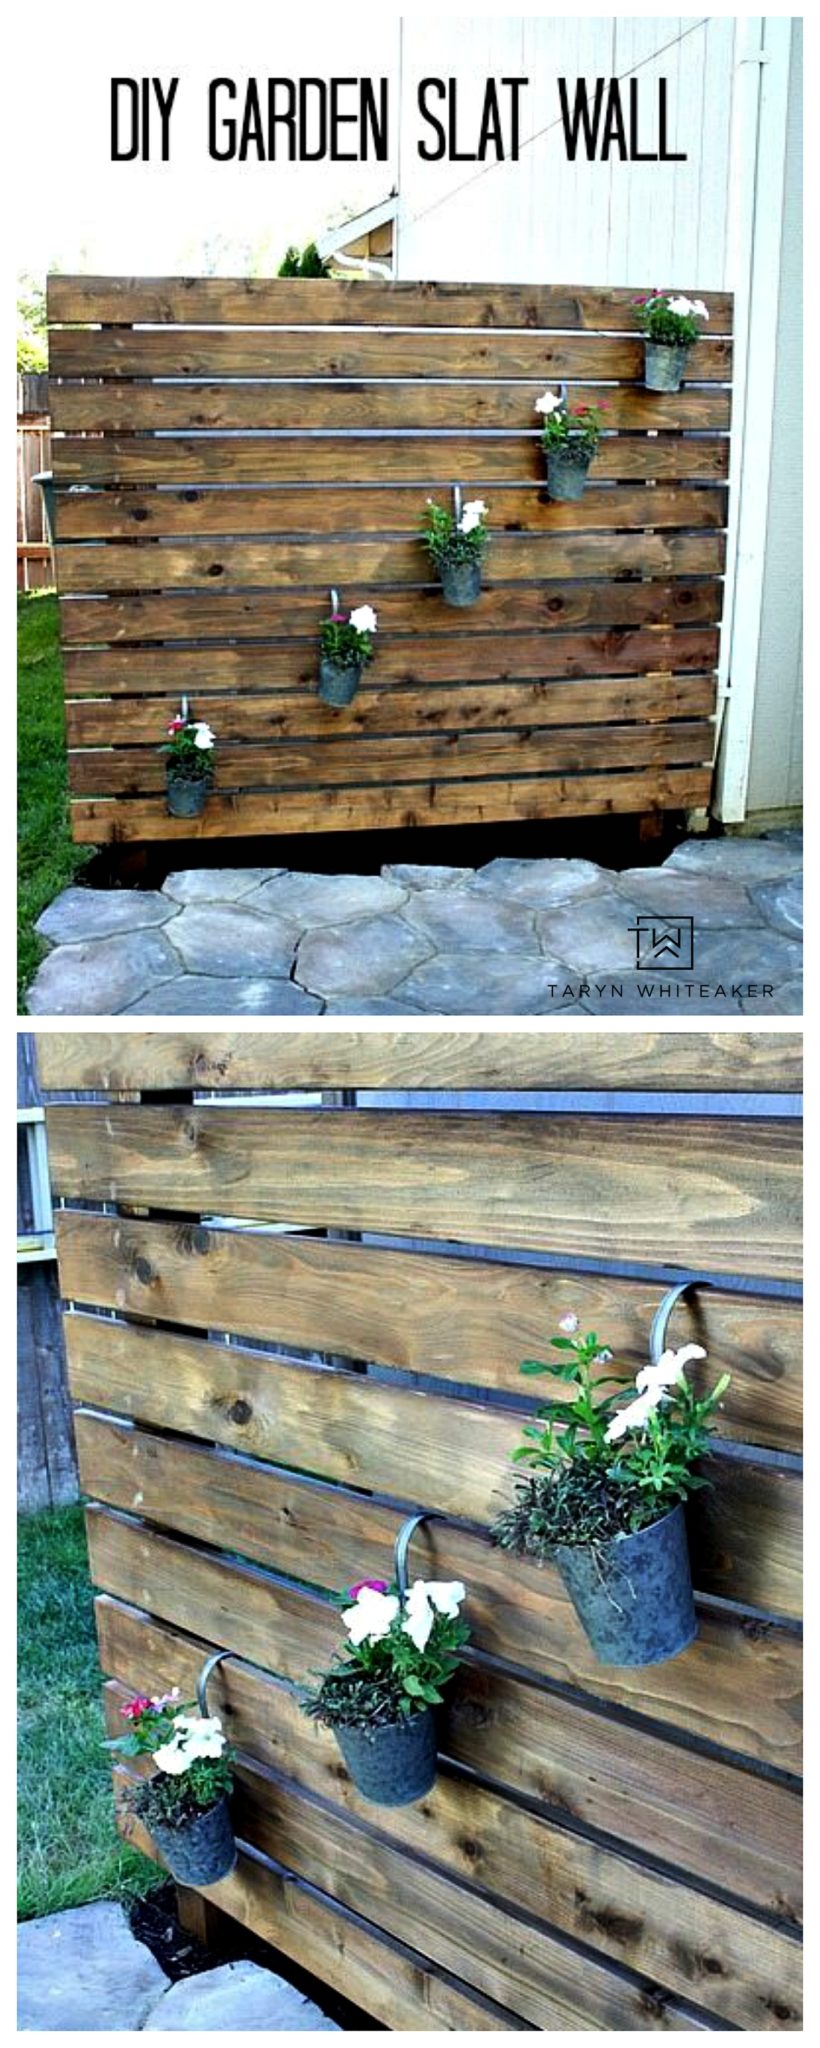


When we built the stone patio we had to remove a large bush that was (somewhat) hiding the shed in our backyard. Removing the bush allowed us to build a gorgeous patio, but it also left us with a full view of the shed. Quite the eye sore. And then….. I came across this picture on Pinterest and instantly fell in love with how this slat wall was both a beautiful and functional.
This project was actually really easy and could definitely be done in a weekend. It could actually be done in a few hours if you don’t factor in the wait time between steps. It was one of those projects that is super simple and yet makes a really big impact.

Here is a look at our progress on this part of the patio.
If you are intimidated by this, don’t be! I’ve even provided you with a tutorial on how to make your own! There is also a video tutorial at the end.
How To Build A Privacy Wall

Safety Eye Wear with Cord Control and Ear Plugs : Sanding Valved Respirator : 3M Wood Filler : 3M™ SandBlaster™ Medium Sanding Sheets : ScotchBlue™ Painter’s Tape : 3M Non-Slip Painter’s Tarp : 2 1/2 ” Exterior Screws : Stain Brush ( Or rag ) : Staining Gloves : English Chestnut Stain : Satin Polyurethane : (11) 1-1/4 x 6 x 8 Cedar Decking : (2) 4 X 4 X 8 Cedar Posts : 50 lb Bag of Quikrete : Leveler : Contractor Pencil : Measuring Tape : Power Drill : Hole Digger : Circular Saw
Digging Your Posts

We started by digging 22″ holes with a hole digger (pictured above). We went down almost two feet to give us a secure base for the structure. This made our fence posts relatively 74″ above the ground, the right amount to cover the top of the shed.

The most important part of this step was making sure both posts were completely level. We used a basic leveler to triple check that the posts were not only level on their own vertically, but that they were both the exact same height. We checked the height by placing a board on top of both posts and then placing a level on top.

To secure the posts into the ground we used Quikrete, a really easy product that is great for this type of project. You simply pour the concrete sand into the hole and then drench it with water. Then just let it set for 4 hours. That’s it, no mixing or anything. I loved it and our posts are really secure.
Building a Slat Wall

I am going to stop right here and tell you what we did wrong. Looking back, I would definitely have stained the posts and the boards FIRST before securing them together. I completely underestimated the space behind the wall and the shed and neither of us could fit behind there, so staining became a real tedious project. So if we had to do it again, I would stain all of the wood prior to putting it together and then just touch up once it was complete.
But here is what we did. After the posts set, we were ready to put on the horizontal slats. We chose cedar decking 1-1/4 x 6 x 8 Cedar Decking for this part. The boards actually measure more like 5 1/2″ and we cut them at 82″ long for this project. We needed 11 boards to fill the 74″ fence posts, spacing them at 1/2″ a part. We used (2) 2 1/2 ” Exterior Screws on both ends to secure the boards to the post.

Once all of the boards were up, I filled the screw holes with 3M Stainable Wood Filler, allowed it to dry 24 hours, and then used 3M™ SandBlaster™ Medium Sanding Sheets to smooth out the filler.

Like I mentioned before, staining was a little bit tedious because we had so many nooks and cracks to fill. To protect our patio, I put down a 3M Non-Slip Tarp and then taped off our gutters with ScotchBlue™ Exterior Painter’s Tape. I chose Minwax English Chestnut Stain for the wall, I liked how it was a rich dark color and added a good contrast with our patio. I prefer to apply stain with a rag while wearing gloves, but you can also use a brush if you want. And don’t forget to use your Sanding and Painting Valved Respirator to protect you from the fumes!
After two coats of stain, apply a coat or two of polyurethane to protect your wood. I prefer a satin sheen.
DIY Privacy Wall

And lastly, I picked up those adorable galvanized planters from Pick Your Plum a while back, 5 for $20! I filled them with soil and some flowers and hung them on the fence. I also spread black mulch under the wall to really polish off the look.
The total cost for this project came in right around $250, that included lumber, stain, Quickrete, screws, new hole digger and all of the flower pots and gardening supplies. The total cost will vary for everyone depending on what you already have on hand.
And are you ready to check out my very first video tutorial? Ok, so don’t laugh. It turned out way longer than I would have wanted but this gives you some insight into the project and I’m pretty sure this is your first time meeting ‘me’ other than what you get from my posts :)
This post is a collaboration with 3M DIY. To keep up-to-date on projects, products and sampling visit 3MDIY.com
 This post is a collaboration with 3M DIY. To keep up-to-date on projects, products and sampling visit
About Taryn Whiteaker
Hi! I’m Taryn! The voice behind Taryn Whiteaker Designs. I launched this brand over 11 years ago when I became a stay-at-home mom. What started as a small craft and mom blog eventually grew into a full time design and DIY site. My goal has always been to inspire others (especially women!) with design ideas, DIY tutorials, entertaining ideas and give you the tools you need to complete them yourself!


This is great in so many ways. Especially for people like me who live so close to their neighbors.
Love your video!!!
I love this Taryn!!!! You have to be the cutest person I have ever seen… haha I love the video!!! You make me want to start doing videos again on my blog. Great job girly!!!! :)
I LOVE it, Taryn! The wall looks awesome. I love it with the hanging planters. You are so stinking cute on your video too. Adorable!
It’s nothing short of AMAZING! Love it! :)
I think you done great on your video as well as your wall, that’s a great idea!
First I’d like to comment on the lovely commentator. You look gorgeous pregnant. Hope you weren’t out there working in terrible heat. I worry about you sometimes girl. Have to take care of that little one and Mama. Can hardly wait to see your new baby, is your little one excited about her new baby?
I haven’t watched the video yet. I can’t ever hear what people are saying on them and I get bored watching, sorry.
I love that wall, what a great project, so glad you shared it, love the patio blocks. I had to save that so we could maybe do something like that, I’d love to put up a wall bordering our fence on road side. People/young adults and kids sometimes come along there and love to tease our dog. I’m afraid he’ll bite them as he’s really protective of us.
You two did a great job on your project. Lots of work but well worth it. Enjoy your summer, just a few weeks now til baby. Happy summer
great project!
Love the video, you’re so cute pregnant… I mean I think you’re cute always… but hearing you, meeting you, and seeing that little one made me smile Taryn! :)
pinning!
gail
LOVE.THIS.PROJECT!!!!!!!!!!!!!!
i love the wall! It adds charm!
Taryn, that is awesome! I love it! I am loving my ‘rusty fence’ project that uses the same idea with the pots of plants. I’m already thinking of putting cute white pumpkins in mine when fall arrrives!
What a beautiful addition to your patio pace Taryn. I love how that turned out.
Okay now that I have watched the video- I have to say you are just way too adorable. I wish I had that much style, pep & looked that great when I was expecting. :) Love the video- great job!
great idea!
This looks like such a fun project! I have been looking for a way to put some planters in our backyard and this would be perfect.
it turned out great!!!! I never would have thought of such an easy way to make sure your post heights are te same!
That is fabulous I love the color you picked to it adds a warmth to the space.
Lisa
Creative Raisins
It’s gorgeous, Taryn! I’ve pinned and I’m including a link back in this week’s DIY highlights. You make it look so easy! ;) Thanks for sharing!
The slat wall looks great! I love the way you’ve dressed it simply with the small pots. I bet it looks even better in real life.
Sandra
Looks great! Any ideas on what you would secure that wall with if it was not secured in ground? Looking to do this same idea for my basement but do not want to attach in the ground, would like to make it portable.
This is just what’s needed for a nosey neighbor! Thank you!
Glad you found it useful too!