This post brought to you by Moen, Incorporated. All opinions are 100% mine.
I mentioned last week that I spontaneously decided to makeover our downstairs bathroom and today I have a little sneak peek for you! I guess it wasn’t entirely spontaneous, it was on my Home Goals List for this year but I wasn’t planning on getting to it for a little while longer. But then, I received this beautiful Moen Boardwalk 1-Handle bathroom faucet in Spot Resist and I just couldn’t bring myself to ONLY update the faucet. Once you pop you just can’t stop right? So all it took was a new faucet and now I’m neck-deep in another remodel project. Typical.
Today, I’m showing you How To Install A Bathroom Faucet and giving you a sneak peek into the new bathroom. It was my husband and my first time installing a bathroom faucet and it was definitely a learning experience so I thought I’d share some of our findings with you.
 Here is a before picture of the space. It is the only room in the house that I haven’t touched since I moved in, and that was 5 years ago. Everything is still builder’s grade and in definite need of a facelift.
  Here is the beautiful Moen Boardwalk 1-Handle Spot resistant bathroom faucet that we installed in the bathroom. We installed one of Moen’s brushed nickel, spot resistant faucets in our kitchen in the spring and we have been so happy with it so far. It is so easy to clean.
Also, the Moen Boardwalk meets WaterSense criteria, using up to 32% less water without sacrificing performance. You can purchase the faucet at Lowes! Here are the primary tools needed to install the new sink. Since I decided I wanted to dive right into the remodel, we took out our existing sink so I could put in our…. drum roll please… DIY cement counter tops! It’s something I’ve wanted to do for a really long time and I’m so excited about how they turned out. It was my trial run for our kitchen so get excited to see more.
But if you were simply going to replace your faucet, you wouldn’t have to do this, you could keep your existing sink in. Here is where we ran into a little problem. We went to put the new faucet onto our old sink and discovered that it didn’t fit, it was too wide and went off the platform. SO we had to buy a new sink. We were actually completely OK with it because the sink was 16 years old anyway and could use an update.  We started by laying out all of the pieces found in the box and pulled out the instructions, you’ll need these.
  Since we bought a new sink, it actually made it easier to install the faucet because we could flip it over and get a better angle on things before we put it back into the countertop. You’ll want to start by putting in the faucet and then tightening the nut and bolt on the other side. On another note, the decorative plate underneath is optional so you could choose not to include it and have a totally different look.
  Then we installed the drain, easy peasy. Take plumbers putty and wrap it around the top, then push it onto the sink until it seals and wipe away any excess.
  Then you’ll want to secure it by screwing on the three pieces included.
  Installing the drain/sink stopper was the hardest part for us. The process didn’t go exactly like the directions said and it took us a little while to get all of the pieces to fit together and the stopper to move up and down. But we did it. Here is how it looked when we were done. At this point we put the sink back into place and secured the hoses.
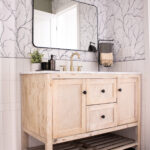
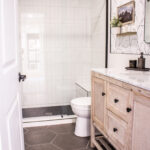
And this my friends is progress! Look at that difference,. The bathroom is coming along and I can’t wait to finish it :)
To keep up with Moen Like Moen on Facebook, Twitter, Pinterest, Instagram and Google +


Now that’s a snazzy faucet. Very modern and awesome. Just think of what you learned putting that faucet in, good job. It’s always scarey to do something for first time but after that- hey nothing to it, right? I can remember hubs when he replaced our kitchen faucet earlier this year. Uh huh. We won’t talk about any longer ok?
How was putting the concrete counter on? Did you make the counter also? I’d so love to do our kitchen counter in concrete, hate it. Not holding my breath on that project either. I’ll just admire other people’s projects. ok? Hey I’m still waiting for my walls to get painted. It’s only been since 2006. When I talk about doing it myself hubs complains and groan and moans.
Happy weekend