Disclaimer: This post is sponsored by WORX Tools, all opinions are 100% my own.
We are in the home stretch of my son’s sports themed bedroom renovation! It goest without saying that I always think I’ll have an entire room renovated in 1-2 months and here we are going into month 4. But hey, at least it is looking amazing and all the hard work is paying off! One of the largest projects in this space has been building the DIY Window Bench With Storage inside an awkward niche.
What was once a very odd space is now not only functional, but brings a whole new design element to the room. I’ve never built anything like this before, it was challenging at times but also easier than expected and I learned a lot from it. Today, I’m walking you through my design plans for building the bench and showing you all the tools you need to complete one yourself!
DIY Window Bench With Storage

Before Space

First, let’s back track and take a look at the before bedroom, what was working, what wasn’t and what needed to happen.
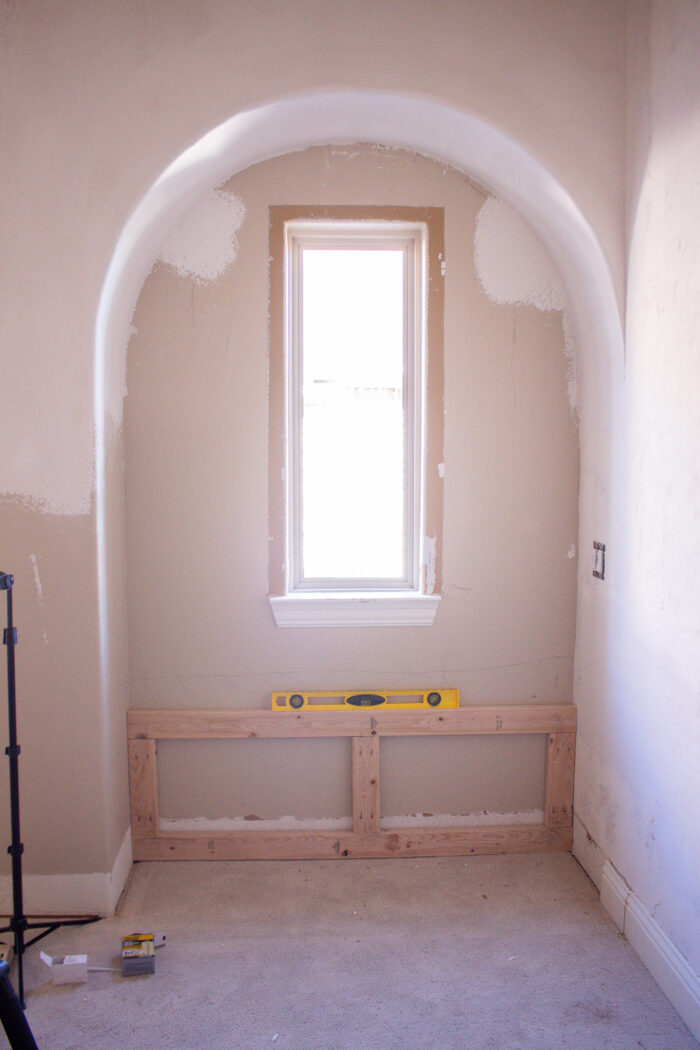
This is what the wall looked like in his room before. There were two “eyebrow arches” on either side of the chimney that comes from downstairs. 1) I don’t love the shape of eyebrow arches. They actually feel a little dated to me. Our entire house has full arches everywhere, but this was the only space with this particular shape. 2) the windows aren’t symmetrical with the chimney which drove me nutty and they just felt like wasted space.

To solve this problem, I decided they needed to actually be two separate spaces instead of trying to be symmetrical. I had a crew come in and do the bigger construction work for me this time around. They removed the left eyebrow arch and then reshaped the right side to be a more rounded arch like the rest of the house.
How To Build A DIY Window Bench

DIY Window Bench Supplies
TOOLS:
- WORX Compound Miter Saw
- WORX Nitro Oscillating Multi-Tool
- WORX Nitro Brad Nailer & Stapler
- WORX Circular Saw
- WORX Nitro JigSaw
- WORX Impact Driver Combo Set
- WORX Pegasus Work Table
- Crow Bar
- Hammer
- Staple Gun
- Caulking Gun
- Pocket Hole Maker
- Level
- Measuring Tape
- Stud Finder
- Iron
SUPPLIES:
- 2 X 4’s
- Oak Plywood (you want a smooth finish plywood)
- PVC Trim
- Veener Edge Banding
- Wood Screws
- 18 Gauge Brad Nails
- Liquid Nails
- Caulk
How To Build A Window Bench
Now it was my turn to jump in and turn this space into a cute reading nook that also includes storage for nerf guns, toys, blankets, etc. I’m sure the function will change over time.
I know the supply list is long and there will be multiple steps to this project, but don’t get overwhelmed. Just take it step by sep. It’s going to be easier than you think, especially if you have some experience with do-it-yourself projects!
Step 1: Frame Your Bench

If you are building this directly against a wall, you will want to remove your base boards first. You can do this by using the WORX Nitro Oscillating Multi-Tool to cut through the baseboard. You just need to remove the back piece, and the sides to your desired width. TIP: Save your baseboards to use as trim for the front of the bench!


Framing your bench is going to be the easiest part of the project, but also the most important part. It’s what makes it structurally sound and also creates the level base for your bench.
Cut your 2 X 4’s down to size. I built the back and front frames first. Cut your long pieces the desired length of the bench (in my case it fits inside the niche perfectly), then cut the remaining two pieces of 2 X 4’s to give you the height that you want your bench to be. I love using my WORX Compound Miter Saw for this. I used a Kreg Jig and my WORX Impact Driver Combo Set to create pocket holes in all my pieces. Then secured them together. Pocket holes create a very seamless look and make it very easy to secure the pieces together.

I went a little higher with my bench height, with such tall ceilings I felt like I wanted it higher, I also like the idea of climbing up on the bench and having more room for storage. But it’s completely personal preference.
To secure the frame in place, you want to make sure you are securing the frame to the studs in the wall. Use a stud finder to find the exact location of where you need your wood screws to go in. I secured the back panel first, then added my side supports (also into the studs). Once the whole frame is connect, I went back and added center supports to the side panels.
Step 2: Cover Your Frame In Plywood


When choosing your plywood for this project, I recommend choosing a higher end plywood that has a smooth finish on it. I chose oak plywood wood.
I cut my plywood down to size using my WORX Circular Saw . I cut mine about 1/2″ taller than the frame. You will see why in the next few steps.

Attach the plywood to the frame using the WORX Nitro Brad Nailer & Stapler. Make sure to actually secure it to the frame :) To give this a very polished look, I also covered the inside of the box. This way, the nails are all covered for safety reasons too.
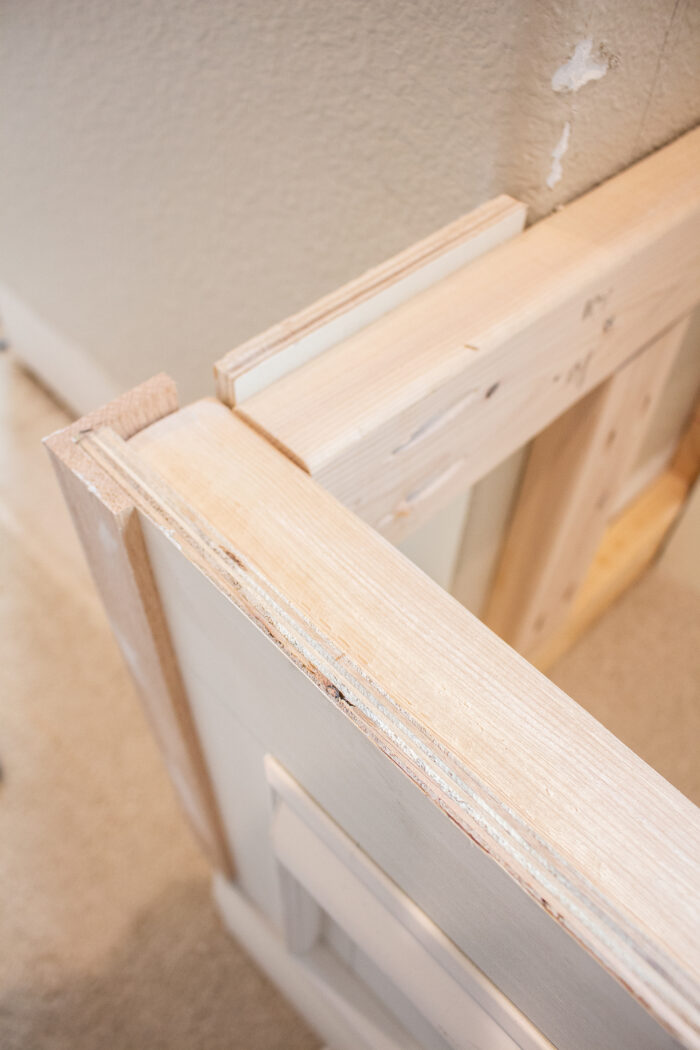
Step 3: Finish the Edges

Why did I leave that 1/2″ gap at the top of the frame? For a very finished look I added a piece of 2 X 1/2″ wood inside the gap to make the top edge flush. If I went just to the top of the 2 X 4’s the top wouldn’t have been as flat. 2 X 4’s are slightly rounded so it would have been hard to apply the edge banding to it and make it flat. So I created my own flat top edge.
Completely unnecessary, but I added trim to the corners for an even more elevated look. I love trim and the detail it gives wood working.


The final touch is to add Veener Edge Banding to the top. This will give your piece a very polished look and cover all of the raw edges. I used the 3″ banding and then trimmed the excess. You simply iron it on. Make sure to realllly put pressure on it and make sure it is fully secure. Once cooled, use an Xacto knife to cut the excess off.
FYI- I did have some issues with the banding bubbling after I painted. I’m not sure if it was because it wasn’t fully secure to the wood, or if the amount of paint used from the sprayer caused it to get too wet. Maybe rolling it would be better.
Step 4: Add Trim Work


Grab those baseboards you removed at the beginning and reuse them for the front of the bench and along the sides if needed. I wasn’t sure if I would be able to find this exact trim again, so I am glad I saved mine and reused it. Because the back baseboards were cut for an inside angle, I did have to piece mine together a bit to create and outside angle. If your bench doesn’t come out like mine, you won’t have to worry about this.
Since I added picture frame moulding to the entire room, I wanted the base of the bench to have the same aesthetic and feel like an extension of the walls. So I added two small rectangles of picture frame moulding onto the front of the bench. I also use a piece of 3″ trim as my guide so all the trim is equal distances apart from the edges and in between. I always use my WORX Nitro Brad Nailer to install my trim.
Step 5: Prime & Paint Your Bench


I was planning on using my industrial paint sprayer for the entire room, so I primed the bench the same time that I primed the whole room. After letting it cure for 24 hours, I painted it Sherwin Williams Web Gray. It’s a really pretty gray/blue color.
Step 6: Upholster Your Bench Top


I used left over plywood to use for the bench top! I stacked 2″ foam along with a layer of batting ( I think this makes it more comfortable) and then wrapped the fabric around it and stapled it on the back. I also added a piece of black backing to make it feel a little more polished. You can see it in the pic below.
Step 7: Add Hinges

To finish it off, I added hinges to make it a full functioning storage bench. I grabbed these ones off Amazon!
DIY Window Bench Seat With Storage

I could not love this space more! This was definitely a learning experience building this! I had never built anything quite like this before. It was a great lesson in framing and detail work and it only made me want to take on even bigger builds! I couldn’t have done with without my WORX Tools! I’ve said it a million times before, but having the right tools is KEY to being successful in DIY. Every project is so much easier when you have the correct tool for the job.
My son already loves this space! When wiring for the scones, we purposely added an outlet to this look nook. It also includes a USB port so he can charge electronics while hanging out here.
I’ve got just a few more projects left in this space and I’ll be doing a FULL reveal of this entire wall and full baseball bedroom very soon! It is truly a dream boys bedroom, I can’t believe how far this space has come!
Paint Color: Sherwin Williams Web Gray | Grid Pattern Bench Fabric | Industrial Sconces | Faux Leather Pillows | Tassel Pillow- Magnolia Home | Industrial Night Stand | Tall Black Bedside Lamps
Watch The Process
About Taryn Whiteaker
Hi! I’m Taryn! The voice behind Taryn Whiteaker Designs. I launched this brand over 11 years ago when I became a stay-at-home mom. What started as a small craft and mom blog eventually grew into a full time design and DIY site. My goal has always been to inspire others (especially women!) with design ideas, DIY tutorials, entertaining ideas and give you the tools you need to complete them yourself!


Love it! You really are a whiz with the tools! I love the dark paint and was wondering who makes it and the color. Thanks!
Hi! Thank you SO much! The paint color is called Web Gray by Sherwin Williams
Do you mind sharing what type of hinges you used?
Hi there! Would you be able to share where the Roman shades are from and what color you got?
Hi! Yes, they are from Select blinds, the classic Roman Shades with blackout liner and i did the remote control option which I love. The color is Stormy Sky