• Skip to primary navigation
  • Skip to main content
  • Skip to primary sidebar
  • Skip to footer
  • Home
  • About
  • Contact
  • Partner with Taryn

Taryn Whiteaker Designs

DIY and Interior Blog

  • Our Dallas Home Tour
  • Shop My Pics
  • Home Styling
    • Room Reveals
      • Our Current Home
      • Our First Home
    • Seasonal Home Tours
  • DIY Projects
    • DIY Home Decor
    • Crafts & Sewing
    • Before and Afters
    • Before and Afters
    • Furniture Builds and Makeovers
  • Seasonal Decor
    • Christmas
    • Easter
    • Fall
    • Fourth of July
    • Halloween
    • Spring
    • Valentine’s Day
  • Printables
  • Entertaining
    • Parties
    • Tablescapes
  • Fashion
  • Travel

June 12, 2019

DIY Kids Art Center

Hello! You may remember about a month ago we finished up my daughter’s bigger girl room. I love the space, but it didn’t feel completely right to me. I would say maybe 90% there but I have learned over the years that I truly need to take a break from a room for a little bit and come back to it in order for it to be done right. So here I am with the first little change and I am SO excited about it.

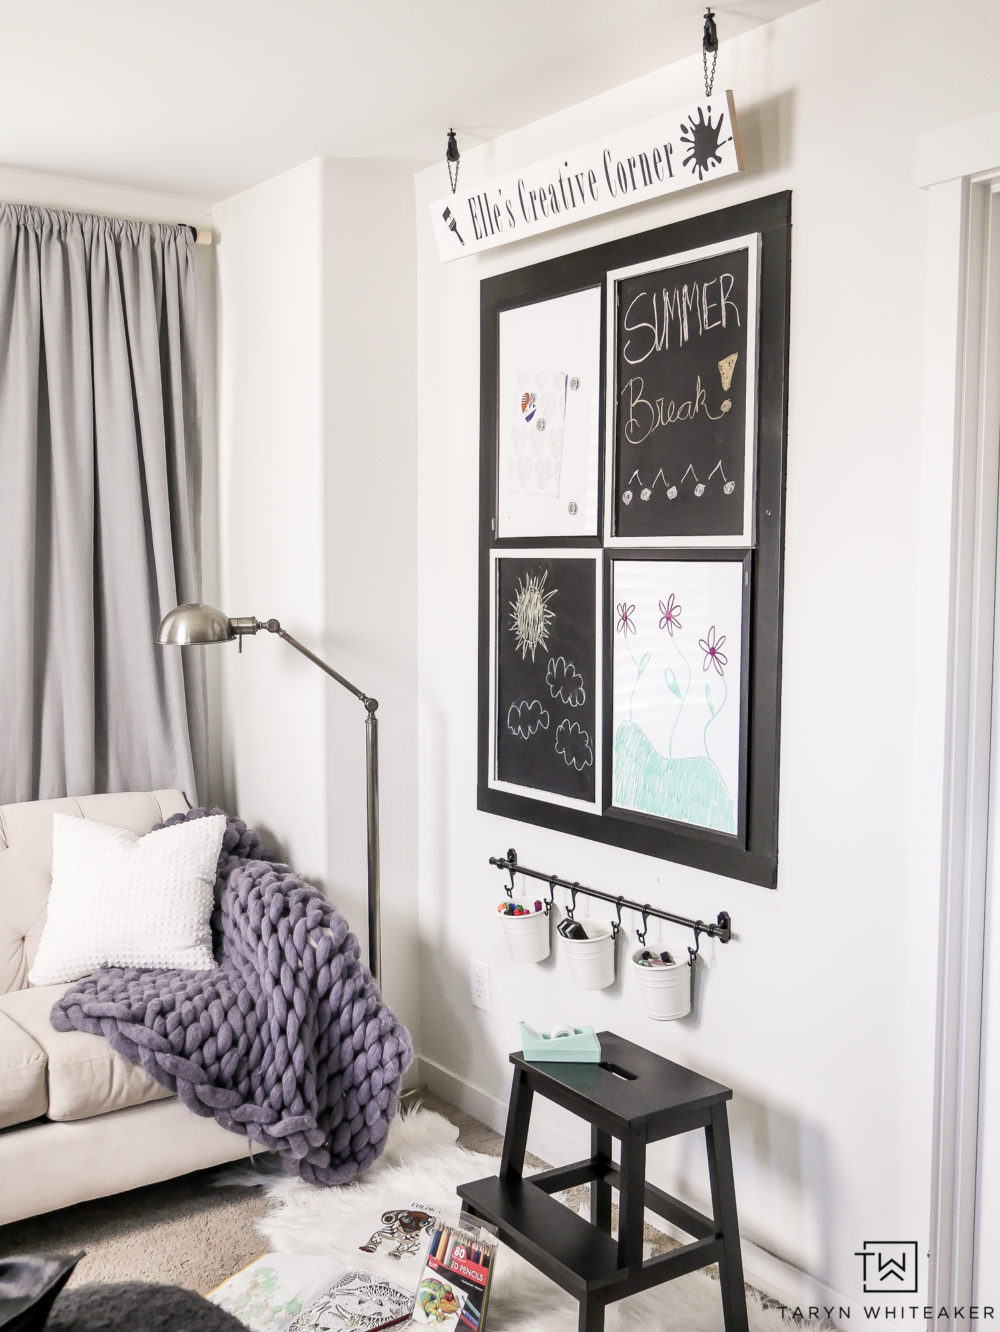
My daughter’s two favorite things are gymnastics and art. I already included the gymnastics prints in her room but I wanted to create a space for her to be creative and display her artwork. I took down a wall that I didn’t feel right about and created this DIY Kids Art Center instead! I think it is a much better use of the space and more practical. It just suits her better than hanging a few shelves that didn’t take up the space well anyway. And it only costs around $70!

DIY Kids Art Center

Need to take up space on a large wall or just want a place for your kids to be creative? Learn how to make this DIY Art Center for just $70!

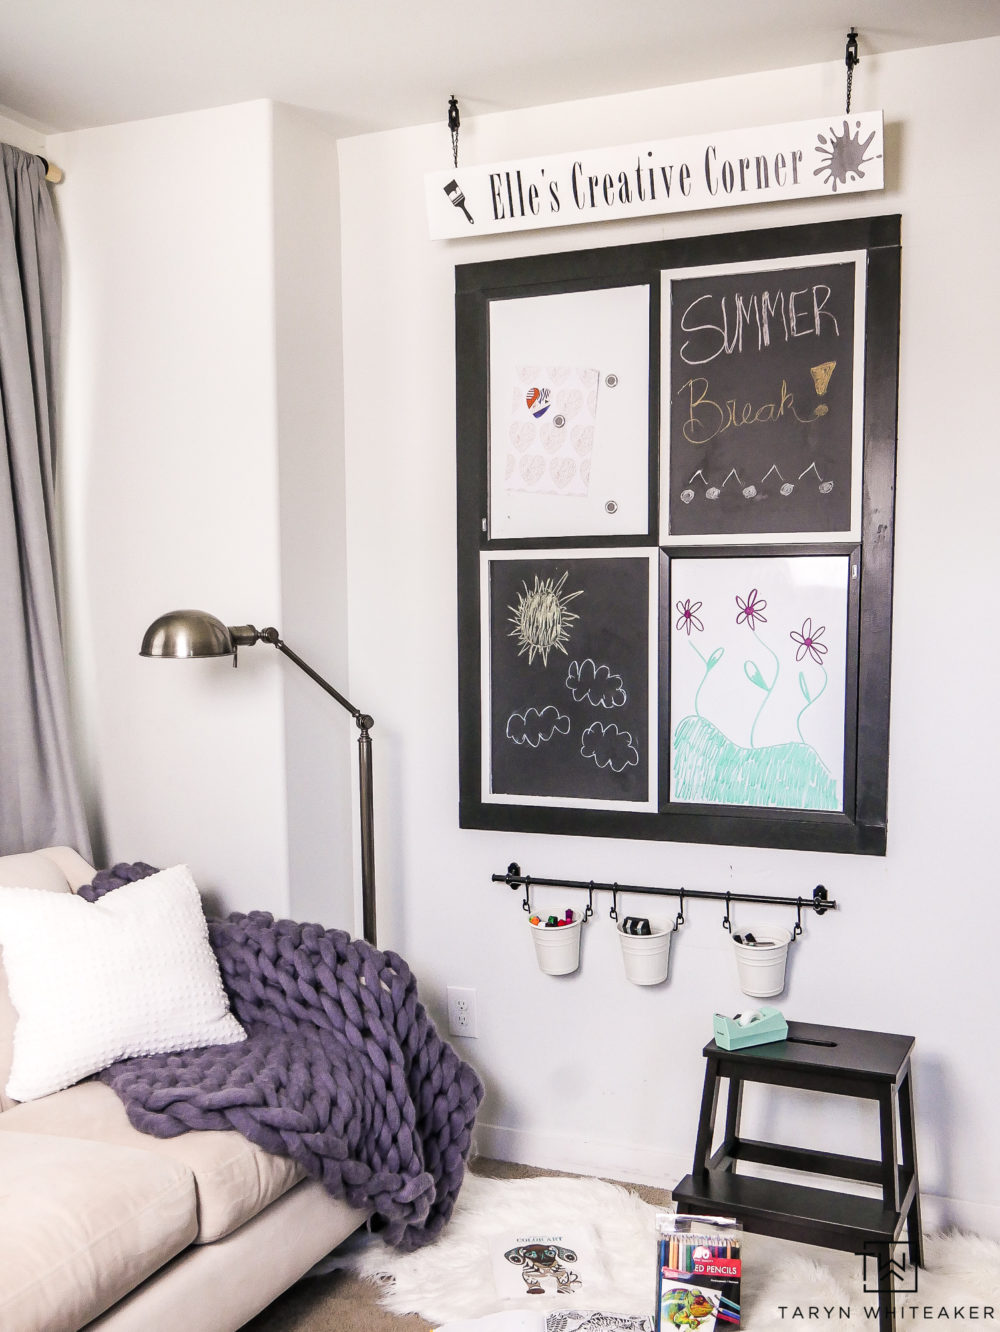
I am so excited about how this space turned out. I wanted a place for her to be creative, display her artwork and just play. Ok, and I also wanted something design wise that took up more space :)

Need to take up space on a large wall or just want a place for your kids to be creative? Learn how to make this DIY Art Center for just $70!


When it comes to kids rooms especially, I love adding a few personalized touches to make them feel like the space is truly theirs. I created this little sign using a piece of scrap wood and my Cricut. I hung it using some vintage industrial hooks I had left over from another project and black chain.

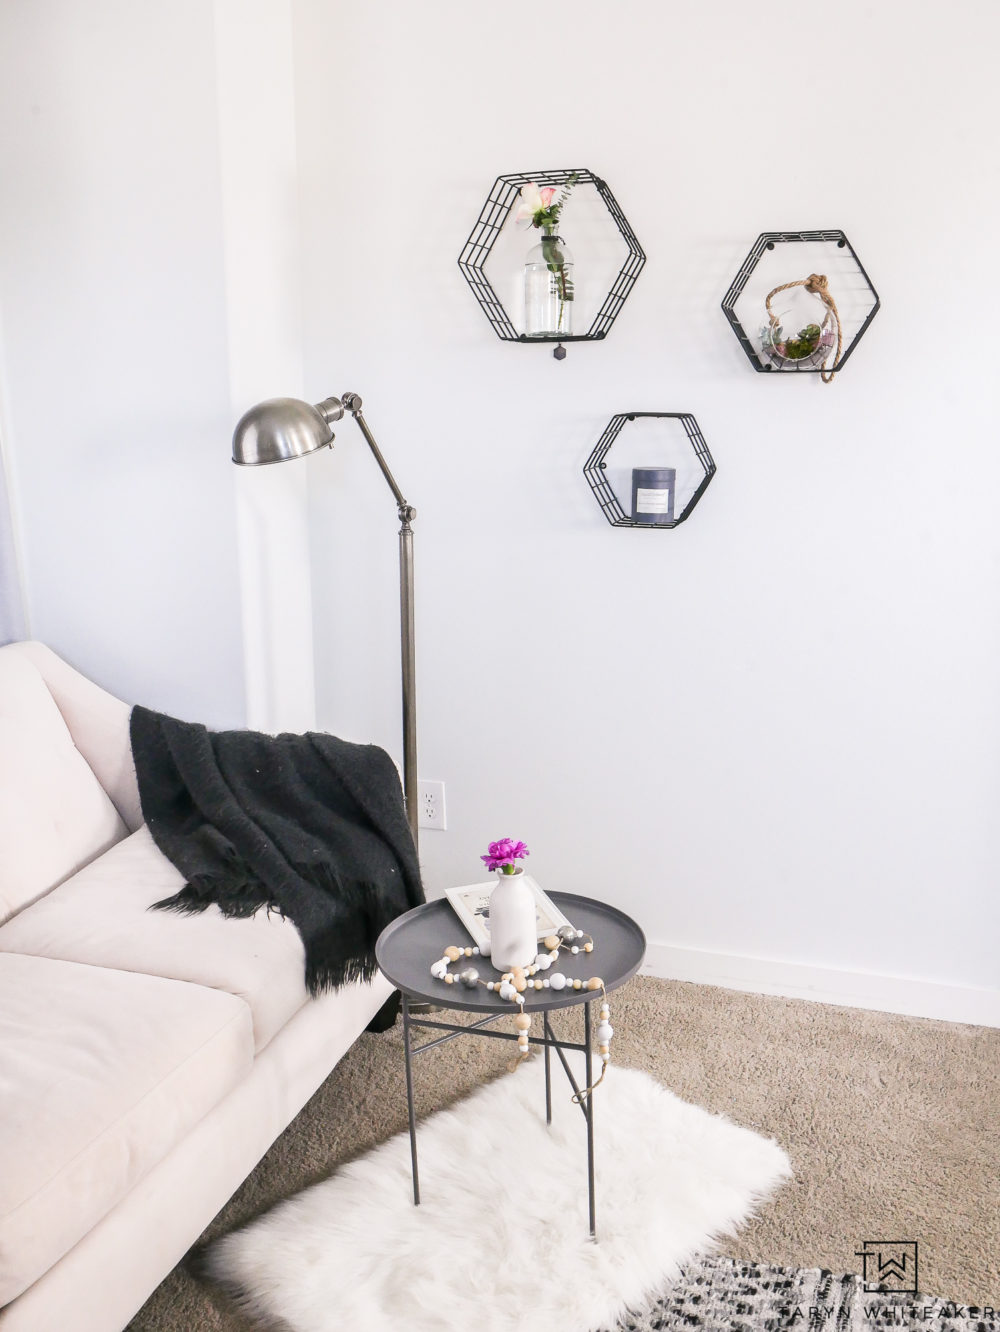
Here is what the space looked like in the original reveal. While I love those hexagon shelves, they just weren’t working in this particular space. They were too tiny and looked awkward.

Kids will love this DIY kids Art Center and keep them occupied for hours!

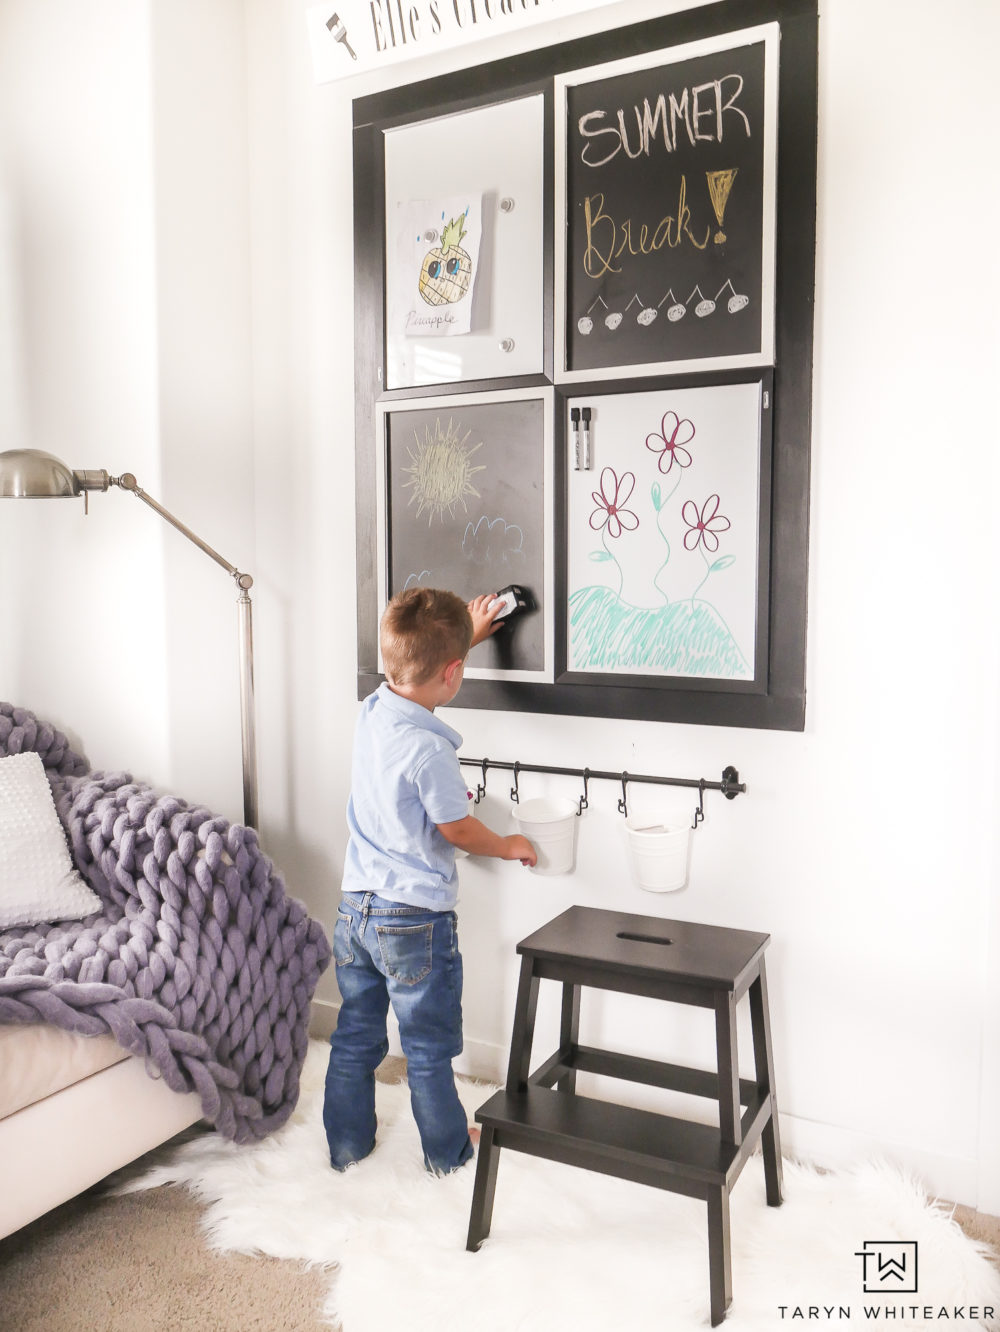
On the bottom, I added the staple IKEA bucket organizer to hold dry erase markers, chalk and an eraser.

Since the top boards are pretty high up, I added a black step stool so she (and the other kids) could reach the top boards and they would be usable.

This kids art center is a great way to use up a large wall and also provide entertainment for the kids!

Overall, this project was very inexpensive, it just took some planning to get it right! I’m going to walk you through all the dimensions and exact boards I used to get the perfect spacing.

SUPPLIES

  • (2) 17X23 Chalkboard
  • (2) 17X23 Whiteboard
  • Command Strips
  • 3″ Trim
  • IKEA Bucket Organizers
  • Dry Erase Markers
  • Chalk
  • White Paint

How To Create Your Own Art Center

Step 1: Mark Your Lines

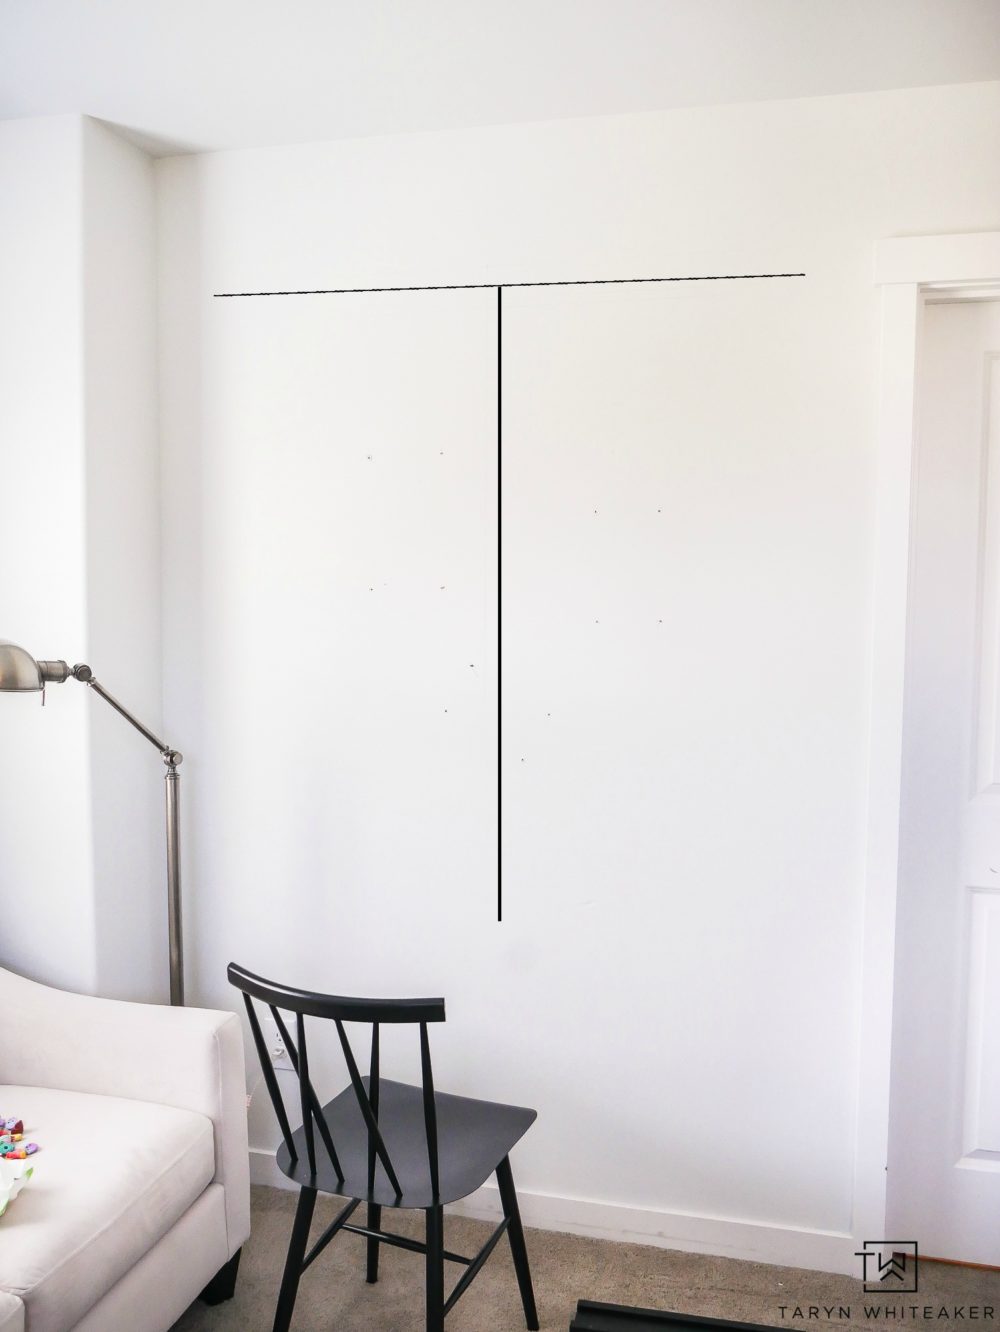
First step is to prep your wall and mark your lines! I used a level to draw the top line where I wanted the top of the boards to rest and then drew one straight down the center. It was hard to see my pencil lines in the pic so I marked them up for you to see. These guidelines will make it SO easy to put together your craft wall.

I absolutely LOVE using Command Strips to hang just about everything I can in our home. It makes it so easy hang things, you can move them around without making any more nail holes and it’s easy to adjust them if something hangs a little off. I put four on each board.

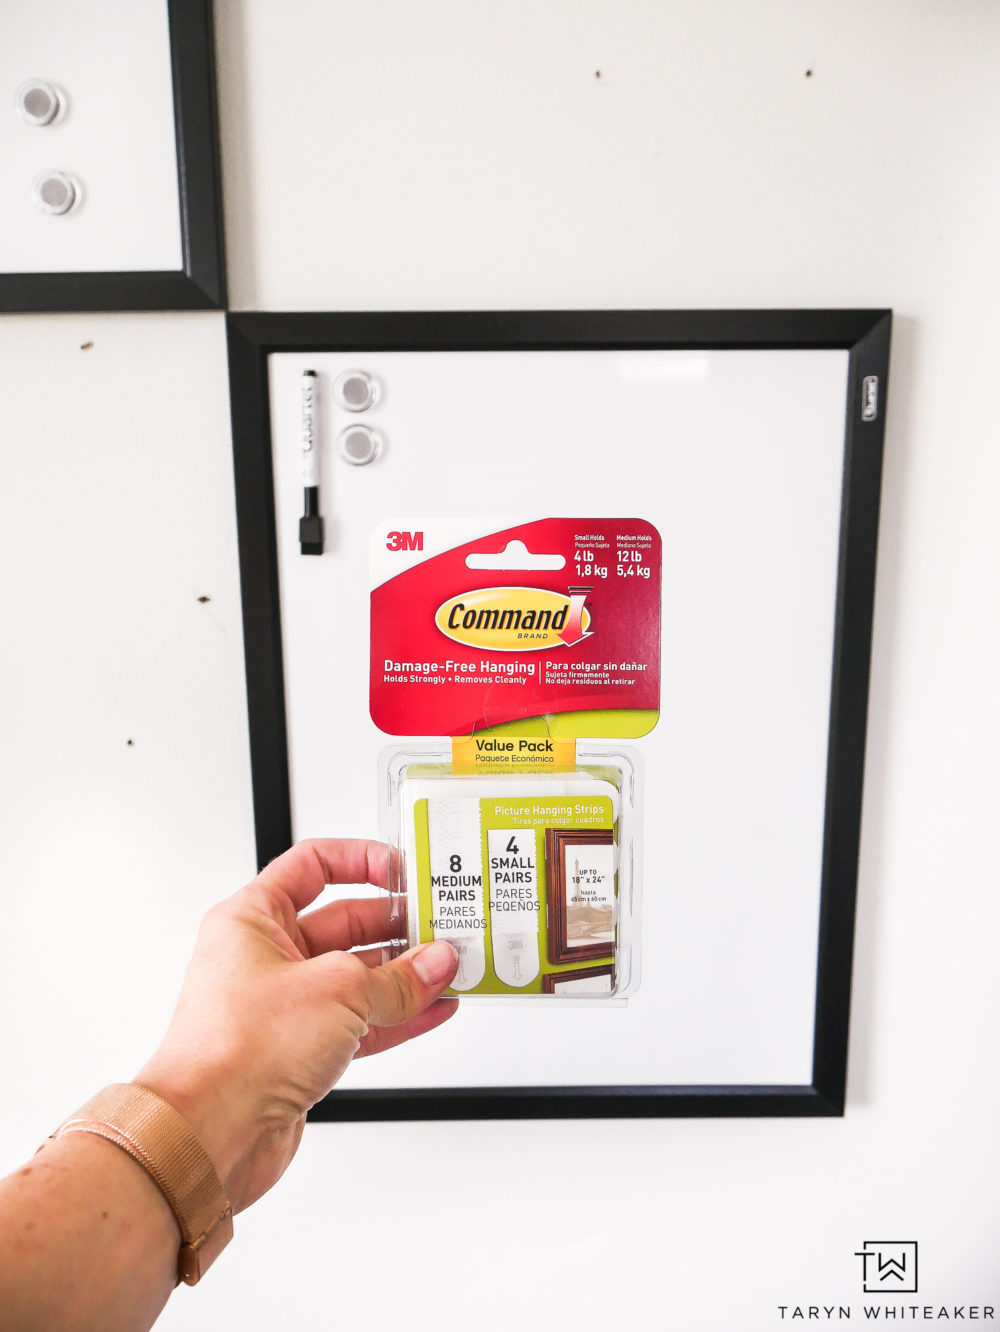
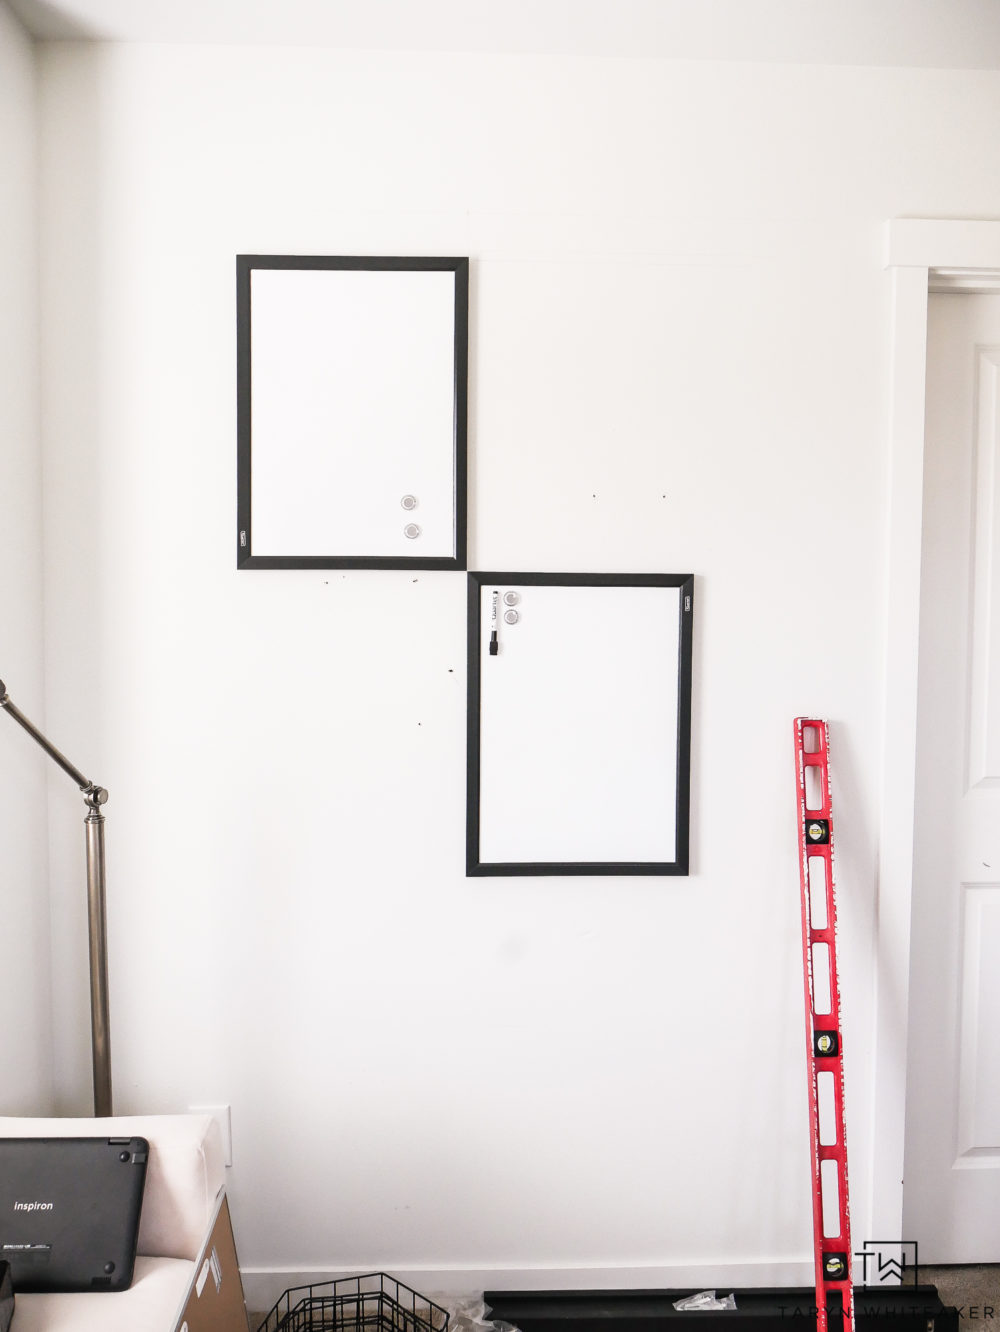
I started with aligning the top left white board the top line and the center line and then the lower right with the center line so the middle corners touch.


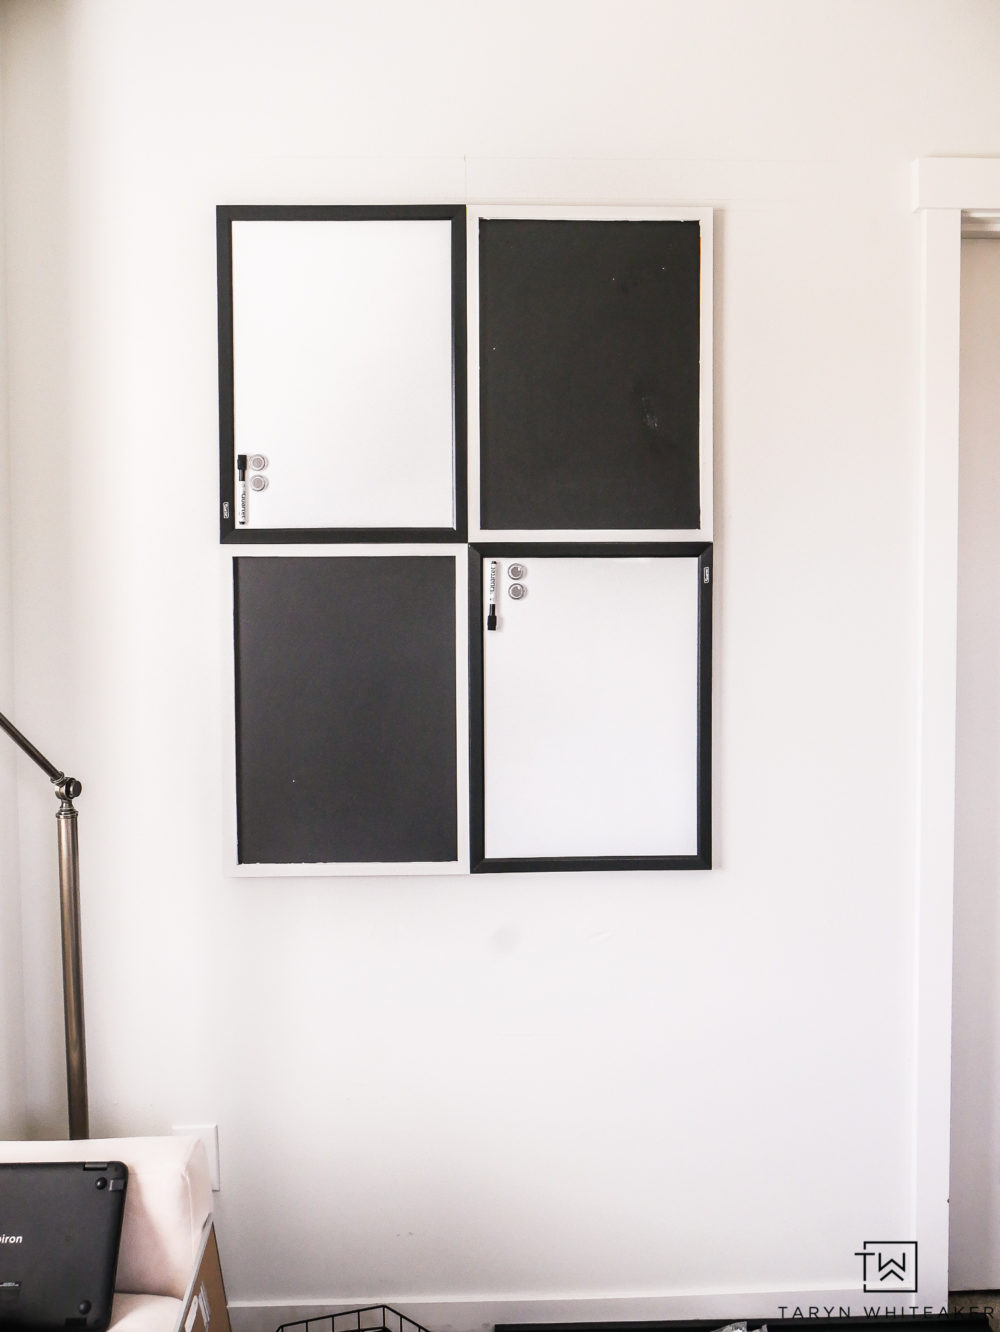
Then all you have to do is add the chalkboards and you have yourself the perfect fit! The chalkboards come with an oak boarder and then I painted them white to go with the design.

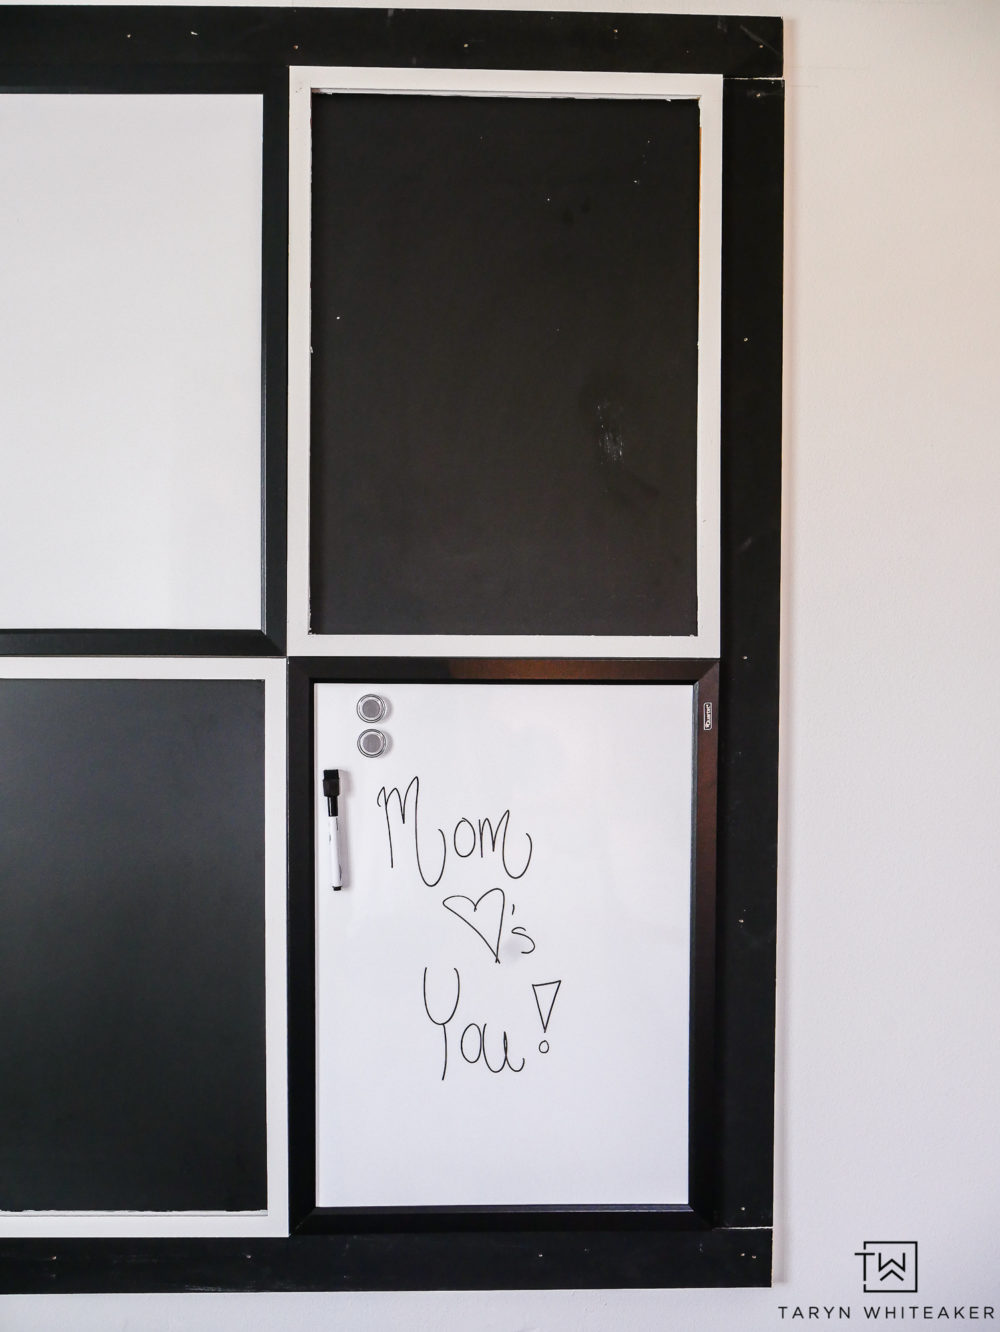
To make the space feel a little more finished off, I added some black trim around it.

Fill the nail holes and the joints with a little wood filler. Let it dry and sand it down.

Then, I gave it two coats of black paint.

Need to take up space on a large wall or just want a place for your kids to be creative? Learn how to make this DIY Art Center for just $70!

SHOP THIS SPACE

If you are looking for something to take up a large wall and/or wanting to put together your own diy kids art center, this is a pretty inexpensive way to do it! $70 is a good deal!

About Taryn Whiteaker

Hi! I’m Taryn! The voice behind Taryn Whiteaker Designs. I launched this brand over 11 years ago when I became a stay-at-home mom. What started as a small craft and mom blog eventually grew into a full time design and DIY site. My goal has always been to inspire others (especially women!) with design ideas, DIY tutorials, entertaining ideas and give you the tools you need to complete them yourself!

You May Also Like:

  • Sports Gallery Wall-8
    Black And White Kids Portrait Wall

Filed Under: ALL POSTS, Before and Afters, DIY Home Decor, DIY Projects, Our Current Home, Our Home Projects, Room Reveals

Reader Interactions

Comments

  1. Gwen says

    June 13, 2019 at 7:25 pm

    This is an awesome idea! I am making one in the hallway for our grandbabies. Thank you for the wonderful idea!

    Reply

Leave a Reply Cancel reply

Your email address will not be published. Required fields are marked *

Primary Sidebar

Looking For Something?

CONNECT

Meet Taryn

Taryn Whiteaker

Hi and welcome! I'm Taryn and the voice of style behind Taryn Whiteaker Designs. Sharing our journey of modernizing our European style home in Dallas. Thanks for stopping by and don't forget to subscribe to my mailing list to get all the latest updates! Read more...

Footer

THIS SITE

  • Home
  • About
  • Contact
  • Partner with Taryn

Privacy Policy

If you are interested in learning more about data that might be collected by this site you are encouraged to read the Privacy Policy

COPYRIGHT POLICY

All images on this site are copyright of Design, Dining and Diapers, LLC. Unless otherwise noted. You may not use these images without written permission. If you would like to feature a project shown on Design, Dining and Diapers you may use a maximum of 2 images and include a visible link back to the project.

More From The Gram

tarynwhiteaker_designs

Taryn Whiteaker Designs
Comment SHOP for top Amazon sellers from February! Comment SHOP for top Amazon sellers from February! Sharing what you loved and found the most helpful last month! 

#amazonfinds #homedecor #homefinds
Here we go! Kicking off a brand new project on a r Here we go! Kicking off a brand new project on a rarely see room on here but one I see all day long 🤪. It’s time to make it a little more practical and make it a lot more fun! 

#roommakeover #diy #laundryroommakeover
Comment LINKS for more info on this space and all Comment LINKS for more info on this space and all my design sources. 

#homedecor #neutralhome #neutraldecor #homedesign #transitionalstyle
Family Room Phase 1 reveal! Swipe for the before a Family Room Phase 1 reveal! Swipe for the before and to see a video with the light on! My goal was to create a cozy yet elegant space where we can kickback and relax and also entertain. I wanted to keep the neutral tones and use the dark beams as a starting point for the design. Adding comfortable furniture but also a statement chandelier and vintage inspired accents. 

Phase 2: building a custom, built-in media center coming later this year! 

#neutrals #neutralhomedecor #interiorstyling #moderntraditional
Comment RUG and I’ll send you the link! It’s o Comment RUG and I’ll send you the link! It’s on major sale this weekend too! 

It’s very soft, definitely a cream color but not yellow. Great quality! Highly recommend it. 

#homedecor #wayfair #wayfaircreator #decorhome #neutralhomedecor
Solving this design dilemma! This large light swit Solving this design dilemma! This large light switch in the middle of the wall has been tricky to decorate around, so I decided to decorate with it, incorporating it into the gallery wall. 

All the prints are purchased from Etsy!  Most frames are from Target. 

#homedecor #neutralhome #diyhomedecor #transitionaldesign #arches
My goal with every room is to make it feel warm, i My goal with every room is to make it feel warm, inviting and extra cozy. It’s often the final finishing touches that truly transform the vibe of a room. I picked up some final styling pieces from @wayfair , I am obsessed with both side tables. They are both statement pieces. And the personal photos, candle, heart trays and leather pillows are why bring the warmth and personal touches into this space. 

Comment SHOP for everything I added in here! 

#wayfaircreator #wayfair #ad #valentinesday #wayfairpicks
I finally found the perfect family and pet-friendl I finally found the perfect family and pet-friendly sofa that passes the designer test! This is the 5-Seat Modular Corner Sectional from @7thavenueco in the color Oatmeal Beige. We ordered it in the extra-deep seat option for ultimate coziness. The material is water-repellent, stain-resistant and you can also throw all covers in the wash!

We cannot say enough great things about this sofa, we all love it and just sink into it. It definitely passes the family test. Plus, it truly is gorgeous. It looks very chic. 

Comment SOFA and I’ll send you the link to this exact one! 

#familyroomdecor #partner #homedecor #neutralhomedecor #interiordecorating
If you are looking for another family trip this wi If you are looking for another family trip this winter, we loved our time at @bigcedarlodge ! There is so much to do in winter, and it was fun to see pics of all the snow over the past week! Here are a few notes that we took away from our 3 nights earlier this month! Save this post for your next trip…

#bigcedarlodge #ozarks #bransonmo #familytravel 

(Hosted)
Follow on Instagram

Copyright© 2026 · Brunch Pro Theme by Shay Bocks · Hosting by 3116 Digital