• Skip to primary navigation
  • Skip to main content
  • Skip to primary sidebar
  • Skip to footer
  • Home
  • About
  • Contact
  • Partner with Taryn

Taryn Whiteaker Designs

DIY and Interior Blog

  • Our Dallas Home Tour
  • Shop My Pics
  • Home Styling
    • Room Reveals
      • Our Current Home
      • Our First Home
    • Seasonal Home Tours
  • DIY Projects
    • DIY Home Decor
    • Crafts & Sewing
    • Before and Afters
    • Before and Afters
    • Furniture Builds and Makeovers
  • Seasonal Decor
    • Christmas
    • Easter
    • Fall
    • Fourth of July
    • Halloween
    • Spring
    • Valentine’s Day
  • Printables
  • Entertaining
    • Parties
    • Tablescapes
  • Fashion
  • Travel

August 7, 2020

Tips For Painting A Front Door

Does your front door need a little refresh? Ours sure did! Over the past few months I have painted our front door TWICE. The first time I did it, I made a few mistakes, and I didn’t LOVE the color. So I painted it again, made a few tweaks and changed the color. So what did I learn throughout the process? A lot. Today, I want to chat about Tips For Painting A Front Door, what I did wrong and what I did right….in the end.

Tips For Painting A Front Door

Get Tips for painting your own front door!

Steps For Prepping Your Front Door For Paint

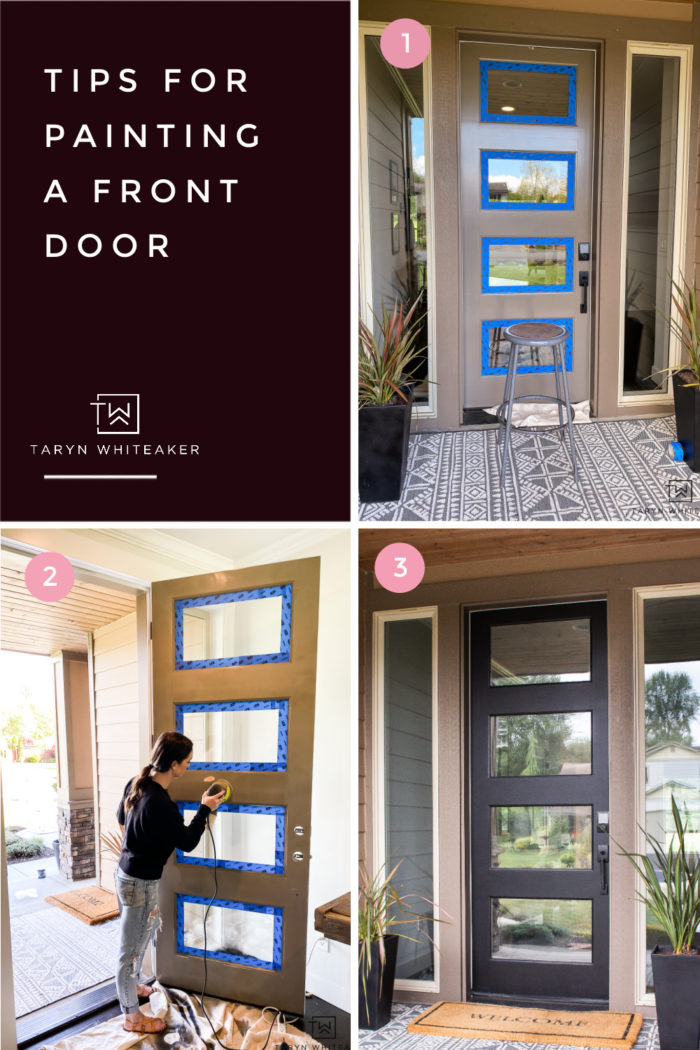
  1. Tape Your Front door: If you don’t have any glass to work around, you most likely can skip this step. I have a lot of glass panels so I had to do some taping!

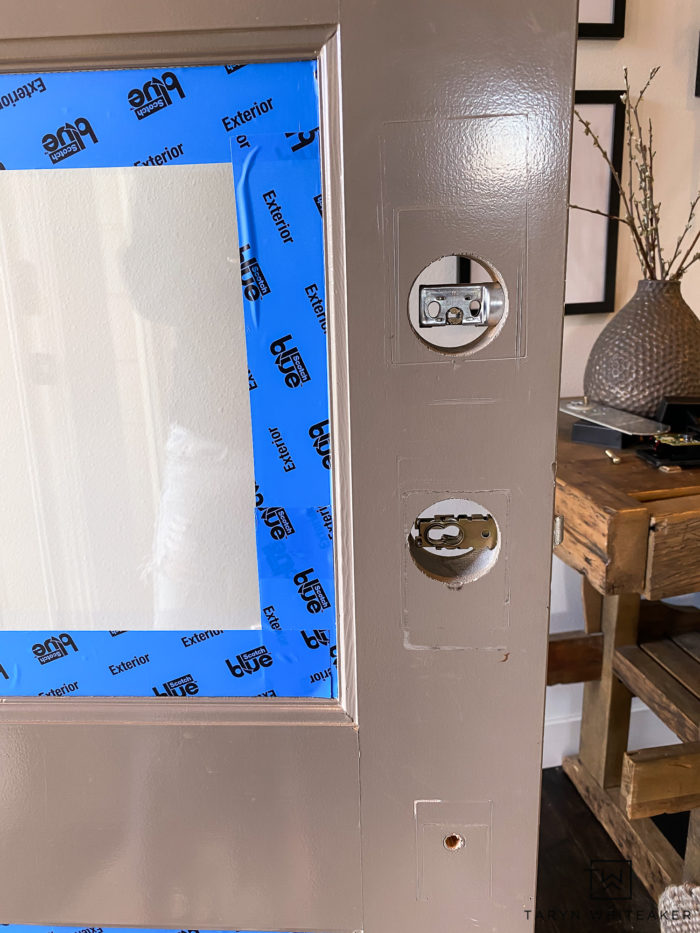
2. Remove the door hardware. To ensure a really clean nice finish, remove all the door hardware. This includes the handle, lock, and any door knockers.

3. Gently sand your door with a high grit sand paper. Probably around 220. This will remove any loose paint, smooth out blemishes, etc.

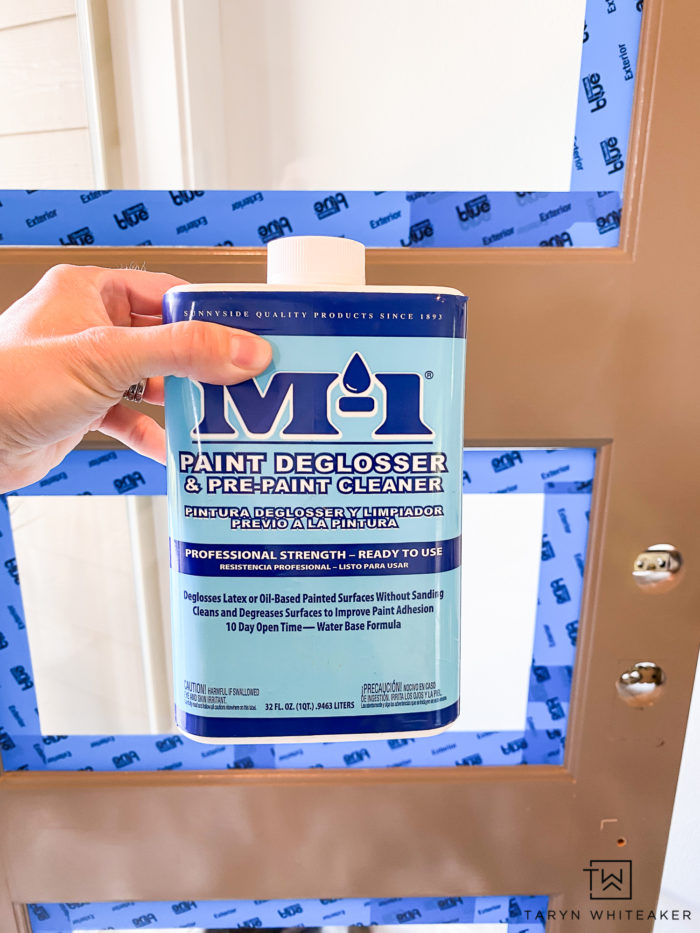
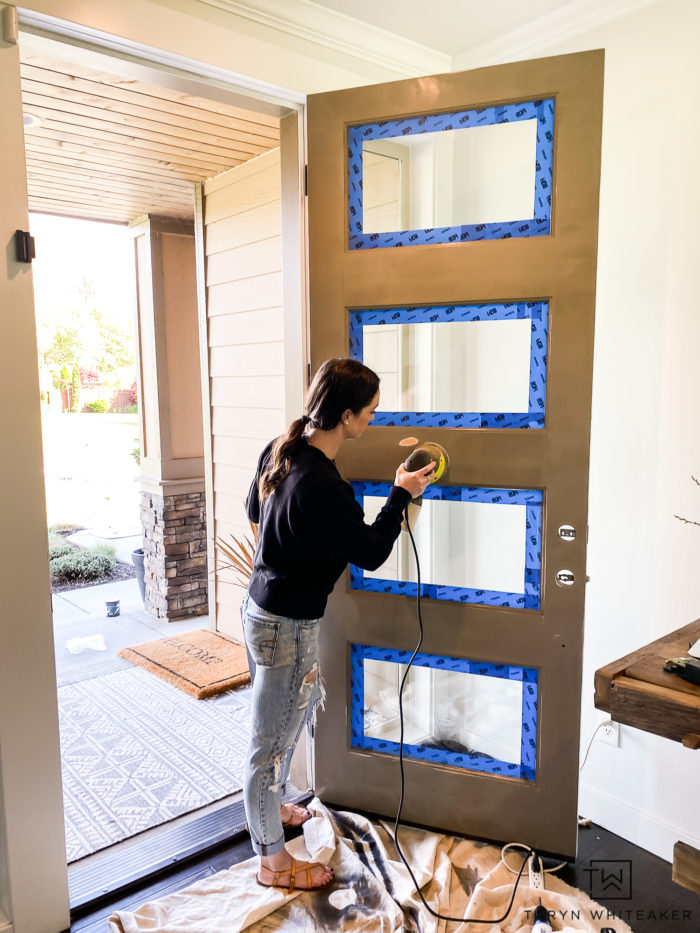
4. Rub a deglosser on the door! This is a SUPER important step. Don’t skip this! I used this M-1 Deglosser and Cleaner and it worked perfect!

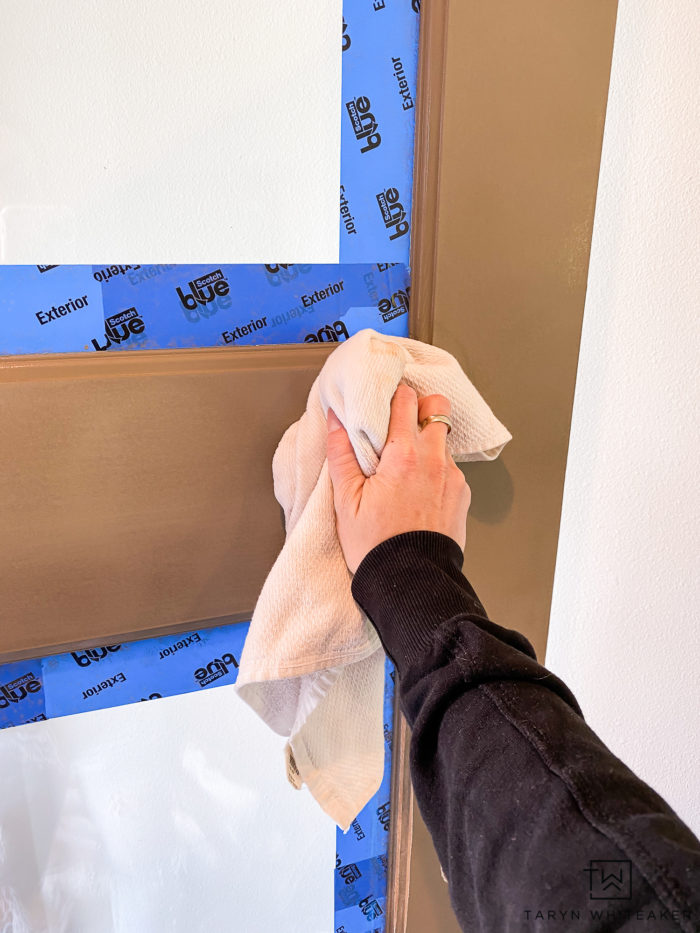
All you do is apply some to a rag and rub it on, thoroughly. This will remove all the shine from the door and previous paint and allow the new paint to adhere better.

Here you can see the spots from where the deglosser tried and where it took the shine off. Apply another coat if you see areas that need more. Wait about 10 minutes to start painting.

Should You Brush Or Roll Your Front Door?

This is where I learned a lot. ROLL! 100% use a small roller to paint your front door. At least on the flat parts.

I do recommend using a nice brush for the trim, or the inset parts of your door, and then roll all the main areas.

Let’s take a look at the difference.

The first time I painted our front door I used a brush for the entire door. You can see the brush strokes in the picture above. It did not turn out as smooth as I wanted at all.

I also did a dark charcoal gray paint and decided it just wasn’t the look I wanted. I wanted a shade or two darker. This is a tip to never settle, if something doesn’t feel right keep going until it does!

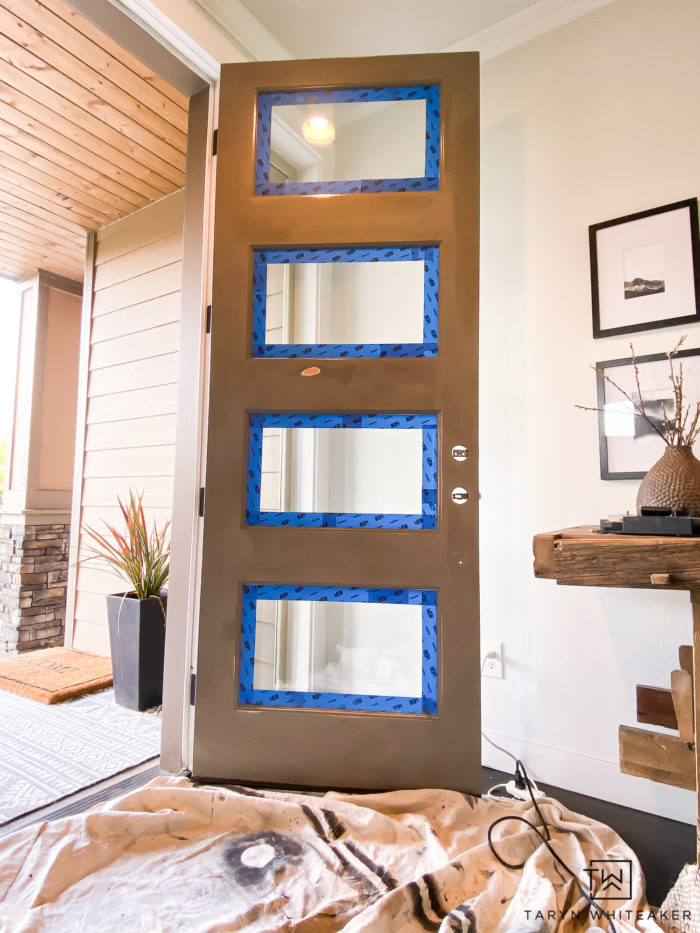
Second Attempt at Painting The Front Door

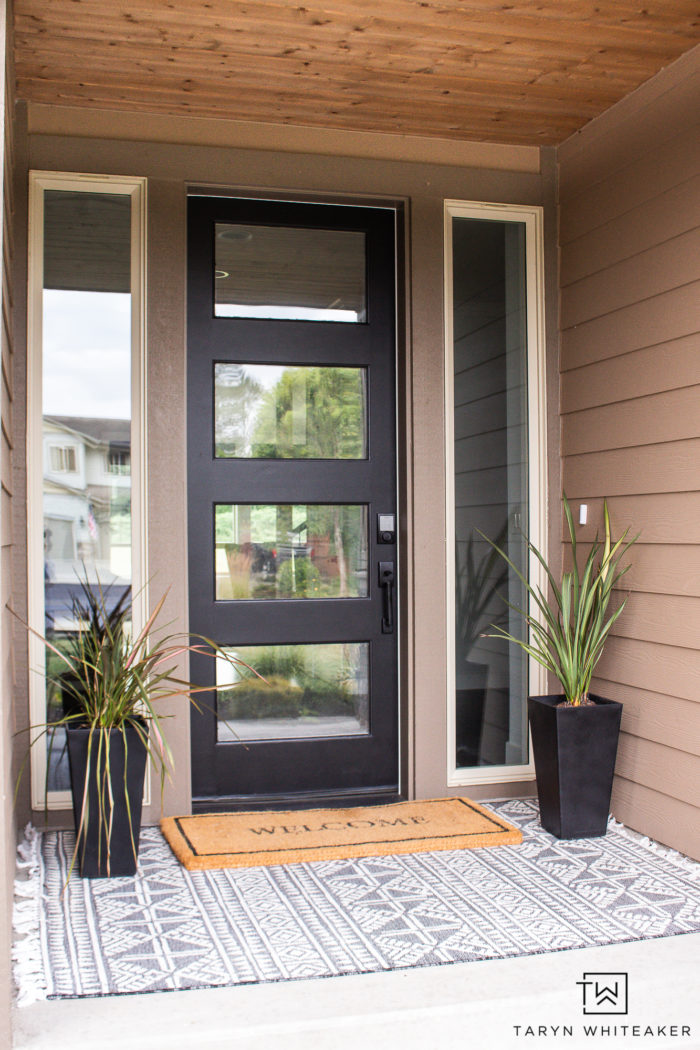
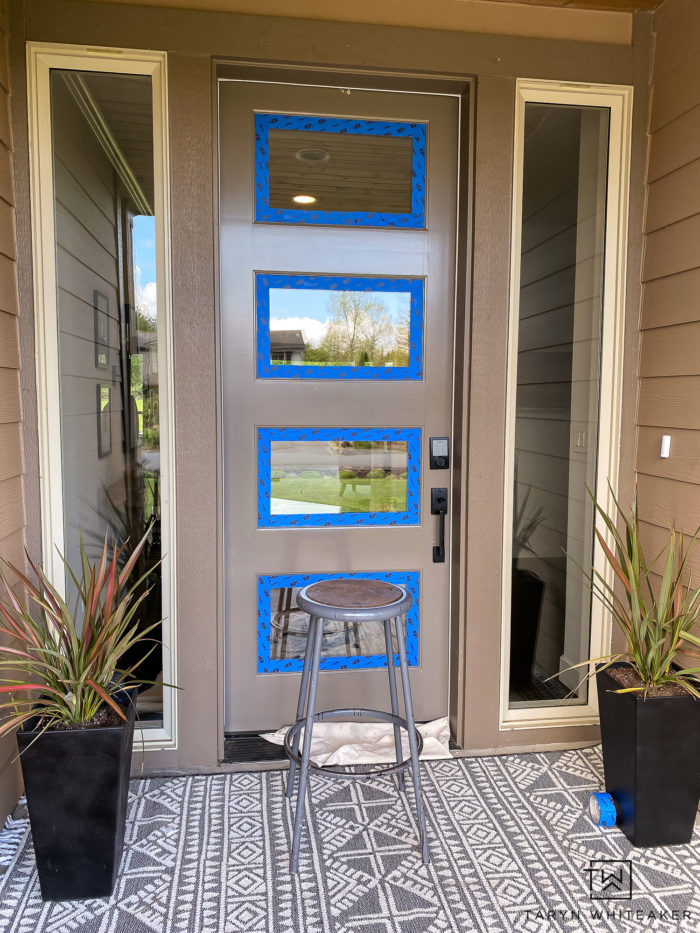
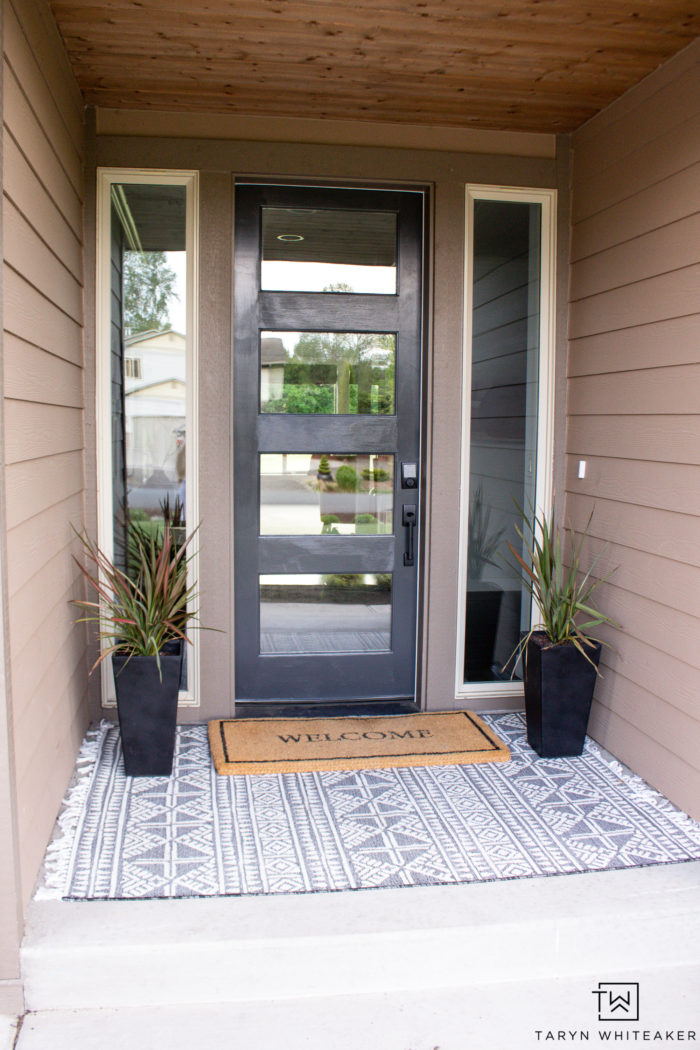
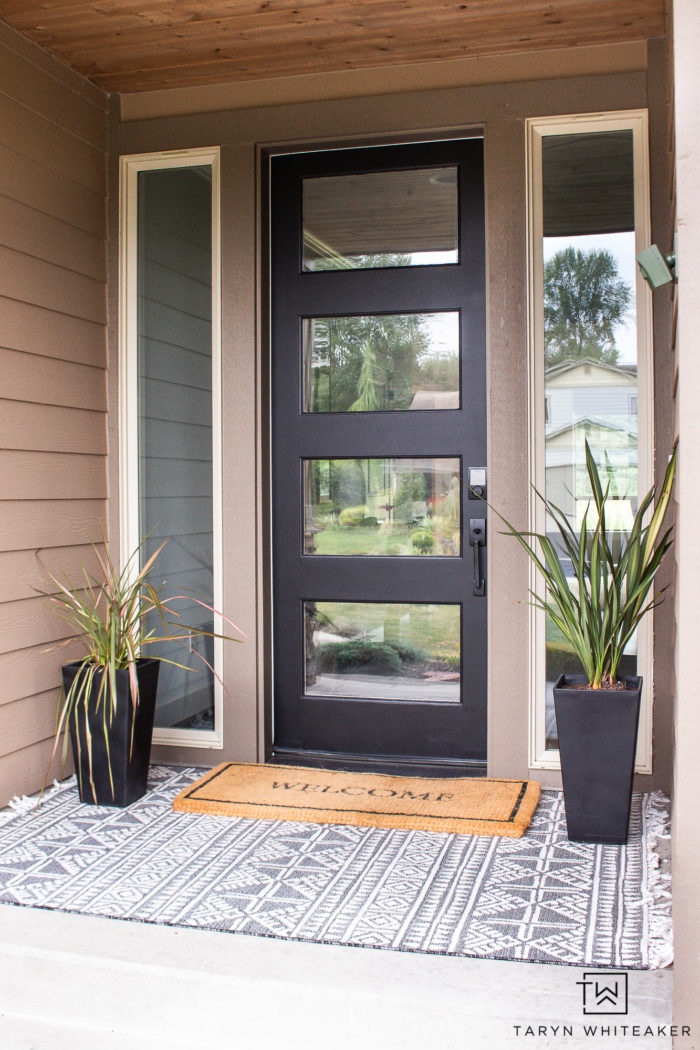
And here is how the front door looks now! This time I used a small roller for the frame and changed the color to my favorite Rebel by Kilz (Visit this post on my Fav Neutral Paint Colors for more).

I love the bold pop it has now. The contrast is much better and the black goes better with our planters and rug.

Shop This Post

About Taryn Whiteaker

Hi! I’m Taryn! The voice behind Taryn Whiteaker Designs. I launched this brand over 11 years ago when I became a stay-at-home mom. What started as a small craft and mom blog eventually grew into a full time design and DIY site. My goal has always been to inspire others (especially women!) with design ideas, DIY tutorials, entertaining ideas and give you the tools you need to complete them yourself!

Filed Under: ALL POSTS, Before and Afters, DIY Home Decor, DIY Projects

Reader Interactions

Comments

  1. Ashley says

    September 17, 2020 at 9:12 pm

    Hi! What sheen do you recommend for a front door?

    Reply
    • Taryn Whiteaker says

      September 19, 2020 at 9:18 am

      The standard exterior paint is semi-gloss, but I feel like it is too shiny for me. I tried it on my first coat on the front door and didn’t care for it, so I went down to satin finish and really like that.

      Reply

Leave a Reply Cancel reply

Your email address will not be published. Required fields are marked *

Primary Sidebar

Looking For Something?

CONNECT

Meet Taryn

Taryn Whiteaker

Hi and welcome! I'm Taryn and the voice of style behind Taryn Whiteaker Designs. Sharing our journey of modernizing our European style home in Dallas. Thanks for stopping by and don't forget to subscribe to my mailing list to get all the latest updates! Read more...

Footer

THIS SITE

  • Home
  • About
  • Contact
  • Partner with Taryn

Privacy Policy

If you are interested in learning more about data that might be collected by this site you are encouraged to read the Privacy Policy

COPYRIGHT POLICY

All images on this site are copyright of Design, Dining and Diapers, LLC. Unless otherwise noted. You may not use these images without written permission. If you would like to feature a project shown on Design, Dining and Diapers you may use a maximum of 2 images and include a visible link back to the project.

More From The Gram

tarynwhiteaker_designs

Taryn Whiteaker Designs
I finally have a drying rack! Here’s how I built I finally have a drying rack! Here’s how I built the custom drying rack for our laundry room to make it more functional. My @worxtools Switch Driver and Impact Driver were the real MVP’s of this project! Saving me time and energy. I love how it now doubles as a shelf to display antiques I’ve collected throughout the years and also helps me keep this place organized! 

Comment SUPPLIES for everything I used to build this piece! 

#worxtools #partner #dıy #diyhomedecor #homerenovation
Comment SHOP for all these pieces! What every 40-s Comment SHOP for all these pieces! What every 40-something girl is looking for this summer: cute, comfy, and sweat ready outfits for summer travels! I picked up these cute items from @halara_official to mix and match and I am obsessed with the material. Most of the items are made out of athletic material and are so soft. Perfect travel outfits, you still feel cute but very easy fabrics.

The price points are 👌🏼, almost everything is under $50! 

Use my code taryn2:for 20% OFF full-price items or Super code taryn26 : Spend $120 → 10% OFF / Spend $150 → 12% OFF
#halara #over40outfits #travelfit #traveloutfits #partner
Almost done! Since we vetoed the wallpaper on the Almost done! Since we vetoed the wallpaper on the ceiling, I still wanted a pop of pattern and decided to go with a little peel of a mural behind the washer and dryer! Just what it needed! 

Comment LAUNDRY to shop this space so far! 

#homedecor #diyhomedecor #wallmural #laundryroommakeover
It all started as a vision… comment REVEAL for a It all started as a vision… comment REVEAL for all the details on this bold, teen sports bedroom! 

#homedecor #diyhomedecor #kidsbedroom #sportsroom #beforeandafter
For the record he was very nice and helpful, but h For the record he was very nice and helpful, but had very little faith in me. 😉

PS. Happy Mother’s Day to all the strong, loving and beautiful mommas ❤️ 💪🏼 . 

#diyhomedecor #homedecor #renovation #laundryroommakeover
One of my favorite places to be. After 4 years in One of my favorite places to be. After 4 years in this house the porch swing is still in perfect condition, just time to replace the cushion and add some fresh outdoor pillows! 

Comment SWING for all the sources! 

#homedecor #exteriordecor #outdoorprojects #potterybarn #ballarddesigns
Still one of my favorite transformations to date…. 

Comment BEDROOM for all the sources. 

#homedecor #diyhomedecor #boysbedroom #kidsroom #homedesign
Comment SPRING and I’ll send you all my fav laye Comment SPRING and I’ll send you all my fav layered looks for spring, all affordable and budget friendly. Pieces I keep wearing over and over this season! 

#amazonfashion #amazonfinds #over40fashion #springoutfit #easyoutfits
Laundry room update number two! Walls have been sk Laundry room update number two! Walls have been skim coated and primed, first coat of paint on walls and trim. Cabinets are off and getting prepped… next up: installing dark wood ceiling, painting cabinets, hanging a surprise wall mural, and building a custom drying rack! 

Paint color: BM Cromwell Gray 

#homedecor #cromwellgray #diyhomedecor #homerenovation #diy
Follow on Instagram

Copyright© 2026 · Brunch Pro Theme by Shay Bocks · Hosting by 3116 Digital