We got our first big project completed! Painting our back deck has been on my list since the beginning of the year and I am thankful that we had the time at home to tackle it. We have been in this house for almost 6 years and it was definitely time to give the deck some love. This is my first time doing a project like this so I thought I’d share some tips for painting a deck!
I can’t wait for you to see how much it changed this space. It’s one of those projects where I didn’t realize how much it needed to be done until I did it.
Tips For Painting A Deck
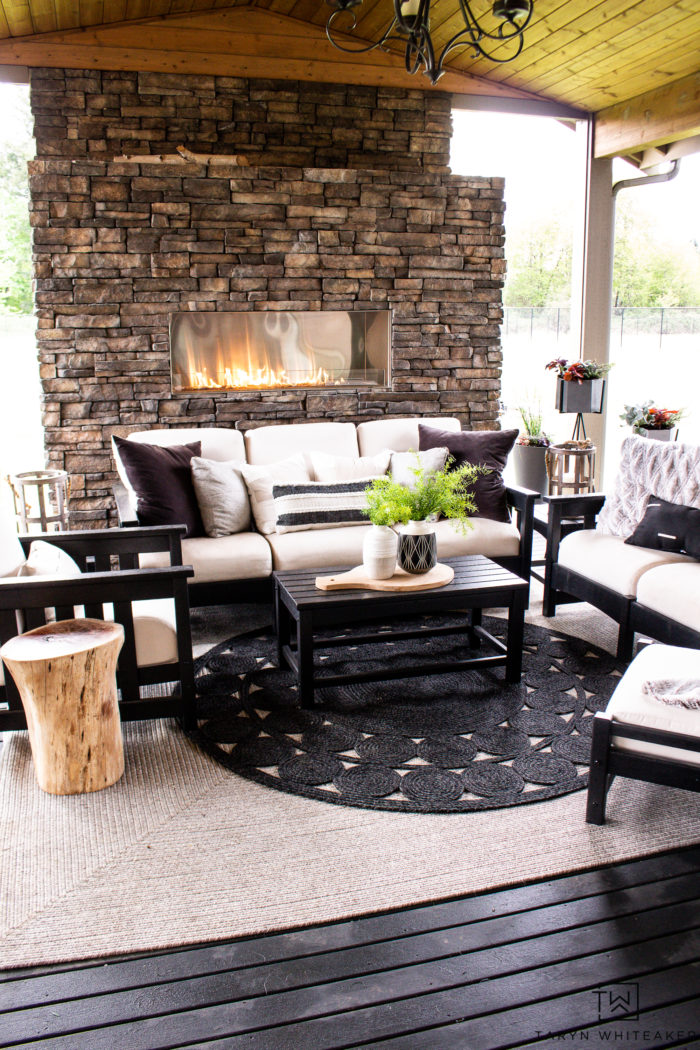
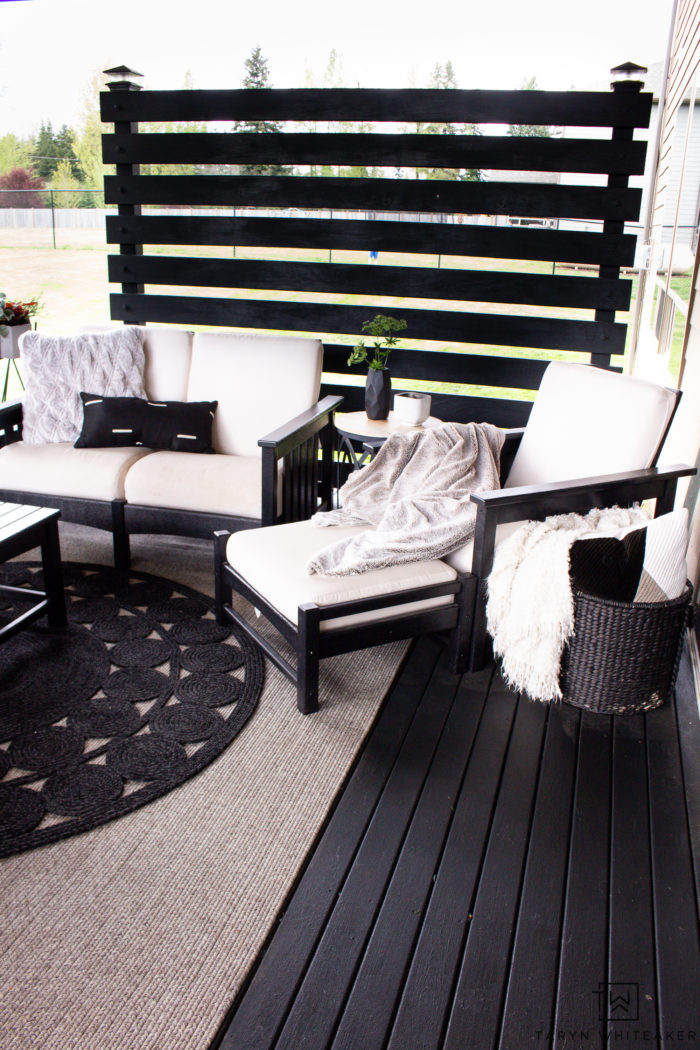
Taking into consideration that our entire house is slowly turning black and white, and I wasn’t about to paint our deck white… means it was only appropriate to paint it black. Right? The color is technically called slate and goes on more like a dark charcoal gray. But at most hours of the day, it looks black.
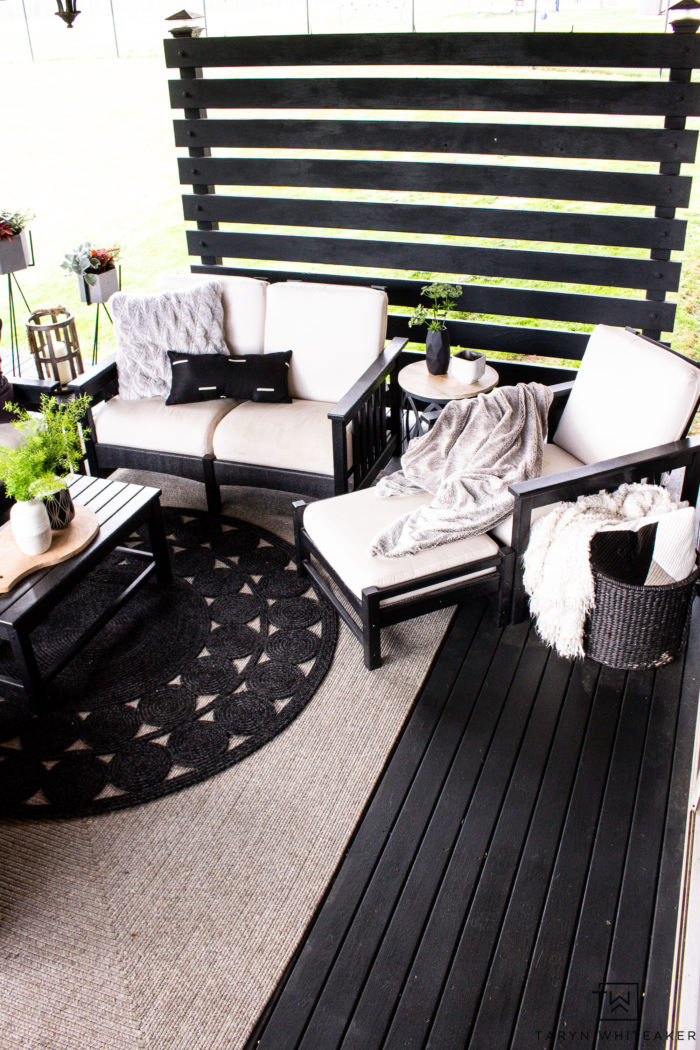
This is where I see the biggest difference! I decided to paint the privacy screens the same color and I love the dark bold moody vibe it gave this space. It instantly made it more modern and now the furniture pops.


Before and After Deck Makeover

Seeing these pictures side by side really show the difference. Here is what the deck looked like before when I recently shared about the new outdoor decor.

And this is what a difference the dark paint made! Holy cow!
Tips For Painting A Deck
Supplies
- Pressure Washer with Disc Attachment
- Orbit Sander
- Behr DeckOver in Slate
- Paint Brush
- Nap Roller
- Exterior Painter’s Tape
Prepare Your Deck

Remove everything off the patio. You can see how ready our deck was for a little TLC. And also the discoloring from the rug.

Step 1. Pressure Wash Your Deck. I used this Disc Attachment to do the initial pressure washing. I recently used this on our driveway and it worked wonders and made the job SO fast. When it came to the deck, I think it did a good job getting the first layer off but the plain nozzle ended up being the best to get the job done.


The pressure washer hose really got into the cracks and stripped all the existing stain right off. You can see the difference it made in the picture on the right. It took several hours to do the full deck, but it was worth it. You want to make sure it’s nice and clean before you restain or paint.

So pretty! You want to give it 24 hours to let the deck fully dry out before you do the next step.
Lightly Sand The Deck


Step 2: Sand!I didn’t go crazy with the Orbit Sander, but you will want to sand it down. The pressure washer will leave the wood a little beat up. I went over all the boards gently until they were all smooth.
Picking The Right Deck Paint

I did a lot of research on deck paint before this project and finally decided on the Behr DeckOver Paint in Slate . My main goal is picking the right product was durability. I didn’t want to restain the deck because I was afraid of it starting to wear off like it did before. I wanted a more solid look and also something that would hold up with a dog and kids going in and out all day.
I like how the DeckOver paint has a grit to it and adds texture for durability. It’s nonslip as well.

Here is a closer look at the texture it adds when it goes on. You can watch the short video below to see the difference on how the paint goes on. I liked how it went on with a brush, which made the project take SO much longer. But I felt like the roller applied the paint much thicker and made the texture stand up too much for my liking.

I did two full coats. The 5 gallon bucket was the perfect amount I needed for two coats on the deck and the privacy walls.
In full disclosure, the ONE thing I haven’t loved is that with dark paint you see the dirt more. So while the paint is extra durable it will be harder to keep clean.
More updates coming back here soon!
PIN FOR LATER!

Shop This Space
About Taryn Whiteaker
Hi! I’m Taryn! The voice behind Taryn Whiteaker Designs. I launched this brand over 11 years ago when I became a stay-at-home mom. What started as a small craft and mom blog eventually grew into a full time design and DIY site. My goal has always been to inspire others (especially women!) with design ideas, DIY tutorials, entertaining ideas and give you the tools you need to complete them yourself!


Leave a Reply