• Skip to primary navigation
  • Skip to main content
  • Skip to primary sidebar
  • Skip to footer
  • Home
  • About
  • Contact
  • Partner with Taryn

Taryn Whiteaker Designs

DIY and Interior Blog

  • Our Dallas Home Tour
  • Shop My Pics
  • Home Styling
    • Room Reveals
      • Our Current Home
      • Our First Home
    • Seasonal Home Tours
  • DIY Projects
    • DIY Home Decor
    • Crafts & Sewing
    • Before and Afters
    • Before and Afters
    • Furniture Builds and Makeovers
  • Seasonal Decor
    • Christmas
    • Easter
    • Fall
    • Fourth of July
    • Halloween
    • Spring
    • Valentine’s Day
  • Printables
  • Entertaining
    • Parties
    • Tablescapes
  • Fashion
  • Travel

November 22, 2019

Installing Marble Mosaic Tile

This is a sponsored post written by me on behalf of Floor & Decor. All opinions are 100% mine.

Ok let’s talk about one of my favorite parts of the kitchen! THE BACKSPLASH! When we started the kitchen renovation I was planning on keeping our old backsplash. While it wasn’t my personal style it wasn’t terrible. However, after a nice discussion on Instagram with all of YOU, you convinced me it was time for a change and you were right. Changing the backsplash to this gorgeous marble mosaic tile from Floor & Decor was the absolute best decision during the kitchen renovation. The long days that turned into weeks were worth it because I absolutely love how it turned out.

Today, I want to walk you through my process of choosing the tile and installing it and the decisions we made along the way. Tiling is one of my favorite DIY jobs, I absolutely love it and this was probably one the largest ones I’ve tackled to date. SO let’s talk about Installing Marble Mosaic Tile and what I learned.

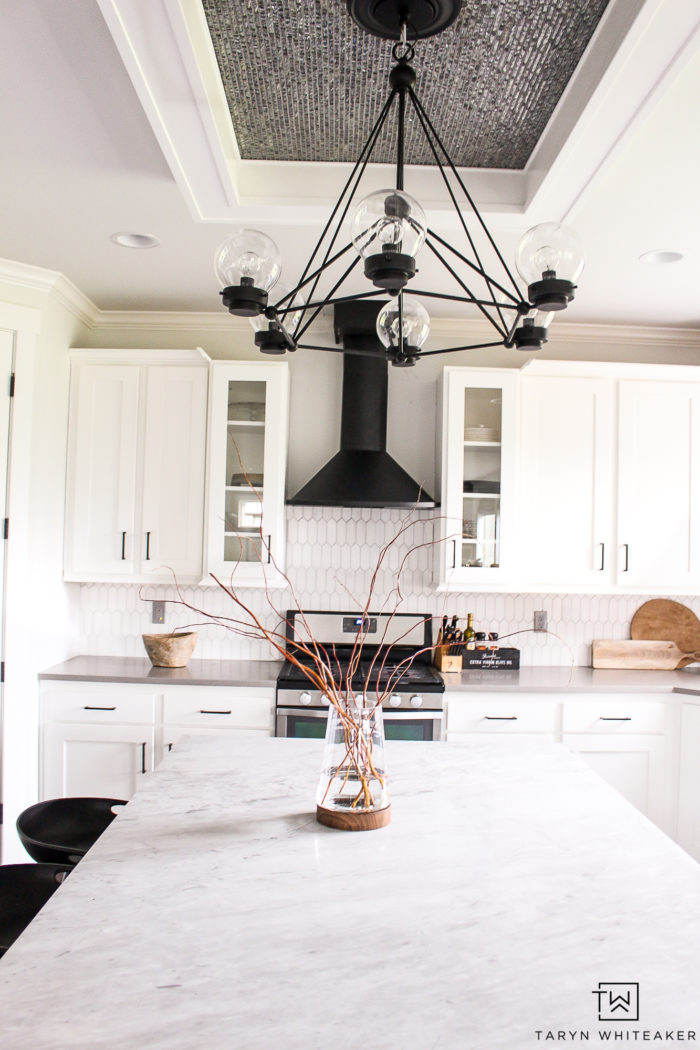
Marble Picket Backsplash

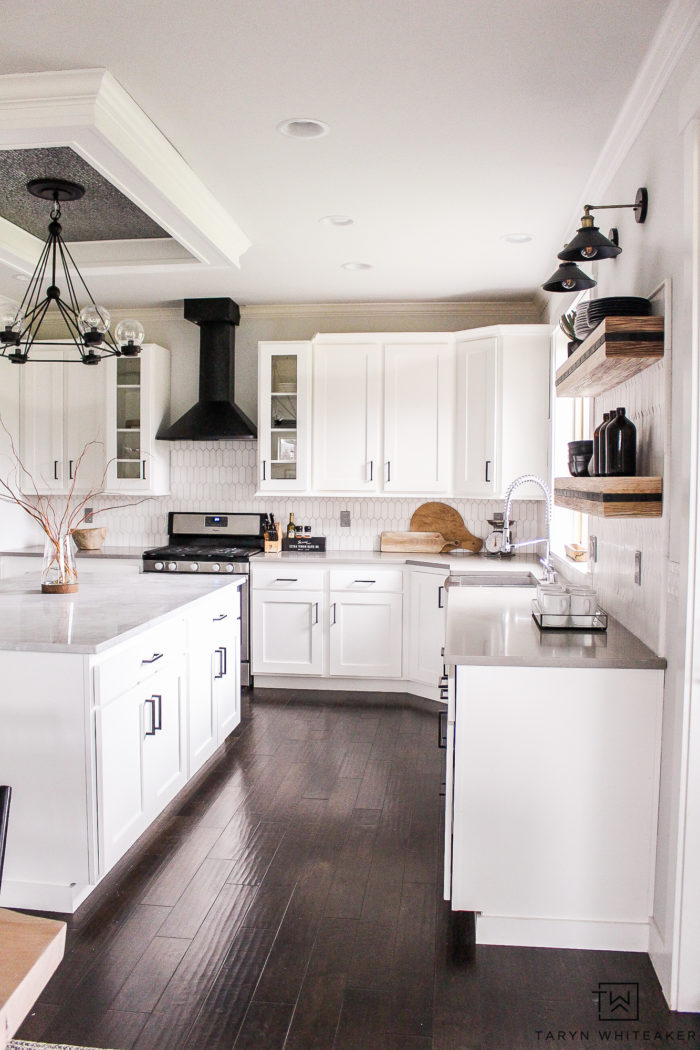
This Viviano Marmo Dolomite Premium Picket Polished Marble Mosaic completely makes this kitchen and gives it the classic modern look I was envisioning.
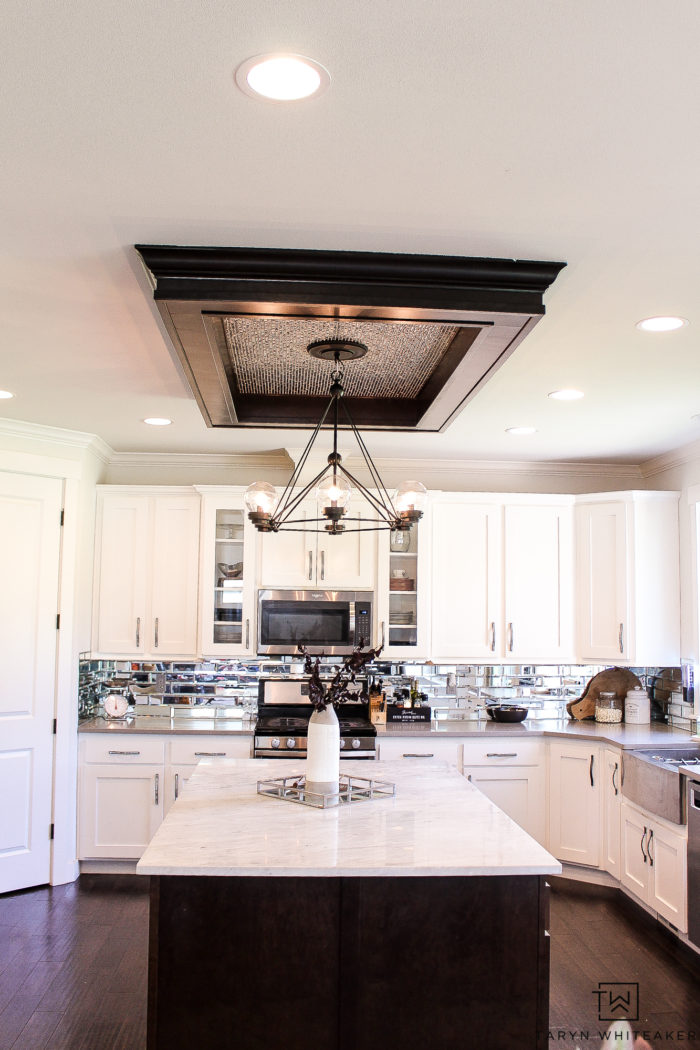
Kitchen Before

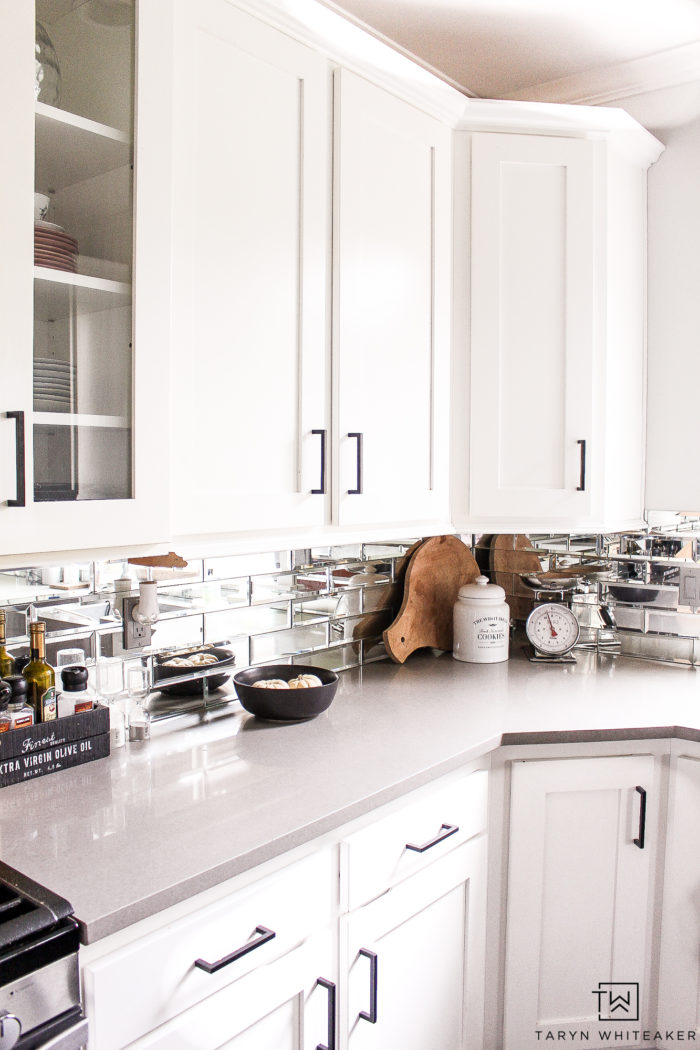
If you remember before, we had a mirror subway tile backsplash that was here when we moved into the house. It was fun and a lot of bling but didn’t match my personal style. I wanted something a little more minimalistic and organic feeling.

Picking Out Our Backsplash

Literally the day after we decided to change out our backsplash I headed straight to Floor & Decor. I am SO thankful we have one near by because they have the largest selection of tile and flooring EVER. And not just a large selection but really beautiful, trendy styles.

I had a pretty good idea of what I wanted for the backsplash going into the selection process which made it easy to narrow down choices. I knew I wanted a white backsplash, something that blended with the gray counters and marble island, and I did not want subway tile or small mosaic pieces. Nothing against subway tile at all, I think it is gorgeous and such a classic choice but I wanted to go a different route for in here.

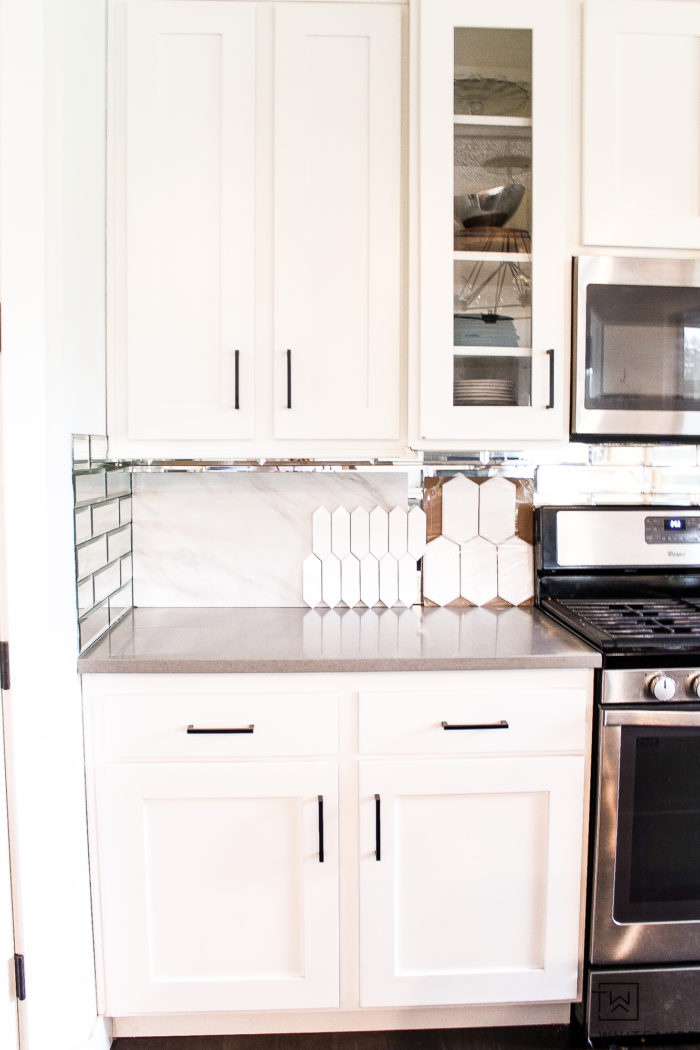
I came home with these three choices, the Marble Picket Mosaic, the Oversized Picket Mosaic , and the 12X24 polish ceramic tile.

It didn’t take us long to decide on the smaller Marble Picket Mosaic and I really love how it turned out!

Tile Behind Open Shelves

I absolutely love the look of a tall dramatic backsplash. If our cabinets went all the way to the ceiling I would have done a full wall, but since they are not ceiling height I kept the backsplash at 3/4 up the wall.

My original plan was to take the tile just up to the bottom of the upper shelf, but it just didn’t look right. So instead, I took it up over the shelves to create a frame. The change set me back a whole day in the renovation, but it was so worth it!

Using Pencil Tiles To Frame Backsplash

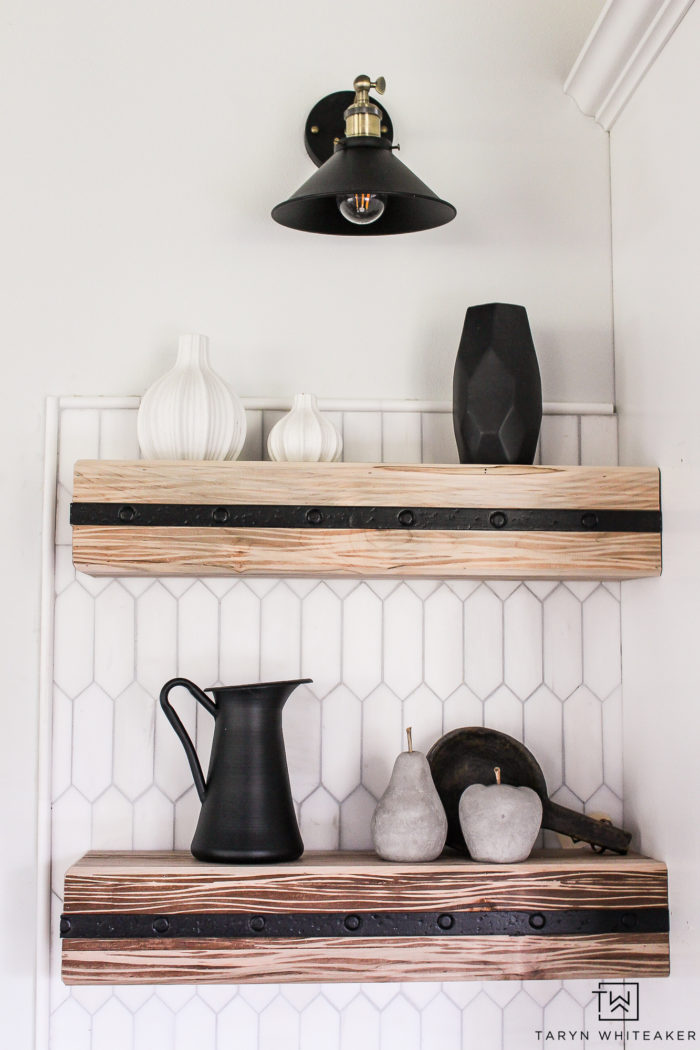
I used the matching Dolomite Marble Pencil Tiles to frame out the backsplash on all open areas of the kitchen. I think it created such a clean look and made everything look more polished.

Which Grout To Use On Marble Tile?

Picking out the grout color was actually a huge deal over here! I went with this Maepei FlexColor Grout in Rain. This was my first time using this particular pre-mixed grout and I absolutely loved it. It went on really smooth, comes with a great sponge for cleaning and it covered a lot of square footage! I only used about 1 and 1/4 tubs for our whole kitchen!

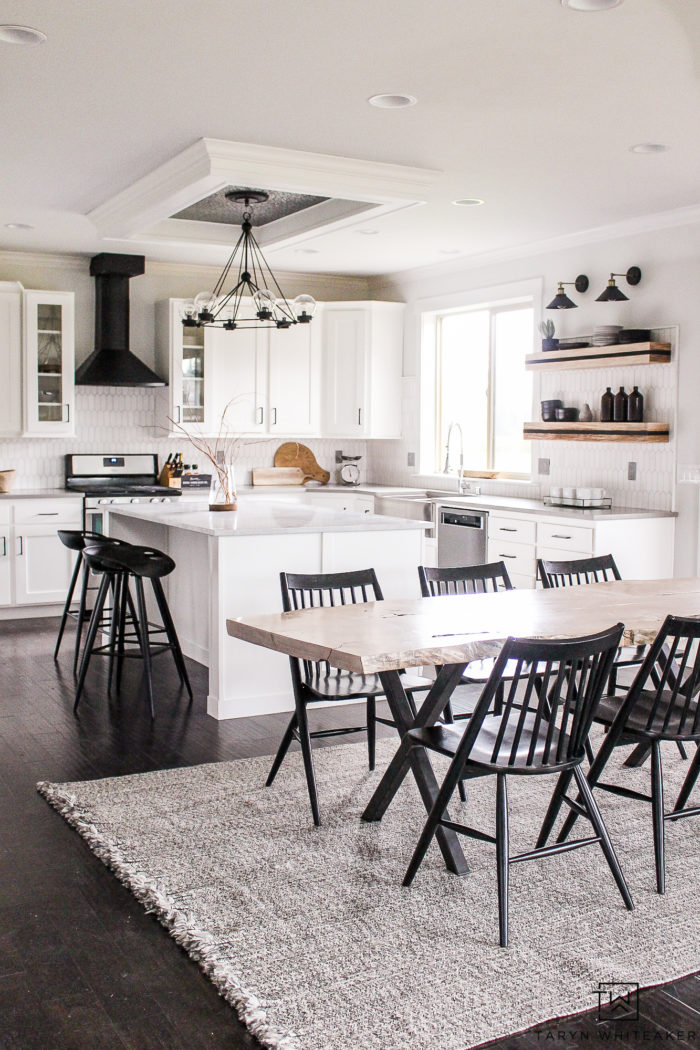
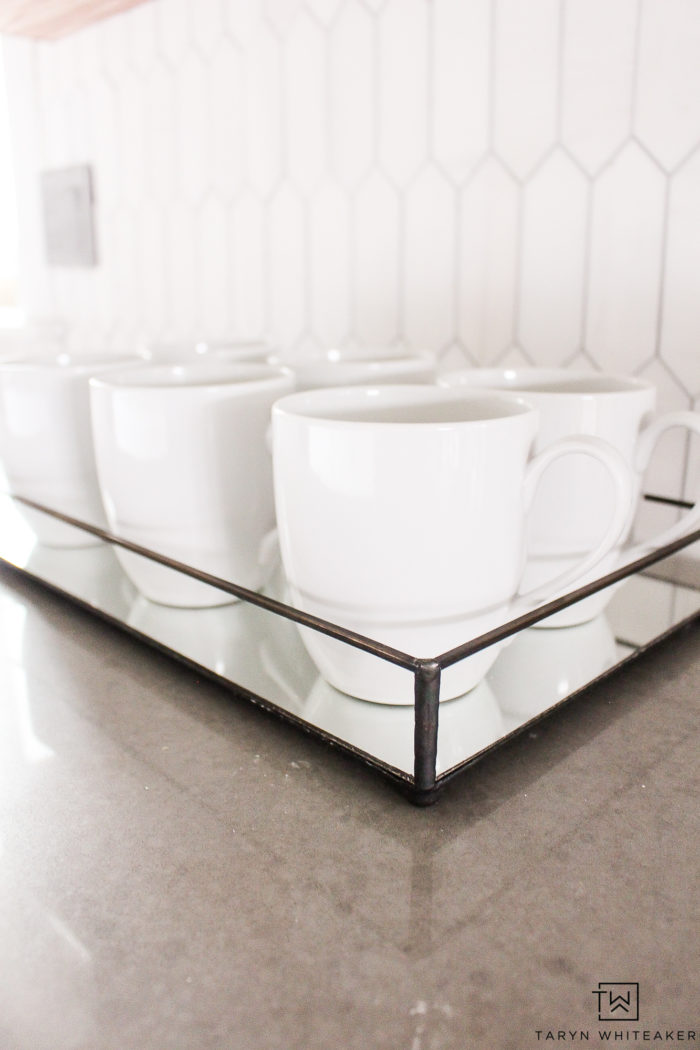
Marble Kitchen Backsplash

We couldn’t be happier with the tile. I am so glad we went the extra mile and put the work in to make it even more our style. We love it.

Huge thanks to Floor & Decor for helping us with this project, what a huge difference it made from the before.

About Taryn Whiteaker

Hi! I’m Taryn! The voice behind Taryn Whiteaker Designs. I launched this brand over 11 years ago when I became a stay-at-home mom. What started as a small craft and mom blog eventually grew into a full time design and DIY site. My goal has always been to inspire others (especially women!) with design ideas, DIY tutorials, entertaining ideas and give you the tools you need to complete them yourself!

You May Also Like:

  • TarynWhiteakerDesigns_BoysSportsBedroom-6
    Installing Thin Brick Tiles
  • DIY Wall Trellis-7
    Installing a Trellis On Brick Exterior

Filed Under: ALL POSTS, Before and Afters, DIY Home Decor, DIY Projects, Sponsored

Reader Interactions

Comments

  1. Sandra Cook says

    November 26, 2019 at 6:58 am

    Could you please give us some tips and the step by step method on removing the old tiles?

    Reply
    • Taryn Whiteaker says

      December 3, 2019 at 6:25 pm

      Hi! This is a great question. Our previous backsplash wasn’t a traditional tile, sine it was mirror it was actually glued on, with no grout.

      Reply
  2. Nancy Ríos says

    January 4, 2021 at 1:41 pm

    Hi,
    Im just now having the same exact backsplash you installed. It seems to be a little darker once installed. Will it go back to its original color. Also, did you deal before installing?

    Reply
    • Taryn Whiteaker says

      January 4, 2021 at 5:15 pm

      Hi! I do remember it changing color a little bit, I did not seal before I put it on. I feel like after I cleaned it up a lot it looked a little better, but it did change a bit.

      Reply
      • Nanci Rios says

        January 4, 2021 at 8:37 pm

        Thank you for responding! I hope they lighten up some look more grey than anything. We will see. I loved yours so I went after it?

        Reply
  3. Cecilia says

    March 26, 2021 at 3:02 pm

    Hi. I love what you did with your kitchen. Can you pleas tell me where you got those shelves?

    Reply
    • Taryn Whiteaker says

      March 27, 2021 at 8:01 am

      Hi! They are from Ornamental Moulding https://bit.ly/2vipIZM

      Reply
  4. Linda says

    August 12, 2021 at 6:12 am

    I am considering a marble backsplash in our kitchen reno, but I do a LOT of cooking, and I’m worried about staining. I am not seeing any info online about sealing a marble backsplash. Do you know if it comes sealed?

    Reply

Leave a Reply Cancel reply

Your email address will not be published. Required fields are marked *

Primary Sidebar

Looking For Something?

CONNECT

Meet Taryn

Taryn Whiteaker

Hi and welcome! I'm Taryn and the voice of style behind Taryn Whiteaker Designs. Sharing our journey of modernizing our European style home in Dallas. Thanks for stopping by and don't forget to subscribe to my mailing list to get all the latest updates! Read more...

Footer

THIS SITE

  • Home
  • About
  • Contact
  • Partner with Taryn

Privacy Policy

If you are interested in learning more about data that might be collected by this site you are encouraged to read the Privacy Policy

COPYRIGHT POLICY

All images on this site are copyright of Design, Dining and Diapers, LLC. Unless otherwise noted. You may not use these images without written permission. If you would like to feature a project shown on Design, Dining and Diapers you may use a maximum of 2 images and include a visible link back to the project.

More From The Gram

tarynwhiteaker_designs

Taryn Whiteaker Designs
My goal with every room is to make it feel warm, i My goal with every room is to make it feel warm, inviting and extra cozy. It’s often the final finishing touches that truly transform the vibe of a room. I picked up some final styling pieces from @wayfair , I am obsessed with both side tables. They are both statement pieces. And the personal photos, candle, heart trays and leather pillows are why bring the warmth and personal touches into this space. 

Comment SHOP for everything I added in here! 

#wayfaircreator #wayfair #ad #valentinesday #wayfairpicks
I finally found the perfect family and pet-friendl I finally found the perfect family and pet-friendly sofa that passes the designer test! This is the 5-Seat Modular Corner Sectional from @7thavenueco in the color Oatmeal Beige. We ordered it in the extra-deep seat option for ultimate coziness. The material is water-repellent, stain-resistant and you can also throw all covers in the wash!

We cannot say enough great things about this sofa, we all love it and just sink into it. It definitely passes the family test. Plus, it truly is gorgeous. It looks very chic. 

Comment SOFA and I’ll send you the link to this exact one! 

#familyroomdecor #partner #homedecor #neutralhomedecor #interiordecorating
If you are looking for another family trip this wi If you are looking for another family trip this winter, we loved our time at @bigcedarlodge ! There is so much to do in winter, and it was fun to see pics of all the snow over the past week! Here are a few notes that we took away from our 3 nights earlier this month! Save this post for your next trip…

#bigcedarlodge #ozarks #bransonmo #familytravel 

(Hosted)
Snow days in Dallas. ❄️ #dallaska #snowdays Snow days in Dallas. ❄️ 

#dallaska #snowdays #snowmuchfun #iceicebaby
What’s on the list for 2026?? Swipe through to s What’s on the list for 2026?? Swipe through to see all the spaces on my list and my initial ideas. Will I get to all of them!? I would love to but I also know I probably won’t, and that’s ok. But here is my lofty goal list. Kicking off the first one this week! 

1. Family room refresh 
2. Laundry Room Makeover
3. Primary Bedroom and attached seating area 
4. Formal Living Room 
5. Cozy Reading Nook in Hallway 
6. Finish the Staircases
Making use of an overlooked spot in our upstairs h Making use of an overlooked spot in our upstairs hallway! Love how this little vignette came together with fun finds from over the years. 

#neutralhome #organicmodern #decorating #neutraldecor
The biggest project we’ve done yet! I still have The biggest project we’ve done yet! I still have two more projects left to do in here to add some more warmth and texture, but the changes made so far are 🙌🏻. Classic, elegant, timeless and feels so fresh. 

So far: 
Replaced railings with custom ones
New carpet runners
Installed Gold Stair Rods 
Swapped out the chandelier for a statement piece 
Had the walls skim coated to level 5 finish and painted!

Sharing more details on the blog! Click the link in my bio. 

#houserenovations #interiordesigns #neutralhomedecor #staircases #renovation
Help me pick a chandelier for our back stairwell! Help me pick a chandelier for our back stairwell! The very last one was my initial pick, but now y’all have me questioning a few others after my stories today…

Comment SHOP if you want links to any of them! 

#interiordesign #homedecor #neutralhome
Comment STAIRS for the links to the gold stair rod Comment STAIRS for the links to the gold stair rods I used! $600 vs. $4000 is a huge difference for two staircases! Love the elevated, timeless look. They add such an elegance. ✨ #homedecor #diy #diyhomedecor #lookforless #interiordesign
Follow on Instagram

Copyright© 2026 · Brunch Pro Theme by Shay Bocks · Hosting by 3116 Digital