Disclosure: This post is sponsored by WORX Tools, all opinions are 100% my own.
This might be one of my favorite projects to date! One of my big goals for this year is to start doing more custom builds for our home. It’s something I have been too scared to do in the past or felt like I wasn’t capable, but this is my year to stretch myself and GO BIG! I thought the best way to start was to do an IKEA hack, where I start the build with pre-made IKEA cabinets and use it has my base to create my own custom piece of furniture. For this project, I started with 3 IVAR Cabinets and create my own DIY Floating Buffet for our dining room!

I completely believe that anyone can do this! You can easily take this concept and personalize it in a way that fits your home and style. In the end, it saved me so much money versus having someone build a custom piece for me or buying a larger buffet piece and best part is, it’s completely custom to the house now.
DIY Floating Buffet Using IKEA IVAR Cabinets
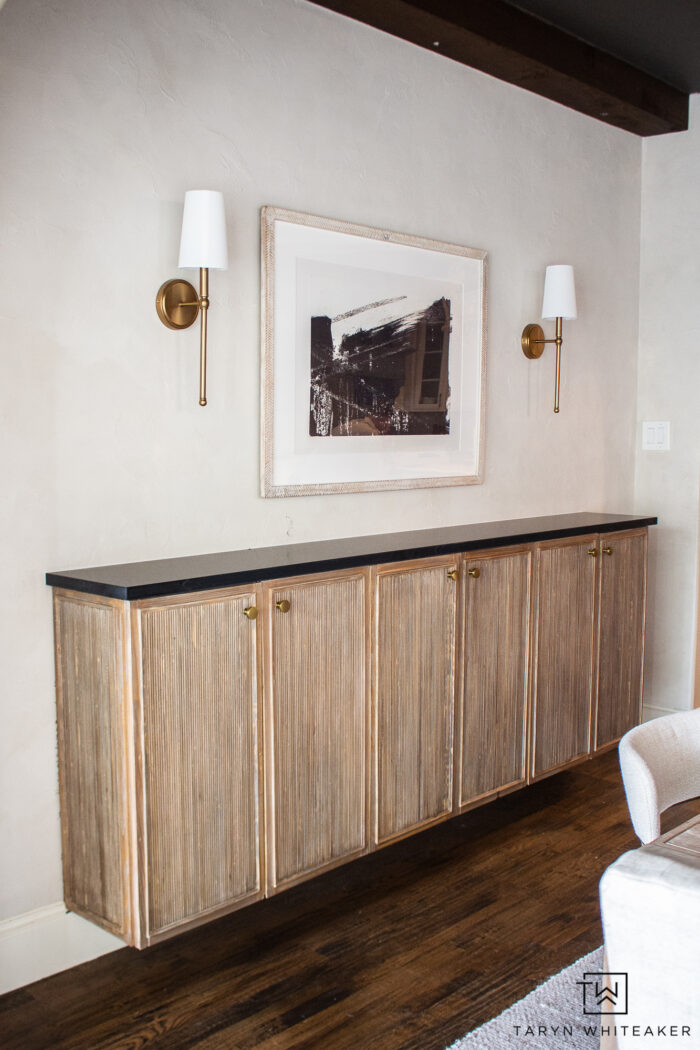
If you saw this piece in someone’s home, would you even think for a second that it was build out of 3 IKEA cabinets?!? Each cabinet only cost me $130, total just shy of $400. The dowels and trim pieces definitely added up, but I still came out way ahead of what it would have cost me buying a luxury piece of having it built.
BASIC IKEA BUFFET: $425
ESTIMATED TOTAL COST: $1,700 (including quartz countertop)
How To Build Your Own Floating Buffet
Supplies:
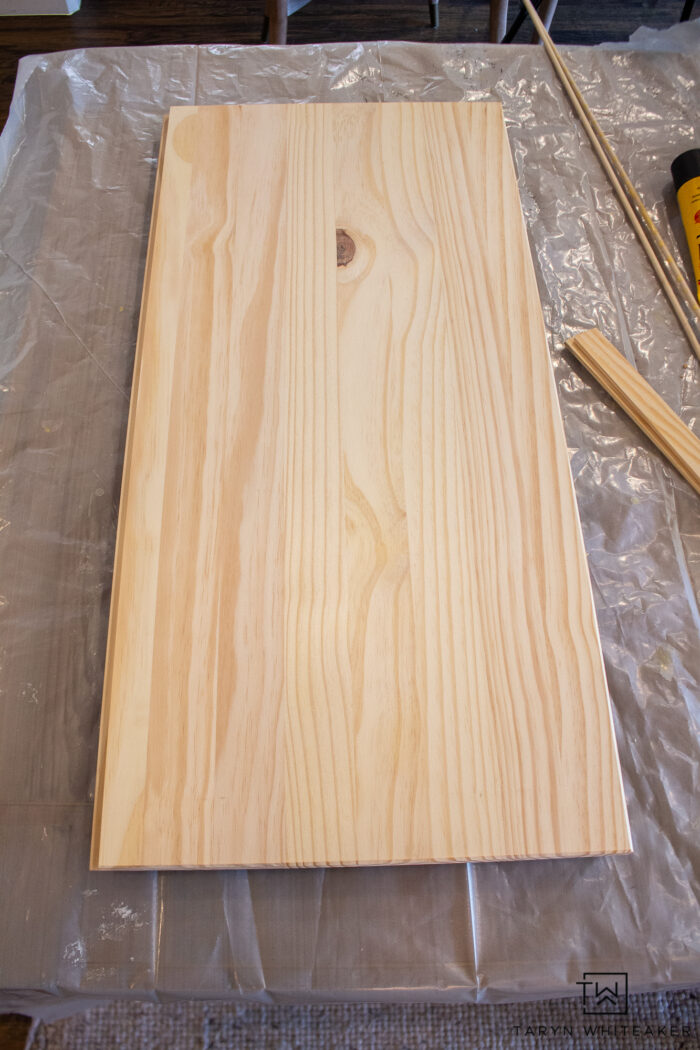
- 3 IKEA IVAR Cabinets
- (1) 3 X 1/2″ wood for extra support
- (375) 1/4″ Poplar Dowels
- (10) 1X1/4″ Pine Boards
- (10) 13/32 Chair Rail Moulding
- Wood Glue
- Stainable Wood Filler
- 3″ Wood Screws
- Wood Conditioner
- Minwax Special Walnut Stain
- Minwax Classic Grey
- Minwax White Wash Gel Stain
- Minwax Polyacrylic
- Brass Knobs
- Countertop is Vadara Noir Blanc
Tools:

- WORX 20V Power Share Cordless Sliding Compound Miter Saw
- WORX Nitro 20V Power Share Cordless 18 Gauge Nail and Staple Gun
- WORX Sawhorse & Clamps
- WORX Impact Driver
- WORX Nitro Hammer Drill
When starting larger DIY projects or higher end home projects, having the proper tools really is key. I have many stories from my early days of DIY where I was trying to cut corners and use the tools I had versus just buying what I really needed and I can tell you from experience that none of those projects turned out great. They looked like a DIY because they weren’t done right.
Over the years I’ve realized the importance of having the right tools for the job. It makes the world of a difference and will most definitely take your projects to the next level. So next time you are going to skimp and not buy the $150 tool, trust me when I say, it will be worth it in the end or you will end up wasting more material or taking more of your valuable time.
For this project, I used all of my trusted WORX Tools that I have been collecting over the years. Their Nitro line of power tools is the next level, more commercial grade tools and they have helped me take my DIY skills to the next level.
Installing A DIY Floating Buffet
I’m going to walk you through the process of building your own floating buffet! I’m going to go into quite a few steps and details, but I promise it really is a fairly easy process if you’ve done a few DIY projects before.
First, assemble your IKEA Ivar cabinets boxes, but leave the cabinet doors off for now. I added wood glue between every piece of wood to make it extra strong!
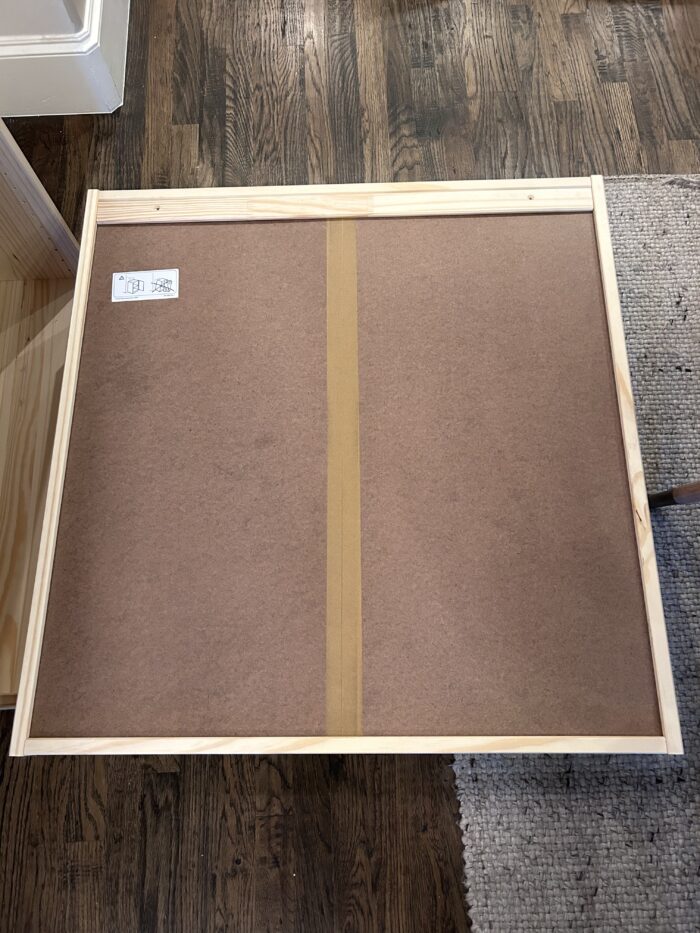

Since these are going to be floating, I wanted to make sure they were as secure as they could be. When I realized the back panel was thin particle board, I added an additional support piece to the back of the cabinet. The top of the cabinet already had a small ledge where you an drill wood screws through the cabinet and directly into the studs, but the bottom of the cabinet didn’t. So I added an additional support piece using wood glue and brad nails around the edges. Let them dry over night.
Hanging The Cabinets on The Wall
To hang the cabinets, start by finding the studs in your wall with a stud finder. I marked mine with pieces of painters tape.
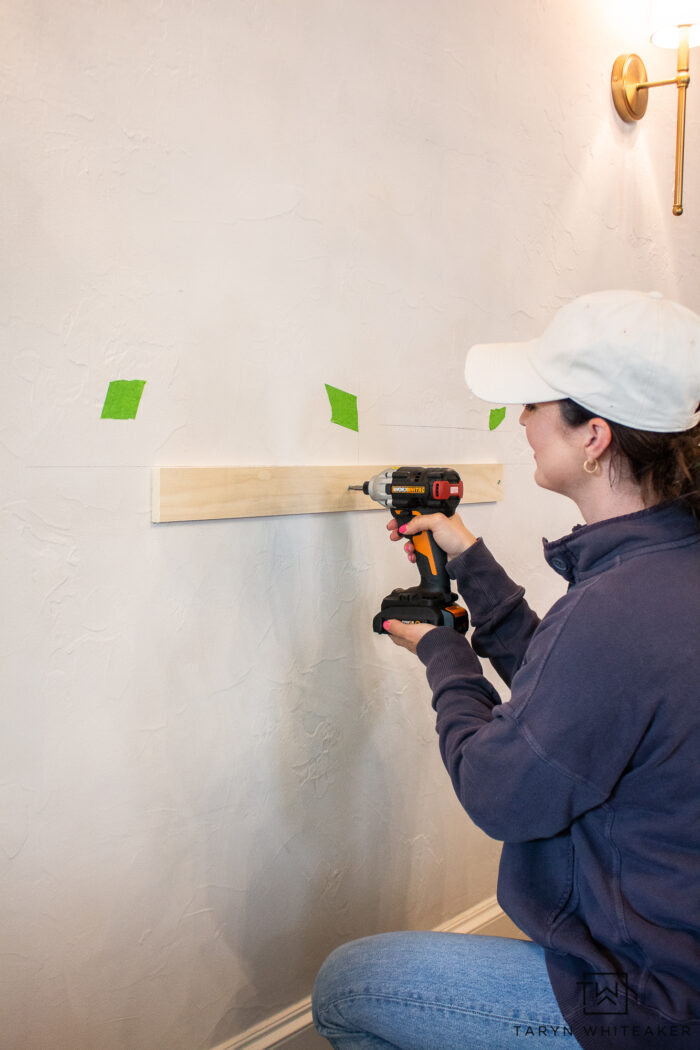

You can hang the cabinets a few different ways. I ended up using a version of a French Cleat system, which means I added pieces of wood onto the wall first and secured them directly into studs. Then, I hung the cabinets right on top. The lip on the back of the cabinet, fit perfectly on top of each piece of wood, allowing the cabinets to hang there while I secured them. I have to clarify and say that a TRUE French Cleat system is when the two piece of wood are cut at a 45 degree angle and when they slide on top they create a perfect square. For this, since there was already a lip on the back of the cabinet I just put up straight pieces of wood.
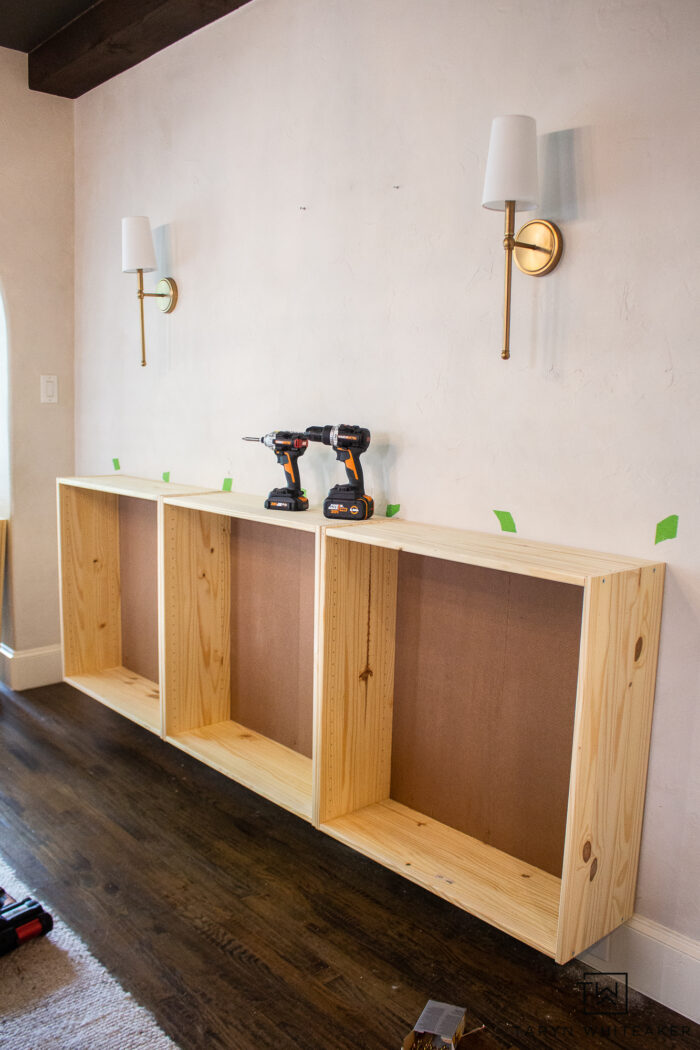
I liked this method for a few reasons, it allowed me to get the cleats level first so when I hung the cabinets they were already perfectly level and in place. This was much easier than having someone hold them in place while we secured them to the wall. I was also able to hang them by myself this way. And the most important part, they provide additional support for the weight of the cabinets.
I used 3″ wood screws to secure the cabinets directly into the studs. I put 3 screws on the top panel, 3 on the lower panel and a few straight through the french cleats. These babies aren’t going anywhere.
When drilling into studs, it can help to use a higher powered drill. I love my hammer drill from WORX Tools! This drill is great for drilling into tile or concrete. It does the job a lot faster and you don’t have to use quite as much muscle. It does it for you!
DIY Fluted Cabinets

This is what the completed piece looks like with the stock cabinet doors. Here is where you can customize the buffet anyway you want by painting, staining, adding trim, maybe a mural, the possibilities are endless!
For me, I had my heart set on a fluted cabinet front. There are a lot of different ways to do this. Using pole wrap was definitely an option but I couldn’t get it here in time. I tried fluted moulding but it was too thick and wouldn’t allow the cabinet doors to fully open. I ended up going with the more time consuming route of framing out the cabinet fronts with flat trim, and then filled in the boxes with 1/4″ dowels. 375 of them to be exact!
This is where the project added up a little bit, but I think it was worth it!

First, cut your trim down to size. I did straight edge versus cutting the pieces at two 45 degree angles. If you are doing this exact project, my outside pieces measured 32 6/16″ and the shorter sides measured 13 5/16″. I made sure they completely covered the door front and slightly over lapped on the inside edge to help hide the gap that is naturally between the cabinet doors.
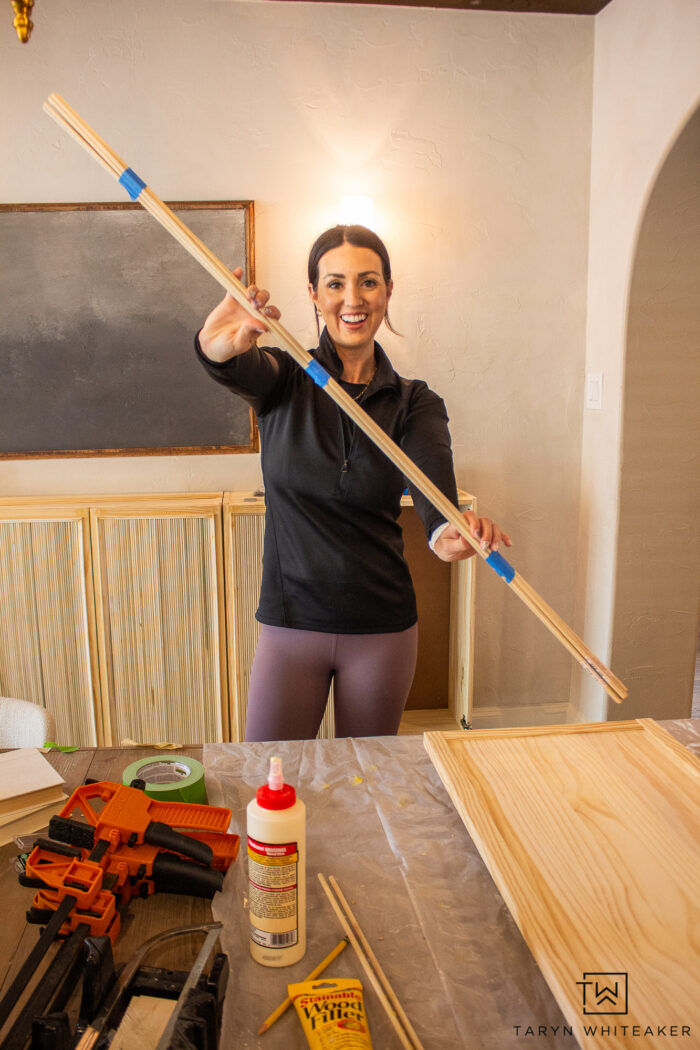
Then it’s time to cut the dowels! Cutting each of them individually takes A LONG time. I knew there had to be a way to make this faster. A quick search on Google showed me a trick of wrapping the dowels in groups of 10 with tape and then cutting them with my miter saw all at once!
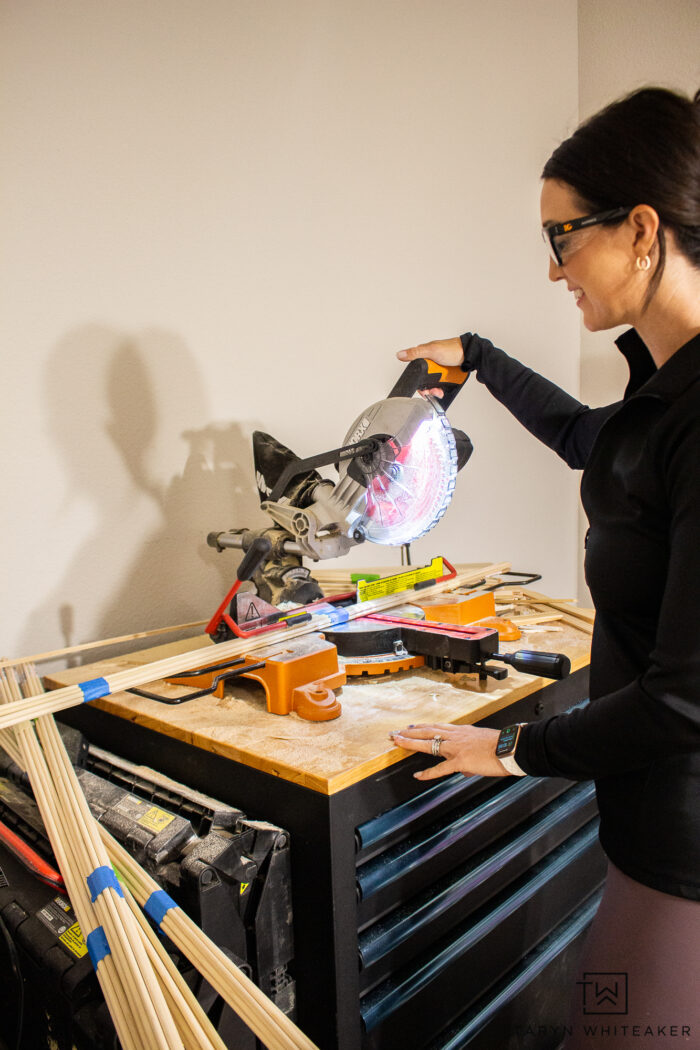
Use the safety bar on the WORX Tools Miter Saw to hold them in place and gently cut through them all. The tape holds them all together.
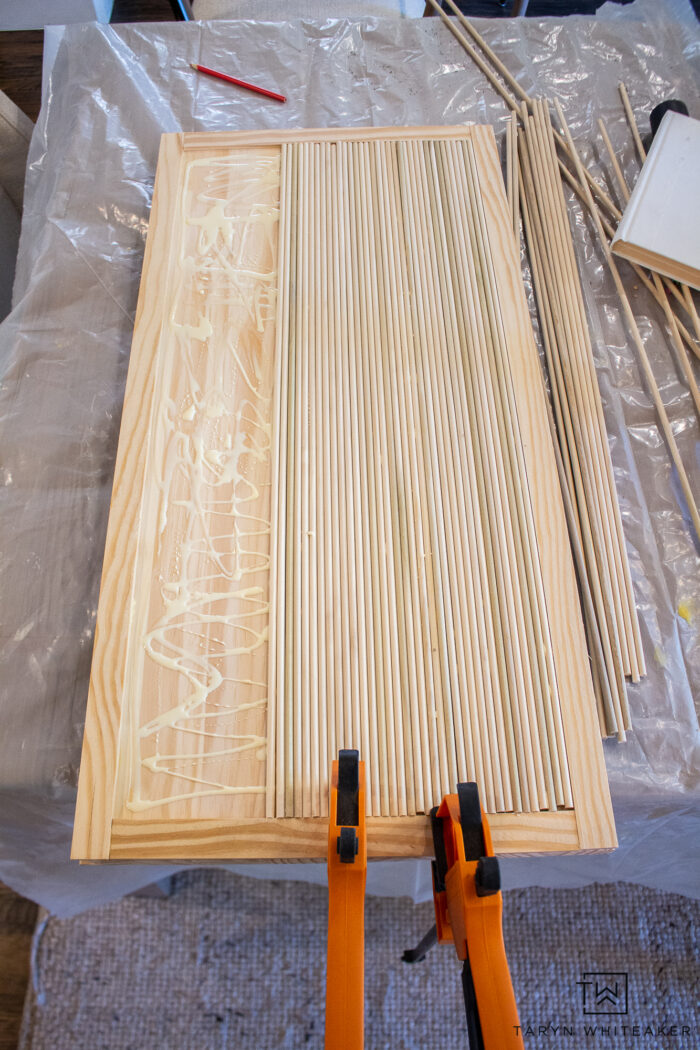

To lay the dowels, get ready for A LOT of wood glue. You want to make sure there is enough wood glue for them to be secure but not too much where it is seeping through onto the dowels. Excess wood glue doesn’t always take stain well and can leave streaks in your project.
To prevent the dowels from popping up, I used wood clamps along the edges to hold them in place until they dried.


No matter how hard I tried, I could not get a perfectly straight line with the dowels. But maybe you know know a trick! Regardless, the fail ended up turning into one of my favorite details of the project. I wanted to cover up the imperfections but not take away the detail of the dowels. I needed something delicate and thin. I found this 13/32 Chair Rail Moulding and created a box moulding on top of the cabinet. It was the perfect addition and really polished off the piece. I used my miter saw to create 45 degree angles at the corners and installed it using my WORX Nitro 20V Power Share Cordless 18 Gauge Nail and Staple Gun. For this project I used 1″ Brad Nails so they wouldn’t go through the doors.
I use my nail gun in almost every project! It’s definitely a tool everyone needs. See how I did a DIY tongue and groove ceiling with it!

Here you can see just how big of a difference that extra moulding made! It really elevated the design!
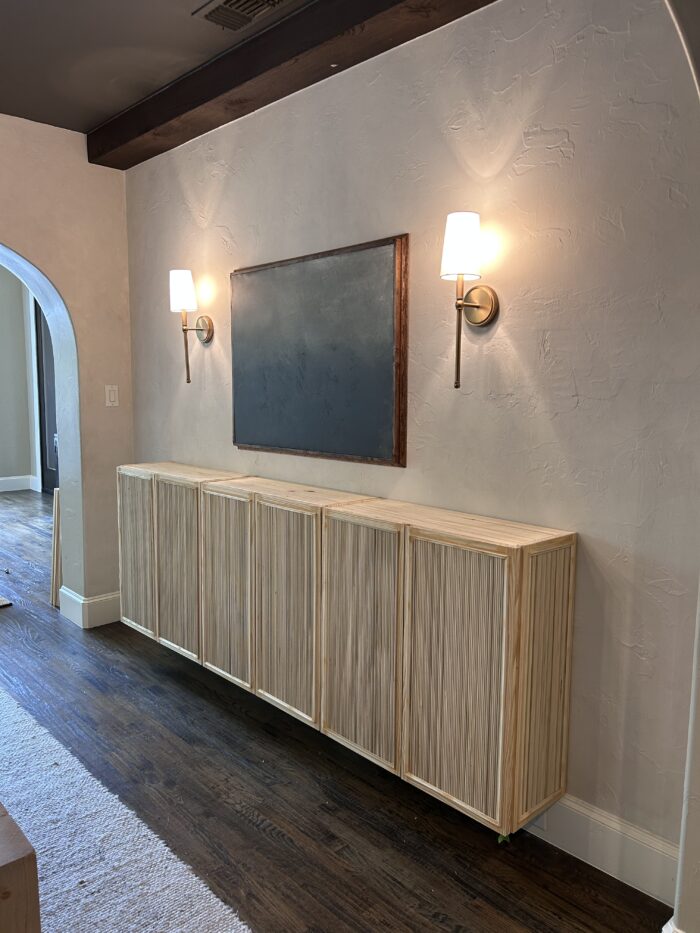
After doing the cabinet fronts, I wanted to take the buffet to the next level! I decided to continue to dowel and trim work around the sides of the buffet. This covered up the exposed screws on the IKEA cabinets and created a very custom look. Details matter and almost always take your piece from DIY to professional!
Picking The Right Wood Stain
This part was a tricky one for me! I haven’t stained a large wood project in years and this was by far the largest and most permanent structure I have ever worked on! I wanted a medium wood tone that blended with our dining table, that wasn’t too dark but also was cohesive with the darker wood tones of our home that bring in so much character. I wanted it old but also modern. This was going to be tricky.

I started with a coat of pre-stain wood conditioner. The helps the stain absorb evenly and is suppose to give a more full coverage look and prevent it from being blotchy. It helped but not as much as I would have liked.


First color was Minwax Special Walnut followed by a coat of Minwax Classic Gray. The gray helped cut the yellow tone in the wood and warm it up.


For the third coat, I did Minwax White Wash Gel Stain. Gel stain is a little different because it is a thicker consistency, which is great for projects where you don’t want stain dripping everywhere. I loved the white wash it added to the piece, but it didn’t blend as well as I had hoped. So I kept going…
My fourth a final coat was another layer of Special Walnut. It toned down the white wash but allowed it to still come through. This was the final and perfect layer to get the color I wanted.
Adding The Countertop

The finishing touches included adding the Vadara Noir Blanc quartz countertop and Brass Knobs .
DIY FLOATING BUFFET From IKEA Cabinets

This was a labor of love and trial and error of getting the perfect look for our space, but it was all worth it! I absolutely love how it turned out, it fits our home and our space so perfectly.
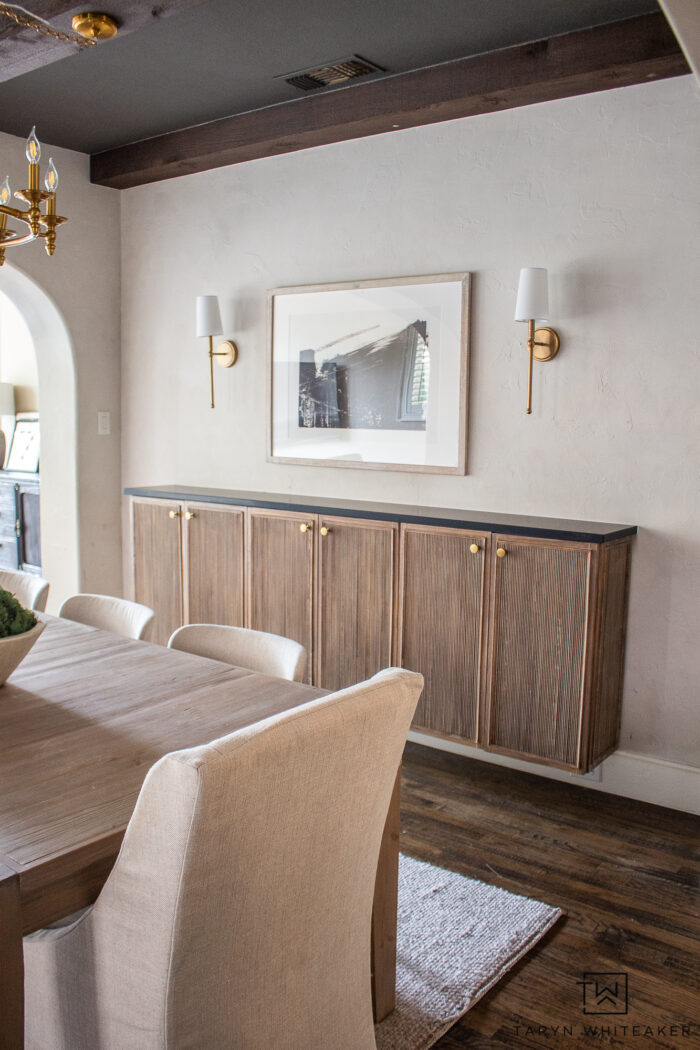
I could not be more proud of myself for how it turned out, I learned so much throughout the process and best part, I gained a lot of confidence to do even bigger builds!
Watch The Process
About Taryn Whiteaker
Hi! I’m Taryn! The voice behind Taryn Whiteaker Designs. I launched this brand over 11 years ago when I became a stay-at-home mom. What started as a small craft and mom blog eventually grew into a full time design and DIY site. My goal has always been to inspire others (especially women!) with design ideas, DIY tutorials, entertaining ideas and give you the tools you need to complete them yourself!


I love it! The addition of the dowels, the creative stain,… Just perfect!
What product tile/wood w/ color did you use throughout your home? I have dark wood floors and I’ve had a really difficult time trying to find dark wood flooring to match or slightly contrast. Thanks in advance.
Hi! I am not sure, the flooring was here when we purchased the home!
This color is perfect! I want to try this with my IVAR cabinets. Do you know how many cans of each stain color you used for all three cabinets?
I think I did a quart of each and I still have left overs
Your husband did a great job on this project. You did a good job as well posing.
You mean he did a great job cheering me on :)
YOU did an amazing job! It looks fantastic! I’m not able to find the countertop online. I have a bank of 3 ikea hemnes I need to add a top to. Could you share the name of the supplier? Thanks so much!
Hi! Thank you! I don’t see this exact color on their site anymore, this is the noir blanc
Hi!! Love this design. Where are the chairs from?
I’m looking to do something similar, but wonder are you still able to open the middle doors or do they open only one at a time? I worry that the added thickness will prevent the doors from having the room they need to open when sandwiched together.
Hello…these are fabulous!! Very inspiring! I love the paint color on your walls. Can you tell me the brand and color? Thank you so much!
Hi! I used a lime wash paint on the walls by Coloratelier. I used the color Plateau. I used their primer first, then two coats of lime wash.
Hi there, did you screw the bottom of the cabinets into the wall? I understand you floated the the shelves on top of the french ‘cleat’ but wondering where you secured the cabinets/how?
Yes I did! I screwed them into studs on the walls. On the back of the cabinets there is a wood piece that goes along the lower edge, so I screwed them in from inside directly into the wall.