Hello Design, Dining, and Diapers fans! I’m Jenn from Clean and Scentsible and I am so excited to be here visiting while Taryn enjoys some time off with her beautiful little boy!
I have been resisting the end of summer as long as possible, but I am finally coming to terms with the fact that fall has arrived! The air is crisp, the leaves are changing, and it is time for some fall decorating!!

I always like to start my decorating out on the front porch and my wreath from last year was looking quite haggard. I was wanting to create something that I could change up for different seasons instead of making a new wreath for each new holiday so I decided to go with a neutral burlap wreath as my starting point.
This wreath is super simple to make and the basic wreath can easily be done in less than 30 minutes.
Materials
- metal wire wreath
- high density burlap garland {I used about 2 1/2 rolls}
- pipe cleaners {as close to the color of your burlap as possible}
- thin wood sign
- chalkboard paint
- wheat
- elastic bands
- duct tape
- twine
Instructions
- Take a strip of burlap roughly about 2 feet long and fold it into thirds.

- Take a pipe cleaner and tie in the middle to form a bow {I used a dark brown pipe cleaner in the picture just so you can see it better but I used a lighter color for my wreath so that it blended in more}.

- Attach to the metal wire wreath {I attached mine on the second wire from the center} by twisting the ends of the pipe cleaner.
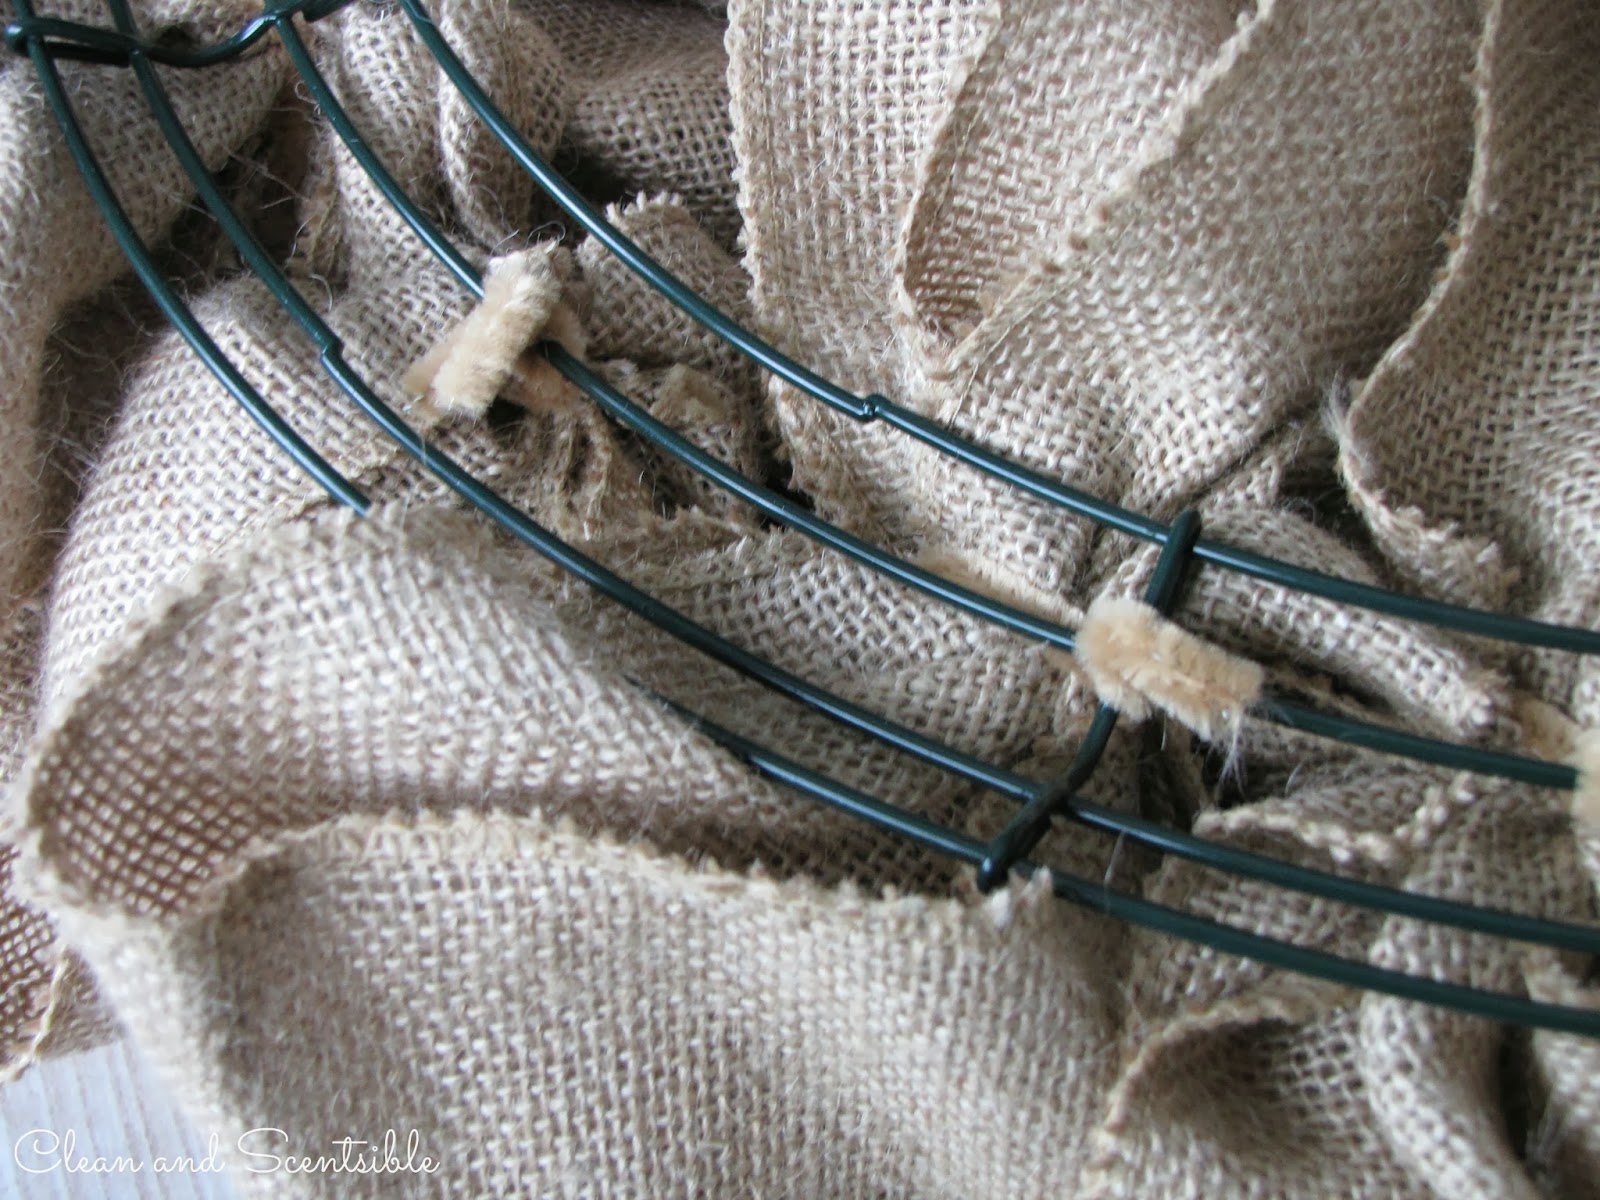
- Continue to add the bows until you have the desired fullness that you like. Fluff the boys to fill in any gaps. {NOTE: By the end of the project, I was actually not cutting the burlap into individual bows. It was a little trickier to form the bows when it was still joined up to the previous one but if I ever want to take the wreath apart I will still have a nice long strand of garland to use}
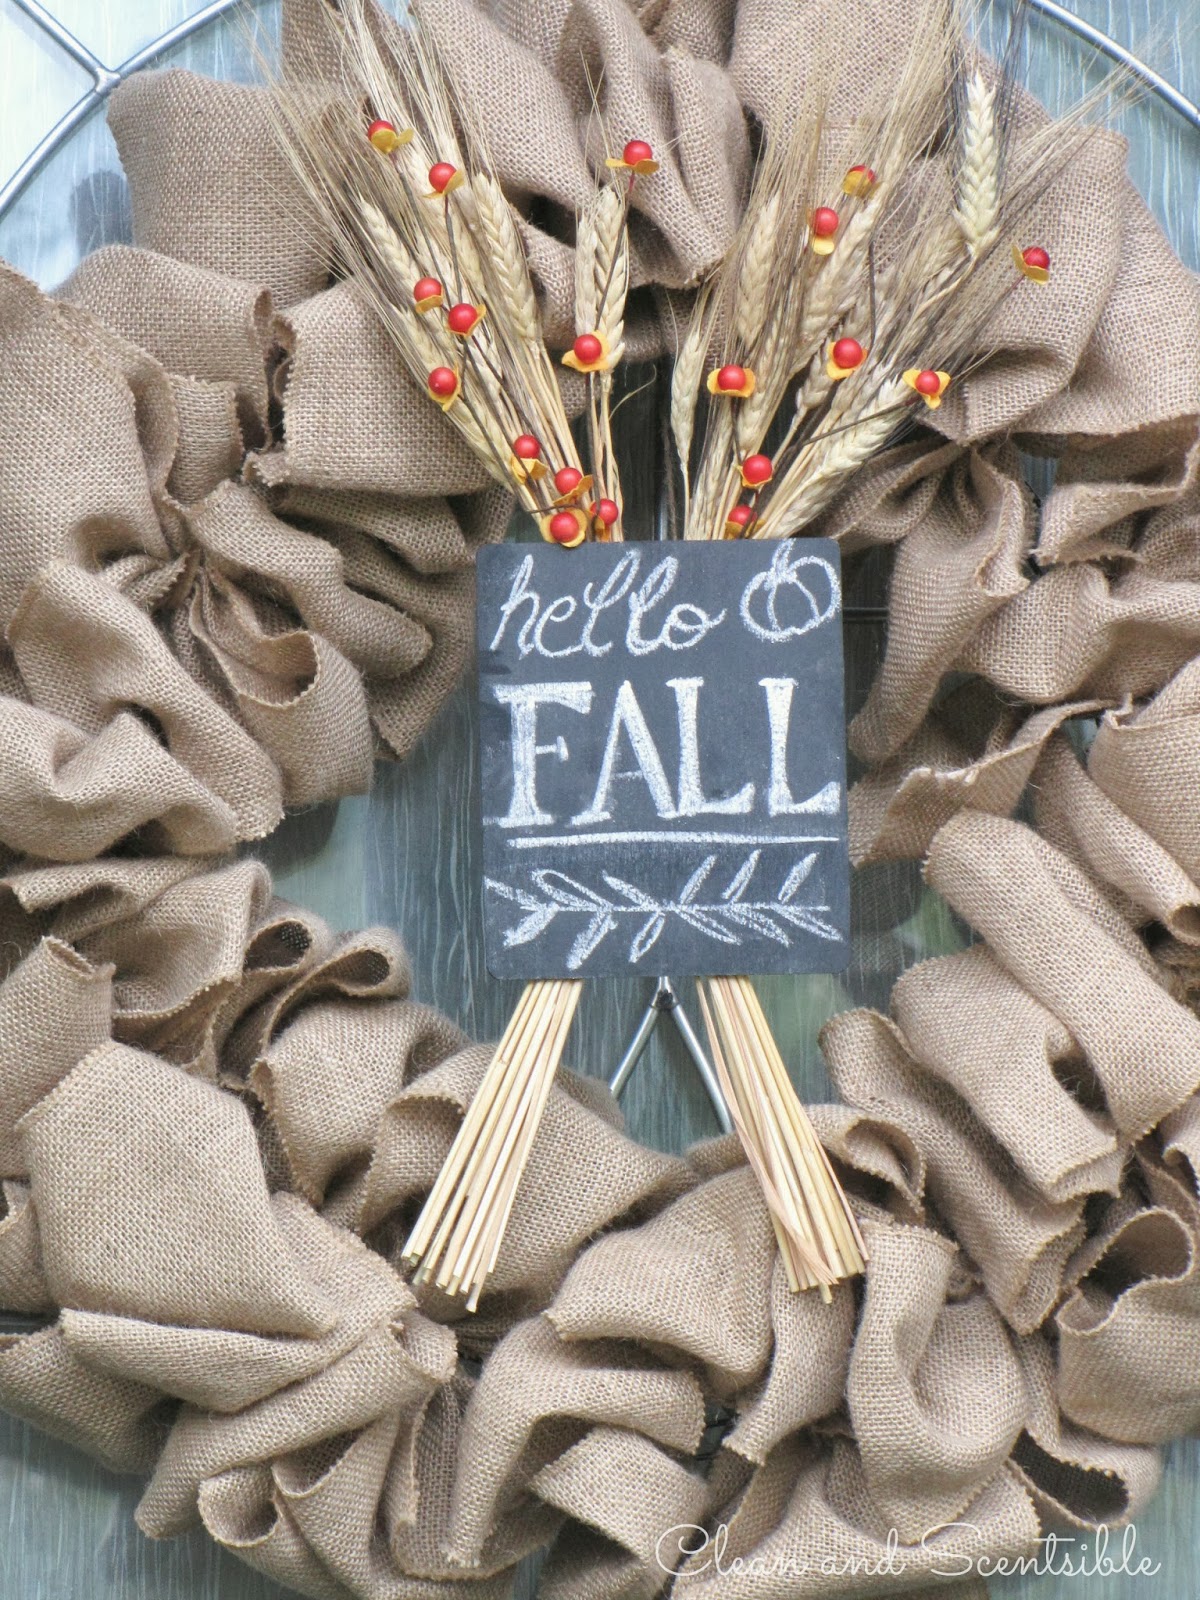
- Now to add a little fall touch! Spray a wood board with a few good coats of chalkboard paint {I just purchased mine from Michaels}. Let dry for 24 hours and then “season” the chalkboard by rubbing the side of a piece of chalk over the entire board. Erase and add your fall greeting.
- I purchased a bunch of wheat from our local Safeway and split it into two little bunches, tying each up with an elastic band to secure. Using duct tape to secure them, I taped them down over the back of the board. {It doesn’t look too pretty on the back but you don’t see it!}
- I hung the burlap wreath on our wreath holder and then attached some twine to the back of each what bundle to form a handle to place on the wreath holder as well. This makes it super quick and easy to change up my wreath with each season since the chalkboard is not actually attached to the wreath at all.
- Just to give it a little pop of color, I stuck in a few twig berry branches as well.

If you get a chance, pop on over to Clean and Scentsible to and see how the wreath looks on our front porch! I also have lots of other fall ideas like these ruffled felt pumpkins, harvest sign, and mini-raspeberry apple pies!

You can also connect with me here:
FACEBOOK /PINTEREST/ INSTAGRAM /TWITTERThanks so much for having me Taryn! I hope you are getting lots of baby snuggles on your time off!
About Taryn Whiteaker
Hi! I’m Taryn! The voice behind Taryn Whiteaker Designs. I launched this brand over 11 years ago when I became a stay-at-home mom. What started as a small craft and mom blog eventually grew into a full time design and DIY site. My goal has always been to inspire others (especially women!) with design ideas, DIY tutorials, entertaining ideas and give you the tools you need to complete them yourself!


Thanks so much for having me Taryn! Hope you have a great weekend! :)