Disclosure: This post is in partnership with True Value.
It’s finally time to bring out the Christmas decor! While we don’t get our real Christmas Tree until after Thanksgiving, I’ll be slowly starting to decorate this week. I love this time of year. I honestly believe the house is filled with so much joy and magic when holiday decor goes up!
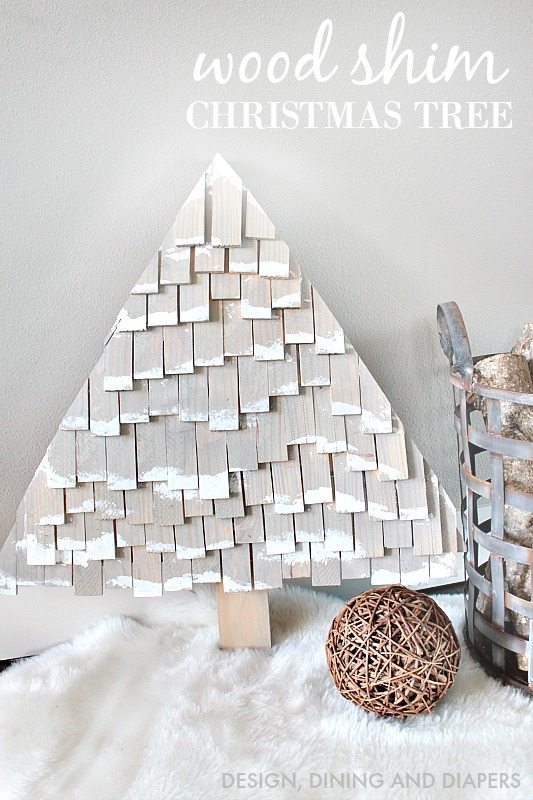
I love using wood shims and for projects, they are inexpensive and create a cool rustic look. I had this idea of making DIY Wood Shim Christmas Trees and I’m so happy with how they turned out! All you need is a little paint and these become beautiful holiday trees.
 I love how unique they are, full of dimension and they have such a great rustic look for Christmas and winter.

TUTORIAL
Supplies
- Plywood
- 6″ Wood Shims
- Rustoleum Sunbleached Stain
- Wood Glue
- White Paint
Tools
- Circular Saw
- Paint Brush
 You want to start by cutting your plywood into a triangle. This is when you can completely customize the shape and size of your tree. Make it tall and narrow or short and full. This tree is 24″ wide and 23″ from the top point to the bottom points.
Then you want to start layering the wood shims. Start with adding a generous amount of wood glue to the bottom and then place the thick end of the wood shim facing down. Stagger them so they create an organic edge.
Once the first layer is down, add another layer of glue and stagger another line. The wood shims do get heavy after awhile, so I recommend doing 2 layers and then letting them dry for a few hours then doing another 2-3 layers.
 At the end, it should look like this. Don’t worry about going over the edges of the plywood, we will take care of that. You just want to make a full tree using the plywood as a guide. After all the wood shims are glued on, let it dry for a few hours. Then, you can flip it over and trim the excess wood shims using a circular saw.
 It was super easy to trim them! I had a really clean cut and the wood shims didn’t crack at all.
 To give it a winter look, I stained the entire tree using Rustoleum Sunbleached stain. I typically use a rag to apply it, but a brush worked better for this project to help get in the cracks.
 Then, take a paint brush and gently blot on some white paint on the edges to create the look of snow.
 You can make these in so many different looks! Paint the whole tree or make an entire forest for your yard!
Have you been busy crafting for the holidays? Be sure to post your photos to Instagram and enter True Value’s #DIYaHoliday Instagram Challenge going on now! Head to the True Value Instagram page to find out more information and participate.
For more fun DIY projects, tips and tricks, visit TrueValueProjects.com or follow True Value on Facebook, Twitter, Instagram and Pinterest.
I was one of the bloggers selected by True Value to work on the DIY Squad. I have been compensated for my time commitment to the program as well as writing about my experience. I have also been compensated for the materials needed for my DIY project. However, my opinions are entirely my own and I have not been paid to publish positive comments.


Darling, simply darling Taryn, thank you and Happy Thanksgiving!