• Skip to primary navigation
  • Skip to main content
  • Skip to primary sidebar
  • Skip to footer
  • Home
  • About
  • Contact
  • Partner with Taryn

Taryn Whiteaker Designs

DIY and Interior Blog

  • Our Dallas Home Tour
  • Shop My Pics
  • Home Styling
    • Room Reveals
      • Our Current Home
      • Our First Home
    • Seasonal Home Tours
  • DIY Projects
    • DIY Home Decor
    • Crafts & Sewing
    • Before and Afters
    • Before and Afters
    • Furniture Builds and Makeovers
  • Seasonal Decor
    • Christmas
    • Easter
    • Fall
    • Fourth of July
    • Halloween
    • Spring
    • Valentine’s Day
  • Printables
  • Entertaining
    • Parties
    • Tablescapes
  • Fashion
  • Travel

January 17, 2023

How To Cut Curved Tile

Disclosure: This post is in partnership with WORX Tools! All opinions are my own.

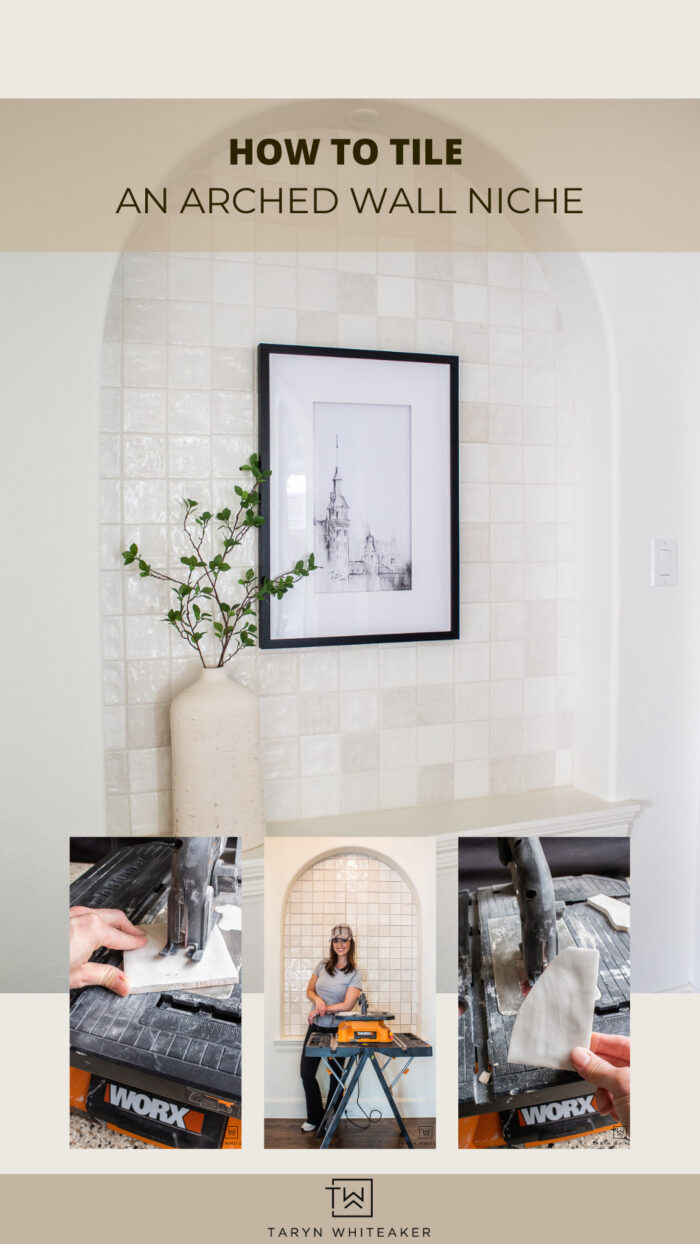
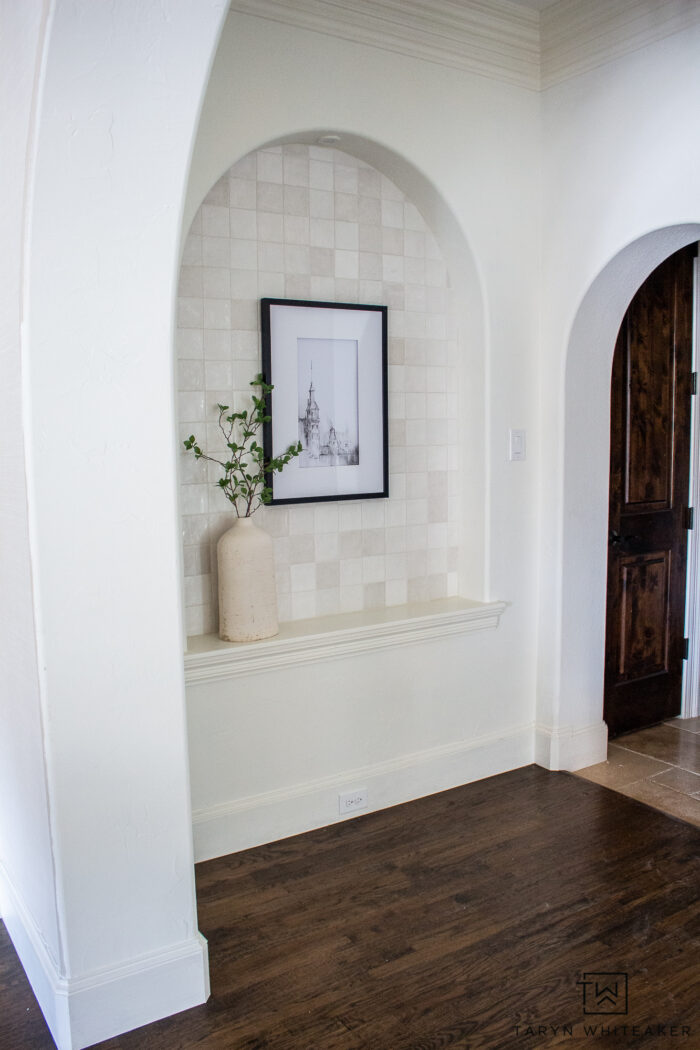
When we first started looking at homes in Texas, one of the first things I noticed are the NICHES! Big, small and lots of arches. Let me just say these can often be tricky to decorate with and there are definitely some that I would just remove and drywall over. We have two large arched niches in our downstairs and I actually like them. I think they are the perfect place to feature artwork. However, ours definitely needed a little refresh. I wanted to turn them into a design element versus just a blank niche. First step was to paint, next step is to add square ceramic tile to give it some neutral texture and dimension. When I first shared this project on Instagram, I was often asked, ‘But how are you going to cut the tile for the arch?’. Today, I’m diving into the details on exactly how to cut curved tile, or detailed tiles cuts in general.

How To Cut Curved Tile

Learn exactly how to cut curved tile using the BladeRunner by WORX Tools! This tool can cut curved pieces of tile and circles around pipes.

I have been tiling for many years. I have tackled all sorts of tiling projects from flooring, showers and backsplashes. But this was my first time tiling a niche, and an arched one at that! Even though I had never done it before, I wasn’t worried because I knew I had the right tools for the job! Which is the most important part of starting any project.

Before Hallway

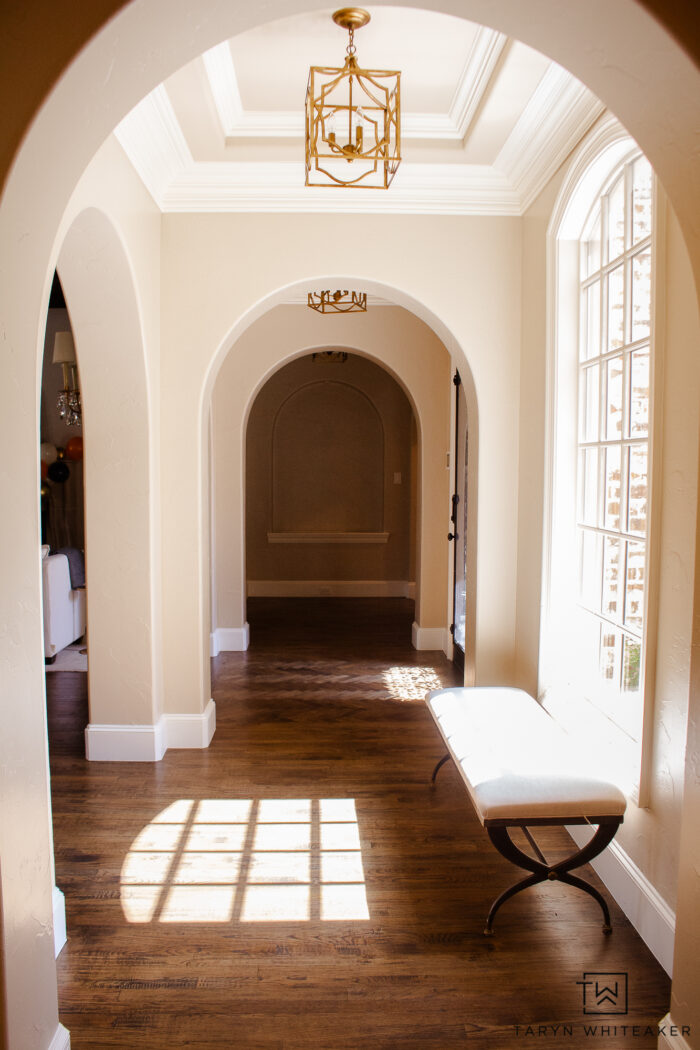
Here is what the hallway looked like when we moved in. I started by giving it a fresh coat of cream paint and now it was time to add a more modern element to the niche.

Tiling an Arched Niche

Learn exactly how to cut curved tile using the BladeRunner by WORX Tools! This tool can cut curved pieces of tile and circles around pipes.

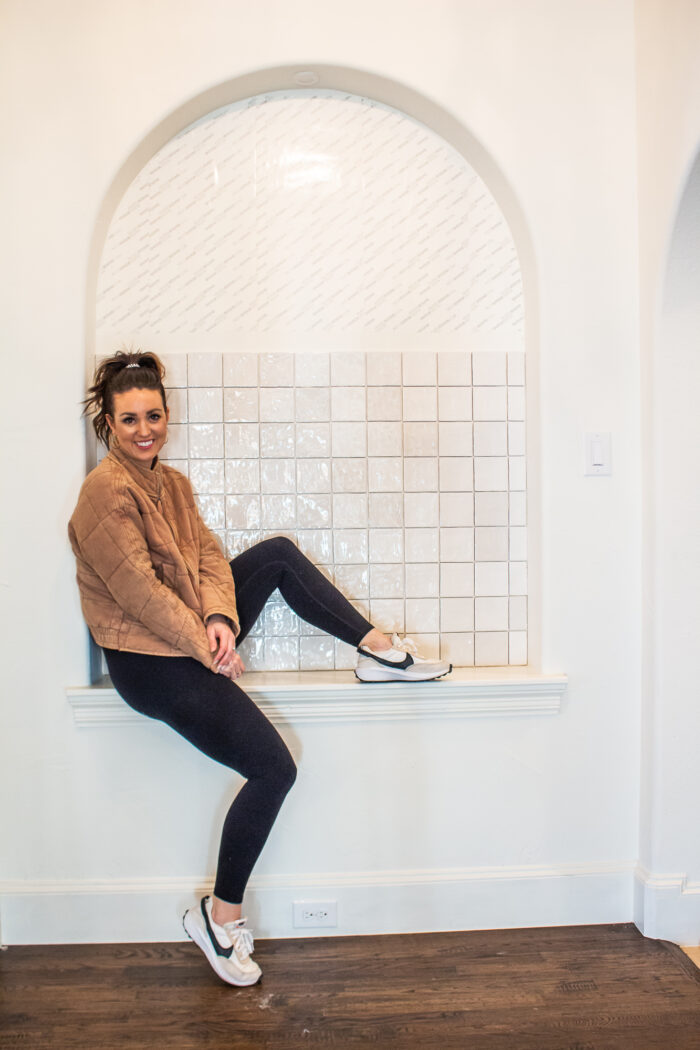
To start, I tiled the bottom half of the niche where I was just laying straight pieces. This was really simple and only took me a few hours to do! I a using these 4X4 ceramic square tiles for this project and decided to use a tile adhesive for the first time, versus a thin set. I ended up really loving it. It made for a very simple project, no clean up and a lot less messy!

Next, I laid all of the remaining full pieces and was left with all of the curved outer edge pieces. In my experience, cutting the few remaining detailed cuts, takes the same amount of time as laying ALL the full pieces. The details take the most time for sure, with all the precise measuring and often times redoing cuts.

Cutting Curved Pieces of Tile

Learn exactly how to cut curved tile using the BladeRunner by WORX Tools! This tool can cut curved pieces of tile and circles around pipes.

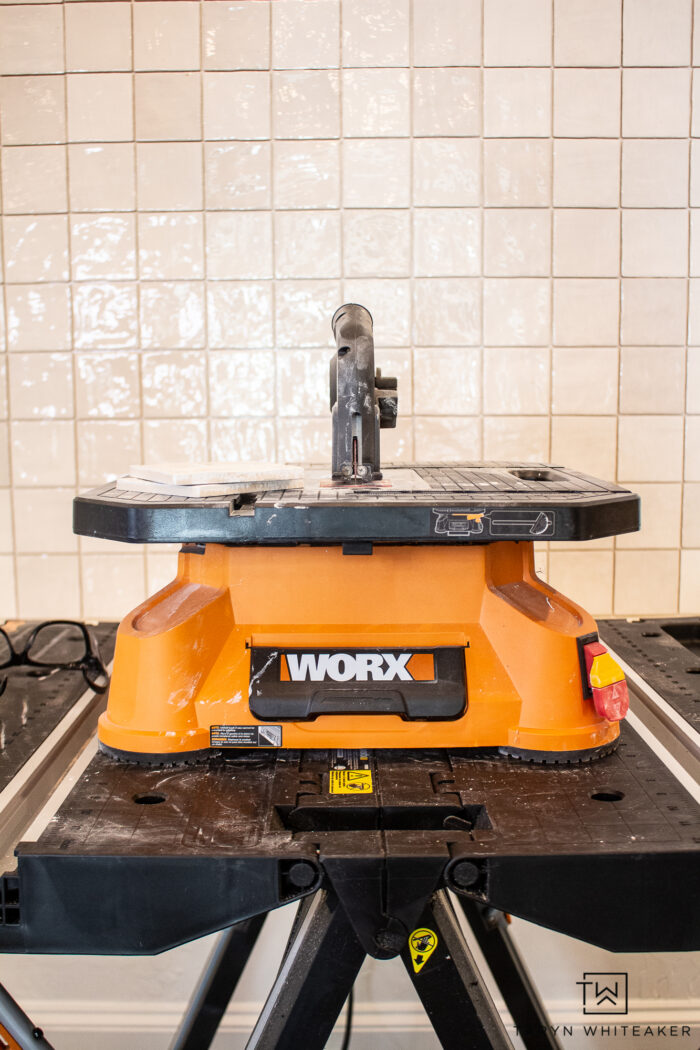
For this project, I am using my BladeRunner Portable Table Top Saw by WORX Tools. There are a lot of different tiling tools out there, but most are for straight cuts. This is the ONLY tool I will use for curved, circle or detailed cuts. It works amazing and allows you to really maneuver the tile.

This is a very versatile tool. You can use it as a basic table saw, cut LVP, cut round pcv pipes or copper pipes, and so much more. It’s very light weight. I set mine up inside the ouse with my Pegasus Folding Work Table (another must have for me. I have two and use them for every project).

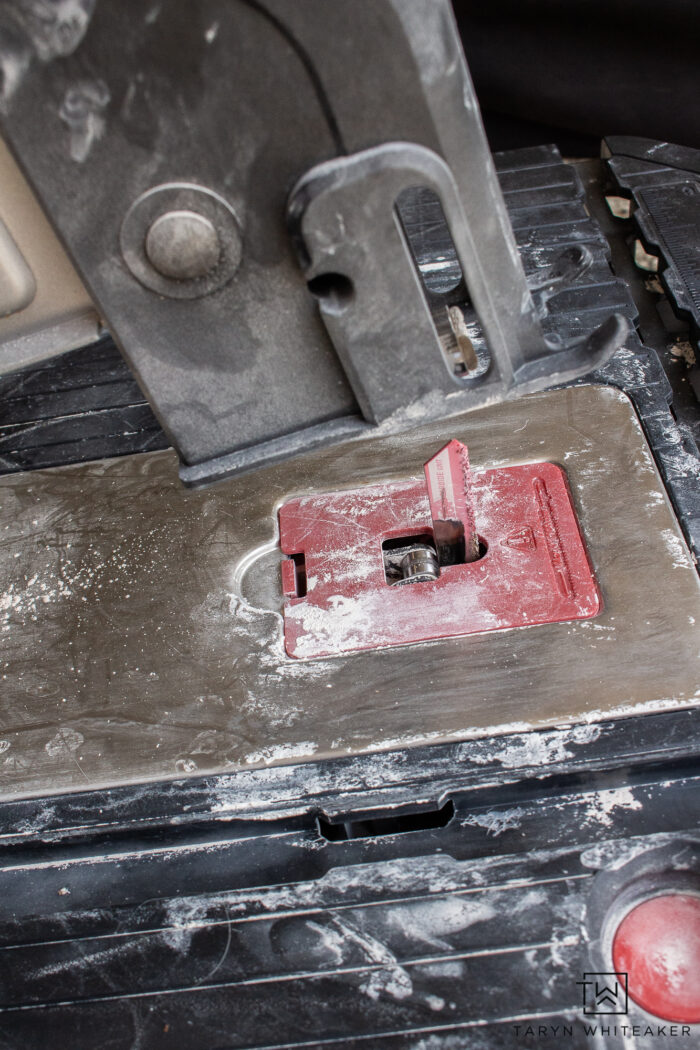
When cutting tile, you first want to make sure you are using the correct blade. The BladeRunner uses a standard jigsaw blade, so you just want to make sure you are using a ceramic tile jigsaw blade. My other suggestion is to replace it fairly often. If you find that it’s taking a while to cut through a piece of tile, check the blade and make sure it’s not too worn out.

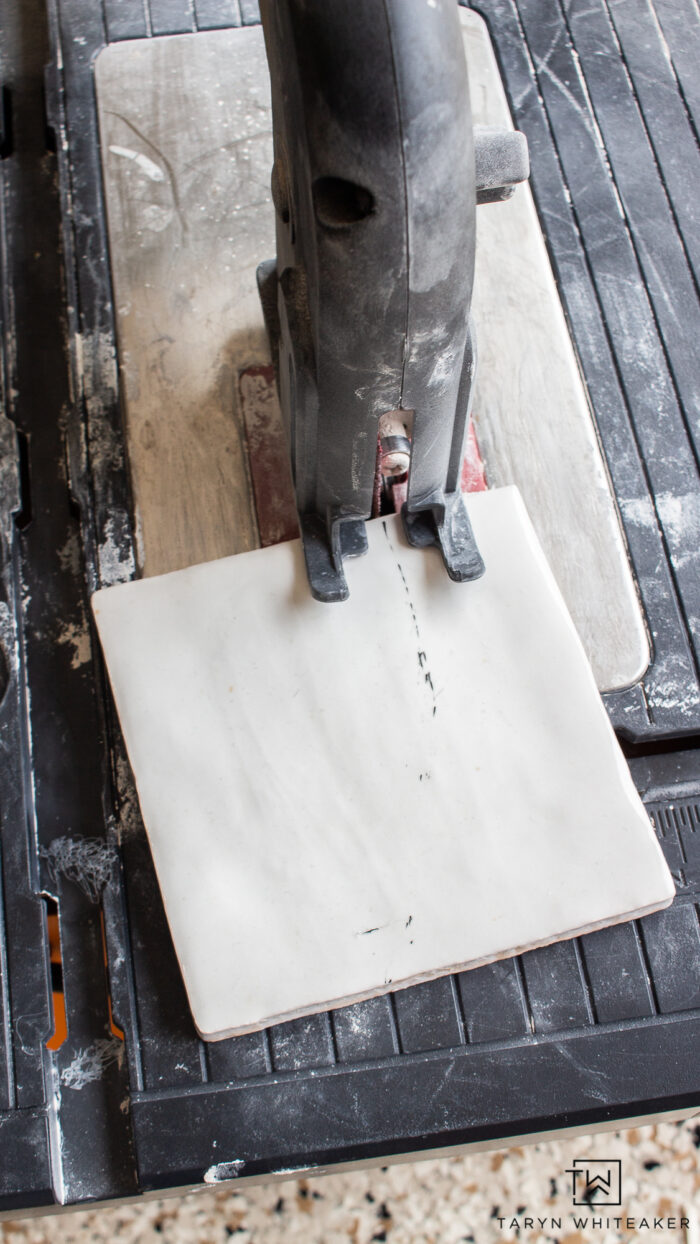
To cut the edge pieces, I first created a template using a piece of parchment paper. You can see more on this in the video below. But I simply held it up and traced the spot, and then transferred the angle directly onto the tile.

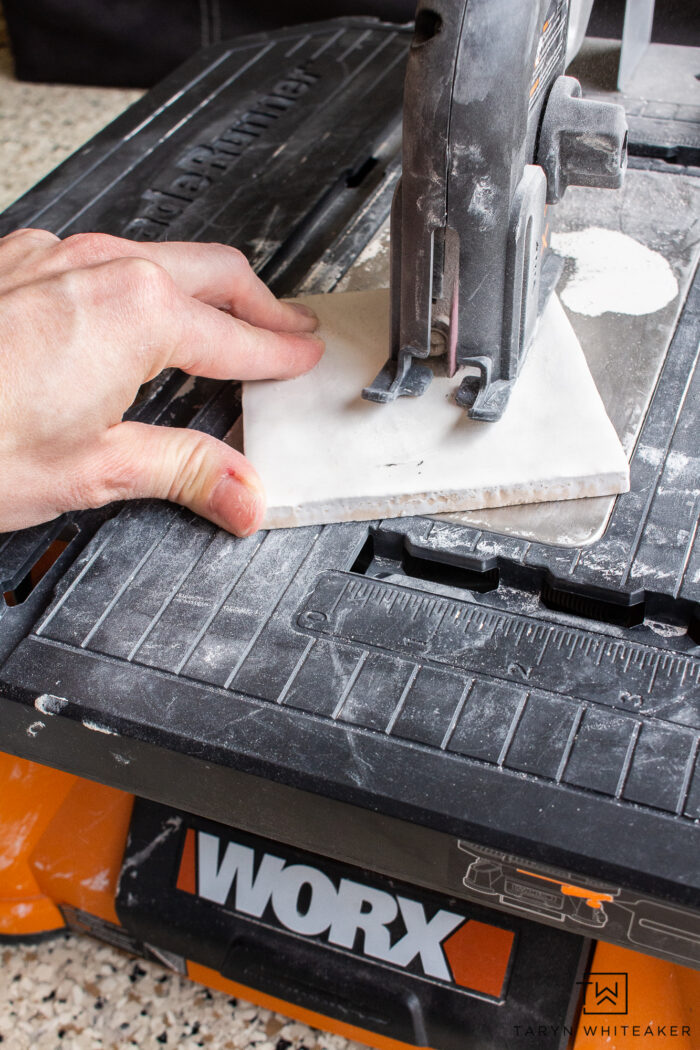
Once you have your lines, gently feed it into the saw. You have to be patient, put pressure on the tile and gently push it through. But don’t force it or else it will crack.

Cutting curved pieces of tile

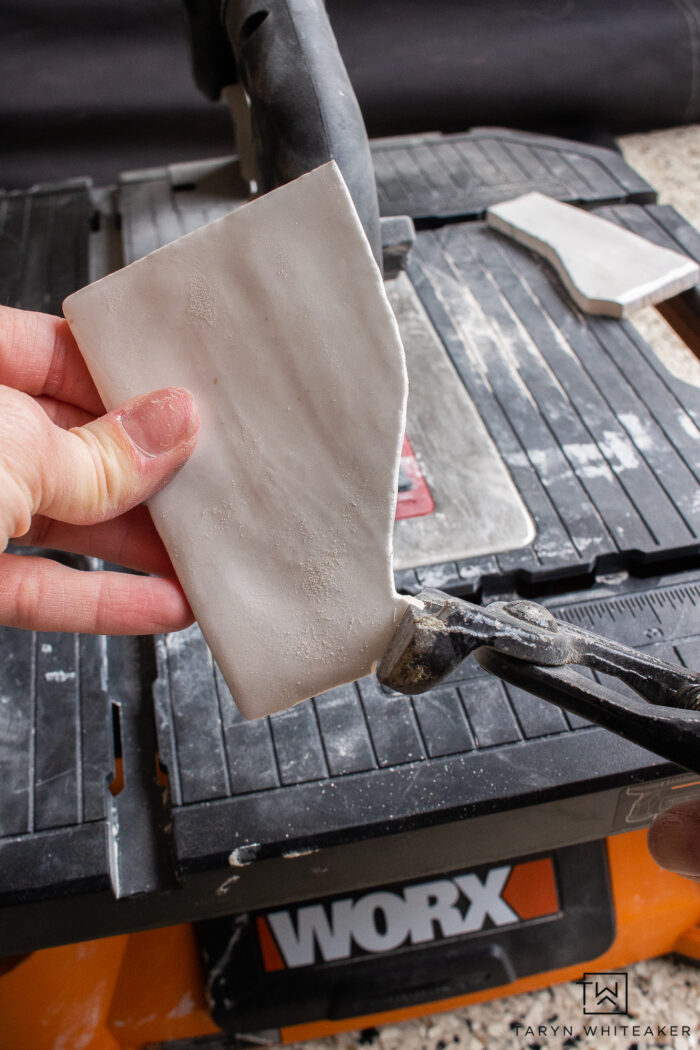
Quite a few times, the very last piece would be left on the tile or the shape was slightly off from me angling the tile wrong. This is an easy fix. Just take use a pair of tile nippers to carefully chip away the tile. It’s very easy.

This shape is something you cannot do with a wet saw or tile snapper. You will most definitely need the BladeRunner for cutting angles like this on tile! I also used this to cut circles around all the plumbing in our last bathroom renovation in our previous home. It worked amazing and made the tile work look so professional.

Learn exactly how to cut curved tile using the BladeRunner by WORX Tools! This tool can cut curved pieces of tile and circles around pipes.

I have to say, I’m pretty darn proud of myself for this one! Those were some intricate cuts that really didn’t take that long.

Tiled Arched Wall Niche Design

Tiled Arched Wall Niche! Learn how to update your space with a transitional modern look using ceramic tile and neutral decor accents.

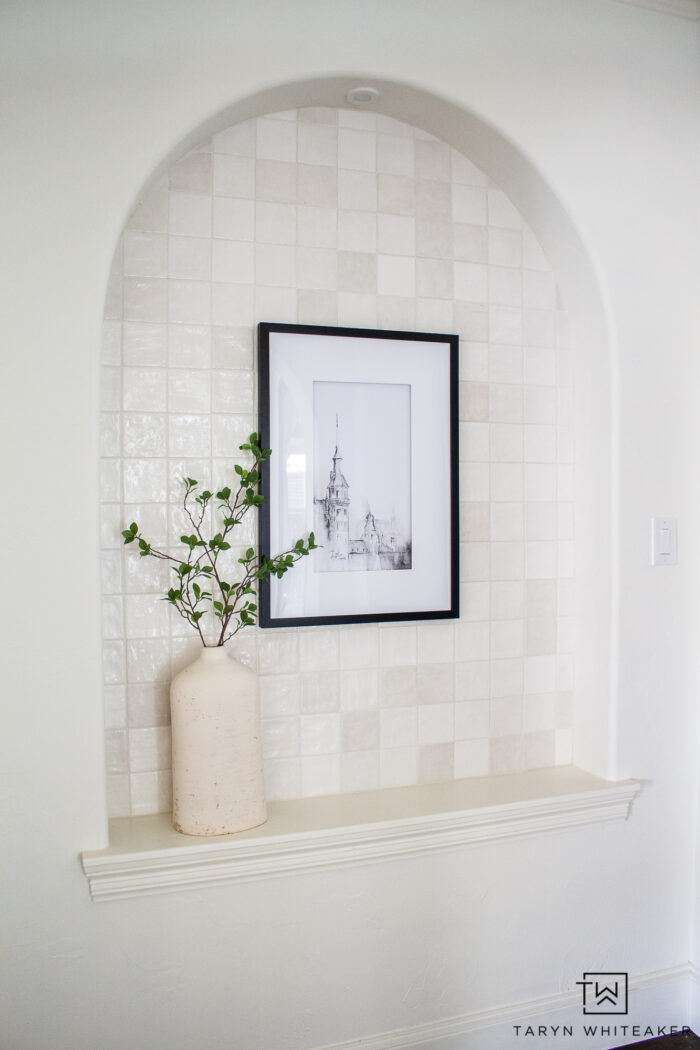
To finish it off, I grouted the tile using this white premixed grout. It definitely isn’t pure white, it’s very creamy which worked perfect with the wall color and warmth of the tile.

What I love most about this project is that it’s subtle but also made a really big impact on the space. I could have done a statement tile with a lot of pattern for a big bold look. But I didn’t want it to be over powering. I wanted it to be neutral but also add texture dimension. Something to modernize it but wouldn’t get tired of in a year since I look at it a million times a day!

Tiled Arched Wall Niche! Learn how to update your space with a transitional modern look using ceramic tile and neutral decor accents.

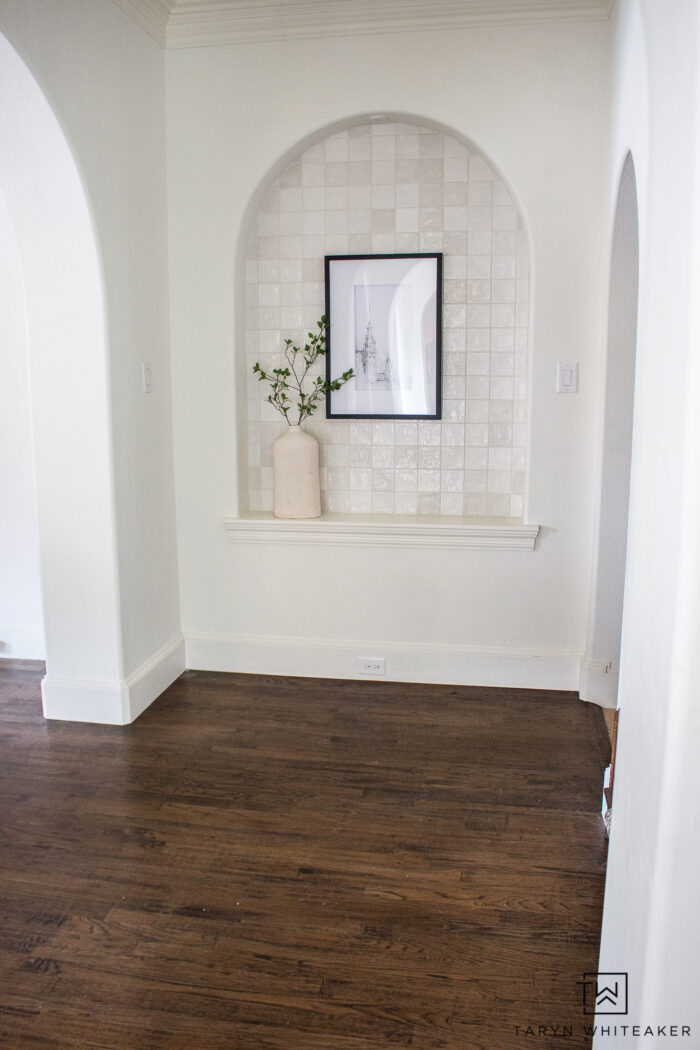
I couldn’t be happier with how it turned out. This is one of the few projects I have done where I wouldn’t have done anything differently. In fact, we have the exact same niche on the opposite side of this room, and I’ll be repeating this project over there soon too!

Tiled Arched Wall Niche! Learn how to update your space with a transitional modern look using ceramic tile and neutral decor accents.

Be sure to check out WORX Tools to see everything they have to offer. They have a tool for everything, I love their NITRO Power Tool line, along with their landscape tools.

WATCH THE PROCESS

About Taryn Whiteaker

Hi! I’m Taryn! The voice behind Taryn Whiteaker Designs. I launched this brand over 11 years ago when I became a stay-at-home mom. What started as a small craft and mom blog eventually grew into a full time design and DIY site. My goal has always been to inspire others (especially women!) with design ideas, DIY tutorials, entertaining ideas and give you the tools you need to complete them yourself!

Filed Under: ALL POSTS, Before and Afters, Dallas Home Projects, DIY Projects, Sponsored

Reader Interactions

Leave a Reply Cancel reply

Your email address will not be published. Required fields are marked *

Primary Sidebar

Looking For Something?

CONNECT

Meet Taryn

Taryn Whiteaker

Hi and welcome! I'm Taryn and the voice of style behind Taryn Whiteaker Designs. Sharing our journey of modernizing our European style home in Dallas. Thanks for stopping by and don't forget to subscribe to my mailing list to get all the latest updates! Read more...

Footer

THIS SITE

  • Home
  • About
  • Contact
  • Partner with Taryn

Privacy Policy

If you are interested in learning more about data that might be collected by this site you are encouraged to read the Privacy Policy

COPYRIGHT POLICY

All images on this site are copyright of Design, Dining and Diapers, LLC. Unless otherwise noted. You may not use these images without written permission. If you would like to feature a project shown on Design, Dining and Diapers you may use a maximum of 2 images and include a visible link back to the project.

More From The Gram

tarynwhiteaker_designs

Taryn Whiteaker Designs
POV: working with what you have and creating somet POV: working with what you have and creating something completely new! I kept all the original flooring, cabinets, backsplash and fixtures and did only cosmetic updates to update this space. I wanted to add more contrast, character, warmth and texture. By smoothing out the texture of the walls it instantly gave it an updated look, the new paint color added contrast, the wood ceiling added warmth and texture and all the antiques and vintage pieces gave it the charm. 🖤

#diyhomedecor #neutralhome #diyprojects #laundryroommakeover #transitionalstyle
LAUNDRY ROOM IS DONE ! This was a true example of LAUNDRY ROOM IS DONE ! This was a true example of working with what we have, turning something with great bones into something that is unique, custom and full of character. (Swipe for the before) It now feels like my own little escape to the French countryside every time I do laundry, and I’m not mad about it. 

Comment LAUNDRY for all the details and links! 

Paint color: BM Cromwall Gray 

#diy #laundryroom #homerenovationideas #interiordesign #roommakeover
I finally have a drying rack! Here’s how I built I finally have a drying rack! Here’s how I built the custom drying rack for our laundry room to make it more functional. My @worxtools Switch Driver and Impact Driver were the real MVP’s of this project! Saving me time and energy. I love how it now doubles as a shelf to display antiques I’ve collected throughout the years and also helps me keep this place organized! 

Comment SUPPLIES for everything I used to build this piece! 

#worxtools #partner #dıy #diyhomedecor #homerenovation
Comment SHOP for all these pieces! What every 40-s Comment SHOP for all these pieces! What every 40-something girl is looking for this summer: cute, comfy, and sweat ready outfits for summer travels! I picked up these cute items from @halara_official to mix and match and I am obsessed with the material. Most of the items are made out of athletic material and are so soft. Perfect travel outfits, you still feel cute but very easy fabrics.

The price points are 👌🏼, almost everything is under $50! 

Use my code taryn2:for 20% OFF full-price items or Super code taryn26 : Spend $120 → 10% OFF / Spend $150 → 12% OFF
#halara #over40outfits #travelfit #traveloutfits #partner
Almost done! Since we vetoed the wallpaper on the Almost done! Since we vetoed the wallpaper on the ceiling, I still wanted a pop of pattern and decided to go with a little peel of a mural behind the washer and dryer! Just what it needed! 

Comment LAUNDRY to shop this space so far! 

#homedecor #diyhomedecor #wallmural #laundryroommakeover
It all started as a vision… comment REVEAL for a It all started as a vision… comment REVEAL for all the details on this bold, teen sports bedroom! 

#homedecor #diyhomedecor #kidsbedroom #sportsroom #beforeandafter
For the record he was very nice and helpful, but h For the record he was very nice and helpful, but had very little faith in me. 😉

PS. Happy Mother’s Day to all the strong, loving and beautiful mommas ❤️ 💪🏼 . 

#diyhomedecor #homedecor #renovation #laundryroommakeover
One of my favorite places to be. After 4 years in One of my favorite places to be. After 4 years in this house the porch swing is still in perfect condition, just time to replace the cushion and add some fresh outdoor pillows! 

Comment SWING for all the sources! 

#homedecor #exteriordecor #outdoorprojects #potterybarn #ballarddesigns
Still one of my favorite transformations to date…. 

Comment BEDROOM for all the sources. 

#homedecor #diyhomedecor #boysbedroom #kidsroom #homedesign
Follow on Instagram

Copyright© 2026 · Brunch Pro Theme by Shay Bocks · Hosting by 3116 Digital